Table of Contents
Advertisement
Available languages
Available languages
Quick Links
VDP
PLW16
LED W
WASH EFFEC
LED W
WASHEFFECT
EFFET
LED WASH
EFECT
O 'WASH' C
LED-W
WASHEFFEK
USER
MANUAL
GEBRU
UIKERSHAND
NOTIC
CE D'EMPLOI
MANU
AL DEL USU
BEDIE
ENUNGSANLE
601
CT - INARA
I - 16 x 1W
T - INARA I
I - 16 x 1W
H - INARA I
- 16 x 1W
CON LEDs -
INARA I -
KT - INARA
I - 16 x 1W
DLEIDING
I
11
UARIO
15
EITUNG
19
W R+G+B+W
W R+G+B+W
R+V+B+W
16 x 1W R
W R+G+B+W
3
7
W
W
W
+G+B+W
W
Advertisement
Table of Contents

Related Manuals for HQ Power PLW16


Summary of Contents for HQ Power PLW16
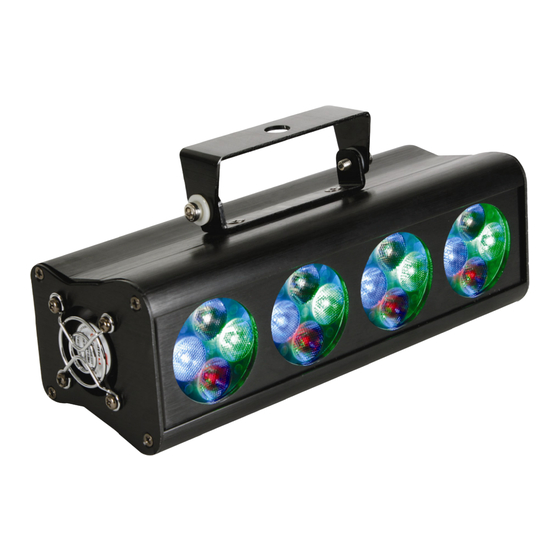
- Page 1 PLW16 LED W WASH EFFEC CT - INARA I - 16 x 1W W R+G+B+W LED W WASHEFFECT T - INARA I I - 16 x 1W W R+G+B+W EFFET LED WASH H - INARA I - 16 x 1W...
- Page 2 VDPLW160 terminator eindweerstan résistance d terminaison terminación Terminierun 1 brig htness/speed 1 intensiteit/ /snelheid 2 brig htness/speed 2 led intensit teit/snelheid 3 brig htness/speed 3 intensiteit/ /snelheid 4 brig htness/speed 4 led intensit teit/snelheid 5 DIP switch 5 DIP-schake elaars 6 micr rophone 6 microfoon...
- Page 3 VDPLW 1601 User m anual 1. Int troduction To all re esidents of the e European Un Importa ant environme ntal informati on about this product This symbol on n the device or t the package ind dicates that disp posal of the devi ice after its lifec cycle...
-
Page 4: Installation
VDPLW1601 • Damage caused by disregard of certain guidelines in this manual is not covered by the warranty and the dealer will not accept responsibility for any ensuing defects or problems. • A qualified technician should install and service this device. •... -
Page 5: Operation
VDPLW1601 6. Operation Refer to the illustrations on page 2 of this manual. • The VDPLW1601 can work stand-alone with fixed colour output or controlled by an external DMX- controller (not incl.). • The VDPLW1601 in master mode generates DMX values on the DMX output [6]. Linked devices will follow the behaviour of the master when they are placed in slave mode. -
Page 6: Cleaning And Maintenance
VDPLW1601 b) Stand alone mode (master) • DIP switches 9 and 10 must be set to OFF, the other switches set the light effect (see table below). effect remarks switch red LEDs on use the UP [1] and DOWN [4] button to set the brightness green LEDs on blue LEDs on white LEDs on... - Page 7 VDPLW 1601 GEBRU UIKERSHA ANDLEID DING 1. Inl eiding Aan alle e ingezetenen v van de Europe ese Unie Belangr ijke milieu-inf formatie betre effende dit pro oduct Dit symbool op het toestel of d de verpakking ge eeft aan dat, als s het na zijn lev venscyclus word weggeworpen, d...
- Page 8 VDPLW1601 • Gebruik het toestel enkel waarvoor het gemaakt is. Andere toepassingen kunnen leiden tot kortsluitingen, brandwonden, elektrische schokken, enz. Bij onoordeelkundig gebruik vervalt de garantie. • De garantie geldt niet voor schade door het negeren van bepaalde richtlijnen in deze handleiding en uw dealer zal de verantwoordelijkheid afwijzen voor defecten of problemen die hier rechtstreeks verband mee houden.
- Page 9 VDPLW1601 c) algemeen • Verwijder alle brandbaar materiaal in een straal van 0,5 m rond het toestel en voorzie voldoende koeling. • Een geschoolde elektricien moet het toestel aansluiten. • Sluit het toestel via de stekker aan op het lichtnet. Sluit het niet aan op een dimmerpack. •...
-
Page 10: Reiniging En Onderhoud
VDPLW1601 b) Zelfstandige modus (mastersturing) • Plaats DIP-schakelaars 9 en 10 op OFF. Stel het effect in met de overige DIP-schakelaars (zie tabel hieronder). DIP- effect opmerking schak. rode leds aan stel helderheid in met [1] of groene leds aan blauwe leds aan witte leds aan kleurovergang... - Page 11 VDPLW 1601 OTICE D ’EMPLOI 1. Int troduction Aux rési idents de l'Uni ion européenn Des info ormations envi ironnementale es importantes s concernant c ce produit Ce symbole sur r l'appareil ou l' emballage indiq que que l’élimina ation d’un appa reil en fin de vie peut polluer l'e nvironnement.
-
Page 12: Caractéristiques
VDPLW1601 • Toute modification est interdite pour des raisons de sécurité. Les dommages occasionnés par des modifications par le client ne tombent pas sous la garantie. • N’utiliser votre VDPLW1601 qu’à sa fonction prévue. Tout autre usage peut causer des courts-circuits, des brûlures, des électrochocs, etc. - Page 13 VDPLW1601 c) En général • Enlever tout matériau inflammable dans un rayon de 0,5 m autour de l’appareil et assurer une ventilation suffisante. • Un électricien qualifié doit établir la connexion électrique. • Brancher l’appareil sur le réseau électrique par la fiche d’alimentation. Ne pas le brancher sur un bloc de puissance.
-
Page 14: Nettoyage Et Entretien
VDPLW1601 b) Mode autonome (mode maître) • Placer les interrupteurs DIP 9 et 10 sur OFF ; sélectionner l’effet avec les interrupteurs 1 à 8 (voir tableau ci-dessous). effet remarque LED rouges allumées régler l’intensité avec [1] ou LED vertes allumées LED bleues allumées LED blanches allumées transition... - Page 15 VDPLW 1601 NUAL DEL L USUAR 1. Int troducción A los ciu udadanos de la a Unión Europe Importa antes informac ciones sobre e el medio ambie ente concernie ente a este pro oducto Este símbolo en este aparato o el embalaje ind ica que, si tira l las muestras ins...
-
Page 16: Instalación
VDPLW1601 • Los daños causados por descuido de las instrucciones de seguridad de este manual invalidarán su garantía y su distribuidor no será responsable de ningún daño u otros problemas resultantes. • La instalación y el mantenimiento deben ser realizados por personal especializado. •... - Page 17 VDPLW1601 6. Uso Véase las figuras en la página 2 de este manual del usuario. • Es posible utilizar el VDPLW1601 de manera autónoma con un color fijo, o controlado por un controlador DMX externo (no incl.). • En el modo maestro, el VDPLW1601 genera los valores DMX de la salida DMX. Todos los focos conectados al foco maestro siguen el programa de este último.
-
Page 18: Limpieza Y Mantenimiento
VDPLW1601 b) Modo autónomo (modo maestro) • Ponga los interruptores DIP 9 y 10 en la posición OFF ; seleccione el efecto con los interruptores de 1 a 8 (véase la lista a continuación). efecto observación LEDs rojos activados ajuste la intensidad con [1] o LEDs verdes activados LEDs azules activados... - Page 19 VDPLW 1601 BEDIEN NUNGS SANLEIT TUNG 1. Ein nführung An alle E Einwohner der r Europäischen n Union Wichtige e Umweltinfor rmationen übe er dieses Produ Dieses Symbol auf dem Produk kt oder der Verp packung zeigt a an, dass die Ents sorgung dieses Produktes nach h seinem Lebens...
- Page 20 VDPLW1601 • Eigenmächtige Veränderungen sind aus Sicherheitsgründen verboten. Bei Schäden verursacht durch eigenmächtige Änderungen erlischt der Garantieanspruch. • Verwenden Sie das Gerät nur für Anwendungen beschrieben in dieser Bedienungsanleitung sonst kann dies zu Schäden am Produkt führen und erlischt der Garantieanspruch. Jede andere Verwendung ist mit Gefahren wie Kurzschluss, Brandwunden, elektrischem Schlag, usw.
- Page 21 VDPLW1601 c) General • Achten Sie darauf, dass sich kein entflammbares Material in einem Umkreis von 50 cm befindet und beachten Sie, dass es genügend Kühlung gibt. • Lassen Sie das Gerät von einem qualifizierten Elektriker anschließen. • Schließen Sie das Gerät an das Hauptnetz und nicht an einen Dimmer an. •...
-
Page 22: Reinigung Und Wartung
VDPLW1601 b) Stand-Alone-Modus (Mastersteuerung) • Stellen Sie DIP-Schalter 9 und 10 auf OFF. Stellen Sie den Effekt mit den übrigen DIP-Schaltern ein (siehe nachfolgende Liste). DIP- Effekt Bemerkung Schalter rote LEDs EIN stellen Sie die Helligkeit mit [1] oder [4] ein grüne LEDs EIN blaue LEDs EIN weiße LEDs EIN... - Page 23 door het toestel, alsook zijn inhoud (bv. verlies van data), vergoeding voor eventuele winstderving. - verbruiksgoederen, onderdelen of hulpstukken die regelmatig dienen te Velleman® Service and Quality Warranty worden vervangen, zoals bv. batterijen, lampen, rubberen onderdelen, Velleman® has over 35 years of experience in the electronics world and aandrijfriemen...
- Page 24 • tuyau : il est conseillé de consulter la notice et de contrôler câbles, problemas a pesar de todas las precauciones, es posible apelar a nuestra piles, etc. avant de retourner l’appareil. Un appareil retourné jugé garantía (véase las condiciones de garantía). défectueux qui s’avère en bon état de marche pourra faire l’objet d’une Condiciones generales referentes a la garantía sobre productos note de frais à...
Need help?
Do you have a question about the PLW16 and is the answer not in the manual?
Questions and answers