
Subscribe to Our Youtube Channel
Related Manuals for Access Virus TI Series


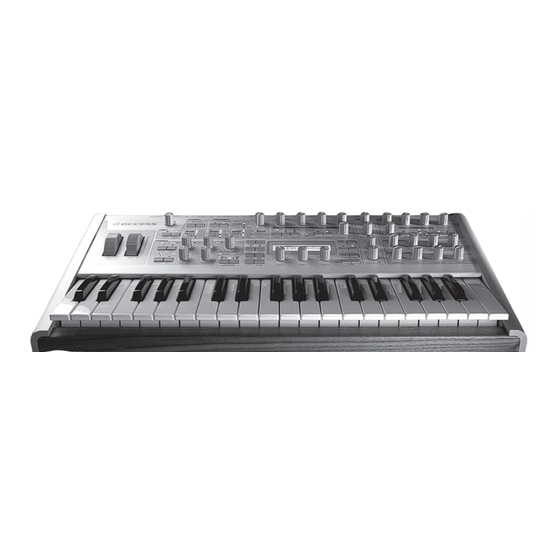
Summary of Contents for Access Virus TI Series
- Page 1 Virus TI Series Quickstart manual 5 Manual de iniciación rápida 49 Schnellstart Anleitung 93 Guide de démarrage rapide 137...
- Page 2 Quickstart manual...
-
Page 3: Table Of Contents
TABLE OF CONTENTS Table Of Contents Introduction Welcome Health and Safety Maintenance Where do I find ... How to get customer support? Basic Operation Power On/Off Connect it to your other equipment Audio I/O Choose Your Weapon Virus Control vs MIDI? What Is Total Integration? Host Software Modes Of Operation... - Page 4 QUICKSTART MANUAL Effect Section Effects In Upper Row Effects In Lower Row Utility Buttons Shift Search Store Random Patch Generator Undo Edit Config Exit Transpose About Virus Control Center Backup and Restore Burn To Flash Update OS About Polyphony Level 1 Level 3 Level 5 Maximising Polyphony...
-
Page 5: Introduction
Introduction Welcome The Virus TI is the most powerful synthesizer Access have ever built. The dual DSP architecture is capable of delivering loads of voices over 16-part multi-timbral parts each with the full arsenal of effects to its disposal. The user-interface comprises 32 knobs and 42 buttons, and a elegant LC display to give you easy and intui- tive access to its vast array of sound-sculpting possibilities. -
Page 6: Health And Safety
Maintenance • Updating the OS Access Music is famous for improving their products via free updates to the operating system. We recom- mend that you visit www.access-music.de/start/ regularly and download the latest OS. • Cleaning Only use a soft, dry cloth or soft brush to clean the panel - do not apply any liquids. -
Page 7: Where Do I Find
Patch parameter · Click on the “?” in Virus Control and open the patch parameter reference. reference · PC: Start > All programs > Access Music > Virus TI > Documentation > Manuals · Mac: Applications/Access Music/Virus TI/Documens/Manuals/ Multi parameter ·... -
Page 8: How To Get Customer Support
We prefer to be contacted my e-mail. Simply because it is easier to gather all information in writing than on the phone. Nevertheless call us, if you prefer to talk. Details on how to contact our international support team can be found here: http://access-music.de/support/... -
Page 9: Basic Operation
Important: You must install the TI Software and drivers before connecting the Virus to your computer via USB. To install: Go to www.access-music.de/start/ and download the latest build of the Virus TI installer package for your chosen computer platform. Once downloaded, extract the archive and run the installer. Follow the on screen instructions carefully, and connect the USB cable when told to do so. -
Page 10: Audio I/O
QUICKSTART MANUAL • MIDI For those of you who simply cannot wait even a couple of minutes to hear your new baby make its first sounds (don’t worry - we sympathise completely), then you can simply connect the out port of any MIDI compatible keyboard to the IN port of the Virus TI and start playing. -
Page 11: Choose Your Weapon
CHOOSE YOUR WEAPON Choose Your Weapon Virus Control vs MIDI? There are three main ways you can work with the Virus TI: · As we’ve already mentioned, you can simply plug a MIDI controller keyboard into the MIDI IN port and start playing. -
Page 12: Host Software
Whilst it is still perfectly possible to use the Virus TI in ‘standalone’ mode, a compatible sequencer will allow you to record your work in minute detail, and experience Total Integration as it was in- tended. -
Page 13: Modes Of Operation
MODES OF OPERATION Modes Of Operation Mode / Exit Button There are 3 ways or ‘modes’ to play your Virus TI. The Mode Select buttons are located to the right of the LCD display. • Single Mode This is the default mode, in which the Virus will only play one sound at a time across the whole length of your MIDI controller keyboard. -
Page 14: Tap Tempo / Panic Button
Should you wish to restore them to their original state at any time, we have saved them as libraries in the Patches folder, which you can access with the Browser in Virus Control (for further details, please refer to the Virus Control chapter in the user manual). -
Page 15: Making Your Own Sounds
For this guide we will be focussing on the primary functions of the knobs and buttons only. To access their secondary function (written in smaller text beneath the primary function), hold the SHIFT button whilst turn- ing or pressing them. -
Page 16: Parameter Overview
OSC1 LED (directly above SELECT) is lit up. Press EDIT once to access parameters relevant to the selected oscillator. You can now use the VALUE 1/2/3 knobs beneath the display to adjust the displayed parameters, and the PARAMETER buttons to navigate the pages within the menu. - Page 17 QUICKSTART MANUAL Mode Meaning Wavetable .. Formant Sweeps through the Index of the current wavetable Complex • Wave Select / PW The function of the WAVE SELECT/ PW knob varies depending on the Oscillator Mode and the current value of SHAPE. Starting with patch ROM B-120 ‘Tutorial 1’, please take some time to explore the different modes and how the WAVE SELECT/PW knob behaves in each (first ensure that SELECT is focussed to OSC1): Mode Meaning...
- Page 18 PARAMETER OVERVIEW Mode Meaning Classic/Wavetable/Grain/ Determines by how much the frequency of Osc 2 is modulated by Osc 1 Formant Hypersaw Controls the pitch of the HyperSaw’s internal sync oscillator. Sweeping this parameter is great for creating screaming lead and bass sounds. *To hear the effects of FM, you must have OSC BALANCE (MIX section) set so that Osc 2 is at least audible.
-
Page 19: Mixer Section
QUICKSTART MANUAL Mixer Section The Mixer section is where you can combine the output of the Oscillator section with some additional signal sources, and adjust the overall balance between them. From here, the combined signal is sent to the Filter section. -
Page 20: Filter Section
PARAMETER OVERVIEW • Noise Volume Controls the volume of the Noise Generator, which can be useful for adding hiss and making certain types of sound FX. Filter Section We use filters in synthesizers for changing and shaping the timbre of a sound by removing certain frequen- cies. - Page 21 QUICKSTART MANUAL • (Filter) Edit Press the EDIT button to enter the Filter Edit menu. This menu contains all of the parameters relevant to the filter section, including Filter Routing and both the Filter and Amplifier Envelopes. Use the PARAMETER but- tons to move through the pages - if you want to navigate more quickly, you can use the EDIT button to jump from one group of parameters to the next.
-
Page 22: Envelopes
PARAMETER OVERVIEW Envelopes The term ‘envelope’ is used to describe the parts of a synthesizer we use to shape the timbre and volume of a sound over time. The Virus TI has two envelopes, one for the Filter section and one for the Amplifier. They both behave in exactly the same way, and are therefore equipped with the same selection of knobs. -
Page 23: Modulators Section
Each LFO has its own SELECT button, which has two purposes: Firstly, it brings the RATE knob and the buttons on the top row to the focus of the selected LFO. Secondly, it allows direct access to the parameters assigned to the selected LFO via the VALUE knobs beneath the display - press SELECT repeatedly to cycle through the available options (watch the display!). -
Page 24: Matrix Section
PARAMETER OVERVIEW • Rate The RATE knob affects the rate or speed of the selected LFO. You can adjust the rate continuously from 0-127, or you can use it to select clock divisions by first enabling Clock mode in the EDIT menu. Please select patch ROM B-123 ‘Tutorial 4’... -
Page 25: Arp Section
Switches the Arpeggiator on/off. • (Arp) Edit Press this to gain access to all parameters relevant to the Arpeggiator. Please note that most are unavailable when the Arpeggiator is switched off. Effect Section Effects are like the final icing on your cake of sound. The entire output of the sound-engine passes through the Effects section, where you can use several different FX types to take a basic sound and turn it into a production-ready epic. - Page 26 PARAMETER OVERVIEW Effect Meaning Mid EQ Attenuates or boosts the amount of mid frequency content in the sound by up to +/-16dB. Use EQ GAIN to set the desired level and EQ FREQ to set the frequency above which the Gain is applied. Q determines the slope of the peak/cut. High EQ Attenuates or boosts the amount of high frequency (treble) content in the sound by up to +/-16dB.
- Page 27 QUICKSTART MANUAL Effect Meaning (Others) Vocoder The Vocoder is used to modulate the sound of the oscillators with a band- filtered audio signal - usually to make it sound as though the notes you play are speaking. Please refer to the Vocoder chapter in the reference manual for details. (Others) Input Follower Allows you to modulate the cutoff of the filter by an incoming audio signal.
- Page 28 UTILITY BUTTONS Utility Buttons To the left of the display you will see 4 rows of buttons, most of which are used for administration purposes. Let’s take a quick look at them, starting with the bottom row: Shift Press and hold the SHIFT button to switch the focus of the knobs and buttons to their secondary function, which is written in small type underneath the primary function.
-
Page 29: Random Patch Generator
QUICKSTART MANUAL Random Patch Generator Press SHIFT+STORE if you wish to trigger the Random Patch Generator. Undo Press UNDO to undo the last edit you made. Press again to redo it. If you haven’t made any edits to the currently selected patch, pressing UNDO will revert to the previously selected patch, including any edits you made to it before you accidentally changed patches. - Page 30 UTILITY BUTTONS Transpose To the left of the SHIFT button are the TRANSPOSE buttons. Use these to adjust the pitch up or down by up to 2 octaves.
- Page 31 ABOUT VIRUS CONTROL CENTER About Virus Control Center Virus Control Center helps you handle Virus TI data backups and allows you to overwrite the content of the ROM preset banks. It can also update your Virus TI to the latest OS version, although the Virus TI software suite installer usually takes care of this.
- Page 32 QUICKSTART MANUAL Update OS In most situations you will never need to manually install an OS update. The Software Suite installer auto- matically takes care of it. In the unlikely case that the firmware update wasn’t successfully transferred you can use the Virus Control Center to manually install the firmware again. Since OS 2.7 your Virus shows an alert during boot up if the firmware wasn’t successfully installed.
- Page 33 ABOUT POLYPHONY About Polyphony So, how many voices (notes) can you expect from the Virus TI at a time? The answer is that since the Virus TI sound engine is highly dynamic, the voice count can vary dramatically from one sound to the next, de- pending on which features are being used.
- Page 34 QUICKSTART MANUAL Maximising Polyphony The Virus TI has several features which are considerably more demanding of the available DSP power than others, and this can become apparent much more quickly in Multi Mode. If you find you are running out voices too quickly, you could take a closer look at the patches you are using, and seeing if they can be opti- mised in any way.
- Page 35 ABOUT POLYPHONY It is also advisable to switch off any redundant mod slots, i.e. don’t just turn them down to zero, switch the source and/or destination parameters to Off. Finally, remember that every single feature you can turn on and off can have an effect on the polyphony, even if it’s only by a single voice, but sometimes you may only need to find yourself that one extra voice to achieve the result you desire, so think efficient! Conclusion...
Need help?
Do you have a question about the Virus TI Series and is the answer not in the manual?
Questions and answers