
Related Manuals for Whirlpool AWG 860


Summary of Contents for Whirlpool AWG 860
-
Page 1: Table Of Contents
CONTENTS BEFORE USING THE WASHING MACHINE FIRST WASH CYCLE PRECAUTIONS AND GENERAL RECOMMENDATIONS DESCRIPTION OF THE WASHING MACHINE CHILD SAFETY PREPARATION OF THE WASHING DETERGENT AND ADDITIVES WASHING PROGRAMME REMOVING THE FILTER DRAINING RESIDUAL WATER CARE AND MAINTENANCE TROUBLESHOOTING GUIDE AFTER-SALES SERVICE TRANSPORT / HANDLING INSTALLATION... -
Page 2: Before Using The Washing Machine
BEFORE USING THE WASHING MACHINE 1.Removing the packaging and inspection 5.Drain • After unpacking, make sure that the washing • Connect the drain hose to the siphon or hook it machine is undamaged. If in doubt, do not use over the edge of a sink with the “U” bend the washing machine. -
Page 3: First Wash Cycle
FIRST WASH CYCLE This initial cycle without laundry serves to eliminate any water remaining after your appliance was tested at the factory. 1.Open the tap. 2.Close the door. 3.Pour a small amount of detergent (about 30 ml) into the detergent dispenser. 4.Select a short programme (see programme chart). -
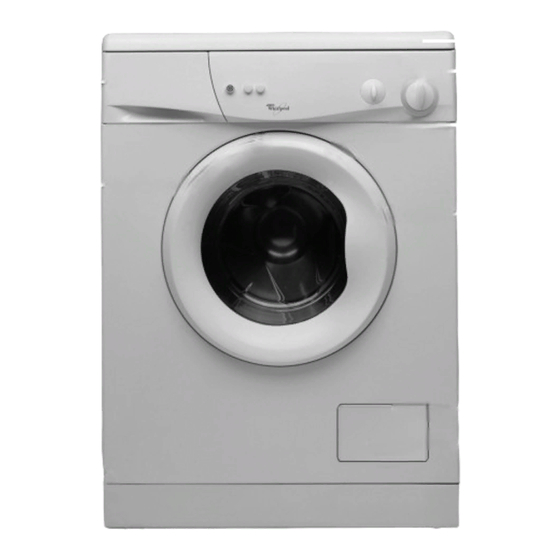
Page 4: Description Of The Washing Machine
DESCRIPTION OF THE WASHING MACHINE 1.Worktop 2.Control panel 3.Detergent dispenser 4.Door 5.Door handle • To open the door press the button inside the handle and pull. • Close the door by pushing it firmly (the lock will click into place) 6.Filter (behind cover) 7.After-Sales Service sticker (inside door) -
Page 5: Preparation Of The Washing
PREPARATION OF THE WASHING Sort the laundry Stain removal 1.Sort the laundry according to… • Blood, milk, egg and other organic substances • Type of fabric / care label symbol are generally removed by the enzyme phase of Cottons, mixed fibres, easy care/synthetics, the programme. - Page 6 • water hardness in your area (ask for information You can use liquid detergent in the “Prewash” from your water company). soft water requires phase for programmes with this option. In this less detergent than hard water. case put only powder detergents in the Notes: compartment for the main wash Overdosing the detergent results in excessive...
-
Page 7: Washing Programme
WASHING PROGRAMME Select the programme: 1. Check that the Programme Selector is on “Stop”. 2.Plug in the appliance. 3.Open the tap. 4.Set the Programme Selector to the desired programme. 5. Depending on model, set the Temperature Selector knob to the desired temperature. 6. -
Page 8: Removing The Filter
REMOVING THE FILTER 1. Stop the appliance and unplug it. 2. Open the filter cover. 3. Place a bowl beneath the filter. 4. Slowly turn the filter anticlockwise without extracting it as yet. 5. Wait until all the water has drained. 6. -
Page 9: Care And Maintenance
CARE AND MAINTENANCE Appliance exterior and control panel Door seal • Clean using normal household cleaner (do not • Clean with a damp cloth when necessary. use abrasive products and no solvents). • Check the condition of the door seal periodically. •... -
Page 10: Troubleshooting Guide
TROUBLESHOOTING GUIDE Detergent and additive product residues in The appliance will not start, the lamp does detergent drawer at end of wash. not light up. Check whether: Check whether: • the siphon is correctly installed and clean • the appliance is plugged in; (see “Care and maintenance”);... -
Page 11: After-Sales Service
AFTER-SALES SERVICE Before contacting After-Sales Service: Specify: 1.Try to remedy the problem yourself • The nature of the problem. (see “Troubleshooting Guide”). • The exact model of the appliance. 2.Restart the programme to check whether the • The service code (number after the word problem has solved itself. -
Page 12: Installation
INSTALLATION Remove the transit bolts 1.Slacken the three or four bolts (according to model) with the spanner supplied. 2.Unscrew the bolts by hand. 3.Hold the screws together with the plastic spacers and remove them. 4.Close the holes with the plastic covers (supplied with the documents). - Page 13 Worktop for built-under models. The appliance must only be installed beneath a continuous fitted kitchen worktop. If the appliance is to be built under, it is mandatory to use the cover panel UBS. This can be obtained from specialist shops or from After-Sales Service. 1.Unplug the appliance.
-
Page 14: Electrical Connection
Socket outlet / plug If the fitted plug is not suitable for your socket outlet, please contact Whirlpool Service on 0870 600 8989 for further instruction. Please do not attempt to change plug yourself. This procedure needs to be carried out by a...
Need help?
Do you have a question about the AWG 860 and is the answer not in the manual?
Questions and answers