
Related Manuals for Bauknecht BIVMS 8100


Summary of Contents for Bauknecht BIVMS 8100
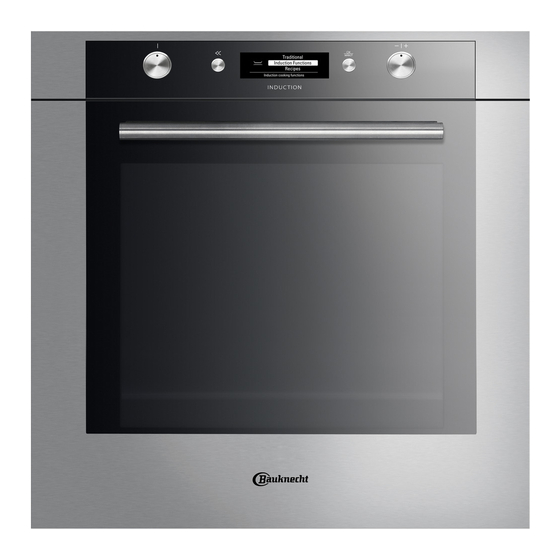
- Page 1 BIVMS 8100 Benutzer- und Wartungshandbuch User and maintenance manual Manuel d’utilisation et d’entretien Handleiding voor gebruik en onderhoud Manuale d’uso e manutenzione...
-
Page 2: Important Safety Instructions
IMPORTANT SAFETY INSTRUCTIONS YOUR SAFETY AND THAT OF OTHERS IS PARAMOUNT This manual and the appliance itself provide important safety warnings, to be read and observed at all times. This is the danger symbol, pertaining to safety, which alerts users to potential risks to themselves and others. All safety warnings are preceded by the danger symbol and the following terms: Indicates a hazardous situation which, if not avoided, will cause serious injury. - Page 3 - Do not touch the appliance with any wet part of the body and do not operate it when barefoot. - This appliance is designed solely for use as a domestic appliance for cooking food. No other type of use is permitted (e.g.: heating rooms).
-
Page 4: Installation
- Overheated oils and fats catch fire easily. Always remain vigilant when cooking foods rich in fat and oil. - Never leave the appliance unattended during food drying. - If alcoholic beverages are used when cooking foods (e.g. rum, cognac, wine), remember that alcohol evaporates at high temperatures. -
Page 5: Preparing The Housing Unit
PREPARING THE HOUSING UNIT • Kitchen units in contact with the oven must be heat resistant (min 90°C). • Carry out all cabinet cutting work before fitting the oven in the housing and carefully remove all wood chips and sawdust. •... -
Page 6: Safeguarding The Environment
SAFEGUARDING THE ENVIRONMENT Disposal of packing material The packing material is 100% recyclable and is marked with the recycle symbol ( ). The various parts of the packing must therefore be disposed of responsibly and in full compliance with local authority regulations governing waste disposal. Scrapping the product This appliance is marked in compliance with European Directive 2002/96/EC, Waste Electrical and Electronic Equipment (WEEE). -
Page 7: Oven Exterior
CLEANING Never use steam cleaning equipment. WARNING Only clean the oven when it is cool to the touch. Disconnect the appliance from the power supply. Oven exterior IMPORTANT: do not use corrosive or abrasive detergents. If any of these products accidentally comes into contact with the appliance, clean immediately with a damp Microfibre cloth. -
Page 8: Maintenance
MAINTENANCE Use protective gloves. WARNING Ensure the oven is cold before carrying out the following operations. Disconnect the appliance from the power supply. REMOVING THE DOOR To remove the door: Open the door fully. Lift the catches and push them forwards as far as they will go (Fig. 1). Close the door as far as it will go (A), lift it up (B) and turn it (C) until it is released (D) (Fig. - Page 9 Replace the lamp (see note for lamp type) (Fig. 11). Reposition the lamp cover, pushing it on firmly until it snaps into place (Fig. 12). Refit the side accessory holder grilles. Reconnect the oven to the power supply. Fig. 9 Fig.
-
Page 10: Accessories Supplied
INSTRUCTIONS FOR OVEN USE FOR THE ELECTRICAL CONNECTION, SEE THE SECTION ON INSTALLATION The induction oven is equipped with an electrical socket on the rear wall of the oven to supply power to the heating element inside the induction plate when plugged in. The induction plate is designed to work together with the induction cooking vessel supplied with the oven. -
Page 11: Accessories Not Supplied
ACCESSORIES NOT SUPPLIED Other accessories can be purchased separately from the After-sales Service. INSERTING RACKS AND OTHER ACCESSORIES IN THE OVEN The rack and other accessories have a locking system to prevent their inadvertent removal. Fig. 1 Insert the rack horizontally, with the raised part “A” upwards (Fig. 1). Tilt the rack when it reaches the locking position “B”... - Page 12 REMOVAL OF THE COOKING VESSEL AND INDUCTION PLATE REMOVING THE COOKING VESSEL: IMPORTANT: The induction cooking vessel can become extremely hot. Always use oven gloves to touch and move it. Fig. 1 Fig. 2 Using both hands, grasp the front handle and partially remove the cooking vessel (Fig. 1). Then use the lateral handles to better grasp and fully remove the cooking vessel (Fig.
-
Page 13: Function Details
NOTE: The induction first alert can be disabled/enabled through the Settings Menu. If the induction plate is already properly engaged, when oven is switch on, the induction first alert will not be shown. The submenus are available and selectable by turning the knob to the functions INDUCTION, GRILL, SPECIALS, SETTINGS and RECIPES. - Page 14 Inside the submenu, browse the various options available by turning the “Browse” knob: the chosen function is highlighted in white in the middle of the screen. To select it, press the button The cooking settings appear on the display. If the preselected values are those desired, turn the “Browse”...
-
Page 15: Setting The Cooking Duration
SETTING THE COOKING DURATION 180°C --:-- 180°C - 00:30 TEMPERATURE COOK TIME TEMPERATURE HH:MM Conventional Conventional --:-- 19:01 Start Start PREHEAT END TIME PREHEAT END TIME 180°C 00:01 180°C - 00:30 TEMPERATURE HH:MM TEMPERATURE COOK TIME Conventional Conventional 19:01 19:20 Start Start PREHEAT... - Page 16 TIMER 00 : 00 : 00 00 : 30 : 00 01 : 09 : 00 (HH) (MM) (SS) (HH) (MM) (SS) Turn +/- to set Timer, ✓ to Start Turn +/- to set Timer, ✓ to Start Timer This function can be used only with the oven switched off and is useful, for example, for controlling the cooking time of pasta.
- Page 17 INDUCTION FUNCTIONS Thanks to the Induction Heating technology, the oven offers several cooking functions (see Function Description table) which guarantee high cooking performances together with a very fast cooking process and low energy consumption. In order to ensure optimum performance, use the induction plate in combination with the supplied stainless steel cooking vessel (see Inserting Wire Shelves and Other Accessories in the Oven for information on how to insert both the induction plate and the cooking vessel).
- Page 18 DESCRIPTION OF FUNCTIONS TABLE FUNCTIONS KNOB To stop cooking and switch off the oven. INDUCTION See INDUCTION FUNCTIONS. FUNCTIONS Selecting 30 different preset recipes (see enclosed recipe-book). The oven automatically sets the optimum cooking temperature, function and RECIPES duration. It is important to follow the instructions given in the recipe-book regarding preparation, accessories and which level to use.
- Page 19 SPECIAL FUNCTIONS To speed up defrosting of food. It is advisable to place food on the middle DEFROST level. It is advisable to leave food in its packaging to prevent it from becoming dry on the outside. For keeping just-cooked food (e.g. meat, fried food, flans) hot and crisp. It KEEP WARM is advisable to place food on the middle level.
- Page 20 INDUCTION FUNCTIONS The function automatically selects the ideal Roast beef cooking temperature and mode for different 4 steps: from 0.6 to 2 kg weight categories (see oven display). It is Roast meat Roasted possible to roast any type of meat (e.g. beef, 3 steps: from 1 to 4 kg Meat veal, pork, ribs, lamb, etc.).
- Page 21 These functions are ideal for finishing any dish Low grill that requires a grill or gratin cooking mode. Using three different level of grill, it is possible Medium grill Finishing to control the power or speed of this cooking mode. During top finishing the tray is not High grill functional.
- Page 22 Range time Range time Recipe with cooking Pre- Level Tempera- Function (min.-max) (min.-max) vessel (provided) heat tray ture LOW* HIGH* Trout (0.2 - 0.4 Kg) Automatic Trout (0.5 - 0.8 Kg) Fish whole Automatic Trout (0.8 - 1.0 Kg) Automatic Cod fish Fish fillet / piece Automatic...
-
Page 23: Cooking Table
COOKING TABLE Recipe Function Pre- Shelf (from Temp. Time Accessories and notes heating bottom) (°C) (min) 160-180 30-90 Cake tin on rack Leavened cakes Level 4: cake tin on rack 160-180 30-90 Level 1: cake tin on rack Drip-tray / baking tray or 160-200 35-90 Filled pies... - Page 24 Recipe Function Pre- Shelf (from Temp. Time Accessories and notes heating bottom) (°C) (min) 180-190 40-55 Cake tin on rack Level 4: cake tin on rack 180-190 45-70 Savoury pies Level 1: cake tin on rack (vegetable pie, Level 5: cake tin on rack quiche lorraine) Level 3: cake tin on rack 1-3-5...
- Page 25 Recipe Function Pre- Shelf (from Temp. Time Accessories and notes heating bottom) (°C) (min) Drip-tray or baking tray (turn food two thirds of the way Baked potatoes Medium 45-55 through cooking if necessary) Vegetables au High 10-15 Pan on rack gratin Level 4: pan on rack Lasagna &...
- Page 26 TESTED RECIPES in compliance with IEC 50304/60350:2009-03 and DIN 3360-12:07:07 Recipe Function Pre- Shelf (from Temp. Time Accessories and notes heating bottom) (°C) (min) IEC 60350:2009-03 § 8.4.1 15-30 Drip-tray / baking tray Shortbread Level 4: baking tray 20-35 Level 1: drip-tray IEC 60350:2009-03 §...
-
Page 27: Tips And Advice
TIPS AND ADVICE How to read the cooking table The table indicates the best function to use for a given food, to be cooked on one or more shelves at the same time. Cooking times start from the moment food is placed in the oven, excluding preheating (when required). - Page 28 When using the roast Meat and whole roast Chicken functions, the meat does not need to be turned over. For the “Roast beef” function: after cooking for 15 minutes it is recommended that the meat is turned to achieve even surface browning. When the beef is cooked to your liking take it out of the oven and leave to rest.
- Page 29 Printed in Italy 05/2012 5019 400 00357 Copyright Whirlpool Europe s.r.l. 2012. All rights reserved...
Need help?
Do you have a question about the BIVMS 8100 and is the answer not in the manual?
Questions and answers
How do i put the handle on the door