Table of Contents
Advertisement
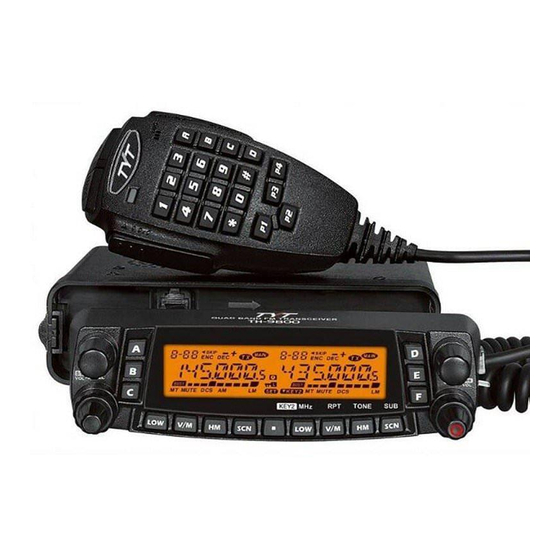
TH-7800 User Manual
Thank you very much for choosing the
TH-7800 dual band mobile transceiver.
The TH-7800 provides you with a reliable, clear and efficient communications service
which in enhanced by an ergonomic design and intuitive user controls.
Inherently reliable you can depend on your TH-7800 no matter where you are in the
harsh environment.
The TH-7800 is cost-effective, multi-functional and will meet all of your VHF/UHF
band communication needs no matter what the situation.
For a full explanation of the many features, functions and the care free maintenance
of your new mobile please take the time to read the user manual enclosed with your
transceiver.
Advertisement
Table of Contents

Related Manuals for TYT TH-7800


Summary of Contents for TYT TH-7800
- Page 1 The TH-7800 provides you with a reliable, clear and efficient communications service which in enhanced by an ergonomic design and intuitive user controls. Inherently reliable you can depend on your TH-7800 no matter where you are in the harsh environment.
-
Page 2: Table Of Contents
CONTENTS Display Rear Panel User Safety Information Microphone Package includes Basic Operation Main Features Switching the power on/off Initial Installation Adjusting the volume Mobile Installation Adjusting the squelch level Installation methods Selecting the operating band Mounting bracket installation Selecting the frequency band Separation cable connection Selecting desired frequency DC Power Cable Connection... - Page 3 Deleting Memories 2 Tone & 5 Tone Signaling Operation HOME Channel Memory Auto Range Transponder System (ARTS) Operation Hyper Memory Channel Cross-band Repeater Operation Memory Only Mode Microphone Key Assignments Some Advanced Features Menu Operation Factory Reset Operation Repeater Operation Simple Trouble Shooting CTCSS Tone / DCS Code Operation Specifications...
-
Page 4: User Safety Information
User Safety Information Main Features Do not attempt to configure your transceiver while driving. Cover 144 / 430 MHz four transmitting bands This transceiver is designed for a 13.8V DC power supply. Do not use a 24V battery to power on the transceiver. Wide band AM receiving and FM receiving for 108-180MHz, 134-174MHz, 350-520MHz (except cell phone). -
Page 5: Initial Installation
2 – Remote Control Installation Separation cable connection Front panel Transceiver A separation cable (4.5m; 14.8 ft) is supplied with the TH-7800. Connect the controller and the main unit using with the separation cable as follows. Main unit Main body... -
Page 6: Dc Power Cable Connection
DC Power Cable Connection Fixed Station Operation Note: Locate the power input connector as close to the transceiver as possible. In order to use this transceiver for fixed station operation you will need a separate 13.8V DC power supply (not included). The vehicle battery must have a nominal rating of 12V. -
Page 7: Replacing Fuses
Replacing Fuses Antenna Connection If the fuse blows, determine the cause then correct the problem. After the problem is resolved replace the fuse. If newly Before operating install an efficient well-tuned antenna. The success of your installation will depend largely on the type of installed fuses continue to blow, disconnect the power cable and contact your local dealer for assistance. -
Page 8: Accessories Connections
Microphone Accessories Connections For voice communications connect a microphone equipped with an 8-pin modular plug into the modular socket on the side External Speaker of the main unit. Press firmly on the plug until the locking tab clicks. Attach the supplied microphone hanger in an approp- If you plan to use an external speaker, choose a speaker with an impedance of 8*. -
Page 9: Getting Acquainted
Getting Acquainted 1. Short press the key to switch frequency control for the "left" band between the VFO and Memory Front Panel Operation mode. LEFT [V/M] 2. Press and hold in this key for 1/2 second to shift to the "Memory Tuning" feature when the "left" band is set to the Memory mode. -
Page 10: Display
Display RIGHT [HM] 1. Short press the key to recall a favorite "HOME" frequency memory. (Default) 2. Press and hold in this key for 1/2 second to activate Priority Channel Scanning under VFO or MR mode. RIGHT [TONE] Short press the key to change the Tone Squelch mode: ENC (CTCSS Encoder), ENC DEC (CTCSS (Key Mode 2) Encoder &... -
Page 11: Rear Panel
Rear Panel Port FUNCTION Press the key to transmit. Decrease channel number or setting value. Increase channel number or setting value. Speak here during transmission. LOCK Locks out the microphone buttons except key 0 - 9 and PTT. LAMP Illuminates the microphone keypad. Number Key Input channel number or DTMF dial out etc. -
Page 12: Basic Operation
" icon will light up alt- MHz step. This feature is useful for making rapid frequency excursions over the wide tuning range of the TH-7800. ernative sides of the display as you switch "Main" bands from the "left" side to the "right" side, and vice-versa. -
Page 13: Receiving
100 MHz any required leading zeroes must be entered. The TH-7800 provides 4 kinds of memory systems. These include: Example: To enter 144.025 MHz, press [1] -> [4] -> [4] -> [0] -> [2] -> [5] 1. -
Page 14: Storing Independent Transmit Frequencies ("Odd Splits")
HOME Channel Memory Note: The TH-7800 allows quick recall of a favorite operating frequency on each band, called HOME channel (one for each of Whenever you recall a memory which contains independent-stored transmit and receive frequencies, the " " icon will the 6 operating bands). -
Page 15: Memory Only Mode
2. Press and hold in the one of the Hyper Memory keys ([A] ~ [F]) for 2 seconds to store into the Hyper Memory channel The TH-7800 provides a convenient Automatic Repeater Shift feature, which causes the appropriate repeater shift to be which you wish to store that configuration. -
Page 16: Ctcss Tone / Dcs Code Operation
CTCSS Tone / DCS Code Operation Just as in CTCSS operation, DCS requires that you set the Tone Mode to DCS and then select a code. 1. Short press the [SET] key to enter the Menu mode. CTCSS setup involves two actions: setting the Tone Mode and Tone Frequency by using the Menu # 31 (TONE M) and # 30 (TONE F). -
Page 17: Dcs Code Inversion
"Main" band DIAL to lock in that tone/code, then press the [SET] key to save the new setting and exit to nor- If you find that the TH-7800 receiver squelch does not open when both you and the other station are using a common DCS code, you can try the following: mal operation. -
Page 18: Vfo Scanning
Before you begin to scan, select the way in which you would like the scanner to resume scanning after it halts on a signal. 3. As with VFO mode, the scanner will halt on any signal and resume scanning according to the Scan-Resume mode. To set the scan-Resume mode: 4. -
Page 19: Programmable Memory Scan
16 DTMF autodialer memories are available. These DTMF autodialer memories can store up to 16 digits of a telephone The TH-7800 has a two-channel scanning capability which allows you to operate on a VFO, Memory channel, or Home number for, repeater autopatch or other uses. -
Page 20: Tone & 5 Tone Signaling Operation
To load DTMF autodialer memories: 2 Tone & 5 Tone Signaling Operation 1. Short press the [SET] key to enter the Menu mode. The difference between 2/5 Tone and DTMF operation is that 2/5 Tone can be sent using the autodialer feature only, not 2. -
Page 21: Cross-Band Repeater Operation
Cross-band Repeater Operation To assign the function to a key: The TH-7800 can be set up to operate as a cross-band repeater via a simple Menu procedure. This feature is useful for 1. Press the [SET] key to enter the Menu mode. -
Page 22: Menu Operation
Menu Operation Name Function Procedure: SCAN Activate the Scanner on the "Main" band. 1. Short press the [SET] key to enter the Menu mode. SQL.OFF Opens the Squelch on the "Main" band to allow un-muted reception. 2. Turn the "Main" band DIAL to select the Menu item to be adjusted (You can recall the Menu items using the micropho- TCALL Activates 1750 Hz Tone Burst (1000/1450/1750/2100 Hz tone can be selected in the ne directly). - Page 23 # 4 BEEP # 9 DSP.MOD Function: enable/Disable the beeper Function: select Memory channel display mode. Available Values: BEP.ON / BEP.OFF Available Values: DSP.FRQ / DSP.NAM Default: BEP.ON Default: DSP.FRQ # 5 Clock frequency shift - CLK.SFT # 10 DTMF D Function: shifting of CPU clock frequency Function: setting of the DTMF autodialer delay time.
- Page 24 Available Values: KEY1 / KEY2 Default: BAND Default: KEY1 # 20 PG P2 # 15 LOCK Function: program the microphone's [p2] button assignment. Function: enable/disable the Key/Button Lock feature. Default: VFO/MR Available Values: MANUAL / AUTO # 21 PG P3 Default: MANUAL Function: program the microphone's [p3] button assignment.
- Page 25 # 25 SCAN Default: 12.5 KHz Note: the step can be set independently for each band. Function: selects the scan-resume mode. Available Values: TIME / BUSY # 29 SPK Default: TIME Function: set the squelch mode. TIME: the scanner will halt on a signal it encounters, and will hold 5 seconds. If you do not take action to disable the sca- Available Values: SQ / CTC / TON / C+T and C/T nner within 5 seconds, the scanner will resume even if the stations are still alive.
- Page 26 ENC: CTCSS Encoder. Default: OFF ENC.DEC: CTCSS Encoder/Decoder. # 37 AUT.AM DCS: Digital Code Squelch Encoder/Decoder. Function: enable/disable automatic AM mode. # 32 Time-Out Timer - TOT Available Values: ON / OFF Function: set the time-out timer. Default: ON Available Values: OFF / 1 ~ 30 min # 38 2TONE Default: 6 min Function: assign the 2 Tone autodialer memory channel.
-
Page 27: Factory Reset Operation
# 42 HSD.TYP Simple Trouble Shooting Function: activate 2 TONE/ 5 TONE/ DTMF Squelch. Problem Possible Causes and Potential Solutions Available Values: OFF / 2 TONE / 5 TONE / DTMF Power is on, but nothing "+" and "-" polarities of power connection are reversed. Connect Red lead to pos- Default: OFF appears on the display.
Need help?
Do you have a question about the TH-7800 and is the answer not in the manual?
Questions and answers