
Related Manuals for Amit APC772AM-P01

Summary of Contents for Amit APC772AM-P01
-
Page 1: Quick Installation Guide
Quick Installation Guide APC772AM-P01 APC761AM-P03 Business Access Point V1.1_20140312... -
Page 2: Chapter 1 Introduction
Support Multiple-SSID capability to use one Physical AP to simultaneously emulate 8 APs with different ESSIDs by separate their packets via VLAN technology. Contents List Items Description Contents Quantity APC772AM-P01 1pcs Business Access Point 1pcs Power Adapter RJ45 Cable 1pcs 1pcs APC772AM-P01 Quick Installation Guide... -
Page 3: Hardware Installation
Web-based Configuration Utility Internet Explorer 6.0 or higher Requirements Chrome 2.0 or higher Firefox 3.0 or higher Safari 3.0 or higher (with Java 1.3.1 or higher) Windows® Users: Make sure you have the 3 APC772AM-P01 Quick Installation Guide... - Page 4 Java installed. Visit www.java.com to download the latest version. Computer with the following: Windows® 7, Vista®, or XP with Service CD Installation Wizard Requirements Pack 2 An installed Ethernet adapter CD-ROM drive 4 APC772AM-P01 Quick Installation Guide...
-
Page 5: Hardware Configuration
Business Access Point 1.2.3 Hardware Configuration Rear View: PoE-PD Receptor Ethernet for Power Port Adapter 5 APC772AM-P01 Quick Installation Guide... - Page 6 If you run the cable above the ceiling (invisible cabling), you have to drill another big hole (about 10~20 mm diameter) to pull out the cable for connecting to the device. 2. Screw the mounting bracket on the ceiling / wall. 6 APC772AM-P01 Quick Installation Guide...
- Page 7 Plug-in the cable (Ethernet cable, Power cord) to the connectors in the button side. Run the cables upward to proper location. Attached this device to mounting bracket by rotating it clock wisely to click into place. 7 APC772AM-P01 Quick Installation Guide...
- Page 8 Business Access Point Installation completed. 8 APC772AM-P01 Quick Installation Guide...
-
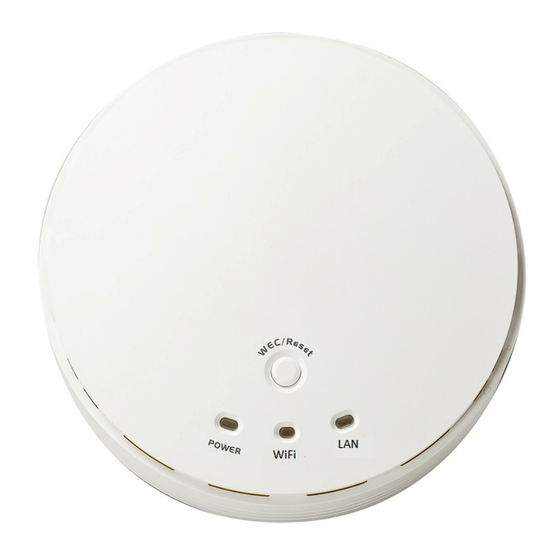
Page 9: Led Indicators
LED in slow flash or Flash Green and Amber Alternately : Wireless Connection doesn't establish. LED in Solid: Wireless Connection established successfully. OFF: No Ethernet connection. Solid Green: Ethernet connection is linked up. Flash Green: Data packet is transferred over the Ethernet link. 9 APC772AM-P01 Quick Installation Guide... - Page 10 2 minutes.) 4. Once easy configuration process completed, the Status LED will be recovered to its original behavior (prior to you triggered it). And the WiFi LED will be Solid when Slave AP 10 APC772AM-P01 Quick Installation Guide...
- Page 11 2. The WiFi LED becomes OFF in 3 ~ 5 seconds, 3. After about 20 ~ 25 seconds, the WiFi LED will be lit ON again to indicate that the AP Mode is changed. It takes about 36 seconds to change (toggle) the 11 APC772AM-P01 Quick Installation Guide...
- Page 12 Release the button. Reset to Default (Press 20 2. Then, the device will reboot automatically and sec) apply the factory default settings as well. It takes about 2 minutes to finish the reset to factory default operation. 12 APC772AM-P01 Quick Installation Guide...
-
Page 13: Chapter 2 Getting Started
IP setting for the Ethernet Interface. You can refer to Appendix A for how to assign a Static IP address you your computer. The device’s default IP address is 192.168.123.50, and your computer must be assigned with a 192.168.123.x IP address to get access to the device. 13 APC772AM-P01 Quick Installation Guide... - Page 14 You can browse web UI to configure the device. Firstly you need to launch the Setup Wizard browser first and then the Setup Wizard will guide you step-by-step to finish the basic setup process. Activate the setup wizard: Type in the IP Address (http://192.168.123.50) 14 APC772AM-P01 Quick Installation Guide...
- Page 15 Select “Wizard” for basic settings in a simple way. Or, you can go to Basic Network / Advanced Network / Applications / System to setup the configuration by your own selection. Press “Next” to start the Setup Wizard. 15 APC772AM-P01 Quick Installation Guide...
- Page 16 You have to change the IP address of this device according to your network configuration. Step 3-1 Wireless settings. You can specify the Wireless setting for VAP1. Step 3-2 Wireless settings. Specify VAP1’s wireless authentication and encryption. 16 APC772AM-P01 Quick Installation Guide...
- Page 17 Mode. Before starting to use WEC to configure your AP devices, you have to learn how to identify and set the device in the Master Mode, or the Slave Mode (As stated in Section 1.2.4 and 1.2.5). 17 APC772AM-P01 Quick Installation Guide...
- Page 18 1. Make sure AP2 / AP3 is in Slave Mode (WiFi Set AP2 and AP3 in Slave LED should be “Amber” color, if not, you have to Mode. toggle its AP mode via pressing the WEC button for 9~10 seconds) 18 APC772AM-P01 Quick Installation Guide...
- Page 19 In this case, AP3 is located out of the service range of AP1, you don’t have to check AP3’s WiFi LED, but you have to connect the AP3 with an Ethernet cable to the gateway. 19 APC772AM-P01 Quick Installation Guide...
- Page 20 1. Make sure AP2 / AP3 / AP4 is in Slave Mode Set AP2, AP3, AP4 in (WiFi LED should be “Amber” color, if not, you Slave Mode. have to toggle its AP mode via pressing the WEC button for 8 seconds) 20 APC772AM-P01 Quick Installation Guide...
- Page 21 AP2. Besides, You can also check the AP3’s WiFi LED, it should be “Solid Amber” if AP3 already connected AP2. 4. Install AP4 to its location and verify its wireless 21 APC772AM-P01 Quick Installation Guide...
- Page 22 If Ethernet cable is reachable, connecting each AP to an Ethernet Uplink is recommended. Above WEC configuration process is also suitable for running Ethernet cables to AP2 ~ AP4 to get a better wireless network.. 22 APC772AM-P01 Quick Installation Guide...
Need help?
Do you have a question about the APC772AM-P01 and is the answer not in the manual?
Questions and answers