
Subscribe to Our Youtube Channel
Related Manuals for Sencor 3cam 4k02w

Summary of Contents for Sencor 3cam 4k02w
- Page 1 OUTDOOR CAMERA USER’S MANUAL OUTDOOROVÁ KAMERA NÁVOD K OBSLUZE OUTDOOROVÁ KAMERA NÁVOD NA OBSLUHU SZABADIDŐ-KAMERA HASZNÁLATI ÚTMUTATÓ KAMERA OUTDOOROWA INSTRUKCJA OBSŁUGI 3CAM 4K02W SK HU PL...
- Page 3 Warning 1. Warning This product is made with high precision and designed with respect to its multi-purpose outdoor use for individual entertainment purposes. Respect valid privacy laws when capturing recordings, in particular in your absence. Prevent falls and impacts, especially on sharp and angular objects, stones etc. Do not expose the device to strong magnetic fi...
-
Page 4: Storage Information
Warning Storage information Keep in mind that this product is also designed for outdoor use, which can result in it becoming soiled. Carefully clean your camera, case and accessories and blow dust from soiled areas prior to storing, for example, outside of the season, whether short-term or long-term. -
Page 5: Outdoor Use
Warning Outdoor use Prior to using the camera outdoors, prepare and put together the device and accessories ahead of time in a calm manner and dry environment. Make sure the camera is capable of recording scenes you are interested in and that your equipment and clothing are not in the way. - Page 6 Introduction freeze at lower temperatures, making it diffi cult or impossible to control the camera, especially around the buttons. It can also lead to impaired image quality. Try to prevent condensation and freezing. 2. Introduction This product is a digital video recording device with ultra high resolution. It offers a host of top features like digital video recording, photography, sound recording, video display and a removable battery, which makes it the ideal device for recording in the vehicle, photographing, outdoor sports, exploration in water, slow recording of fast events, accelerated...
- Page 7 Start-up large enough to correctly accommodate the holder. Prior to applying the tape, check to ensure it is clean and intact and that the adhesive is not old (an older adhesive might not have the desired effect). Purchase a new brand name and quality tape, if necessary. Holder (bed) of the camera is designed with regard to ease of use and robustness, the window provides access to only a part of the display.
-
Page 8: Battery Installation And Removal
Start-up To remove the card, push the card gently until the card lock clicks and slightly slides the card out from the slot. Use your fi ngers to remove the card completely from the camera. Note: use your own brand name microSD card and format the card using a computer before use. - Page 9 Start-up Tip: a new battery reaches full capacity after about 3 charging cycles. We recommend fully charging the battery (until the red indicator goes off) and deplete it until the camera switches off. This extends the battery life. Note: the camera can be operated even without a battery with an external power supply, for example in the car.
-
Page 10: Switching Between Modes
Start-up The camera also switches on and off (based on the current settings, see further) by connecting and disconnecting the power supply, for example in the car, according to the ignition key position. The camera can also be confi gured to automatically start based on its internal motion detectors and shut down after a confi... -
Page 11: Hdmi Connection
Start-up 3.8. HDMI connection You can play the video camera recordings on a monitor (TV) when you connect it with proper cable. The camera has a Micro HDMI (Type D) connector. With HDMI connection to input the TV camera turns off its display and its image redirects to a connected monitor (TV), control buttons operate unchanged. -
Page 12: Computer Connection
Computer connection 4. Computer connection Plug the camera into the computer USB port (Windows) using the included cable. Besides charging the device, you can also use the cable for transferring data. Once the camera detects a connection to a computer, you receive a message with a choice of USB storage mode, PC camera, and charging. - Page 13 Wi-Fi control When you fi rst connect to a given computer port it usually fi rst seeks drivers for the appropriate connections. An internet connection will eventually be required to download operating system updates. Wait for the installation process to fi nish. If the installation fails, try a different port, or replace the cable.
- Page 14 Wi-Fi control From the available wireless networks, select the name corresponding to the message on the camera display. The default Wi-Fi connection password is “1234567890”. Enter the right password into your mobile phone and the camera will establish the connection. After a connection is successfully established, the indicator remains lit and the camera display is disabled to save energy.
-
Page 15: Camera Settings
Camera settings NOTICE: The camera constantly keeps its setting on conserving power (Power Save). If you have set e.g. the interval of shut off, the camera turns off after its expiration and it disconnects, similarly like when the idle time expires, WiFi. To reconnect after turning on you have to reestablish WiFi connection. - Page 16 Camera settings 6.1. Video card Video Resolution – indicated by displayed number Select a suitable resolution and speed of the recording (fps) from several options according to the anticipated event. Remember that for higher resolution and recording speed you need to have a fast enough memory card that can handle the writing of the fl...
- Page 17 Camera settings 6.2. Photo card Photo resolution – number of Mpix on display in the camera mode complete with the estimate of remaining space on the card Select the size of the photos between 16M 4608×3456, 12M 4000×3000, 8M 3264×2448, 5M 2592×1936, 2M 1600×1200.
- Page 18 Camera settings 6.3. Selection card Exposure – value on the display The video camera and camera exposure can be pre-set from -3 (for lighter environments) to +3 (for darker environments). White balance – symbol on the display in camera mode According to the predominant type of lighting, you can adjust the tint of the photos among Auto (recommended), Sunny, Cloudy, Incandescent Light, Fluorescent Light.
- Page 19 Camera settings Shock sensor has the fi le locking function to protect against automatic deletion after the card is full, and the location of these fi les is in the folder LOCK. Select the setting of sensitivity between Unused (Close) / LOW / MIDDLE / HIGH. G-sensor is active only in the Driving Mode.
- Page 20 Camera settings Time Watermark Enable or disable including the date and time directly in your recording. 6.4. Card generally Language Choose from one of several user interface languages. Date – Time Set using arrows Up and Down, toggle between items by pressing OK. Format This feature allows you to format the inserted card to be used in the camera.
- Page 21 Camera settings Reset to Factory setting Sets all items to the factory pre-sets. This is useful if you would like to return to the default status for multiple settings. Confi rm Yes (Confi rmation) or cancel by selecting Cancel Firmware version Lists information about the currently used system.
-
Page 22: Technical Data
Technical data 7. Technical data LCD display 2“ (960 × 240) Lens Wide angle lens HD with viewing angle 170° Video/codec formats MP4/H.264 Recorded video resolution (3840 ×2160) 30 p./s 2.7K (2688 × 1520) 30 p./s 1080P (1920 × 1080) 60 fps 1080P (1920 ×... - Page 23 Technical data Camera weight including 65 g battery Camera dimensions 59 × 41 × 29 mm Camera weight including 65 g battery Operating temperature –10 °C ~ +55 °C Storage -20 °C ~ +70 °C Humidity 5 % ~ 95 % Water resistance in a case 60 m in depth Note: The technical data can be updated.
- Page 24 INSTRUCTIONS AND INFORMATION REGARDING THE DISPOSAL OF USED PACKAGING MATERIALS Dispose of packaging material at a public waste disposal site. DISPOSAL OF USED ELECTRICAL AND ELECTRONIC APPLIANCES The meaning of the symbol on the product, its accessory or packaging indicates that this product shall not be treated as household waste.
-
Page 25: Warranty Conditions
Technical data Warranty conditions Warranty card is not a part of the device packaging. This product is warranted for the period of 24 months from the date of purchase to the end-user. Warranty is limited to the following conditions. Warranty is referred only to the customer goods using for common domestic use. - Page 26 Cases when the claiming product cannot be indentified according to the presented documents (e.g. the serial number or the warranty seal has been damaged). Authorized service centers Visit www.sencor.eu for detailed information about authorized service centers 24 EN Copyright © 2016, Fast ČR, a. s.
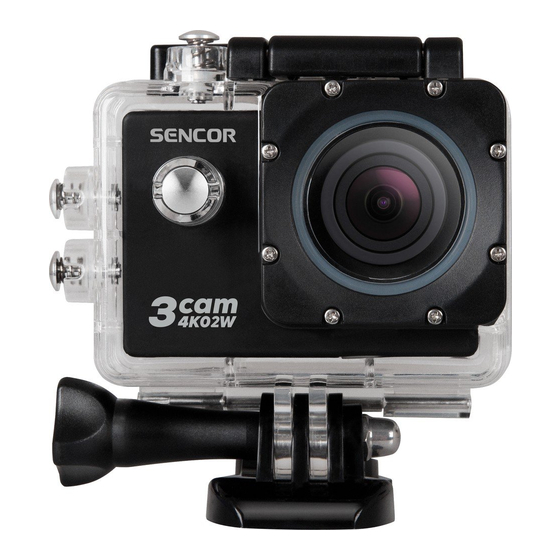
- Page 27 Product image / Obrázek produktu / Obrázok produktu / A kamera részei / Zdjęcie produktu ję 10. Blue light LED – HDMI operation Objektiv 11. Screen LED indicator 12. Button – arrow down Mikrofon Switching/mode 13. Button – arrow up microSD HDMI –...
- Page 28 13. Tlačítko – šipka nahoru 13. Tlačidlo – šípka hore – WiFi – Wi-Fi 14. Reproduktor 14. Reproduktor Wskaźnik LED Przełącznik / tryb HDMI Obiektyw Kontrolka LED LED kijelző Prepínanie/režim Átkapcsoló / üzemmód Mikrofon HDMI HDMI microSD Objektív Objektív Czerwone światło LED – ładowanie Mikrofón Mikrofon...
- Page 29 Accessories / Příslušenství / Príslušenstvo / Kiegészítők / Akcesoria Water-resistant case Bike holder Stand 1 Stand 2 Rear clip Voděodolné pouzdro Držák na kolo Podstavec 1 Podstavec 2 Zadní klip Vodoodolné puzdro Držiak na bicykel Podstavec 1 Podstavec 2 Zadná klipsa Vízhatlan tok Tartó...
- Page 30 Helmet stand Armband Hard case Tightening tape 3M pad Podstavec pro helmu Obinadlo Pevné pouzdro Stahovací páska 3M podložka Podstavec na helmu Ovínadlo Pevné puzdro Sťahovacia páska 3M podložka Sisak alátét Kötés Szilárd tok Meghúzó szalag 3M alátét Podstawka pod kask Taśma mocująca Futerał...
- Page 31 Application assembly diagram / Aplikační schéma sestavy / Aplikačná schéma zostavy / Összerakási ábra / Schemat aplikacyjny zestawu: base long rod helmet stand podstavec dlouhá tyč podstavec pro helmu water resistant case podstavec dlhá tyč podstavec na helmu vodotěsné pouzdro alátét hosszú...
- Page 32 stand 1 / stand 3 / stand 2 / water resistant helmet stand long rod short rod short rod case podstavec pro podstavec 1/ podstavec 3/ podstavec 2/ vodotěsné pouzdro helmu dlouhá tyč krátká tyč krátká tyč vodotesné puzdro podstavec na podstavec 3/ podstavec 2/ vízhatlan tok...
- Page 33 camera rear clip clip fotoaparát klip zadní klip fotoaparát klipsa zadná klipsa fényképezőgép klipsz hátsó klipsz aparat fotografi czny klips tylny klips (Tips: Some properties of the above features may vary depending on the current model, without notice.) (Tipy: Některé vlastnosti výše uvedených funkcí se mohou lišit v závislosti od aktuálního modelu, bez dalšího upozornění.) (Tipy: Niektoré...
- Page 36 ® Designed in Europe by Sencor , Made in China www.sencor.cz...
Need help?
Do you have a question about the 3cam 4k02w and is the answer not in the manual?
Questions and answers