Table of Contents
Advertisement
Address: No.23-7.Yaobei Road,Dalian,China
Website: www.seaside.net.cn
GARAGE DOOR operator
Models 9357
For Residential Use Only
Before installation, write down the serial number and purchase date:
(The model number is labeled on the plastic cover with light socket of your operator).
Serial # _ _ _ _ _ _ _ _ _
Purchase Date _ _- _ _- _ _ _
Version No.:MEN-005-B
Owner's Manual
1
Advertisement
Table of Contents

Related Manuals for Seaside 9357


Summary of Contents for Seaside 9357
- Page 1 Address: No.23-7.Yaobei Road,Dalian,China Website: www.seaside.net.cn GARAGE DOOR operator Models 9357 For Residential Use Only Before installation, write down the serial number and purchase date: (The model number is labeled on the plastic cover with light socket of your operator). Serial # _ _ _ _ _ _ _ _ _ Purchase Date _ _- _ _- _ _ _ Version No.:MEN-005-B...
-
Page 2: Table Of Contents
Before installation, please read this manual and instructions carefully! The Photo eye system must be installed. Routine maintenance of the operator according to this manual to ensure safe operation. Please keep the manual in your sight near the garage door. TABLE OF CONTENTS Introduction…............3-4 14. -
Page 3: Introduction
INTRODUCTION Safety Symbols This garage door operator has been tested and manufactured to provide safe service . Please install, handle, maintain, and check in strict compliance with the instructions and warnings used in this owner’s manual. The following Safety Symbols used in this manual will warn you the possibility of serious injury or death if you do not operate in accordance with the warnings attached. -
Page 4: Important Installation Instructions
IMPORTANT INSTALLATION INSTRUCTIONS WARNING To prevent any possible SERIOUS INJURY or DEATH: 1. Read and follow all installation instructions. 2. Always call a professional qualified door technician to make repairs to garage door cables, spring assemblies, and other hardware before installing the operator. -
Page 5: Operator Contents And Tool
Operator contents and tools: H、 One-Piece Rail A、Header bracket I、 Hanging bracket B、Pulley assembly J、 Garage door operator C、 Door bracket K、“U” rail clips(2) D、 Curved door arm L、 Photoelectric sensors E、Straight door arm M、 Chain/Belt F、 Trolley assembly N、 Sprocket and sprocket holder assembly G、Emergency release rope and knob O、... - Page 6 The tools illustrated below may be used during installation and adjustment of your operator: For future reference, the following parts should be pre-installed in the rail. A、Rail N、 Sprocket and B、Pulley assembly sprocket holder assembly...
- Page 7 F、Trolley Assembly Locking Holes Belt Belt Belt Connector Chain Chain Chain Connector...
- Page 8 Hardware H1 Shouldered H2 Shouldered H3 Hex Nut M8(6) shaft, long Φ8×80 (1) shaft, short Φ8×30 (2) H4 Hex Bolt M8×20(6) H5 Cotter Pin Φ2×25(3) H6 Screw M5×20(2) H7 Lag Screw M8×50 (6) H8 Self-drilling Screw M6×25 (4) Curved door arm “U”...
-
Page 9: Installation Steps
INCLUDED ACCESSORIES Wall Control Panel Remote Control(2) Photo Eye Sensors W221 T041-315 INSTALLATION STEPS Do not run the garage door operator until instructed. CAUTION To prevent INJURY from pinching, keep hands and fingers away from the joints while assembling the rail 1、Adjust the chain or belt 1.1 To increase the tension and tighten the chain, turn the tension nut clockwise with adjustable wrench until the nut is spaced properly from... -
Page 10: Connect The Rail To The Operator
2、Connect the rail to the operator CAUTION To avoid SERIOUS damage to garage door operator, use ONLY those bolts mounted in top of the operator. 2.1 Position operator as showed below. Rest operator head on cardboard or protective surface on floor so operator does not get scratched. Chassis side of operator facing up. -
Page 11: Install The Header Bracket
3、Install The Header Bracket WARNING To reduce any possible SERIOUS INJURY or DEATH: · Header bracket MUST be fastened to structural support on header Wall or ceiling, otherwise the reversing safety system may not work. · Do not install header bracket over drywall. ·... -
Page 12: Connect The Rail To The Header Bracket
Optional ceiling Unfinished mount for ceiling Header bracket Structural support Header wall 4、Connect the Rail to the Header Bracket Mount the rail to the header bracket by inserting the Shouldered shaft (H1) through the holes in the header bracket and rail. Secure with the cotter pin(H5). HARDWARE H1 Shouldered shaft, long H5 Cotter pin Φ2×25(1) -
Page 13: Attach The Garage Door Operator To The
5、Attach the garage door operator to the ceiling 5.1 Elevate the operator onto a ladder. You will need help if the ladder is not tall enough. 5.2 Open the door all the way, leave the operator on the top section. WARNING To reduce possible SERIOUS INJURY, the garage door operator must be properly secured to structural support of the garage. -
Page 14: Ceiling
5.4 The garage door operator must be 5.3 On finished ceilings, use the lag aligned with the hanging bracket. The screws (H7) to fasten a hanging distance from each side of the garage bracket (not provided) to the structural door operator to the structural supports before installing the garage supports must be equal. -
Page 15: Install The Door Bracket
5.8 Open and close the door manually. If the door hits the rail, lift the header bracket. 6、Install the door bracket NOTE: Please contact your garage door manufacturer if your garage door needs reinforcement kit. Many door reinforcement kits provide for direct attachment of the clevis pin and door arm. -
Page 16: Attach The Door Arm
7、Attach the door arm H4 Hex Bolt H2 Shouldered shaft Hex Nut Cotter pin M8×20(2) M8(2) Φ2×25(2) Φ8×30 (2) 7.1 Close the door. Connect the curved door arm to the door bracket by using the shouldered shaft (H2).Attach the shouldered shaft with the cotter pin(H5). Pull the emergency release to move the trolley to the locking holes. -
Page 17: Install Light Bulb
7.3 Line up the straight arm and curved arm. And fasten them using the bolts (H4), nuts (H3) inserted in the 2 holes as far apart as possible. 7.4 If the curved arm and straight arm’s holes do not exactly match, pull the emergency release to move the trolley a little bit. -
Page 18: Knob
8.1 To remove the two screws in both light lenses,then take both light lens out.. 8.2 Insert two A19 incandescent or compact fluorescent light bulb (100 watt maximum), or compact fluorescent (26W) into both light sockets. 8.3 Line up the lens taps with slots in operator, fasten it with the two screws. 9、Install the Emergency Release Cord and Knob WARNING To avoid possible SERIOUS INJURY or DEATH from a falling garage door:... -
Page 19: Install The Wall Control
Emergency release cord and knob 10、Install the wall control WARNING Installation and wiring must comply with local building and electrical rules and laws. To avoid any possible SERIOUS INJURY or DEATH : · DO NOT connect the power source at this time. ·... - Page 20 10.2 Open the back cover of the wall 10.1 Strip back 10 mm of control. insulation and separate the wires. 5/13” (10mm) 10.3 If the wires are not connected, 10.4 Mark the location of the 2 holes Connect the white wire to the #3 of back cover of wall control and screw ,connect the red \white drill a 6 mm hole.
-
Page 21: Connect The Wall Control To The Garage Door
11. Connect the wall control to the garage door operator Run the wires from the wall control along the wall and ceiling to the operator. Use staples or suitable material to secure wiring neatly to avoid entanglement. 11.1 Strip back 10 mm of insulation 11.2 Connect the white wire to the #3 from the other end of the wire. -
Page 22: Install The Photo Eye System
13、Install The Photo Eye System WARNING Do not plug the operator in. To avoid SERIOUS INJURY or DEATH from a closing garage door: · Properly install the Photo eye safety system as instructed. The photo eye safety system MUST NOT be deactivated. ·... - Page 23 Infrared beam protection area Photo eye Sensor 6”(15cm) max .above floor 13.1 Install the Photo Eye Sensors(PE-002) The photo eye sensors can be attached to the wall or the floor, The sensors should be no more than 6 inches (15 cm) above the floor. 15cm...
-
Page 24: Connect The Operator To Power
NOTE: 1. Draw a line from the floor, no more than 6 inch(15cm). 2. Locate the mounting bracket against the wall as figure, and mark the mounting points, with sensor holder facing each other from left to the right of the door. 3. -
Page 25: Permanent Wiring
NOTE: Do not use extension cord. Do not use any power supplies other than standard household power source. Do no use a 3 to 2 plug adapter. The operator must be connected to a grounded outlet near the operator head, if the grounded outlet is not available, please contact a qualified electrician. -
Page 26: System
(7) Install a conduit or flex cable adapter to the 7/8" hole (8) Run wires through conduit, cut to proper length and strip insulation. (9) Attach with wire nuts provided. Attach the ground wire to the green ground screw. The opener must be grounded. (10) Properly secure wire under plastic ties so that wire does not come in contact with moving parts. -
Page 27: Test And Adjustments
While the door is opening, the LEDs in both sensors will not glow. The LEDs on the sensors will not go into the sleep mode until the garage door operator has completed 5 cycles of opening and closing. The photo eye sensors will enter sleep mode when the door is fully closed. -
Page 28: System Setup
1、SYSTEM SETUP The Setting Panel is located on the left side of the garage door operator. To use the setting panel, remove the left light cover. SETTING PANEL 1 2 3 4 5 SETTING BUTTON (UP BUTTON) (DOWN BUTTON) CODE BUTTON THE SCREEN Setting the Travel Limits During the initial setting,adjustments,or testing, always make sure the doorway is... -
Page 29: Test The Reversing Safety System
1.4 Save the desired UP position by 1.5 Press and hold the DOWN Button press and release the SETTING Button. to bring the door to the desired DOWN The screen will show “2”. position. 1.6 Use UP button and Down button to adjust until the desired close position is found. -
Page 30: Force Sensitivity Adjustment
2.2 Use the remote control to close 2.1 Lay a 1-1/2 inch high (3.8cm) board on the floor, centered under the garage the door. The door MUST reverse door after the door is fully opened. on contacts with the board. 2.3 If the door fails to reverse, check if the travel limits are correct (refer to Test and Adjustment--setting the travel limits ). - Page 31 3.1 Adjust The CLOSE force sensitivity a. Press and hold the SETTING Button b. Press and release the DOWN until the screen show the number from Button and the screen show the “ ∪”. “1” to “3”. d. Use the UP Button to increase c.
- Page 32 3.2 Adjust The “OPEN” force sensitivity a. Press and hold the SETTING b. Press and release the UP Button Button until the screen show the and the screen show the “∩” number from “1” to “3”. c. Press and release the SETTING d.
-
Page 33: System
4、TEST THE PHOTO EYE SAFETY SYSTEM 4.1 While the door is fully opened, lay a box under the door to block infrared light beam. 4.2 Close the door with remote control. The door should not move, and the garage door operator lights will flash three minutes. -
Page 34: System
SAFETY INSTRUCTION IMPORTANT SAFETY INSTRUCTIONS WARNING To reduce the risk of SEVERE INJURY or DEATH: 1. READ AND FOLLOW ALL INSTRUCTIONS. 2. NEVER let children operate or play with garage door controls or remote controls. Keep remote control away from children. 3. -
Page 35: Wall Control
5、 WALL CONTROL Open/close button Open/Close Button To open and close, press the open/close button Light button LIGHT BUTTON To turn the garage door operator lights on or Lock button off, use the light button. Once the lights are on ,they will switch off after three minutes. Lock button Use the Lock button to disable the remote controls from opening or closing the garage door. -
Page 36: Program The Remote Control
6、PROGRAM THE REMOTE CONTROL 6.1 Press the CODE Button on the setting panel until the screen shows “●”. 6.2 Within 10 seconds, press the Button 1 on the remote control , the “●”will turn off. Press the Button 1 again, the “●” will flash and turn off. Now, congratulation! Button 1 Button 2 T041-31... -
Page 37: Delete The Memory
7、DELETE THE MOMERY DELETE ALL MEMORY FROM REMOTE CONTROLS Press and hold the CODE button on SETTING PANEL, the “●” will turn on. Release the CODE button until the “●” turns off. All remote controls are now disabled. To reprogram, refer to Program The Remote Controls. 8、USE EMERGENCY RELEASE TO OPEN GARAGE DOOR MANUALY WARNING... -
Page 38: Maintenance Schedule
8.1 How to use the emergency release: a If possible, keep the door in closed position. b Pull down the emergency release knob and hold. Then carefully open or close the door manually, always take highly cautious when the door is disconnected from the operator because of falling door. -
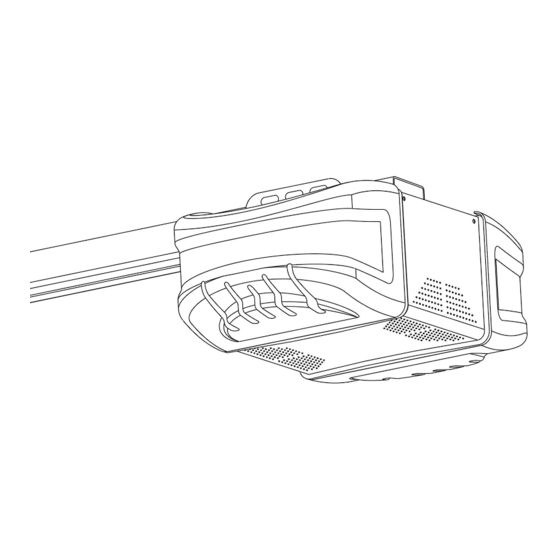
Page 39: Operator Parts
Operator Parts: DESCRIPTION ACCESSORIES 1. Chassis. 1.Mounting Bracket and the 2. Motor and Hall sensor reversing safety sensors with 3. Transformer wire (PE-002) 4. Logic Control Board 2.Wall control (W221) 5. Light Lens 3.Remote control (T041-315) 6. Light Socket 7. Light socket fixed board 8. -
Page 40: Operator Parts
GARAGE DOOR OPERATOR PARTS 11. Wiring Board 8. Plastic cover 9.Plastic cover with 6. Light Socket with light socket Logic Control Board 7. Light socket fixed board 5. Light Lens 4. Logic Control Board 1. Chassis. 3.Transformer 2. Motor and Hall sensor. 10. -
Page 41: Troubleshooting
Troubleshooting The screen on setting panel of your operator shows the diagnostic codes. Screen Problem Most likely Solution show Number No closing movement Photo eyes not Check if the photo eye system is properly and flashing light. installed or installed and connected. (refer to Install The flashing connected. - Page 42 open and close the door . The light will flash. Number The door cannot move. Low power Have the logic board replaced. The light will flash. voltage supply flashing Number The door cannot move. Bad logic board Have the logic board replaced. The light will flash.
-
Page 43: Limited Warranty
Seaside’s cost. Devices must be sent to Seaside for service at owner’s expense. This warranty does not apply to damage to the product from negligence,abuse,abnormal usage, misuse, accidents, normal wear or tear or due to failure to follow Seller’s instructions, or arising from...
Need help?
Do you have a question about the 9357 and is the answer not in the manual?
Questions and answers