Table of Contents
Advertisement
Quick Links
Advertisement
Table of Contents

Related Manuals for iBall ANDI 5G Blink 4G


Summary of Contents for iBall ANDI 5G Blink 4G
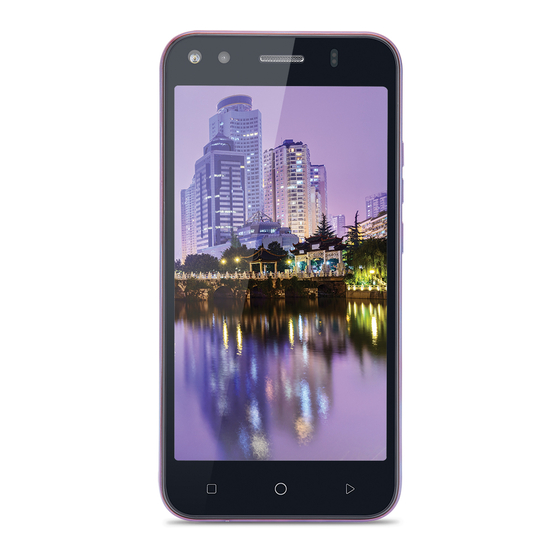
- Page 1 User Manual Andi 5G Blink 4G...
-
Page 2: Legal Information
Best IT World (India) Pvt. Ltd. reserves the right to add, modify or delete, any of the contents herein or withdraw this document at any time without prior notice and without assigning any reasons thereof. For detailed terms and conditions refer www.iBall.co.in Safety Precautions Operate Safely •... - Page 3 • Speak directly into the microphone. • Do not cover the antenna area with your hands or other objects. This may cause connectivity problems or drain the battery. Careful handling • Avoid potential damage to your Mobiles under: - Keep away from liquids. - Avoid using and / or storing in dusty and / or dirty places / environments.
- Page 4 - In Medical hospitals / clinics; - Areas where chemicals are used or stored; - Fuel and gas stations; - In and around areas having electrical / electronic equipment; - Areas where any kind of blasting activity is being carried out. Turn off the device in potentially explosive environments.
-
Page 5: Protect Your Hearing
Mobile phones/Mobile emit Radio Frequency (RF) signals that may interfere with unshielded or improperly Shielded electronic equipment, such as pace makers, hearing aids, other medical devices and other electronic devices in homes and / or vehicles and may prove to be hazardous. Protect Your Hearing Excessive exposure to high volumes may cause hearing problems. -
Page 6: Using This Guide
Protect your personal data and prevent leakage or misuse of sensitive information While using your device, be sure to back up important data. iBall is not responsible for the loss of any data. When disposing of your device, back up all data and then reset your device to prevent misuse of your personal information. -
Page 7: Sar
This guide has been specially designed to guide you through the basics of your device, such as getting started with the device. Please read this guide carefully before using your device to ensure safe and correct use. The descriptions in this guide are based on the default settings of your device. Please keep this guide for future reference. - Page 8 • Please keep your calls short and use SMS whenever more convenient. This advice applies especially to children and pregnant women. • Prefer to use your Mobile when the signal quality is good. SAR Value Tested SAR Value of iBall Andi 5G Blink 4G as follows (2G) GSM 900MHz: 1.011 W/kg (1g) (2G) GSM 1800MHz: 0.932 W/kg (1g)
-
Page 9: Table Of Contents
Index Legal Information ........................1 Using this Guide ........................5 SAR............................6 Index ............................8 Introduction ........................9 Quick Panel Setting ......................11 Starting up the Device ..................... 14 Home screen ........................15 Settings ........................... 18 Communication ....................... 40 Messaging ........................ -
Page 10: Introduction
1. Introduction 1.1 Specification iBall Andi 5G Blink 4G Details Description Powerful Quard Core 1GHz Cortex A53 Advanced 64 bit Processor Memory 1GB RAM 8GB Built-in Storage Storage Micro SD card Support up to 32 GB Operating System Android 6.0, Marshmallow (64-bit) Dual SIM (Dual Stand by),Wi-Fi 802.11 b\g\n, Bluetooth 4.0, USB... - Page 11 1.2 Know Your Device...
-
Page 12: Quick Panel Setting
2. Quick Panel Setting Quick setting panel is the option you will find by Swipe down from the top of anyscreen. This option provides the shortcut to the following functions: Setting:Tab to setting icon to reach system settings. Battery:It will indicate you the current battery status & you can go to battery setting directly from here. - Page 13 Wi-Fi:Using this you can turn Wi-Fi On/Off. Bluetooth:Using this you can turn Bluetooth On/Off. You‘ll have options for ―Total Silence‖, ―Alarms Only‖ and ―Priority Only‖ Do not disturb : and you can set time limits for how long you want Do Not Disturb to last SIM card setting: Using this you can turn the data connection On/Off.
- Page 14 When the talk time and standby times are noticeably shorter than normal, get the battery replaced. Use only iBall approved batteries, and recharge your battery only with iBall approved chargers designated for this device. If a battery is being used for the first time or if the battery has not been used for a prolonged period, it may be necessary to connect the charger, then disconnect and reconnect it to begin charging the battery.
-
Page 15: Starting Up The Device
Select ‗Power OFF‘ from the given options and confirm. This will turn OFF the device. To power ON again, press & hold the POWER key. The iBall power start up animation will appear on the screen indicating that the device is starting. It takes around 40 seconds to completely reboot the device. -
Page 16: Home Screen
You can increase the security of your phone by setting Screen unlock pattern. Once set, in order to unlock your screen, you‘ll have to draw the correct unlock pattern. You can set your screen unlock pattern as follows: 1. On the Home screen, click and select Settings. 2. - Page 17 1. Click the application tab with your fingertip to reveal the application icons. 2. The Home screen actually extends beyond the screen width. On Home screen, swipe your fingertip left and right along the screen to reveal the full width of the Home screen. This additional space gives you more room to customize Home with applications, shortcuts, and widgets.
-
Page 18: Read Your Notifications
4.1 Read your notifications On the Top of your phone screen is the status bar. On the left side, icons will appear, notifying you of a new message, upcoming calendar event, or something else you should notice. On the right side of the status bar, you‘ll see connection status icons. -
Page 19: Settings
4.2 Connection status icons When you see a notification in the status bar, click the bar and swipe your finger down the screen to open the list of notifications displayed in the sliding window. Ongoing notifications report activities such as call forwarding ON, current call status, song playing. - Page 20 5.1 Wi-Fi Wi-Fi ON/OFF: Select this option if you prefer to use Wi-Fi for your data connection. You can activate Wi-Fi by toggling the switch left/right to On/Off Wi-Fi connectivity. Wi-Fi settings: Open the Wi-Fi settings screen. Select it from the network list. Provide your username or password if required Advanced: This option contains the following features: 1.Network notification: By default, when Wi-Fi is on, you receive a notifications in the...
- Page 21 3. Install certificates: Here you can see and add your certificate. 4. Wi-Fi Direct: Using Wi-Fi direct feature, you can transfer little heavy data from one device to another through Wi-Fi without the need of an access point. 5. WPS Push Button:Select to turn ON Wi-Fi protected setup for a Wi-Fi protected setup capable network.
- Page 22 Bluetooth settings: With Bluetooth services ON, you can open the Bluetooth settings screen to: Rename this device 1. Make sure you have turned Bluetooth ON. 2. Select Settings Bluetooth . Thne click on this icon .Then select Rename this device.
-
Page 23: Sim Cards
If you pair with a second headset while connected to the first, the first headset will remain connected. To switch connection to the second headset you must manually select that headset again after pairing. Rescan for Bluetooth devices: If you want to update the list of Bluetooth devices, select ‗Refresh‘. 5.3 SIM Cards You can select to activate or deactivate the SIM card you want to keep in use. -
Page 24: More Settings
By default, you see the settings for mobile data, that is, the data provided by your network carriers. 5.5 More Settings… Airplane mode ON/OFF : When airplane mode is selected, all wireless connectivity is disabled. This icon will display in the status bar when Airplane mode is selected. Default SMS app: The system settings allow users to select a "default SMS app."... - Page 25 Right click on Update DriversInstall from a list or specific location (Advanced) nextSearch for the best drivers in these locationsbrowseiBall tethering driversoknextfinished. Now you can use the Mobile‘s internet on your system using USB connection. Bluetooth Tethering: Tethering refers to connecting one device to another. Tethering allows sharing the Internet connection of the phone or Mobilewith other devices such as laptops.
- Page 26 In PCturn on the system's Bluetooth. Dial upsearch for all available Bluetooth devicesadd your Bluetooth deviceselect your device (Mobile). Now go to network access point serviceperform pairing of the devices. Now you can use the Mobile‘s internet on your system using Bluetooth connection. VPN: VPN stands for Virtual Private Mode.
- Page 27 Wallpaper: Select to choose the type of wallpaper you want on your home screen. You can either select a picture from the gallery or download them on your Mobile. You can select from one out of the available options: Gallery, Live Wallpapers,Photos and Wallpaper.
- Page 28 System: Vibrate: Select to have your Mobile vibrate for incoming calls. System sound: You can select the following 4 options also. Dial pad touch tones: You can select from here if you want the dial pad touch tones to be activated.
- Page 29 5.9 Storage& USB This option helps you to view and manage the data stored on your device. You can view the total internal storage capacity and the capacity of the external memory card here. Default Write disk: You can change default write disk location as Phone storage/ External Storage for captured image/videos, received files, dowanloaded files etc.
- Page 30 Warning! If you stop some apps or services, your device may not work correctly. Battery status (charging, discharging) and level (as a percentage of fully charged) are displayed at the top of the screen. The discharge graph shows battery level over time since you last charged the device, and how long you've been running on battery power.
- Page 31 Voice unlock: Voice unlock lets you unlock your phone using your voice. This is somewhat more securing than face unlock but not as much as pattern or password lock. PIN: PIN requires four or more numbers. Longer PINs tend to be more secure. Password: Password requires four or more letters or numbers.
- Page 32 Encryption takes an hours or more. You must start with a charged battery and keep your phone plugged in thoughout the process. If you interrupt it,you ‗ll lose someor all of your data. Set up SIM card lock: Lock your SIM card for extra security. You can also change your SIM card PIN from this screen.
- Page 33 4. Swipe up to reveal the pin icon . It will be in the bottom right corner of your selected screen. 5. Click the pin icon Unpin a screen 1. When you're on the pinned screen, touch and hold Back key 2.
- Page 34 Google Hindi Input: Google Hindi Input allows you to type messages, update on social networks or compose emails in your own native language on your Android phone iBall MOX Keyboard : It has 21 Indian Regional languages. Speech Text-to-Speech output:Here you can change the text to speech out engine settings like Speech rate, Default language status.
-
Page 35: Gesture Control
5.18 Backup & Reset Back up my data: You can use Android Backup Service to back up data connected to one or more of your Google accounts. If you have to replace your device or erase its data, you can restore your data using any account that you backed up. Automatic restore: When reinstalling an app, restore backed up settings and application data. - Page 36 Sliding up: Move your finger in upward direction to open Gallery directly. Sliding down: Move your finger down to open system setting directly. Sliding to the left: Move your finger to the left from right to open Whatsapp directly. Sliding to the right: Move your finger right from left to open Facebook directly. It has alphabetical gestures also Gesture c, e, m, o and v.
- Page 37 5.22 Accessibility These are certain special features which help people with certain disabilities. These options help the users who are visually impaired and cannot access through the functions properly. These features are great help for such users. You can activate the talkback function which guides the user by speaking feedback or you can set the font size as extra- large for low vision users.
-
Page 38: Developer Options
*Note: All the printers may not be compatible. Please contact your printer manufacturer for details 5.24 Developer Options This option comes after you go to settingsabout iBall Mobilebuild numbertap on this option 6 to 7 times Take bug report: This will collect information about your current device state, to send as an e-mail message. - Page 39 Bug report shortcut : Show a button in the power menu for taking a bug report Select mock location app : Select mock location and service information to be sent to a location manager service for testing. :Inspect views‘ attributes in Android System Manager. Enable view attribute inspection Select debug app : set application for debugging.
-
Page 40: Power Saving Mode
Transition Animation Scale : To speed up transitions (and your phone‘s reaction time), either turn off animations, or reduce the scale. Animator duration scale : The ratio in which the animation scale is measured. Simulate secondary displays : Select one option out of the provided four. Force GPU rendering : Use 2D hardware acceleration in application. -
Page 41: Communication
5.26 About iBall Mobile View the model number and version information for your Mobile. iBall OTA: Here you can check if any system update are available or not, if available you can download update and install. Status: You will get the current status like Battery status, Battery level, SIM status, IMEI information, Wi-Fi MAC address, Bluetooth address, IP address, Serial number &... - Page 42 Making a call Click Phone icon to enter the dial screen. You can type a number which you want to dial, you can search your particular contact through number and name.. To dial a number, click ‗Voice Call‘ button to select SIM1 card or SIM2 card to make a call. To end a call, click ‗END‘...
- Page 43 In-call options While on a call, reveal the in-call options: Loudspeaker, Mute, Dial pad, Hold, Add new call and Call record Note: If Bluetooth services are ON and you are connected to a hands-free device, the more menu indicator will show Bluetooth on. ...
- Page 44 3. Scroll to select the contact or number you want to dial, click ‗Call‘ button. 4. Tap and hold the selected contact you want to call, and then you can do from the following options - call, edit number before call, send text message, add to contacts or remove from call log phone on the shortcut menu.
- Page 45 Sounds and vibration Voice caller ringtone : Select voice calling ringtone. Also vibrate for calls: It enables vibration for all incoming calls. Dialpad tones: Enable it to turn ON dialpad touch tones. SMS on call reject Here some ready templates for call reject message and you can edit as per your need.You can reject a call by sending a SMS.
- Page 46 Fixed Dialing Numbers:Your mobile device can set up Fixed Dial Numbers (FDN). When the FDN feature is active, only numbers that are part of the FDN contacts list can be called from your device. Call forwarding: Select how you want busy, unanswered, and unreachable calls to be handled.
- Page 47 B. Add a contact 1. On the Home screen, click and select Contacts. Your contact list appears. 2. Click the + icon on the bottom of the screen to add new contact. 3. Add all the information you want to store for this contact in the appropriate fields. You must add some information to save a contact.
-
Page 48: Messaging
contact, and to initiate other types of communication with that contact, open the Contact details screen. To open a contact‘s details screen, simply select their name from Contacts. 1. Call a contact: From the contact list, click the contact you want to open the Contact details screen. - Page 49 About text and multimedia messages SMS messages are also known as ―text‖ messages and can each be around 160 characters. If you continue to type after the limit is reached, your message will be delivered as one, but count as more than one message. MMS messages are also known as ―multimedia‖...
- Page 50 If you are downloading only the headers, then you must first select the Download button to retrieve the message body. If you are concerned about the size of your data downloads, you can check the message size before you download. Once the message has downloaded, select ―Play‖...
- Page 51 Any recordings you make will be stored automatically in the Music application in a play list named ―My recordings‖. To remove an attachment, select the attachment‘s ‗Remove‘ button. 5. Type your message: As you type, you will be able to track how many characters/messages you‘re creating.
- Page 52 Request Delivery reports: To receive a report on the delivery status of your message, select this check box. Request Read reports: To receive a report on whether each recipient has read or deleted the message without reading it, select this check box. Send read report : Send a read report if requested by the MMS sender.
-
Page 53: Email
8. Email 8.1 POP3 and IMAP email accounts Add an email account You can fetch messages from up to five POP3 or IMAP accounts. Follow these steps: 1. On the Home screen, then click and select Email application. 2. The Set up new account screen appears. 3. - Page 54 If you have a popular email account, the application will set everything up for you! Before you go to your Inbox, you can name the account (if you don‘t, your email address will be used). You are also asked to type your name as you want it to display on outgoing messages.
- Page 55 2. Touch & hold the message you want to delete. 3. Select ‗Delete‘. 4. Your message is moved to the Trash. 6. Empty Trash: Once you have moved a message to the Trash, to empty messages in the Trash you must delete each message individually. Press MENU and select ‗Folders‘ to enter the Trash.
-
Page 56: Internet
8.3 Add another POP3 or IMAP To add another account (you can add up to five), go to your Inbox, press MENU and select ‗Accounts‘. Your Account‘s screen opens. Press MENU and select ‗Add account‘ another account. 9. Internet 9.1 Ways to connect to the internet Your device‘s networking capabilities allow you to access the Internet or your corporate network through Wi-Fi, GPRS, EDGE, 3G&... - Page 57 The availability and range of your device‘s Wi-Fi signal depends on the number, Note: infrastructure, and other objects through which the signal passes. 9.3 Browser To open the Browser, click and select Browser icon. The Browser always opens to the last Web page you were viewing.
-
Page 58: Media
B . Download Web files and applications Before you download any files or applications using the Browser, note the following: The Browser will only allow you to download items that are supported by an application installed on the Mobile. Warning! Applications downloaded from the Web can be from unknown sources. - Page 59 Load music into your Memory card All the music you can listen to on your Mobile is stored in memory card. Read the instructions below to add music to your memory card. 1. Mount your memory card to your computer by doing one of the following: Remove the memory card and insert it into a card reader attached to your computer;...
- Page 60 4. Playback control: from left to right icons: Go to beginning song, Pause/ resume play and Go to next of song. If a song is playing while you are on the Library screen, you can switch to the Playback screen quickly by selecting the lower song bar. Playlists You can create as many playlists as you wish.
- Page 61 Delete music from memory card All the music you play on your Mobile is stored on the inserted memory card. From your Mobile, you can delete music stored on the card: 1. From the Library screen, select the Artists, Albums, or Songs category. 2.
- Page 62 10.4 Camera All the pictures you can capture or view on yourMobile are stored on memory card, which must be installed in your Mobile. Before you can use the Camera or view pictures in Pictures, make sure you have a card installed. Load pictures onto your memory card Read the instructions below to add pictures to your Memory card or the Mobile storage.
- Page 63 View your pictures To view the pictures you have captured, as well as any you have stored on your memory card or the phone storage, go to Gallery application: 1. To open Pictures, on the Home screen, touch and select Gallery icon. 2.
- Page 64 5. Crop picture: In full-screen view, press MENU and select Crop. Touch & hold an edge of the cropper to reveal the sizing arrows, then drag the edge in or out to size. Touch & drag the centre of the cropper to move it within the picture. When you are happy with the cropped area, select apply crop and then ‗Save‘.
-
Page 65: Sound Recorder
Note: Within doors or shielded environment, the receiving effect of radio may be affected. You can improve the effect in the following ways: Near window, adjust the position of earphone cable or adopt manual adjustment. 10.6 Gallery Gallery option shows all pictures & videos stored in phone & external storage. We can preview &... -
Page 66: Connectivity Features
11.2 iBall OTA In iBall OTA you can check if any system update are available or not, if available you can download update and install. 12. Others 12.1 Calendar... - Page 67 - Swipe your fingertip up/down, through the days and past the beginning/end of the month to move to the previous/next month. Create new event- Touch & hold a day to open the context menu. Select ‗New event‘. You can also press MENU and select ‗New event‘. 2.
- Page 68 itself. You can also touch & hold the event to open the context menu, then select View event. • Edit an event - Assuming you have write privileges on an event, touch and hold the event to open the context menu, then select Edit event. •...
-
Page 69: Alarm Clock
Note: If your event repeats, you will be asked to choose which events you want changed (only the current one you‘re editing, all events in the series, or the current event plus future events). 3. Once you have finished your edits, select ‗Done‘. 4. - Page 70 Set an alarm Two alarms are set up for you, ready to customize. All two alarms are turned off by default. Select the check box to turn on the alarm. To begin, select one of the default alarms to open Alarm settings. Set the following options: Alarm: Select the check box to turn alarm ON (checked) or OFF (cleared).
- Page 71 Once your alarm goes off, you will receive an alert with the options to Snooze (for 10 minutes) or Dismiss. Add more alarms To add more than three alarms, from the main Alarm Clock screen, press + symbol. Change clock display You can change the appearance of the clock displayed on the main Alarm Clock screen: 1.
-
Page 72: Google Applications
To delete numbers, one at a time, clickDEL on the screen. 12.4 File Manager File Manager is an application which provides you easy access to all your media files, images, documents present in your Mobile and in your SD card. It shows you the total storage capacity and the available memory of the device. -
Page 73: Play Store
13.2 Play store Use this application to purchase and download applications and games that are able to run your handset. Tap on Play Store application Installing Applications: Browse the play store & search the require contents with keywords. Select an application tap the price &... -
Page 74: Troubleshooting
• Ensure that your hands are clean and dry when tapping the touch screen. • Restart your device to clear any temporary software bugs. • Ensure that your device software is upgraded to the latest version. • If the touch screen is scratched or damaged, take it to your local iBall Service Centre. - Page 75 • Ensure that the microphone is close to your mouth. • If using a headset, ensure that it is properly connected. • If the Mic is not working, take it to your local iBall Service Centre. 9. Audio quality is poor...
- Page 76 • Free some memory by transferring files to a computer or deleting files from your device. • Restart the device. If you are still having trouble with the camera application even after restarting the phone or trying these tips, contact your nearest iBall Service Centre. 13. Error messages appear when opening music files Some music files may not play on your device for a variety of reasons.
- Page 77 • Ensure that the Bluetooth wireless feature is activated on the device you wish to connect to, if necessary. • Ensure that your device and the other Bluetooth device are within the maximum Bluetooth range (10 m). If the tips above do not solve the problem, contact your nearestiBall Service Centre. 15.
Need help?
Do you have a question about the ANDI 5G Blink 4G and is the answer not in the manual?
Questions and answers