Table of Contents
Advertisement
Owner's Manual & Safety Instructions
Save This Manual
operating, inspection, maintenance and cleaning procedures. Write the product's serial number in the
back of the manual near the assembly diagram (or month and year of purchase if product has no number).
Keep this manual and the receipt in a safe and dry place for future reference.
When unpacking, make sure that the product is intact
and undamaged. If any parts are missing or broken,
please call 1-888-866-5797 as soon as possible.
©
Copyright
2009 by Harbor Freight Tools
No portion of this manual or any artwork contained herein may be reproduced in
any shape or form without the express written consent of Harbor Freight Tools.
Diagrams within this manual may not be drawn proportionally. Due to continuing
improvements, actual product may differ slightly from the product described herein.
Tools required for assembly and service may not be included.
Keep this manual for the safety warnings and precautions, assembly,
Visit our website at: http://www.harborfreight.com
Email our technical support at: productsupport@harborfreight.com
®
. All rights reserved.
Read this material before using this product.
Failure to do so can result in serious injury.
SAVE THIS MANUAL.
REV 15g
Advertisement
Table of Contents

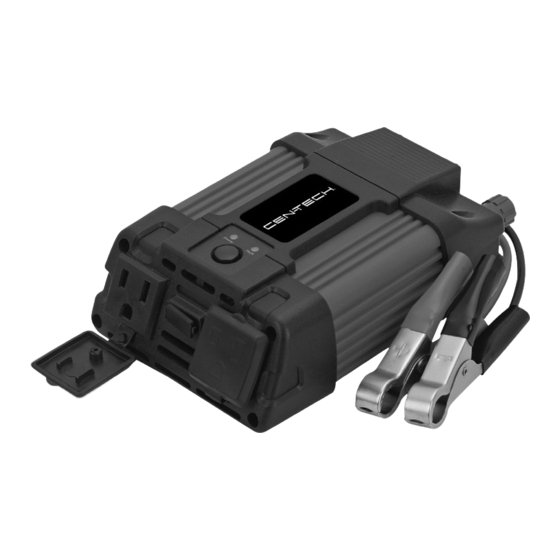
Summary of Contents for CEN-TECH 200 watt continuous
- Page 1 Owner’s Manual & Safety Instructions Save This Manual Keep this manual for the safety warnings and precautions, assembly, operating, inspection, maintenance and cleaning procedures. Write the product’s serial number in the back of the manual near the assembly diagram (or month and year of purchase if product has no number). Keep this manual and the receipt in a safe and dry place for future reference.
-
Page 2: Important Safety Information
WARNING SYMBOLS AND DEFINITIONS This is the safety alert symbol. It is used to alert you to potential personal injury hazards. Obey all safety messages that follow this symbol to avoid possible injury or death. Indicates a hazardous situation which, if not avoided, will result in death or serious injury. -
Page 3: Installation Precautions
Installation Precautions DO NOT INSTALL THIS INVERTER Keep inverter dry and clean. INTO A BUILDING’S ELECTRICAL Do not expose to rain, snow, SYSTEM. This inverter is a vehicular spray, bilge water or dust. accessory. It is not designed to be Install as close to DC source as safely used in a building’s electrical possible, but not in a closed area... -
Page 4: Battery Precautions
Battery Precautions Wear splash-resistant Only connect similar batteries together. ANSI-approved safety goggles Do not connect old and new batteries and electrically insulated gloves together, wet and gel cells together, or while working near batteries. batteries of different capacities together. Charge, store, and maintain batteries Use only 12 V batteries with this item. -
Page 5: Service Precautions
Service Precautions DO NOT OPEN HOUSING. Have your Inverter serviced by Contains no user-serviceable a qualified repair person using parts. Internal parts may be only identical replacement parts. electrified, even with unit off and This will ensure that the safety power disconnected. -
Page 6: Specifications
Specifications Input Voltage 12 VDC (nominal) Output Voltage 115 VAC / 60 Hz Continuous Power 200 W 3069523 Surge Power 400 W Operating Conditions 32° - 104° F Two 3-prong grounded polarized AC outlets Receptacles One 5 VDC 500mA USB outlet Fuse Type 25 Amp Internal Blade-type Fuse (professional replacement only) Cables... -
Page 7: Installation
Installation Read the ENTIRE IMPORTANT SAFETY INFORMATION section at the beginning of this manual including all text under subheadings therein before set up or use of this product. CAUTION! This Inverter must only be connected to batteries with an output voltage of 12 volts DC. - Page 8 Operating Instructions Read the ENTIRE IMPORTANT SAFETY INFORMATION section at the beginning of this manual including all text under subheadings therein before set up or use of this product. Place the Power Inverter on a flat Attach the red Cable’s Alligator Clip surface that has adequate ventilation to the Positive (red) terminal on the and is not in direct sunlight.
-
Page 9: Operating Tips
Operating Tips The total wattage of all items plugged into WARNING! To prevent serious injury the Power Inverter must not use more than and death from carbon monoxide inhalation, do not run the vehicle’s 200 watts during continuous operation, otherwise the Inverter may overload. engine within an enclosed area. -
Page 10: Troubleshooting Tips
Troubleshooting Tips • If the alarm sounds, this means that • This inverter is made to minimize the the input voltage is at or below 10.9 V. interference with TV signals. However, Stop using the Power Inverter especially with weak TV signals, and recharge the battery. -
Page 11: Maintenance And Servicing
Maintenance and Servicing Procedures not specifically explained in this manual must be performed only by a qualified technician. TO PREVENT SERIOUS INJURY FROM ACCIDENTAL OPERATION: Make sure that all loads are disconnected from the Inverter, the Power Button is in the off-position and the cables are disconnected from power source before performing any procedure in this section. - Page 12 Limited 90 Day Warranty Harbor Freight Tools Co. makes every effort to assure that its products meet high quality and durability standards, and warrants to the original purchaser that this product is free from defects in materials and workmanship for the period of 90 days from the date of purchase. This warranty does not apply to damage due directly or indirectly, to misuse, abuse, negligence or accidents, repairs or alterations outside our facilities, criminal activity, improper installation, normal wear and tear, or to lack of maintenance.


Need help?
Do you have a question about the 200 watt continuous and is the answer not in the manual?
Questions and answers