Table of Contents
Advertisement
Advertisement
Table of Contents

Related Manuals for Kurzweil M110


Summary of Contents for Kurzweil M110
- Page 1 M110 USERʼS MANUAL...
-
Page 2: Radio And Television Interference
CAUTION The lightning flash with the arrowhead symbol, within an equilateral triangle is intended to alert the user to the presence of uninsulated RISK OF ELECTRIC SHOCK "dangerous voltage" within the product's enclosure that may be of sufficient magnitude to constitute a risk of electric shock to persons. DO NOT OPEN CAUTION: TO REDUCE THE RISK OF ELECTRIC SHOCK, The exclamation point within an equilateral triangle is intended... -
Page 3: Important Safety Instructions
IMPORTANT SAFETY INSTRUCTIONS 1) Read these instructions. 2) Keep these instructions. 3) Heed all warnings. 4) Follow all instructions. 5) Do not use this apparatus near water. 6) Clean only with dry cloth. 7) Do not block any of the ventilation openings. Install in accordance with the manufacturer’s instructions. - Page 4 Kurzweil International Contacts tive. US Customers: American Music & Sound Young Chang North America 925 Broadbeck Dr #220 Newbury Park, CA 91320 Kurzweil Home Products Tel: 800-431-2609 6000 Phyllis Drive Fax: 818-597-0411 Cypress, CA 90630 Email: info@americanmusicandsound.com Tel: 310 637-2000...
-
Page 5: Table Of Contents
Contents Chapter 1 Installation Site and Precautions ..............5 Chapter 2 Control Panel ..............6 Chapter 3 Feature of M110 Primary Features ..............7 Instrument Description ..............7 Chapter 4 Assembly Instructions ............... 8 Chapter 5 Voice/Piano Button Selecting a Voice ..............12 EDU (Teaching Mode) .............. -
Page 7: Installation Site And Precautions
● Do not let paper, metallic, or other objects into the instrument. ● Do not open inside personally. ● When repair is needed, please contact the Kurzweil A/S center. ● Clean only with a soft, dry cloth. Do not use paint thinners,... -
Page 8: Chapter 2 Control Panel
❾ DEMO Button Press this button to hear a selection of 50 demo songs VOICE / PIANO VOICE / PIANO M110 M110 performed in a variety of classical styles. ❿ MP3 AUX IN Connect the audio output of an MP3 player or other audio source to the MP3 AUX IN jack on the control panel. -
Page 9: Chapter 3 Feature Of M110
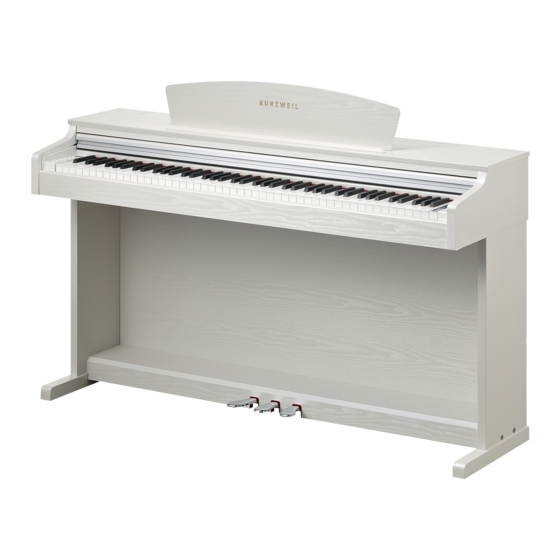
Feature of M110 Chapter 3 Congratulations on your purchase of the M110. You are certain to enjoy many hours exploring the variety of features as well as 88 kinds of the beautiful preset voices. ● 88-Note fully-weighted hammer-action keyboard ● 88 Voices ●... -
Page 10: Assembly Instructions
Assembly Instructions Chapter 4 ❻ Side Panel(Left/Right) Stand & Piano Body Set Bolts x 4 ❶ Piano Body x1 ❷ Side Panel(Left) Stand x1 ❼ Side Panel(Left/Right) Stand & Pedal Box Set Bolts x 4 ❸ Side Panel(Right) Stand x1 ❽... - Page 11 Assembling Left/Right Side Panel Stand 1) Put the cable in the Pedal Box❹ out. 2) Starting with the left stand leg❷, align the holes ➋ Side Panel(Left) Stand in the Pedal Box❹ with the holes in the left stand ➌ Side Panel(Right) Stand leg❷, then thread the Pedal Box Set Bolts➐...
- Page 12 Assembly Instructions Chapter 4 Assembling Left/Right Side Panel Stand 1) After putting the Piano Body on each side of the ➊ Piano Body stand, align the 4 holes in the stands with the holes in the bottom of the Piano Body. Before tighten up the bolts, do not press Piano Body(especially for keys).
-
Page 13: Power Connection
DC power adapter could damage the instrument. Before connecting the power cord, please check whether the power switch is Off or not. (3) When the M110 is set up, turn the power on by pressing the power switch. Master Volume Volume knob is located on the right end of the keyboard. -
Page 14: Chapter 5 Voice/Piano Button
Voice/Piano Button Chapter 5 1. Selecting a Voice When the [Voice/Piano] button is pressed, the LED will blink. Now you can select a voice you want to play. If you press the [Voice/Piano] button without pressing any key of the piano, a “GRAND PIANO’... -
Page 15: Edu (Teaching Mode)
2. EDU (Teaching Mode) Press the [KBD] and [VOICE/PIANO] buttons simultaneously, the LEDs of those buttons will blink. Now Teaching mode is ready to start. In Teaching mode, the current teaching material is displayed on the screen. Select a teaching material by pressing the the [KBD] and [VOICE/PIANO] buttons. You have a choice among “BAY”(Beyer), “C10”(Czerny 100), “C30”(Czerny 30), “C40”(Czerny 40), and “SON”(Sonatine). -
Page 16: Kbd Mode
Voice/Piano Button Chapter 5 Demo Song List 4. KBD MODE Button The [KBD MODE] button selects the Layer, Split, and Duo modes. With these functions, you can layer two different Program sounds on the keyboard (in Layer mode) and split the keyboard into two regions containing two different Program sounds, with adjustable split point (in Split mode). -
Page 17: Touch
E1: Select the next setting 2. Tune You can adjust the M110 tuning to match other instruments or recordings. Press and hold the [FUNCTION] button and press F#2 or G#2 key to change the pitch value by one cent. By pressing F2 or A2 key (in combination with FUNCTION button), you can change the value by 5 cents. -
Page 18: Transpose
3. Transpose You can change the tuning of notes played on the M110 keyboard in semitones, also known as half steps. This is a convenient way to change the key of a song without learning to play it in a different key. -
Page 19: Local Control
Local Control allows you to control whether the M110's keyboard will trigger the internal sound engine. Usually Local Ctrl should be set to On. When using the M110 to record to an external sequencer or computer, turn this setting to Off to avoid creating a MIDI loop which may result in stuck notes or “echoes”. -
Page 20: Chapter 7 Metro/Rhythm Button
METRO/RHYTHM Button Chapter 7 1. Metronome Metronome sound is based on rhythm pattern, not just ‘click’ sound. Press and hold the [METRO/RHY] button and press a key in the range from A#6 to D7 to select Time signature. Press the [PLAY/STOP] button to start Metronome. L / R Press the [PLAY/STOP] button again to stop Metronome FUNCTION... -
Page 21: Chapter 8 Rec & Play/Stop Button
REC & Play/Stop Button Chapter 8 1. Recording a Song If you press the [Record] button, one bar of the Metronome will play before recording begins. L / R Play your piano to start Recording, then The LED in the Play button will be FUNCTION DEMO lit. -
Page 22: Chapter 9 Pedal
Pedal Chapter 9 M110 contains three functional pedals. It also works the same way with Grand Piano. However, this product does not support the Silent Pedal (The middle pedal) of Upright Piano. You can control the volume as a function of Silent Pedal. -
Page 23: Chapter 10 Midi
M110 has a USB port on the back panel of your instrument: ● The MIDI In port is used to receive MIDI data from another MIDI device. ● The MIDI Out port is used to transmit the MIDI data generated by the M110 to another MIDI device. -
Page 24: Midi Channels
MIDI Chapter 10 If you have a sequencer program installed on your computer, you can use this USB connection to record and play MIDI sequences. Computer 2. MIDI Channels MIDI protocol transmits multiple channels of MIDI performance data. Typical MIDI instruments can play up to 16 channels at the same time. -
Page 25: Chapter 11 Connectors
Audio Out ports can be used to transmit the audio signal of the piano to a keyboard amplifier, stereo sound system, mixing console or tape recorder. A RCA cable is needed for the connection. DC Receptacle Connect the power adapter to the DC receptacle on the rear panel of the M110. -
Page 26: Chapter 12 Sonatine List
Sonatine List Chapter 12 Sonatine List F. KUHLAU Number W. A. MOZART Number L. V. BEETHOVEN Number J. L. DUSSEK Number M. CLEMENTI Number J. HAYDN Number... -
Page 27: Midi Implementation Chart
MIDI Implementation Chart Chapter 13... -
Page 28: Chapter 14 Operation Guide
Operation Guide Chapter 14 While pressing the [VOICE/PIANO], [MERTO/Rhythm] or [Function] buttons, press a key you desire. Please check the following chart for precise operation. Grand Piano 8 Beat Dynamic Piano Balade Electric Grand Disco Honky-tonk Dance Party Electric Piano1 Rock&Roll Electric Piano2 Slow Rock... -
Page 29: Specifications
Specifications Chapter 15 Keyboard 88-NOTE, Fully-Weighted Hammer-Action Keyboard Exterior Color Rosewood, White, Mahogany Appearance Pattern (attached guard-rail on the cover) Voice Type Stereo PCM Voice 88 Voices Polyphony 88 Polyphony Rhythm 28 Styles, 6 Metronome Rhythms Function SPLIT, LAYER, DUO Song Learning Beyer, Czerny 100/30/40, Sonatine Demo Songs... -
Page 30: Chapter 16 Troubleshooting
Troubleshooting Chapter 16 Check if one of the following might be the issue. Problem Cause Solution 1. Make sure the volume is 1. The master volume is set set to an appropriate level. in the minimal level. No sound is produced when 2. - Page 31 NOTE...
- Page 32 196, Bongsu-daero, Seo-gu, Incheon, Korea...
Need help?
Do you have a question about the M110 and is the answer not in the manual?
Questions and answers