Table of Contents
Advertisement
Advertisement
Table of Contents

Related Manuals for Bush A6S


Summary of Contents for Bush A6S
- Page 1 Instruction manual A6S Soundbar...
- Page 2 You’ll soon be enjoying your new Soundbar. It all begins here, with your instructions. Don’t worry, there’s nothing too technical coming up. Just simple, step-by-step guidance to get you up and running quickly. Sound good? Then let’s get started. Help and Guidance We’re here to help you get the most from your soundbar.
-
Page 3: Table Of Contents
Contents Safety information Other information Safety information Wall mounting the soundbar Technical specification Getting to know your Soundbar Care & maintenance Ready? Let’s begin Product support Accessories Control panel and remote control Troubleshooting Making the connections Help and assistance Connecting the sub woofer Disposal Remote control (before use) Guarantee... - Page 4 This page is left intentionally blank...
-
Page 5: Safety Information
Safety information... -
Page 6: Safety Information
Safety information Important - Please read these instructions fully before installing or operating Power source Heat build up • This symbol means that this unit is double • During use the unit will heat up, this is not a insulated. An earth connection is not malfunction. -
Page 7: Getting To Know Your Soundbar
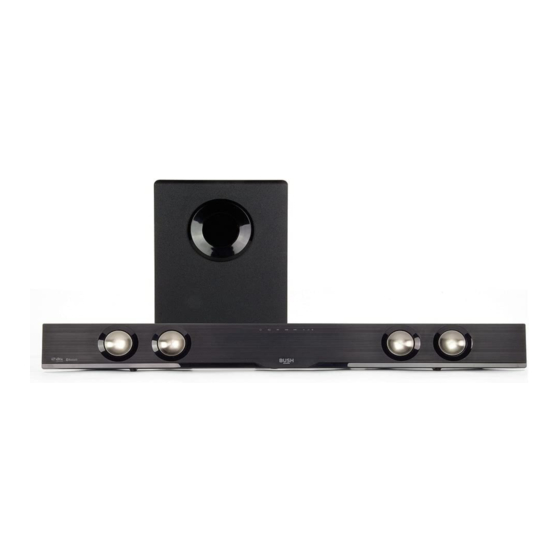
Getting to know your Soundbar... -
Page 8: Ready? Let's Begin
If you require any further assistance, our technical experts are happy to help. For full details, refer to the product support section at the end of these instructions. Accessories A6S soundbar Sub woofer Remote control CR2025 battery Digital coaxial audio cable Digital optical audio cable 3.5mm audio cable... -
Page 9: Control Panel And Remote Control
Getting to know your Soundbar You’ll be up and running in no time DC IN COAX OPTC 1.5A COAX OPTC DC IN STANDBY touch button: Switch on the soundbar WALL-MOUNT BRACKETS: Use these brackets to or switch to STANDBY mode. fix the soundbar to a wall. - Page 10 Getting to know your Soundbar You’ll be up and running in no time Source: Press to cycle between PLAY/PAUSE: Begin or pause COAXIAL, OPTICAL, AUX & playback (bluetooth) BLUETOOTH modes Power: Standby mode ON/ OFF Sound EQ modes: Press repeatedly button to assign different sound EQ modes: STANDARD, MOVIE, MUSIC...
-
Page 11: Making The Connections
Getting to know your Soundbar You’ll be up and running in no time Making the connections Follow the below connection guide to connect the soundbar to a TV with or without a digital output, a Bluray/ DVD player or an audio source such as an MP3 player. Only one digital connection to a TV is required. -
Page 12: Connecting The Sub Woofer
Getting to know your Soundbar You’ll be up and running in no time Connecting the sub woofer Remote control (before use) Follow the below instructions to connect the wired Before use, pull the tab out from the bottom of the subwoofer to the soundbar. -
Page 13: Using Your Soundbar
Using your Soundbar... -
Page 14: Standby Mode
Using your Soundbar Let’s get started Standby mode EQ presets During playback pressing the SOUND EQ This unit is designed to enter STANDBY mode button on the remote control repeatedly cycles automatically after 20 MINUTES (approximately) of through the available sound modes. (Fig 5) inactivity. -
Page 15: Mute Function
Using your Soundbar Let’s get started Mute function Adjusting the display brightness Pressing the MUTE button on the remote will Press the DIM button on the remote control temporarily silence the audio output. You will see repeatedly to cycle through the 3 brightness states ‘MUTE’... -
Page 16: Pairing A Bluetooth Device
Press again to pause playback. Enable the Bluetooth function on your audio device and search for a device labelled ‘BUSH A6S’ To skip to the next track press the SKIP button in the available list. -
Page 17: Other Information
Other information... -
Page 18: Wall Mounting The Soundbar
Other information Helpful technical information Insert 2 screws (not supplied) into the holes and Wall mounting the soundbar tighten. Take care to leave 5mm between the Align the soundbar in the chosen location. screw heads and the wall. (Fig 12) Use a pencil to mark the drilling positions 530mm (20.86”) apart. -
Page 19: Technical Specification
Other information Helpful technical information Technical specification Amplifier Power output 200W MAX Frequency response 20Hz - 20KHz ± 3dB Input sensitivity 550 mV Main unit Power supply INPUT: 100-240V ~ 50-60Hz OUTPUT: 24V 2.7 A Power consumption Standby power consumption ≤... - Page 20 This page is left intentionally blank...
-
Page 21: Product Support
Product support... -
Page 22: Troubleshooting
Product support Help is always at hand Troubleshooting No power. • Ensure the mains plug is connected to a power supply, and is switched ON. • Make sure there is power to the mains socket. No sound? • Make sure if playing from the AUX input, the external source has the volume turned up and is outputting sound. •... -
Page 23: Help And Assistance
Product support Help is always at hand Help and assistance If you require any technical guidance or find that your soundbar is not operating as intended, a simple solution can often be found in the Troubleshooting section of these instructions or online at www.argos-support.co.uk If you still require further assistance, call one of our experts on 0345 600 3021*. -
Page 24: Disposal
Product support Help is always at hand Disposal Declaration of Conformance • Disposal of your old product. Your product Hereby, Argos Ltd, declares that this Band II LPD device is designed and manufactured with high is in compliance with the essential requirements and quality materials and components, which other relevant provisions of Directive 1999/5/EC. -
Page 25: Guarantee
Help is always at hand Call us now and activate your 12 month guarantee Thank you for choosing Bush. Your new product is guaranteed against faults and breakdowns for 12 months. Don’t forget to register it with us today so we can provide you with our best possible after-sales service and useful updates. - Page 28 Contact: www.argos-support.co.uk Helpline: 0345 600 3021...
Need help?
Do you have a question about the A6S and is the answer not in the manual?
Questions and answers