Lennox SLP98DFV Installation Instructions Manual
Hide thumbs
Also See for SLP98DFV:
- Installation instructions manual (64 pages) ,
- User's information manual (8 pages) ,
- Handbook (71 pages)
Table of Contents
Advertisement
© 2016 Lennox Industries Inc.
Dallas, Texas USA
WARNING
Improper installation, adjustment, alteration, service
or maintenance can cause property damage, personal
injury or loss of life. Installation and service must be
performed by a licensed professional HVAC installer or
equivalent, service agency, or the gas supplier.
Contents
Unit Dimensions - inches (mm) ......................................2
Parts Arrangement..........................................................3
SLP98DFV Gas Furnace ................................................4
Shipping and Packing List ..............................................4
Safety Information ..........................................................4
Building Codes ...............................................................4
Use of Furnace as Construction Heater .........................5
General ...........................................................................6
Installation - Setting Equipment ......................................6
Filters ..............................................................................9
Duct System ...................................................................9
Pipe & Fittings Specifications .......................................10
Venting Options ............................................................12
Joint Cementing Procedure ..........................................13
Venting Pracitces ..........................................................14
Vent piping Guidliens ....................................................14
INSTALLATION
INSTRUCTIONS
SLP98DFV
DAVE LENNOX SIGNATURE®
COLLECTION GAS FURNACES
DOWNFLOW AIR DISCHARGE
507027-02
05/2016
Superseds 507027-01
THIS MANUAL MUST BE LEFT WITH THE
HOMEOWNER FOR FUTURE REFERENCE
This is a safety alert symbol and should never be
ignored. When you see this symbol on labels or in man-
uals, be alert to the potential for personal injury or death.
As with any mechanical equipment, contact with sharp
sheet metal edges can result in personal injury. Take
care while handling this equipment and wear gloves and
protective clothing.
A thermostat is not included and must be ordered
separately.
• The Lennox iComfort Wi-Fi
in communicating applications.
• In non-communicating applications, the Lennox
ComfortSense
7500 thermostat may be used, as well
®
as other non-communicating thermostats.
In all cases, setup is critical to ensure proper system
operation.
Field
wiring
for
communicating applications is illustrated in diagrams,
which begin on page 34.
Gas Piping ....................................................................29
Electrical .......................................................................32
Integrated Control .........................................................40
Blower Data ..................................................................44
Unit Start-Up .................................................................49
Turning Off Gas to Unit .................................................50
High Altitude Information ..............................................50
Gas Pressure Measurement.........................................50
Proper Combustion.......................................................50
Other Unit Adjustments.................................................53
Heating Sequence of Operation ...................................53
Service..........................................................................55
Repair Parts..................................................................56
Integrated Control Diagnostic Codes............................57
Configuring Unit Size Codes ........................................60
Page 1
CAUTION
NOTICE
thermostat must be used
®
both
communicating
and
non-
Advertisement
Table of Contents

Related Manuals for Lennox SLP98DFV


Summary of Contents for Lennox SLP98DFV
-
Page 1: Table Of Contents
A thermostat is not included and must be ordered separately. • The Lennox iComfort Wi-Fi thermostat must be used ® in communicating applications. • In non-communicating applications, the Lennox ComfortSense 7500 thermostat may be used, as well ® WARNING as other non-communicating thermostats. -
Page 2: Unit Dimensions - Inches (Mm)
Unit Dimensions - inches (mm) 9/16 (14) COMBUSTION Flue Condensate Trap Assembly AIR INTAKE Furnished for external RETURN AIR field installation (178) OPENING EXHAUST AIR on either side of unit. OUTLET (See installation instructions for additional information.) 2-1/16 (52) 9/16 2-1/4 (14) (57) -
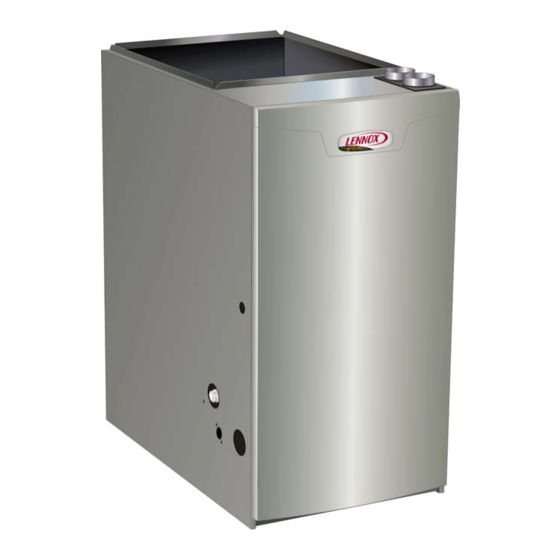
Page 3: Parts Arrangement
Parts Arrangement CONTROL BOX (includes variable capacity integrated control, transformer, circuit breaker and door switch) BLOWER ASSEMBLY (Variable Speed Blower Motor Is Hidden) BAG ASSEMBLY BLOWER SIDE VENT ACCESS PATCH PLATE PANEL ACCESS PANEL COMBUSTION AIR INDUCER PRIMARY LIMIT GAS VALVE BURNER BOX ASSEMBLY FIGURE 1 Page 3... -
Page 4: Slp98Dfv Gas Furnace
A changeover kit may be ordered for LP equivalent), service agency or the gas supplier. applications. The SLP98DFV must be installed only as a Direct Vent CAUTION gas central furnace. As with any mechanical equipment, contact with sharp NOTE - In Direct Vent installations, combustion air is tak- en from outdoors and flue gases are discharged outdoors. -
Page 5: Use Of Furnace As Construction Heater
Very low return air temperatures, harmful vapors and operation of the unit with clogged or misplaced filters will damage the unit. SLP98DFV units may be used for heating of buildings or Dampers structures under construction, if the following conditions... -
Page 6: General
CAUTION devices, which could result in personal injury or death. SLP98DFV unit should not be installed in areas normally Select a location that allows for the required clearances subject to freezing temperatures. - Page 7 NOTE - The 1/2 hp blower motor used in the SLP98D- IThe unit may be installed three ways in downflow applica- tions: on non-combustible flooring, on combustible floor- F070V36B and SLP98DF090V36C unit is equipped with three flexible legs and one rigid leg. The rigid leg ing using a base, or on a reverse-flow cooling coil cabinet.
- Page 8 TABLE 1 NON-COMBUSTIBLE FLOOR OPENINGSIZE FURNACE Front to Rear Side to Side Cabinet Width B Cabinet 17 - 1/2” 19 - 3/4 16 - 5/8 SUPPLY AIR PLENUM C Cabinet 21” 19 - 3/4 20 - 1/8 PROPERLY NOTE - Floor opening dimensions listed are 1/4 inch (6 mm) larger than COMBUSTIBLE SIZED FLOOR the unit opening.
-
Page 9: Filters
Before using any filter with this system, check the specifications provided by the filter manufacturer against FIGURE 10 the data given in the appropriate Lennox Product Return Air Opening -- Downflow Units Specifications bulletin. Additional information is provided in Service and Application Note ACC002 (August 2000). -
Page 10: Pipe & Fittings Specifications
IMPORTANT Refer to table 4 for approved piping and fitting materials. TABLE 4 SLP98DFV exhaust and intake connections are made PIPING AND FITTINGS SPECIFICATIONS of PVC. Use PVC primer and solvent cement when Schedule 40 PVC (Pipe) D1785 using PVC vent pipe. - Page 11 TABLE 5 OUTDOOR TERMINATION USAGE* STANDARD CONCENTRIC Wall Ring Wall Kit 1-1.2 inch 2 inch 3 inch Flush Mount Kit Vent Pipe 2 inch 3 inch 2 inch Input Size Field 71M80 69M29 Dia. in. 51W11 22G44 44J40 Fabricated (US) (US) 60L46 (US) (US)
-
Page 12: Venting Options
IMPORTANT Venting Options The SLP98DF is shipped with vent exhaust / air intake Side vent sealing plates and side vent sealing gaskets connection at the top cap. See figure 13. Using parts pro- must be used when converting to right side venting. vided, the furnace may be field modified to have these Failure to use gaskets and plates may lead to improper connections on the right side of the furnace cabinet. -
Page 13: Joint Cementing Procedure
Right Side Vent Configuration Side Vent Sealing Plate Side Vent Sealing Gaskets Exhaust Intake Street Elbows (2) FIGURE 15 6 - Promptly apply solvent cement to end of pipe and Joint Cementing Procedure inside socket surface of fitting. Cement should be All cementing of joints should be done according to these applied lightly but uniformly to inside of socket. -
Page 14: Venting Pracitces
Without the heat of the original furnace flue The SLP98DFV is installed only as a Direct Vent gas products, the existing vent pipe is probably oversized for central furnace. - Page 15 In some applications which permit the use of several dif- 070, 090 or 110? ferent sizes of vent pipe, a combination vent pipe may be used. Contact Lennox’ Application Department for assis- tance in sizing vent pipe in these applications. Which style termination...
- Page 16 TABLE 7 Maximum Allowable Intake or Exhaust Vent Length in Feet *Size intake and exhaust pipe length separately. Values in table are for Intake OR Exhaust, not combined total. Both Intake and Exhaust must be same pipe size. NOTE - Additional vent pipe and elbows used to terminate the vent pipe outside the structure must be included in the total vent length calculation. Standard Termination at Elevation 0 - 4500’...
- Page 17 TABLE 7 Maximum Allowable Intake or Exhaust Vent Length in Feet *Size intake and exhaust pipe length separately. Values in table are for Intake OR Exhaust, not combined total. Both Intake and Exhaust must be same pipe size. Concentric Termination at Elevation 0 - 4500’ Number 2”...
- Page 18 TYPICAL EXHAUST PIPE CONNECTIONS AND CONDENSATE TRAP INSTALLATION 2” 2” 2” DO NOT transition from smaller to larger pipe size in horizontal runs of exhaust pipe. 3” TRANSITION *2“ Exhaust Air Intake TOP VIEW * When transitioning up in pipe size, use the shortest length of 2” PVC pipe possible. NOTE −...
- Page 19 TYPICAL EXHAUST CONNECTIONS WITH RIGHT SIDE VENT OPTION Pipe Length 4” Maximum (Not Furnished) 3” 2” 2” TRANSITION *2” 2” Plate (Furnished) Street Ell (Not Furnished) TOP VIEW * When transitioning up in pipe size, use the shortest length of 2” PVC pipe possible. NOTE Intake pipe and exhaust pipe must be the same diameter.
-
Page 20: Vent Termination Clearances
‡ Permitted only if veranda, porch, deck or balcony is fully open on a minimum of two sides beneath the floor. Lennox recommends avoiding this location if possible. FIGURE 23 Page 20... - Page 21 (19mm) Armaflex or equivalent may be necessary. Insu- doors. The SLP98DFV is classified as a direct vent, Cate- lation must be protected from deterioration. Armaflex with gory IV gas furnace.
- Page 22 TABLE 8 Maximum Allowable Vent Pipe Length (in ft.) Without Insulation In Unconditioned Space For Winter Design Temperatures Modulating High Efficiency Furnace Winter Design Unit Input Size Vent Pipe Temperatures1 Diameter °F (°C) 2 in. 32 to 21 (0 to -6) 2-1/2 in 3 in.
- Page 23 NOTE - Care must be taken to avoid recirculation of ex- (different pressure zone) haust back into intake pipe. TABLE 9 Roof T erminated EXHAUST PIPE TERMINATION SIZE REDUCTION Exhaust Pipe SLP98DFV Model Termination Pipe Size *070 1-1/2” *090 2” 2”...
-
Page 24: Front View
7 - If intake and exhaust piping must be run up a side 2” EXTENSION FOR 2” PVC wall to position above snow accumulation or other PIPE1” EXTENSION FOR 3” obstructions, piping must be supported. At least one PVC PIPE bracket must be used within 6”... - Page 25 FIELD FABRICATED WALL TERMINATION NOTE − FIELD−PROVIDED REDUCER MAY BE 2” (51mm) 3” (76mm) REQUIRED TO ADAPT LARGER VENT PIPE SIZE Vent Pipe Vent Pipe TO TERMINATION A− Minimum clearance above grade or average 12” (305 mm) 12” (305 mm) snow accumulation B−...
- Page 26 Condensate Piping 3 - Install the cap over the clean out opening at the base of the trap. Secure with clamp. See figure 40. This unit is designed for either right- or left-side exit of 4 - Install drain trap using appropriate PVC fittings, glue condensate piping.
- Page 27 Coil Using a Common Drain and line. Heat cable kit is available from Lennox in various lengths; 6 ft. (1.8m) - kit no. 26K68 and 24 ft. (7.3m) - kit no.
- Page 28 TRAP / DRAIN ASSEMBLY USING 1/2” PVC OR 3/4” PVC Optional Condensate Drain Connection Adapter 3/4 inch slip X 3/4 inch mpt (not furnished) 90° Street Elbow 3/4 inch PVC (not furnished) Adapter 3/4 inch slip X 3/4 inch mpt (not furnished) Condensate Drain Connection In Unit 1 (25 mm) Min.
-
Page 29: Gas Piping
Gas Piping IMPORTANT CAUTION Compounds used on threaded joints of gas piping must be resistant to the actions of liquified If a flexible gas connector is required or allowed petroleum gases. by the authority that has jurisdiction, black iron pipe shall be installed at the gas valve and extend MANUAL MAIN SHUT-OFF outside the furnace cabinet. - Page 30 Left Side Piping AUTOMATIC MANUAL (Standard) GAS VALVE MAIN SHUT-OFF MANUAL (with manual VALVE AUTOMATIC MAIN SHUT-OFF shut-off valve) (1/8 in. NPT GAS VALVE VALVE plugged tap (with manual (1/8 in. NPT shown) shut-off valve) plugged tap shown) GROUND JOINT UNION GROUND JOINT...
- Page 31 4 - Follow the lighting instructions. Turn on the appliance WARNING that is being inspected. Adjust the thermostat so that the appliance operates continuously. CARBON MONOXIDE POISONING HAZARD 5 - After the main burner has operated for 5 minutes, Failure to follow the steps outlined below for test for leaks of flue gases at the draft hood relief each appliance connected to the venting system opening.
-
Page 32: Electrical
NOTE - Do NOT make a wire connection between the room thermostat L terminal and the L terminal of the OUTSIDE CABINET SLP98DFV integrated control unless this is a communi- cating thermostat installation with a noncommunicating outdoor unit. 6 - Electrically ground the unit according to local codes... - Page 33 “C” terminal. See Indoor Blower Speeds figure 47 for location of terminal. NOTE - When the SLP98DFV is used with icomfort Wi- 10 - Install the room thermostat according to the Fi® thermostat, proper indoor blower speed selections are instructions provided with the thermostat.
- Page 34 -ENABLED Outdoor Unit ® icomfort Wi-Fi Thermostat ® icomfort Wi-Fi Thermostat ® icomfort -Enabled SLP98DFV Indoor Furnace ® icomfort -Enabled SLP98DFV Indoor Furnace Non-Communicating Outdoor Air Conditioner ® icomfort -Enabled Outdoor Air Conditioner or Heat Pump ® icomfort ENABLED ®...
- Page 35 Optional Accessories for use with any icomfort Touch System ® icomfort ® NOTE: icomfort Wi-Fi ENABLED SLP98DFV FIER BASED ON DEMAND. NO OTHER CONTROL OR HUMIDISTAT FURNACE REQUIRED. MIDIFIER (IF NOT ALREADY IN THE SYSTEM FOR OTHER ® FUNCTIONS. BUILT INTO ALL icomfort OUTDOOR UNITS).
- Page 36 TABLE 14 Field Wiring Connections for Non-Communicating Thermostat Applications DIP Switch Settings and On-Board Links (figure 47) W914 W915 (DS to R) W951 (Y1 to Y2) Thermostat Wiring Connections DIP Switch 1 (O to R) Two-Stage cation or Heat Pumps Cooling Harmony 1Heat / 1 Cool...
- Page 37 TABLE 14 Field Wiring Connections for Non-Communicating Thermostat Applications (Continued) DIP Switch Settings and On-Board Links (figure 47) W914 W915 (DS to R) (Y1 to Y2) W951 Thermostat Wiring Connections Two-Stage DIP Switch 1 (O to R) cation or Cooling Heat Pumps Harmony 2 Heat / 2 Cool...
- Page 38 TABLE 14 Field Wiring Connections for Non-Communicating Thermostat Applications (Contiued) DIP Switch Settings and On-Board Links (figure 47) W914 W915 (DS to R) W951 (Y1 to Y2) Wiring Connections Thermostat DIP Switch (O to R) Two-Stage cation or Heat Pumps Cooling Harmony Dual Fuel...
- Page 39 TYPICAL SLP98DFV WIRING DIAGRAM FIGURE 46 Page 39...
-
Page 40: Integrated Control
Integrated Control NEUTRAL TERMINALS COMBUSTION AIR INDUCER CONNECTOR IGNITOR CONNECTOR FLAME SENSE DIAGNOSTIC LINE VOLTAGE PUSH BUTTON TERMINALS DIP SWITCHES OUTDOOR AIR INDOOR SENSOR BLOWER TERMINALS 7-SEGMENT CONNECTOR DIAGNOSTIC LED W915 Y1 TO Y2 DISCHARGE AIR SENSOR W951 R TO O TERMINALS W914 R TO DS FACTORY TEST... - Page 41 10 minutes fixed Two-Stage Heat (W1 70%, W2 100%) Two-Stage NOTE - When the SLP98DFV is used with an icomfort The blower off delay affects comfort and is adjustable Wi- Fi® thermostat, all indoor blower speed selections to satisfy individual applications. Adjust the blower off and DIP switch settings are made by the communicating delay to achieve a supply air temperature between 90°...
- Page 42 Switches 8 and 9 -- Cooling Mode Blower Speed -- The TABLE 20 unit is shipped from the factory with the DIP switches po- Cooling Mode Blower Speed Ramping sitioned for high speed (4) indoor blower motor operation during the cooling mode. The table below provides the Ramping Option Switch 12 Switch 13...
- Page 43 Refer to table 24 for operation sequence in appli- button and calibration will begin. The furnace will per- cations including SLP98DFV, a thermostat which features form the high-fire and low-fire pressure switch calibra- humidity control and a single-speed outdoor unit. Table 25 tions and display “CAL”.
-
Page 44: Blower Data
First stage COOL (two-stage air conditioning units only) is approximately 70% of the same second stage COOL speed position. Continuous Fan speeds are approximately 28%, 38%, 70% and 100% (DIP switch selectable) of the same second-stage COOL speed position minimum 250 cfm. Lennox iHarmony Zoning System Applications - Minimum blower speed is 250 cfm. - Page 45 First stage COOL (two-stage air conditioning units only) is approximately 70% of the same second stage COOL speed position. Continuous Fan speeds are approximately 28%, 38%, 70% and 100% (DIP switch selectable) of the same second-stage COOL speed position minimum 250 cfm. Lennox iHarmony Zoning System Applications - Minimum blower speed is 380 cfm.
- Page 46 First stage COOL (two-stage air conditioning units only) is approximately 70% of the same second stage COOL speed position. Continuous Fan speeds are approximately 28%, 38%, 70% and 100% (DIP switch selectable) of the same second-stage COOL speed position minimum 250 cfm. Lennox iHarmony Zoning System Applications - Minimum blower speed is 450 cfm.
- Page 47 TABLE 23 COOLING OPERATING SEQUENCE SLP98DFV and Single-Stage Outdoor Unit OPERATING SEQUENCE SYSTEM DEMAND SYSTEM RESPONSE Thermostat Demand Relative Humidity Blower System Step Compressor Comments Condition Status (cool) stage NO CALL FOR DEHUMIDIFICATION Compressor and indoor Normal Operation Acceptable High...
- Page 48 TABLE 24 OPERATING SEQUENCE SLP98DFV and Two-Speed Outdoor Unit OPERATING SYSTEM DEMAND SYSTEM RESPONSE SEQUENCE Thermostat Demand Relative Humidity Blower System Step Compressor Comments 1 s t Condition Status (cool) stage stage NO CALL FOR DEHUMIDIFICATION Normal Operation Acceptable Compressor and indoor blower...
-
Page 49: Unit Start-Up
The gas valve on the WARNING SLP98DFV is equipped with a gas control switch. Use only your hand to move the control switch. Never use tools. If Do not use this furnace if any part has been underwater. -
Page 50: Turning Off Gas To Unit
100 ppm. authorities. TABLE 26 SLP98DFV units require no manifold pressure adjust- High Fire ments for operation at altitudes up to 10,000 feet (3048 m) above sea level. Units installed at altitude of 7,501 to... - Page 51 Operating pressure signal can be taken while the manifold ative burner box must be considered. Use pressure test pressure pressure check is taken (using two measuring adapter kit (available as Lennox part 10L34) to assist in devices). Or, taken after the manifold pressure measure- measurement.
- Page 52 MANIFOLD PRESSURE MEASUREMENT Gas Valve Field Installed Figure 49 Negative Port Operating Signal (Delta P) Measurement Positive Port Red and Black Tubing - Black Tubing + Gas Valve Field Installed Measuring Device Figure 50 Page 52...
-
Page 53: Other Unit Adjustments
Temperature Rise Other Unit Adjustments After the furnace has been started and supply and return Primary Limit air temperatures have been allowed to stabilize, check the temperature rise with the unit operating at 100 percent fir- The primary limit is located on the heating compartment ing rate. - Page 54 2 - Once the control receives a signal that the low- 4 - After the 20-second warm-up period has ended, fire pressure switch has closed, the combustion the gas valve is energized and ignition occurs.At air inducer begins a 15-second pre-purge in the the same time, the control module begins an indoor ignition speed.
-
Page 55: Service
Annual Furnace Maintenance At the beginning of each heating season, and to compl ith the Lennox Limited Warranty, your system should be checked as follows: Page 55... -
Page 56: Repair Parts
15 - Replace heating compartment access panel. Repair Parts The following repair parts are available through Lennox dealers. When ordering parts, include the complete furnace model number listed on the nameplate -- Example: SLP98DF070V36B. All service must be performed by a licensed profes- sional installer (or equivalent), service agency, or gas supplier. -
Page 57: Integrated Control Diagnostic Codes
Integrated Control Diagnostic Codes Press the diagnostic push button and hold it to cycle through a menu of options. Every five seconds a new menu item will be displayed. Release the button when the desired mode is displayed. When a solid ”P” is displayed, the furnace capacity/ size is programmed. When the solid “E”... - Page 58 Integrated Control Diagnostic Codes Code Diagnostic Codes/Status of Equipment Action Required to Clear and Recover E200 Hard lockout - Rollout circuit open or previously Correct unit cause of rollout trip or replace flame rollout switch and test furnace open. operation. E201 Indoor blower communication failure - Unable to Indoor blower communication failure including power outage.
- Page 59 Integrated Control Diagnostic Codes Code Diagnostic Codes/Status of Equipment Action Required to Clear and Recover E274 Soft lockout - Exceeded maximum number of See E 250. recycles. Last recycle failed due to the limit circuit opening or limit remained open longer than 3 minutes.
-
Page 60: Configuring Unit Size Codes
Integrated Control Diagnostic Codes Code Diagnostic Codes/Status of Equipment Action Required to Clear and Recover LSOM - Outdoor unit system pressure trip. Compressor ran over 18 hours in air conditioning mode. E402 E403 LSOM - Compressor short-cycling (Running less than Outdoor unit pressure trip. -
Page 61: Troubleshooting: Heating Sequence Of Operation
Troubleshooting: Heating Sequence of Operation IGNITION AND CALL FOR LOW FIRE WITH TWO-STAGE THERMOSTAT Safety Check Verify There Is No Main Burner Flame After Indoor blower OFF Heat OFF Delay (Low Heat Speed) Limit Combustion Air Limit De-Energize Error Code Indoor Blower Inducer On Switch... - Page 62 Troubleshooting: Heating Sequence of Operation (continued) CALL FOR HIGH FIRE WITH TWO-STAGE THERMOSTAT 2 Stage Thermostat 1st Call for High Fire? 2nd Stage Recognition Delay (30 Seconds) Combustion Air Inducer ON (100% Rate Speed) High Pressure Switch Increase Combustion Error Code Wait 5 Closes Within Air Inducer Speed...
- Page 63 Troubleshooting: Heating Sequence of Operation (continued) CALL FOR HIGH FIRE WITH TWO-STAGE THERMOSTAT 2 Stage Thermostat 1st Call for High Fire? 2nd Stage Recognition Delay (30 Seconds) Combustion Air Inducer ON (100% Rate Speed) High Pressure Switch Increase Combustion Error Code Wait 5 Closes Within Air Inducer Speed...
- Page 64 Troubleshooting: Heating Sequence of Operation (continued) IGNITION AND CALL FOR HEAT WITH SINGLE-STAGE THERMOSTAT Safety Check Verify There Is No Main Burner Flame Indoor Blower OFF After Heat OFF Delay (Low Heat Speed) Indoor Blower Limit Limit De-Energize Combustion Air Error Code Switch Closes Within 3...
- Page 65 Troubleshooting: Cooling Sequence of Operation CALL FOR COOLING 1st Stage Cooling Request Received Energize 1st Stage Cooling Contactor (Compressor & Fan) Indoor Blower On After 2-second delay Energize Indoor Blower (Per Ramping Profile) 1st Stage 2nd Stage Cooling Request Cooling Still Active? Request? Energize 2nd Stage...
- Page 66 Troubleshooting: Continuous Fan Sequence of Operation CONTINUOUS LOW SPEED INDOOR BLOWER SEQUENCE OF OPERATION Call for Continuous Blower Indoor Blower On (Speed Determined by Dip Switch settings) Request Maintain Indoor for Cooling Go to Call for Cooling Blower at set speed Received? Go to Call for Heat -- Two-Stage Thermostat Request...
- Page 67 Requirements for Commonwealth of Massachusetts 4 - INSPECTION. The state or local gas inspector of the Modifications to NFPA-54, Chapter 10 side wall, horizontally vented, gas-fueled equipment shall not approve the installation unless, upon Revise NFPA-54 section 10.8.3 to add the following inspection, the inspector observes carbon monoxide requirements: detectors and signage installed in accordance with the...
- Page 68 ADDENDUM FOR THE PROVINCE OF SASKATCHEWAN See below for venting in the province of Saskatchewan. Lennox approves the following termination for use in Saskatch- ewan Canada. 12”...
Need help?
Do you have a question about the SLP98DFV and is the answer not in the manual?
Questions and answers