Table of Contents
Advertisement
Quick Links
Advertisement
Table of Contents

Related Manuals for Pyle PSCNPHO32

Summary of Contents for Pyle PSCNPHO32
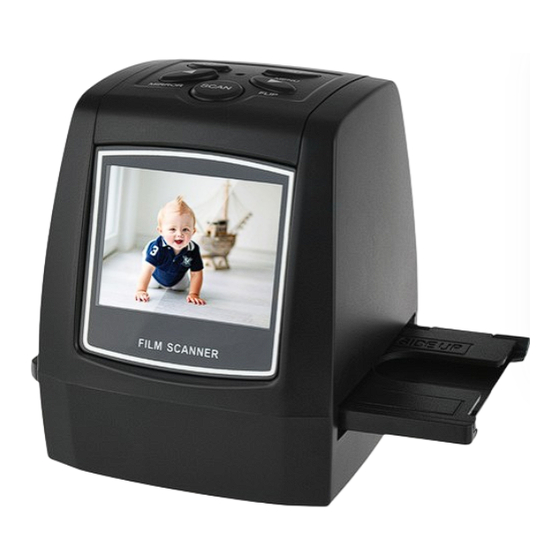
- Page 1 FILM SCANNER * Illustrations are for instructional purposes only, and may be di erent from the actual product. INSTRUCTION MANUAL Model: PSCNPHO32 For correct usage please read these instructions carefully and keeps in a safe place for future reference!
-
Page 2: Safety Precautions
Safety precautions Important Do not expose this product to rain or moisture to preserve the life of your product. Caution Do not disassemble this unit. To prevent the risk of electric shock, do not remove cover. Ventilation The device should be situated so that its location or position does not interfere with its proper ventilation. -
Page 3: Package Contents
Package contents ◆ Film scanner ◆ Negative Adapter ◆ Slide Adapter ◆ 110 lnsert ◆ Super8 lnsert ◆ Video cable ◆ USB cable ◆ AC/DC adapter ◆ Brush ◆ User’s Manual Please remove the adaptor from the mains when not in use. Operation Guide Home/MODE: Main menu ①... - Page 4 Home/MODE: No memory card No memory card indicator If there is no memory card inserted into the device, a warning icon will be shown on screen when entering the main menu 1: Capture After the welcome page, the above menu will appear. User can press LEFT/RIGHT button for desired menu, then press OK button to confirm the selection.
- Page 5 button for Mirror/Flip function, the live view will be adjusted accordingly (This step can be used to correct a misplaced the film/photo; either upside down or flip). Mirror and Flip function can only be used while in the live view mode. Mirror Press LEFT button to change image left to right Flip...
- Page 6 1.5 Live view Capture/Edit menu SCAN Once press SCAN button in live view, the edit menu will appear. When user press OK button, the current image will be saved to internal memory or memory card when there is a memory card inserted, the display will return to live view again.
- Page 7 Select Home icon with LEFT/RIGHT button, then press OK button or press MENU button on top of the device anytime to return to main menu 1.9 Exit from Edit mode back to Capture mode (live view) Once user press OK button for save or cancel option, the display will return to capture mode/live view.
- Page 8 interval from previous captured image. User can also stop the slide show by press OK button (Only the images captured by the film & photo scanner are available in playback mode) 2.2 Playback: Edit Menu ④ ① ⑤ ② ⑥ ③...
- Page 9 2.4 Playback: Rotate/Save If user wants to rotate +90 degrees by OK button, the image will be rotated +90 degrees and cursor will remain at Save. Press OK button again to save modified result and next picture will be shown. For continuously rotate +90 degrees, move cursor to rotate again and press OK button.
- Page 10 2.7 Playback: Home Select Home icon with LEFT/RIGHT button, then press OK button or press MENU button on top of the device anytime to return to main menu 2.8 Playback: No Picture If there is no picture when enter playback mode, a No picture symbol will show on screen Using the Adapter Plates Once you’ve set your scanner to the correct film type, be sure to choose...
- Page 11 1. Before inserting Adapter, set down scanner on flat, stable surface with LCD display facing you. 2. Use included Cleaning Brush to gently wipe scanner lens. 3. DO NOT insert any plates from the left side of the unit. 4. Ensure“This Side Up”side of Adapter is facing upwards. 5.
- Page 12 3. Always handle films with care to avoid scratches or fingerprints. 4. When inserting a negative, feed it in slowly until you see the full image on the viewer display. Film Type When the Film scanner mode is selected, user can change film type by enter Film Type menu when power on the device or access the main menu by Home icon/MENU button anytime.
-
Page 13: Usb Mode
① 14M resolution ② 22M resolution User can press LEFT/RIGHT button to select resolution, then press OK button to confirm Language Change language definition by enter language menu when power on the device or access the main menu by Home icon/MENU button anytime. Press LEFT/RIGHT button for language and press OK button to confirm. -
Page 14: Technical Specifications
Question: The device cannot connect to the computer. Answer: Please check if the cable has already connected to the USB port of the computer. Or connect the cable to another USB port. It is recommended that connect it to the motherboard directly, not to the front panel.
Need help?
Do you have a question about the PSCNPHO32 and is the answer not in the manual?
Questions and answers