Table of Contents
Advertisement
Available languages
Available languages
Quick Links
Advertisement
Chapters
Table of Contents

Subscribe to Our Youtube Channel
Related Manuals for Audiovox D900


Summary of Contents for Audiovox D900
- Page 1 D900 TRAGBARER FERNSEHER MIT 9“ LCD-DISPLAY PORTABLE TV WITH 9“ LCD-DISPLAY TV PORTATILE CON DISPLAY LCD DA 9” BEDIENUNGSANLEITUNG/GARANTIEURKUNDE OWNER´S MANUAL/WARRANTY CARD MANUALE DELL´UTENTE/SCHEDA DI GARANZIA...
-
Page 3: Table Of Contents
INDEX Einleitung Wichtige Warn- und Sicherheitshinweise Lieferumfang Installation im Haus Installation im Auto Bedienelemente Fernbedienung DVD-Player - Tastenfunktionen - Menü - Display Wiedergabe von Audio-CDs SETUP - Systemeinstellungen - Passwort - Präferenzenmenü Wiedergabe von MP3 Discs Gerätebedienung Wiedergabe von TV-Programmen Verwenden von Videospielen &... - Page 4 ACHTUNG: Ein LCD-Display bzw. Videomonitor, der im Sichtfeld des Fahrers im Fahrzeuginnern angebracht wird, dient vorrangig zum Anzeigen von Fahrzeugdaten, zur Systemsteuerung, zur Beobachtung des seitlichen und rück- wärtigen Verkehrs als auch zur Navigation. Soll zudem der Empfang von Fernsehprogrammen oder das Abspielen von Videofilmen oder DVDs ermöglicht werden, so muss das Display bzw.
-
Page 5: Einleitung
Stand der Technik. Er ist dafür gedacht, Ihnen und Ihrer Familie viele Jahre Freude zu bereiten und Sie unterwegs in den vollen Genuss der Videounter– haltung bringen. Der D900 ist kompakt und leicht zu installieren, so dass Sie ihn überall hin mitnehmen können. - Page 6 Benutzen Sie nur Halterungen, die vom Hersteller empfohlen oder mitgeliefert werden. Jegliche Aufstellung dieses Gerätes sollte gemäß der mitgelieferten Bedienungsanleitung erfolgen. 8. HITZE - Setzen Sie den D900 keiner Wärmequelle aus, wie z.B. starken Magnetfeldern, Wärmequellen, Feuer, direktem Sonnenlicht oder anderen Produkten, die Hitze erzeugen (Verstärker).
- Page 7 13. SCHUTZ DES NETZKABELS - Spannungsversorgungskabel sollten stets so verlegt werden, dass sie nicht durch abgestellte Gegenstände abgeklemmt wer- den und dass keine Personen darauf treten. Besonders zu beachtende Kabelstellen sind hierbei jene am Stecker, an Steckerleisten und am Anschluss zum Gerät.
- Page 8 Funktionsstörungen kommen, die sich nur durch umfangreiche Neujustierungen von qualifiziertem Fachpersonal beheben lassen. e. Das Gerät ist heruntergefallen oder wurde anderweitig beschädigt. f. Das weist Gerät einen deutlich erkennbaren Leistungsabfall auf - auch dies deutet auf eine notwendige Wartung oder Reparatur hin. 19.
- Page 9 VORSICHT: Zur Vermeidung von Stromschlägen das Gehäuse nicht öffnen. Reparatur und Wartung des Geräteinneren nur durch geschultes Personal. Dieses Dreieck mit Blitz weist den Benutzer darauf hin, dass Innen- bauteile unter Spannung stehen und bei unsachgemäßem Umgang die Gefahr von Stromschlägen besteht. Dieses Dreieck mit Ausrufezeichen weist den Benutzer darauf hin, dass wichtige Bedienungs- und Wartungsanweisungen mitgeliefert werden.
- Page 10 FCC-Hinweis: Jede Veränderung oder jeder Umbau des Geräts, die/der nicht ausdrücklich von einem technischen Prüfungsamt zugelassen wird, kann zu einem Erlöschen der Betriebserlaubnis für das Gerät führen. 26. INSTALLATION a. EINBAUSTELLE FÜR EMPFÄNGER – Wählen Sie eine Stelle, die eine gute Sicht bietet.
- Page 11 27. DVD - Dieses Gerät besitzt ein Laser System. Um zu eine angemes- sene Handhabung zu gewährleisten, lesen Sie sich bitte die dazugehöri- ge Bedienungsanleitung durch. Bitte öffnen Sie nie das Gehäuse, um nicht der Laser Strahlung ausgesetzt zu sein. Diese kann durch unerlaub- tes Öffnen des Gehäuses oder durch Zerstörung der Arretierungen aus- treten.
-
Page 12: Installation Im Haus
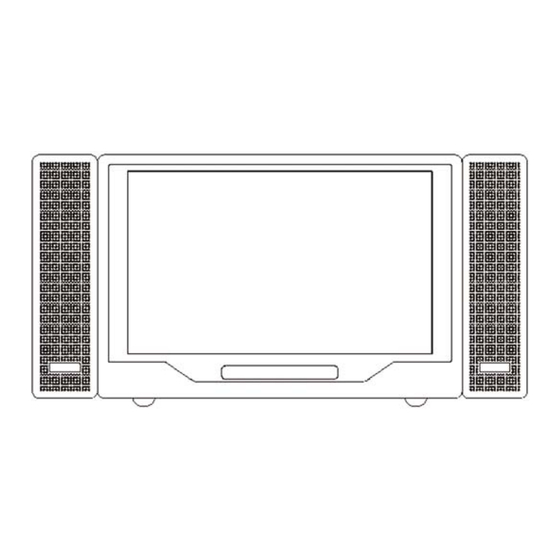
LIEFERUMFANG 1. D900 Fernseher/DVD/CD/MP3-Player mit abnehmbaren Lautsprechern 2. Fernbedienung 3. Steckernetzteil 4. Zigarettenanzünder DC Adapter 5. Tragetasche 6. Bedienungsanleitung 7. RCA AV Anschlusskabel INSTALLATION IM HAUS (Abbildung 1) Platzieren Sie das Gerät auf einem Tisch oder einer sonstigen stabilen, glatten Oberfläche, indem Sie den Metallfuß, der auf der Rückseite befe- stigt ist öffnen. -
Page 13: Installation Im Auto
INSTALLATION IM AUTO (Abbildung 2) 1) Nehmen Sie einen der mitgelieferten Haltegurte der Tragetasche und verbin- den Sie den Karabinerhaken mit einem oberen Metallring der Tasche. Verbinden Sie nun den „S“-Haken mit dem anderen oberen Metallring und platzieren Sie die Schlaufe über der Kopstütze. Stellen Sie den Gurt so ein, dass die Tasche sicher befestigt ist. -
Page 14: Bedienelemente
BEDIENELEMENTE (Abbildung 3) 1. Power An/Aus 2. TV Auto Program 3. TV Channel Down 4. TV Channel Up 5. Volume Down 6. Volume Up 7. Picture Select 8. DVD/TV/AV Switch 9. Bildschirmmodus 10. DVD Previous 11. DVD Play 12. DVD Next13. DVD Stop 14. -
Page 15: Fernbedienung
FERNBEDIENUNG (Abbildung 4) 1. TV/DVD/AUX Select 2. DVD Number Control Select 3. Zahlen 0-9 4. TV/CATV Select 5. Stummschaltung 6. Picture Select 7. Lautstärke (+/-) 8. DVD Eject Taste 9. Up/Down-Left/Right/Enter 10. DVD Menu 11. DVD Display 12. DVD Stop 13. -
Page 16: Tastenfunktionen
DVD PLAYER 1. TASTENFUNKTIONEN POWER EJECT PLAY PAUSE STOP NEXT PREVIOUS FORWARD SCAN REVERSE SCAN SLOW UP/DOWN/LEFT/RIGHT ENTER NUMBERS MENU SUBTITLE AUDIO DISPLAY SETUP Ein- und Ausschalten des Gerätes Auswerfen und Laden der Disc Wiedergabe Standbild (1x) am aktuellen Wiedergabepunkt stoppen (2x) die Wiedergabe stoppen Während der Wiedergabe zum nächsten Kapitel (Titel bzw. -
Page 17: Display
2. MENU Eine DVD ist in mehrere Abschnitte unterteilt, die als „Titel“ oder „Kapitel“ bezeichnet werden. Beim Starten der DVD-Wiedergabe, wird auf dem Bildschirm Ihres Fernsehers oder Monitors das Hauptmenü der Disc angezeigt. Der Inhalt dieses Menüs hängt von der Disc ab. Drücken Sie während der Wiedergabe auf MENU, um das Menü... - Page 18 b) Drücken Sie erneut auf DISPLAY, um die verbleibende Zeit des Titels anzuzeigen. Die Kopfzeile wird automatisch nach 3 Sekunden ausgeblendet. Bildschirmanzeige der verbleibenden Zeit des Titels c) Drücken Sie ein drittes Mal auf DISPLAY, um die verstrichene Zeit für das Kapitel anzuzeigen.
- Page 19 Bildschirmanzeige der verbleibenden Zeit des Kapitels 2) UNTERTITEL Drücken Sie während der Wiedergabe auf SUBTITLE, um die gewünschte* Sprache der Untertitel auszuwählen. Angezeigt werden die Nummer der aktuellen Sprache (1) und die Gesamtanzahl der verfügbaren Sprachen (2). Wenn mehrere Sprachen verfügbar sind, drücken Sie erneut auf SUBTITLE, um eine andere Sprache für den Untertitel auszuwählen.
- Page 20 3) AUDIO Drücken Sie während der Wiedergabe auf AUDIO, um die gewünschte* Sprache auszuwählen. Angezeigt werden die aktuelle Audiokanal-Nummer (1) und die Gesamtanzahl der Audiokanäle (2). Wenn Sie eine andere Sprache auswählen möchten, drücken Sie erneut auf AUDIO. Die Audio-Anzeige wird automatisch ausgeblendet, wenn die Taste AUDIO nicht innerhalb von 3 Sekunden erneut gedrückt wird.
- Page 21 Aktivierung der Titelwiederholung c) Drücken Sie während der Wiedergabe ein drittes Mal auf REPEAT, um alle Kapitel und Titel zu wiederholen. Aktivierung der Titelwiederholung d) Drücken Sie die Taste REPEAT ein viertes Mal, um die normale Wiedergabe fortzusetzen. Die Anzeige REPEAT ALL wird automatisch ausgeblendet, wenn die Taste REPEAT nicht innerhalb von 3 Sekunden erneut gedrückt wird.
-
Page 22: Wiedergabe Von Audio-Cds
4. WIEDERGABE VON AUDIO-CDS Drücken Sie während der Wiedergabe einer Audio-CD auf der Fernbedienung die Taste DISPLAY, um die DISPLAY-Kopfzeile anzuzeigen. In den folgenden Abbildungen werden die Optionen angezeigt, die nach Drücken der Taste DISPLAY auf dem Bildschirm angezeigt werden. a) Drücken Sie während der Wiedergabe einmal auf DISPLAY. - Page 23 c) Drücken Sie ein drittes Mal auf DISPLAY. Anschließend wird GESAMT ABGELAUFEN zusammen mit dem derzeit wiedergegebenen Track und der gesamten Wiedergabezeit angezeigt. Bildschirmanzeige GESAMT ABGELAUFEN Drücken Sie ein viertes Mal auf DISPLAY. Anschließend wird GESAMT VERBLEIBEND zusammen mit dem derzeit wiedergegebenen Track und der verbleibenden Wiedergabezeit der CD angezeigt.
- Page 24 e) Verwenden der Funktion REPEAT Der Standardmodus der REPEAT-Funktion ist OFF. Wenn Sie mehrmals hin- tereinander auf REPEAT drücken, ändern sich die Optionen dieser Funktion: – TRACK- wiederholt den derzeit wiedergegebenen Track – ALL- wiederholt die derzeit wiedergegebene Disc. – OFF- Wiederholung aus Beim Durchblättern der Optionen ändert sich die Funktionsweise entsprechend.
-
Page 25: Systemeinstellungen
SETUP Drücken Sie auf SETUP, um den Hauptbildschirm des Menüs SETUP aufzu- rufen. Durch nochmaliges Drücken der Taste SETUP verlassen Sie das Setup- Menü. 1) SYSTEMEINSTELLUNGEN Wählen Sie mit den LEFT/RIGHT-Tasten die Option SYSTEM- EINSTELLUNGEN aus, und drücken Sie anschließend auf ENTER, um den Bildschirm SYSTEMEINSTELLUNGEN aufzurufen. - Page 26 b) Wählen Sie mit Hilfe der UP/DOWN-Taste TV Type aus, und drücken Sie anschließend auf die RIGHT-Taste, um ins Untermenü zu gelangen. Wählen Sie bei TV TYPE mit den Tasten UP/DOWN die Option PAL für Europa aus. *NTSC - gilt für Amerika c) Wählen Sie mit Hilfe der UP/DOWN-Taste OSD SPRACHE aus, und drücken Sie anschließend auf die RIGHT-Taste, um ins Untermenü...
- Page 27 d) Wählen Sie mit der UP/DOWN-Taste die Option BILDSCHIRMSCHON- ER aus. * EIN: Bildschirmschoner aktiviert. * AUS: Bildschirmschoner deaktiviert. *Hinweis: Verbleibt ein Standbild 5 Minuten auf dem Bildschirm, schal- tet der DVD-Player auf den Bildschirmschonermodus um. Zum Verlassen der Seite SYSTEMEINSTELLUNGEN drücken Sie auf die Taste SETUP.
-
Page 28: Passwort
2) PASSWORT Wählen Sie mit den LEFT/RIGHT-Tasten die Option PASSWORT aus und drücken anschließend auf ENTER, um zur Passwortänderung die Seite PASSWORT EINSTELLUNGEN aufzurufen. a) Drücken Sie die RIGHT-Taste, um in das Untermenü für die Passwortänderung zu gelangen. Geben Sie das alte (PASSWORT ALT) oder das vorgegebene Passwort, das neue (PASSWORT NEU) und das neue Passwort zur Bestätigung (PW BESTÄTIGEN) ein. -
Page 29: Präferenzenmenü
3) PRÄFERENZEN MENÜ Wenn im Player keine Disc eingelegt ist, wählen Sie mit den LEFT/RIGHT- Tasten die Option PRÄFERENZEN-MENÜ aus und drücken anschließend auf ENTER, um die Seite der Voreinstellungen aufzurufen. a) Wählen Sie mit Hilfe der UP/DOWN-Taste TON aus, und drücken Sie anschließend auf die RIGHT-Taste, um ins Untermenü... - Page 30 b) Wählen Sie mit der UP/DOWN-Taste UNTERTITEL aus, und drücken Sie anschießend auf die RIGHT-Taste, um ins Untermenü zu gelangen. Wählen Sie mit den Tasten UP/DOWN die Sprache des Untertitels aus und drücken Sie anschließend auf ENTER, um die Einstellung zu bestätigen. Drücken Sie auf die LEFT-Taste, um zurückzukehren.
- Page 31 d) Wählen Sie mit der UP/DOWN-Taste ERWACHSENE aus, und drücken Sie anschließend auf die RIGHT-Taste, um ins Untermenü zu gelangen.Wählen Sie mit den Tasten UP/DOWN den gewünschten Jugendschutz für Discs mit einer Sperrfunktion und mehreren Einstellungsstufen aus. Die Stufen sind nach ihrem niedrigsten Wert (1 Kind) bis zu ihrem höchsten Wert (8 Erwachsene) aufgeführt.
- Page 32 *Hinweis: Wenn Sie nun eine DVD einlegen, die nicht mit den Kinderschutz - Einstellungen übereinstimmt, erscheint folgendes im Display. Die DVD wird erst nach Eingabe des Passworts abgespielt. Um den Kinderschutz zu deaktivieren, wählen Sie mit den LEFT/RIGHT Tasten YES aus und bestätigen diese Eingabe mit ENTER. Bitte geben Sie nun das vierstellige Passwort ein, um die DVD abzuspielen.
-
Page 33: Wiedergabe Von Mp3 Discs
WIEDERGABE VON MP3-DISCS MP3 ist ein digitales Audio-Format. Ein Song mit der Qualität einer Audio- CD kann im MP3-Format komprimiert werden, um weniger Platz in Anspruch zu nehmen. Der Qualitätsverlust ist dabei nur sehr gering. Das System kann CD-R/RW-Disc, die im MP3-Format aufgenommen wurden, wiedergeben. - Page 34 1. Wählen Sie mit der Taste oder einen Ordner in der Ordnerliste auf der linken Seite des Bildschirms aus. 2. Drücken Sie ENTER, um die Auswahl des markierten Ordners zu bestäti- gen. Die in diesem Ordner vorhandenen Songs werden auf der rechten Seite des Bildschirms angezeigt.
-
Page 35: Gerätebedienung
Achtung - In der linken Spalte der oberen Abbildung sind die Ordnernamen aufge- listet. In der rechten Spalte werden dagegen die Songtitel und Unterordner aufgeführt. - Wenn das Zeichen eines Ordners vor einem Dateinamen eingeblendet ist, handelt es sich um einen Ordner und nicht um eine MP3-Datei. - Wenn “MP3“... -
Page 36: Wiedergabe Von Tv-Programmen
Sie können den Ton auch mit der VOLUME DOWN Taste ausschalten. WIEDERGABE VON TV-PROGRAMMEN 1.Verbinden Sie das Antennenkoaxialkabel mit der Antenneneingangs- buchse des D900. 2. Sobald das System mit Strom versorgt wird und der TV-Modus ausge- wählt ist, drücken Sie auf die Taste TV/CATV der Fernbedienung. Hiermit wählen Sie im OSD-Bildschirmmenü... -
Page 37: Unterstützung Von Heimkino
VERWENDEN VON VIDEO-SPIELEN Verbinden Sie den AV-Ausgang Ihrer Spielekonsole mit der Buchse AV IN seitlich am Gerät. Verwenden Sie das mitgelieferte AV-Kabel und stecken Sie die farbcodierten Stecker in die entsprechenden Anschlüsse: gelb (Video) auf gelb, weiß (Audio links) auf weiß und rot (Audio rechts) auf rot. Wählen Sie den AV-Modus aus und stellen Sie die Lautstärke und Bildqualität nach eigenem Wunsch ein. -
Page 38: Technische Daten
TECHNISCHE DATEN DISPLAY: Auflösung Sichtwinkel Kontrastverhältnis Helligkeit Hintergrundbeleuchtung/ Lebensdauer Disc-Format Fernsehnorm Bildschirm Bildschirmgröße Fernbedienung Antenne Kanäle Audioausgang Frequenzgang Leistungsaufnahme Stromquelle Luftfeuchtigkeit der Betriebsumgebung 10 ~ 75% Betriebstemperatur Lagertemperatur ABMESSUNGEN: B x H x T (mit Lautsprechern) 364 x 180 x 60 mm B x H x T (ohne Lautsprecher) 268 x 180 x 60 mm Gewicht 6 4 0 x 2 2 0... - Page 39 CONTENTS Introduction Cautions and Warnings Contents Indoor Installation Car Installation Remote Control DVD-Player System Operation Watching TV Playing a Video Game Use Headphones Support Home TV Support External Speaker Specifications Guarentee conditions, warranty card p. 41 p. 41 p. 48 p.
- Page 40 Notice: An LCD panel and/or video monitor may be installed in a motor vehicle and visible to the driver if the LCD panel or video monitor is used for vehicle information, system control, rear or side observation or naviga- tion. If the LCD panel or video monitor is used for television reception, video or DVD play, the LCD panel or video monitor must be installed so that these features will only function when the vehicle is in “park”...
-
Page 41: Introduction
A. Introduction Congratulation for selecting this multi-media system, which features a 9” LCD TV/Monitor and DVD/MP3/CD Player. It utilizes the latest state of the art electronics and is designed for use in home, offices, hotels and vehicles. The unit is compact so that you can take it with you anywhere and is designed for easy installation. - Page 42 9. Water – DO NOT use this product near water. For example, avoid placing it near a bathtub, washbowl, kitchen sink, or laundry tub, in a wet basement, or near a swimming pool, etc… 10. Cabinet Slots – NEVER push objects or any kind into the unit through the cabinet slots as they may touch dangerous voltage points or short out parts that could result in a fire or electric shock.
- Page 43 14. Power Sources – This product should be operated only from the type of power source indicated on the rear panel. If you are not sure of the type of power supply to your home consult your product dealer or local power company. 15.
- Page 44 19. Replacement parts – When replacement parts are required, be sure the service technician has used replace- ment parts specified by the manufacturer or have the same characteristics as the original part. UNAUTHORIZED substitution may result in fire, electric shock or other haz- ards.
- Page 45 24. Safety Caution The Lightning flash with the arrowhead symbol within an equilateral triangle is intended to alert the user to the pres- ence of uninsulated “DANGEROUS VOLTAGE” within the product’s enclosure that may be of sufficient magnitude to constitute a risk or electric shock to persons. The Exclamation point within an equilateral triangle is intended to alert the user to the presence of important operating and maintenance (servicing instructions in the...
- Page 46 1. Reorient or relocate the TV antenna 2. Increase the separation between TV and other equipment. 3. Connect TV into separate outlet from equipment. 4. Consult the dealer or an experienced radio/TV technician for help FCC Caution: Any changes or modifications not expressly ap- proved by the party responsible for compliance could void the user’s authority to operate this equipment 26.
- Page 47 27. DVD CAUTION: This unit employs a laser system. To ensure the proper use of the unit, read this manual carefully and keep it for future reference. To prevent direct exposure to the laser radiation, do not open the cabinet. Invisible laser radiation could be present when the cabinet is opened or the interlocks are defeated.
-
Page 48: Contents
C. Contents 1. TV /DVD Combination Unit with Speakers 2. Remote Control 3. AC to DC Adapter 4. Cig. Lighter Adapter 5. Storage Bag and Mounting Bag w/Mounting Straps 6. Owner ’s Manual 7. RCA AV Cable connector D. Indoor Installation (Refer to Figure 1) Swing up the rear metal stand and place the unit on a table or other level surface. -
Page 49: Car Installation
E. Car Installation Between two seats (Refer to Figure 2) 1. Take one of the supplied straps from the storage bag and connect the latch to the top metal ring on the mounting bag. Wrap the strap around the base of one the headrests. Attach the “S”... - Page 50 F. Controls/Indicators/Connectors 1. Power On/Off 2. TV Auto Program 3. TV Channel Down 4. TV Channel Up 5. Volume Down 6. Volume Up 7. Picture Select 8. DVD/TV/AV Switch 9. Wide Select 10. DVD Previous 11. DVD Play 12. DVD Next 13.
-
Page 51: Remote Control
G. Remote Controls (Refer to Figure 4) 1. TV/DVD/AUX Select 2. DVD Number Control Select 3. Numbers 0-9 4. TV/CATV Select 5. Mute 6. Picture Select 7. Volume Up/Down (+/-) 8. DVD Eject Button 9. Up/Down-Left/Right/Enter 10. DVD Menu 11. DVD Display 12. -
Page 52: Basic Operation
H. DVD Player 1. Basic Operation POWER EJECT PLAY PAUSE STOP NEXT PREVIOUS FORWARD SCAN REVERSE SCAN SLOW UP/DOWN/LEFT/RIGHT ENTER NUMBERS MENU SUBTITLE AUDIO DISPLAY SETUP Turn the unit ON or OFF Eject and withdraw the disc Resume play mode Go into the standby mode (1 time) Stops at the present playing point / (2 times) Stops playing... - Page 53 2. Menu A DVD is divided into sections called title and chapter. When you play a DVD, a root menu of the disc will appear on the screen of your TV or Monitor. The contents of the menu vary from disc to disc.
- Page 54 c. Press DISPLAY the 3rd time to display the elapsed time for the chapter. The heading will disappear automatically in about 3 seconds. d. Press DISPLAY the 4th time to display the remaining time for the chapter. The heading will disappear automatically in about 3 seconds.
- Page 55 3) Audio During playback, press AUDIO to select the audio language you desire, with the current audio channel number (1) and the total number of audio channels (2) displayed. Press AUDIO again to select another audio language. The audio display will disappear automatically if the AUDIO button isn’t pressed again for 3 sec- onds.
- Page 56 b. During playback, press REPEAT again to repeatedly play the current title. c. During playback, press REPEAT again to repeat ALL chap- ters and titles. d. During playback, press REPEAT a 4th time to cancel the re- peated playing (REPEAT OFF) and resume normal playback. The repeat display will disappear automatically if the RE- PEAT button isn’t pressed again for 3 seconds.
-
Page 57: Playing Audio Cds
4. Playing Audio CDs When playing an audio CD press the DISPLAY button on the remote to view time information. The options below show you what information is available using this function. a. The current track and playing time of that track will be displayed on the screen. - Page 58 d. Press ‘DISPLAY’ three times and TOTAL REMAIN appears along with the cur- rent track playing and the amount of time remaining on the CD. e. Press ‘DISPLAY’ four times and “ DISPLAY OFF ” will appear momentarily then disappear. The CD time Information will not be displayed. 1) Using the Repeat Feature The default mode for the Repeat Feature is OFF.
- Page 59 a. Select TV DISPLAY using UP/DOWN, and then press RIGHT to enter the submenu. Select the TV display mode on the screen using UP/DOWN, and press ENTER to con- firm the setting. Press LEFT to return. * NORMAL/PS: When the player is connected to a normal TV, and a wide picture is shown on the full screen, with a portion that may be cut off automatically.
- Page 60 c. Select ‘SCREEN SAVER’ using the UP/DOWN buttons, *ON: enables screen saver *OFF: disables screen saver (off) *Note: The DVD player will enter the Screen Saver mode after approximate- ly 5 minutes if the same image remains on the screen. Note: MP3 playback contains a counter that prevents the screen saver from activating.
- Page 61 Note: The default password is 3308 and this password is always effective whether you’ve changed it to another new one or not, in case that you forget the new password. To avoid others using it to set the parental level and change the password, you may note this default password by other means and delete it from this manual.
- Page 62 c. Select DISC MENU using UP/DOWN and then press RIGHT to enter the submenu. Select the disc menu language you de- sire using UP/DOWN and then press ENTER to confirm the setting. Press LEFT to return. Note: Language selection is only available for discs re corded in the languages listed in the submenus above.
- Page 63 Press ENTER. If you have changed the parental level, the PASSWORD page will be displayed; otherwise it will not. Input the password in 4 digits, and then press ENTER to confirm the parental level setting. Note: After inserting the disc in the player, if the paren- al setting does not agree with the rating con- tained on the disc, the disc will not play when selected on the main menu.
-
Page 64: Playing Mp3 Discs
e. Select DEFAULTS using UP/DOWN and then press RIGHT to enter the submenu. Press ENTER to make the setting return to the factory-set mode. Note: Default Reset will not effect the Parental Control. f. Select General Setup Page using LEFT/RIGHT; then press LEFT again to enter theExit Setup Menu. -
Page 65: Using The Repeat Feature
MENU Screen Display 1. Press the on the left side of the screen. 2. Press ENTER to select the highlighted folder. The songs avail- able under the folder will be listed. 3. Press STOP First, use the list. Press ENTER to select and begin playback of the high- lighted song. -
Page 66: System Operation
I. System Operation 1. Press POWER to switch the unit on or off. The switch indica- tor will light red and the unit will go to the mode last used and stored in memory. 2. Press DVD/TV/AV to select your desired mode. When switch- ing the mode, the DVD player can memorize the present play- ing point. -
Page 67: Playing A Video Game
3. Press AUTO MEMORY; all channels in TV or CATV mode are searched and tuned and the channels with signals detected are automatically stored. 4. SKIP/SEARCH selects between SKIP and SEARCH mode. In SKIP mode, the TV only stops on channels that are programmed into memo- ry when the CHANNEL UP/DOWN buttons are used. -
Page 68: Specifications
O. Specifications Display Specs: Resolution Viewing Angle Contrast Ratio Brightness Backlight Life Disc Format Color System Screen type Screen size Remote Control Antenna Channels Audio output Frequency response SP Power Input AC Power Source Operating Humidity Operating Temperature Storage temperature Dimensions (W x H x D) w x h x d (w/Speakers) w x h x d (w/o Speakers) -
Page 69: Guarentee Conditions, Warranty Card
INDICE Introduzione Avvisi ed Avvertenze Indice Installazione in ambienti interni Installazione in autovettura Comandi, indicatori, connettori Telecomandi Lettore DVD Riproduzione di CD Audio Configurazione Riproduzione dei dischi con formato MP3 Funzionamento del sistema Funzione TV Utilizzo di videogame Utilizzo di auricolari Funzione Home TV supportata Altoparlanti esterni supportati Specifiche... - Page 70 Avviso: Un pannello LCD e/o un monitor video può essere installato su un vei- colo a motore ed essere visibile dal guidatore se tale pannello o video monitor vengono utilizzati per mostrare informazioni relative al veicolo, al sistema di controllo, per l’osservazione laterale o posteriore o per la navigazione satellitare.
-
Page 71: Introduzione
Introduzione Congratulazioni per aver scelto questo sistema multimediale che unisce il televisore con TV/monitor LCD da 9 pollici al lettore DVD/MP3/CD. Questo apparecchio utilizza tec- nologie elettroniche di ultima generazione ed è stato ideato per poter essere usato in casa, in ufficio, in hotel e in auto. L'unità è compatta, in modo da poter essere trasportata ovunque, ed è... -
Page 72: Avvisi Ed Avvertenze
AVVISI ED AVVERTENZE 1. Lettura delle istruzioni: prima di utilizzare il prodotto, si consiglia di leggere tutte le istruzioni relative alla sicurezza e all'uso. 2. Conservazione delle istruzioni: conservare le istruzioni relative alla sicurez- za e all'uso per successive consultazioni. 3. - Page 73 10. Fessure dell'intelaiatura: NON introdurre oggetti di alcun tipo attraverso le fessure dell'intelaiatura perché potrebbero toccare punti di tensione pericolosi o corto- circuitare dei componenti, provocando incendi o scosse elettriche. NON versare liqui- di di alcun tipo sul prodotto. 11. Aerazione: NON ostruire le aperture di aerazione. Eseguire l'installazione sec- ondo le istruzioni del produttore.
- Page 74 15. Fulmini: per maggiore sicurezza, in caso di temporali o quando l'apparecchio viene lasciato incustodito o inutilizzato per un periodo prolungato di tempo, scollega- re il cavo di alimentazione e il cavo dell'antenna. In questo modo si evitano danni al prodotto dovuti a fulmini e sovraccarichi di tensione.
- Page 75 21. ATTENZIONE: se la batteria viene sostituita in modo inappropriato, si corre il rischio di esplosioni. Sostituire la batteria solo con una dello stesso tipo o di tipo equi- valente. 22. Informazioni importanti relative all'utilizzo di videogame, compu- ter, sottotitoli e altre visualizzazioni di immagini fisse L'uso prolungato di materiale con immagini fisse può...
- Page 76 PER RIDURRE IL RISCHIO DI INCENDI O SCOSSE ELETTRICHE NON RIMUOVERE IL COPERCHIO (O IL PANNELLO POSTERIORE). ALL'INTERNO NON VI SONO COMPONENTI SOSTITUIBILI O RIPARABILI DALL’UTENTE.PER EVENTUALI OPERAZIONI DI MANUTENZIONE, RIVOLGERSI AL PERSONALE QUALIFICATO. Il simbolo con la freccia a forma di fulmine all’interno di un triangolo equilatero segnala la presenza nel prodotto di “TENSIONE PERICOLOSA”...
-
Page 77: Installazione
Avvertenza FCC: qualunque cambiamento o modifica condotto senza il consenso della casa produttrice potrebbe impedire all’utente di far funzionare l’apparecchiatu- 26. INSTALLAZIONE a. Posizione del ricevitore: individuare un luogo con buona visibilità. Non posi- zionare il ricevitore in un punto in cui il monitor venga colpito dai raggi del sole o da altra fonte luminosa. - Page 78 27. AVVERTENZA RELATIVA AL DVD: l'unità utilizza un dispositivo laser. Per uti- lizzare in modo appropriato l'unità, si consiglia di leggere attentamente il presente manuale e di conservarlo per future consultazioni. Per evitare l'esposizione accidenta- le ai raggi laser emessi, tenere chiusa e sigillata l'intelaiatura dell'apparecchio. Infatti, se questa viene aperta o se i dispositivi di bloccaggio vengono allentati, si rischia che fuoriescano radiazioni laser non necessariamente visibili.
-
Page 79: Indice
Indice 1. Unità combinata TV/DVD con altoparlanti 2. Telecomando 3. Adattatore CA/CC 4. Adattatore per accendisigari 5. Sacca da trasporto e supporto di montaggio con relative fascette 6. Manuale per l’utente 7. Connettore cavo AV RCA Installazione in ambienti interni (vedi fig. 1) Ruotare verso l'alto il supporto di metallo posteriore e porre l'unità... -
Page 80: Installazione In Autovettura
Installazione in autovettura Tra due sedili (vedi fig. 2) Fig. 2 1) Estrarre dalla sacca da trasporto una delle fascette in dotazione e collegare il dis- positivo di aggancio all'anello di metallo superiore del supporto di montaggio. Arrotolare la fascetta intorno alla base del poggiatesta di uno dei sedili. Attaccare il gancio a "S"... -
Page 81: Comandi, Indicatori, Connettori
COMANDI, INDICATORI, CONNETTORI (VEDI FIG. 3) 1. Accensione/Spegnimento 2. Programma automatico TV 3. Canale TV in basso 4. Canale TV in alto 5. Volume in basso 6. Volume in alto 7. Selezione dell’immagine 8. Interruttore DVD/TV/AV 9. Selezione Wide 10. DVD precedente 11. -
Page 82: Telecomandi
TELECOMANDO (VEDI FIG. 4) 1. Selezione TV/DVD/AUX 2. Selezione comando numero DVD 3. Numeri (0-9) 4. Selezione TV/CATV 5. Mute 6. Selezione dell’immagine 7. Volume Su/Giù (+/-) 8. Pulsante di estrazione DVD 9. Su/Giù, Sinistro/Destro/Enter 10. Menu DVD 11. Display DVD 12. -
Page 83: Lettore Dvd
Lettore DVD 1. Funzioni principali POWER (ALIMENTAZIONE) EJECT (ESTRAI) PLAY (RIPRODUCI) PAUSE (PAUSA) STOP NEXT (SUCCESSIVO) PREVIOUS (PRECEDENTE) FORWARD SCAN (SCORRERE IN AVANTI) REVERSE SCAN (SCORRERE INDIETRO) SLOW (RALLENTATO) UP/DOWN/LEFT/RIGHT (SU/GIÙ, SINISTRO/DESTRO) ENTER (INVIO) NUMBERS (NUMERI) MENU SUBTITLE (SOTTOTITOLI) AUDIO DISPLAY SETUP Consente di accendere o spegnere l'unità. - Page 84 2. Menu Un DVD è diviso solitamente in varie sezioni chiamate titoli e capitoli. Quando il DVD viene riprodotto sul lettore, sullo schermo della TV o del monitor viene visualizzato il relativo menu principale. I contenuti del menu possono variare in base al disco. Premere MENU durante la riproduzione per visualizzare il menu, quindi premere ENTER (INVIO) o PLAY (RIPRODUCI) per dare inizio alla riproduzione.
- Page 85 b. Premere di nuovo DISPLAY per visualizzare il tempo residuo per il determinato tito- lo. La scritta visualizzata scompare dopo 3 secondi. seconds. c. Premere DISPLAY una terza volta per visualizzare il tempo trascorso per il capitolo. La scritta visualizzata scompare dopo 3 secondi.
- Page 86 d. Premere DISPLAY una quarta volta per visualizzare il tempo residuo per il capitolo. La scritta visualizzata scompare dopo 3 secondi. Premere DISPLAY per la quinta volta per uscire da questa opzione. 2) Sottotitoli Durante la riproduzione, premere SUBTITLE (SOTTOTITOLI) per selezionare la lingua dei sottotitoli desiderata, avendo visualizzati il numero della lingua dei sottotitoli in corso (1) e il numero totale delle lingue dei sottotitoli (2).
- Page 87 3) Audio Durante la riproduzione, premere AUDIO per selezionare la lingua dell'audio desider- ata, avendo visualizzati il numero del canale audio in uso (1) e il numero totale dei canali audio (2). Premere di nuovo AUDIO per selezionare una lingua per l'audio diversa.
- Page 88 c. Durante la riproduzione, premere di nuovo REPEAT (RIPETI) per riprodurre ripetuta- mente tutti i titoli e capitoli. d. Durante la riproduzione, premere REPEAT (RIPETI) una quarta volta per annullare la ripetizione (REPEAT OFF, RIPETIZIONE DISATTIVATA) e ripristinare la riproduzione nor- male.
-
Page 89: Riproduzione Di Cd Audio
Riproduzione di CD Audio Durante la riproduzione di un CD audio, per visualizzare le informazioni sul tempo, premere sul telecomando il pulsante DISPLAY. Le opzioni riportate di seguito mostrano le informazioni disponibili mediante questa funzione. a. Sullo schermo viene visualizzata la traccia attuale e il tempo di esecuzione della trac- cia. - Page 90 c. Premere due volte “DISPLAY”: oltre alla traccia corrente in esecuzione e al tempo complessivo di esecuzione del CD, viene visualizzata anche la scritta TOTAL ELAPSED (TEMPO TOTALE TRASCORSO). d. Premere tre volte “DISPLAY”: oltre alla traccia in esecuzione e al tempo residuo di tutto il CD, viene visualizzata anche la scritta TOTAL REMAIN (TEMPO RESIDUO TOTALE).
- Page 91 1) Utilizzo della funzione Repeat (Ripeti) Per impostazione predefinita, la funzione Repeat (Ripeti) è disattivata. Premere più volte di seguito REPEAT (RIPETI) per modificare le opzioni di ripetizione. • TRACK (TRACCIA): viene ripetuta la traccia in esecuzione. • ALL (TUTTO): viene ripetuto il CD in esecuzione. •...
-
Page 92: Configurazione
CONFIGURAZIONE Premere “SETUP” (CONFIGURA) per visualizzare sullo schermo la pagina principale del menu di configurazione. Premere nuovamente SETUP (CONFIGURA) per uscire dal relativo menu e ripristinare la modalità di riproduzione o stop. 1) Premere ENTER (INVIO) per accedere alla pagina di configurazione general. a. - Page 93 b. Mediante i pulsanti SU/GIÙ, selezionare TV TYPE (TIPO TV) e quindi premere il pul- sante di DESTRA per accedere al menu secondario. Utilizzare i pulsanti SU/GIÙ per selezionare sullo schermo la modalità relativa al tipo di TV e quindi premere ENTER (INVIO) per confermare l’impostazione.
- Page 94 d. Premere il pulsante di SINISTRA per selezionare General Setup Page (Pagina di con- figurazione generale). Premere nuovamente il pulsante di SINISTRA per uscire dal menu di configurazione; quindi premere ENTER (INVIO). e. Per modificare la password, utilizzare i pulsanti SINISTRA/DESTRA e selezionare PASSWORD;...
- Page 95 b. Mediante i pulsanti SU/GIÙ, selezionare SUBTITLE (SOTTOTITOLI) e quindi preme- re il pulsante di DESTRA per accedere al menu secondario. Utilizzare i pulsanti SU/GIÙ per selezionare la lingua dei sottotitoli o l’opzione SUBTITLE OFF (SOTTOTI- TOLI DISATTIVATI) e quindi premere ENTER (INVIO) per confermare l’impostazione. Premere il pulsante di SINISTRA per tornare indietro.
- Page 96 Selezionare mediante i pulsanti SU/GIÙ il livello desiderato dei contenuti non autoriz- zati per i dischi dotati di funzione di blocco o di più livelli. L’elenco parte dal livello inferiore (1, Child) (Minori) a quello più elevato (8, Adult) (Adulti). Premere ENTER (INVIO).
- Page 97 Selezionare YES (SÌ) mediante i pulsanti SINISTRA/DESTRA e premere ENTER (INVIO). Quindi immettere la password a 4 cifre o la password predefinita. e. Mediante i pulsanti SU/GIÙ, selezionare DEFAULTS (VALORI PREDEFINITI) e quindi premere il pulsante di DESTRA per accedere al menu secondario. Premere ENTER (INVIO) per ripristinare le impostazioni predefinite di fabbrica.
-
Page 98: Riproduzione Dei Dischi Con Formato Mp3
RIPRODUZIONE DEI DISCHI CON FORMATO MP3 Il formato MP3 viene utilizzato per memorizzare l’audio digitale. Un brano audio con qualità da CD viene compresso nel formato MP3: questo consente di perdere pochissi- mo in termini di qualità audio e di guadagnare molto in termini di spazio su disco. I dischi CD-R/RW codificati in formato MP3 sono compatibili con questo sistema. - Page 99 Display della schermata del MENU 1. Premere il pulsante per selezionare una cartella dal relativo evento nella parte sinistra dello schermo. 2. Premere ENTER (INVIO) per selezionare la cartella evidenziata. Vengono elencati i brani disponibili nella cartella. 3. Premere prima STOP, quindi utilizzare il pulsante per selezionare un brano dall’elenco.
-
Page 100: Funzionamento Del Sistema
FUNZIONAMENTO DEL SISTEMA 1. Premere POWER (ACCENSIONE) per accendere o spegnere l’apparecchio. L’indicatore dell’interruttore si illumina di rosso e l’unità si attiva nell’ultima modalità uti- lizzata e memorizzata. 2. Premere DVD/TV/AV per selezionare la modalità desiderata. Quando si cambia modalità, il lettore DVD è in grado di memorizzare il punto di riproduzione attuale. 3. -
Page 101: Utilizzo Di Videogame
4. La funzione SKIP/SEARCH (SALTA/CERCA) consente di scegliere le rispettive moda- lità. In modalità SKIP (SALTA), quando si utilizzano i pulsanti per passare da un cana- le all’altro, la TV si blocca soltanto sui canali programmati nella memoria. Se la moda- lità... -
Page 102: Specifiche
SPECIFICHE SPECIFICHE DEL DISPLAY Risoluzione Angolo visivo Rapporto di contrasto Luminosità Durata backlight Formato disco Sistema di colori Tipo di schermo Misura schermo Telecomando Antenna Canali Uscita audio Risposta frequenza SP Alimentazione Alimentazione c.a. Umidità di esercizio Temperatura di esercizio Temperatura di conservazione Dimensioni (L x A x P) lxaxp (con altoparlanti) -
Page 103: Condizioni E Scheda Di Garanzia
La Vostra garanzia Gentile Cliente, grazie per aver acquistato questo prodotto Audiovox, prodotto studiato secondo i più elevati standard di qualità e sottoposto a test rigorosi. Se utilizzato correttamente, esso funzionerà perfettamente per molti anni. La garanzia copre la sostituzione gratuita dei ricambi e la prestazione di manodopera per tutti i prodotti Audiovox di elettronica di consumo venduti in Italia. - Page 104 Congratulations! You have made a wise selection in becoming the owner of a Audiovox Mobile Video equipment. Due to high quality Audiovox products have earned an excellent reputation through the western world. And this high quality standard enables us to grant a 2-years warranty for Audiovox Mobile Video products.
- Page 105 ARANTIEKARTE ARRANTY Typ/ Type Serien-Nr./Serial-No. Name und Anschrift des Händlers /Stempel Name and address of the dealer/stamp Käufer/Customer Name/Name Straße/Street PLZ, Ort /City Land /Country Kaufdatum / buying date Nur gültig in Verbindung mit Ihrer Kaufquittung! No warranty without receipt!
- Page 106 Audiovox Audio Produkte GmbH Lise-Meitner-Str. 9 · 50259 Pulheim Tel.: +49 2234/807-0 · Fax: + 49 2234/807-399 www.audiovox-germany.de...
Need help?
Do you have a question about the D900 and is the answer not in the manual?
Questions and answers