
Subscribe to Our Youtube Channel
Related Manuals for HydroTools 71225


Summary of Contents for HydroTools 71225
- Page 1 #71225 Swimline Swimline ® SAND FILTER & PUMP TOOLS REQUIRED Phillips Screwdriver Flat Head Screwdriver O-Ring Lube...
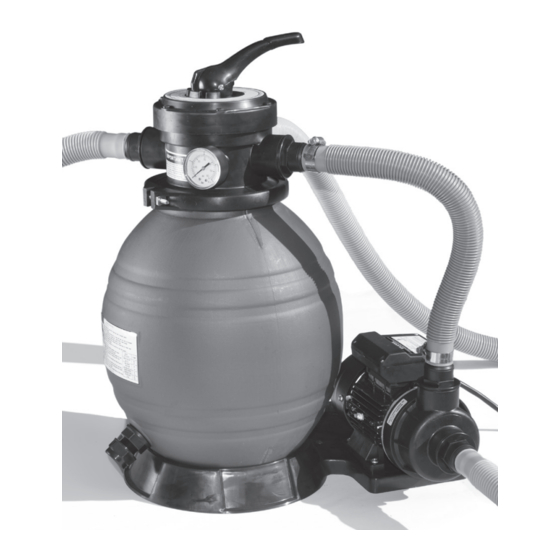
- Page 2 PARTS FOR #71225 SAND FILTER See breakdown on following page for model specific parts list Filter tank Filter base 4 way valve Flange clamp Standpipe Valve o-ring Hose clamps (6) Pressure gauge Straight fitting Teflon tape 2’ filter hose (1) 6’...
- Page 3 PARTS FOR #71225 SAND FILTER BY NUMBER REF# PART# DESCRIPTION 71201 4 WAY VALVE 71202 FLANGE CLAMP & O-RING 71203 STAND PIPE & FILTER ASSEMBLY 71204 DRAIN PLUG & O-RING 71205 STRAIGHT FITTING & O-RING 71206 PUMP...
- Page 4 ASSEMBLY INSTRUCTIONS FOR SAND FILTER NOTE: Filter may be partially assembled; however, nothing has been properly tightened. DO NOT operate filter system without completing assembly instructions! STEP ONE - GETTING STARTED Fig. 1 • Remove the valve (Fig.1) from the box and place it to the side until instructed to attach it.
- Page 5 STEP TWO - ATTACH DRAIN ASSEMBLY • If drain assembly (Fig. 3) is all together, take Fig. 3 Threads it apart. Take one rubber gasket and put over threaded part of the drain assembly. Flat part of gasket must be flush against sealing plate. This side inside tank Gasket Sealing Plate...
- Page 6 STEP THREE - ATTACH THE PUMP The filter and pump should be attached to the base prior to filling the tank with sand as it will be difficult to maneuver after the tank is full. • Allign the pump motor with the four holes that match up to the filter base.
- Page 7 STEP FOUR - ADDING SAND • Before filling tank with sand, align nub on bottom of tank into notched out piece of the base, twist to the right til snug. (Fig. 12) Fig. 12 • Place standpipe inside the filter, cover standpipe with the round plastic standpipe protector device to prevent sand from entering...
- Page 8 STEP FIVE - INSTALLING VALVE (continued) • Clean off any sand or debris on top of filter Fig. 15 and position valve over the opening of the standpipe. Valve will slide ONTO standpipe when positioned properly in tank (Fig. 15). Push down firmly to make sure valve slides on all the way.
- Page 9 STEP FIVE - INSTALLING VALVE (continued) • The clamp should sit flat around the lip of the tank and edge of valve. If it is not sitting flat the clamp will leak. (Fig. 18) Fig. 18 • Make sure that the screws of the clamp are lined up with the seams of the tank.
- Page 10 STEP SEVEN - OPERATING THE FILTER NOTE: Your filter cannot be run if the water is not at the proper level in the pool. Running the filter without water can cause serious damage to your pump and filter system. • Prime filter prior to starting up filter system. DO NOT turn pump on until system has been primed, you can damage your pump.
- Page 11 TROUBLESHOOTING SHORT CLOUDY WATER FLOW FILTER CYCLES WATER 1. Check skimmer basket 1. Check for algae in pool 1. Check chlorine, pH and total alkalinity levels for excess debris and superchlorinate as required. and adjust as required. 2. Check for restrictions in intake and discharge 2.
- Page 12 Swimline Swimline ® International Leisure Products, Inc. 191 Rodeo Drive, Edgewood, New York 11717 Tel: 1.631.254.254.2155 • Fax: 1.631.254.2363 E-Mail: info@swimlinecorp.com www.swimlinecorp.com...
Need help?
Do you have a question about the 71225 and is the answer not in the manual?
Questions and answers
where do i get a replacement
drain plug for 71225 pump
what is the longest duration you can run pump at a time