Table of Contents
Advertisement
Quick Links
Model Numbers:
SA-20WB-HPE
SA-20WB-LPE
SA-20WT-HPE
SA-20WT-LPE
SA-30WT-HPE
SA-30WT-LPE
Important Precautions:
The Solaro Aire™ attic ventilation system is fully functional right
out of the box. THE FAN WILL BEGIN TO OPERATE AS SOON AS
IT IS EXPOSED TO THE SUN. PLEASE KEEP HANDS AND TOOLS
AWAY FROM THE BLADE DURING THE INSTALLATION.
Helpful Hints:
• When determining the location of the solar panel, try to face the
panel towards the equator (South in the Northern Hemisphere or
North in the Southern Hemisphere).
• Avoid potential problems such as shading from large objects,
large trees, or other houses which may cause shading during cer-
tain times of the day.
• WARNING: Avoid all contact with the blades. Even a small bend
in the blades can cause severe vibration & premature motor failure.
Components & Parts List:
SA-20WB-HP
SA-20WB-LP
SA-20WT-HP
SA-20WT-LP
SA-30WT-HP
SA-30WT-LP
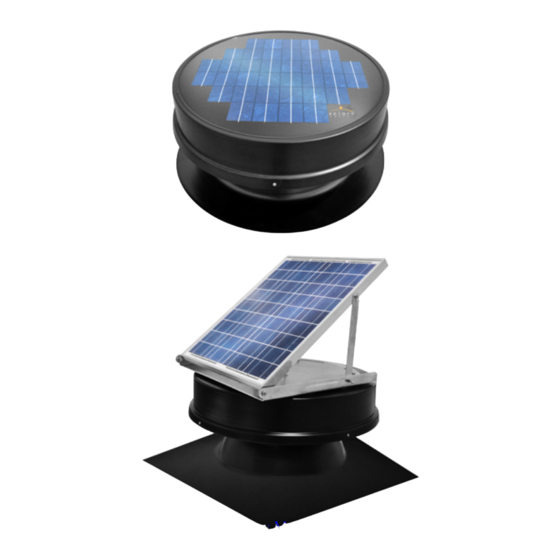
A.
Solaro Aire™ Embedded Series
OR
Solaro Aire™ Tilt Series
™
WARNING: Take caution during installation. Please
read through ENTIRE packet before performing
any work. Not following the instructions can void
the warranty and/or cause serious injury. For
professional help, please call 1-888-355-5SUN
• Do not cut any structural members in the house
• Always measure twice and cut once.
• Installation of the Solaro Aire™ should be centered on the roof.
• The center of the unit should be about 2ft ( 0.6 m) down from
roof ridge for maximum performance.
• Take precaution while working on the roof and with tools.
Tools Needed:
• Drill
• Hammer
• Screwdriver
• Measuring Tape
• Pencil
• Utility Knife
B.
• F-030: (6) 1.5" Dual thread rubber washer screw
• Reciprocating Saw
• Caulk/Caulking Gun
• Flat Bar
• Safety Goggles
• Stud Finder
Fan Install Pack
Advertisement
Table of Contents

Related Manuals for Solaro Energy SA-20WB-HPE

Summary of Contents for Solaro Energy SA-20WB-HPE
- Page 1 ™ Model Numbers: SA-20WB-HPE SA-20WB-HP SA-20WB-LPE SA-20WB-LP WARNING: Take caution during installation. Please read through ENTIRE packet before performing SA-20WT-HPE SA-20WT-HP any work. Not following the instructions can void SA-20WT-LPE SA-20WT-LP the warranty and/or cause serious injury. For professional help, please call 1-888-355-5SUN...
- Page 2 Installation: Please allow up to an hour for installation. Components and hardware are referenced in each step to the corresponding letters on the parts list. (See components and parts list). NOTE: Most rafters are spaced between 16” (41cm) to 24”(60.96cm) on center. Best performance will be achieved by plac- ing the solar attic fan centered between the rafters.
- Page 3 Step 5: Clearance the Shingles • Cut a horizontal 4” (10cm) slit at the 3 o’clock and 9 o’clock positions using a razor knife. These slits allow the solar attic fan flashing to be slid up under the upper courses of shingles. •...
- Page 4 Step 9: Screw Fan Down • Screw the flashing down using the 6 hex head, rubber washer screws (F-030) included. • Place the screws about 2” (5cm) in from the edge in the 2 o’clock, 4 o’clock, 6 o’clock, 8 o’clock, 10 o’clock, and 12 o’clock positions.
Need help?
Do you have a question about the SA-20WB-HPE and is the answer not in the manual?
Questions and answers