Table of Contents
Advertisement
CONTENTS
4.1. PRODUCT SPECIFICATIONS
CS-ME7CKPG
CS-ME10CKPG
CS-ME12CKPG
CS-ME14CKPG
CS-ME18CKPG
CU-2E15CBPG
CU-2E18CBPG
CU-3E23CBPG
CU-4E27CBPG
Page
3
5.1. INDOOR UNIT (CS-
3
3
3
4
4
5
7
8
8
10
12
© 2002 Matsushita Electric Industrial Co., Ltd. All
rights
distribution is a violation of law.
Order No: RAC0209005C2
Room Air Conditioner
reserved.
Unauthorized
Page
12
13
14
15
16
16
17
18
18
19
copying
and
Advertisement
Table of Contents

Related Manuals for Panasonic CS-ME7CKPG


Summary of Contents for Panasonic CS-ME7CKPG
-
Page 1: Table Of Contents
Order No: RAC0209005C2 Room Air Conditioner CS-ME7CKPG CS-ME10CKPG CS-ME12CKPG CS-ME14CKPG CS-ME18CKPG CU-2E15CBPG CU-2E18CBPG CU-3E23CBPG CU-4E27CBPG CONTENTS Page Page 1 Features 5.1. INDOOR UNIT (CS- 2 About Lead Free Solder (PbF) ME7CKPG/ME10CKPG/ME12CKPG/ME14CKPG/ME18CK 2.1. DISTINCTION OF PbF P.C. BOARD 2.2. CAUTION 5.2. OUTDOOR UNIT (CU-2E15CBPG/2E18CBPG) 3 Functions 5.3. - Page 2 CS-ME7CKPG / CS-ME10CKPG / CS-ME12CKPG / CS-ME14CKPG / CS-ME18CKPG / CU-2E15CBPG / CU-2E18CBPG / CU-3E23CBPG / CU-4E27CBPG 8 Wiring Diagram 12 Installation Instruction 8.1. INDOOR UNIT 12.1. INDOOR UNIT 8.2. OUTDOOR UNIT (CU-2E15CBPG/2E18CBPG) 12.2. OUTDOOR UNIT (CU-2E15CBPG/2E18CBPG) 8.3. OUTDOOR UNIT (CU-3E23CBPG/CU-4E27CBPG) 12.3.
-
Page 3: Features
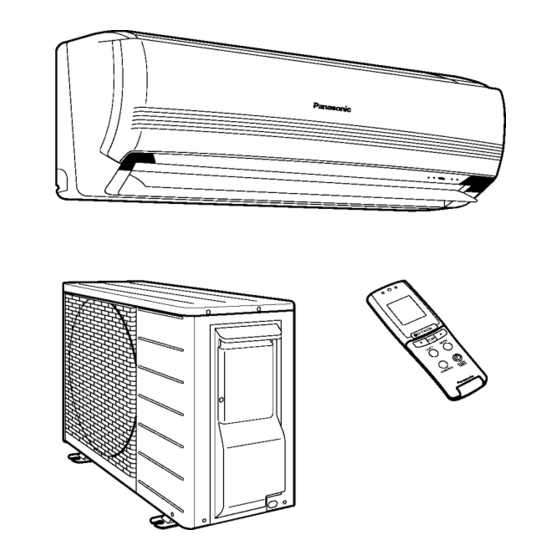
CS-ME7CKPG / CS-ME10CKPG / CS-ME12CKPG / CS-ME14CKPG / CS-ME18CKPG / CU-2E15CBPG / CU-2E18CBPG / CU-3E23CBPG / CU-4E27CBPG 1 Features · Product − − − − A single OUTDOOR unit enables air conditioning of up to four separate rooms − − − − Inverter controlled for High energy efficiency and optimal comfort −... -
Page 4: Functions
CS-ME7CKPG / CS-ME10CKPG / CS-ME12CKPG / CS-ME14CKPG / CS-ME18CKPG / CU-2E15CBPG / CU-2E18CBPG / CU-3E23CBPG / CU-4E27CBPG 3 Functions 3.1. REMOTE CONTROL... -
Page 5: Indoor Unit
CS-ME7CKPG / CS-ME10CKPG / CS-ME12CKPG / CS-ME14CKPG / CS-ME18CKPG / CU-2E15CBPG / CU-2E18CBPG / CU-3E23CBPG / CU-4E27CBPG 3.2. INDOOR UNIT... - Page 6 CS-ME7CKPG / CS-ME10CKPG / CS-ME12CKPG / CS-ME14CKPG / CS-ME18CKPG / CU-2E15CBPG / CU-2E18CBPG / CU-3E23CBPG / CU-4E27CBPG...
-
Page 7: Outdoor Unit
CS-ME7CKPG / CS-ME10CKPG / CS-ME12CKPG / CS-ME14CKPG / CS-ME18CKPG / CU-2E15CBPG / CU-2E18CBPG / CU-3E23CBPG / CU-4E27CBPG 3.3. OUTDOOR UNIT... -
Page 8: Product Specifications
CS-ME7CKPG / CS-ME10CKPG / CS-ME12CKPG / CS-ME14CKPG / CS-ME18CKPG / CU-2E15CBPG / CU-2E18CBPG / CU-3E23CBPG / CU-4E27CBPG 4 Product Specifications 4.1. PRODUCT SPECIFICATIONS 4.1.1. Indoor Unit Model name CS-ME7CKPG CS-ME10CKPG CS-ME12CKPG CS-ME14CKPG CS-ME18CKPG Type Wall Mounted Wall Mounted Wall Mounted... - Page 9 CS-ME7CKPG / CS-ME10CKPG / CS-ME12CKPG / CS-ME14CKPG / CS-ME18CKPG / CU-2E15CBPG / CU-2E18CBPG / CU-3E23CBPG / CU-4E27CBPG 4.1.2. Outdoor Unit Model name CU-2E15CBPG CU-2E18CBPG CU-3E23CBPG CU-4E27CBPG Indoor-units Combination 2.2 kW + 2.2 kW 3.2 kW + 3.2 kW 2.8 kW + 3.2 kW + 3.2 kW + 3.2 kW +...
-
Page 10: Approximate Cooling And Heating Capacities
CS-ME7CKPG / CS-ME10CKPG / CS-ME12CKPG / CS-ME14CKPG / CS-ME18CKPG / CU-2E15CBPG / CU-2E18CBPG / CU-3E23CBPG / CU-4E27CBPG 4.2. APPROXIMATE COOLING AND HEATING CAPACITIES... - Page 11 CS-ME7CKPG / CS-ME10CKPG / CS-ME12CKPG / CS-ME14CKPG / CS-ME18CKPG / CU-2E15CBPG / CU-2E18CBPG / CU-3E23CBPG / CU-4E27CBPG...
-
Page 12: Dimensions
CS-ME7CKPG / CS-ME10CKPG / CS-ME12CKPG / CS-ME14CKPG / CS-ME18CKPG / CU-2E15CBPG / CU-2E18CBPG / CU-3E23CBPG / CU-4E27CBPG 5 Dimensions 5.1. INDOOR UNIT (CS- ME7CKPG/ME10CKPG/ME12CKPG/ME14CKPG/ME18CKPG) -
Page 13: Outdoor Unit (Cu-2E15Cbpg/2E18Cbpg)
CS-ME7CKPG / CS-ME10CKPG / CS-ME12CKPG / CS-ME14CKPG / CS-ME18CKPG / CU-2E15CBPG / CU-2E18CBPG / CU-3E23CBPG / CU-4E27CBPG 5.2. OUTDOOR UNIT (CU-2E15CBPG/2E18CBPG) -
Page 14: Outdoor Unit (Cu-3E23Cbpg)
CS-ME7CKPG / CS-ME10CKPG / CS-ME12CKPG / CS-ME14CKPG / CS-ME18CKPG / CU-2E15CBPG / CU-2E18CBPG / CU-3E23CBPG / CU-4E27CBPG 5.3. OUTDOOR UNIT (CU-3E23CBPG) -
Page 15: Outdoor Unit (Cu-4E27Cbpg)
CS-ME7CKPG / CS-ME10CKPG / CS-ME12CKPG / CS-ME14CKPG / CS-ME18CKPG / CU-2E15CBPG / CU-2E18CBPG / CU-3E23CBPG / CU-4E27CBPG 5.4. OUTDOOR UNIT (CU-4E27CBPG) -
Page 16: Refrigeration Cycle Diagram
CS-ME7CKPG / CS-ME10CKPG / CS-ME12CKPG / CS-ME14CKPG / CS-ME18CKPG / CU-2E15CBPG / CU-2E18CBPG / CU-3E23CBPG / CU-4E27CBPG 6 Refrigeration Cycle Diagram 6.1. OUTDOOR UNIT (CU-2E15CBPG/2E18CBPG) -
Page 17: Outdoor Unit (Cu-3E23Cbpg/Cu-4E27Cbpg)
CS-ME7CKPG / CS-ME10CKPG / CS-ME12CKPG / CS-ME14CKPG / CS-ME18CKPG / CU-2E15CBPG / CU-2E18CBPG / CU-3E23CBPG / CU-4E27CBPG 6.2. OUTDOOR UNIT (CU-3E23CBPG/CU-4E27CBPG) -
Page 18: Block Diagram
CS-ME7CKPG / CS-ME10CKPG / CS-ME12CKPG / CS-ME14CKPG / CS-ME18CKPG / CU-2E15CBPG / CU-2E18CBPG / CU-3E23CBPG / CU-4E27CBPG 7 Block Diagram 7.1. INDOOR UNIT... -
Page 19: Outdoor Unit (Cu-2E15Cbpg/2E18Cbpg)
CS-ME7CKPG / CS-ME10CKPG / CS-ME12CKPG / CS-ME14CKPG / CS-ME18CKPG / CU-2E15CBPG / CU-2E18CBPG / CU-3E23CBPG / CU-4E27CBPG 7.2. OUTDOOR UNIT (CU-2E15CBPG/2E18CBPG) -
Page 20: Wiring Diagram
CS-ME7CKPG / CS-ME10CKPG / CS-ME12CKPG / CS-ME14CKPG / CS-ME18CKPG / CU-2E15CBPG / CU-2E18CBPG / CU-3E23CBPG / CU-4E27CBPG 8 Wiring Diagram 8.1. INDOOR UNIT... -
Page 21: Outdoor Unit (Cu-2E15Cbpg/2E18Cbpg)
CS-ME7CKPG / CS-ME10CKPG / CS-ME12CKPG / CS-ME14CKPG / CS-ME18CKPG / CU-2E15CBPG / CU-2E18CBPG / CU-3E23CBPG / CU-4E27CBPG 8.2. OUTDOOR UNIT (CU-2E15CBPG/2E18CBPG) -
Page 22: Outdoor Unit (Cu-3E23Cbpg/Cu-4E27Cbpg)
CS-ME7CKPG / CS-ME10CKPG / CS-ME12CKPG / CS-ME14CKPG / CS-ME18CKPG / CU-2E15CBPG / CU-2E18CBPG / CU-3E23CBPG / CU-4E27CBPG 8.3. OUTDOOR UNIT (CU-3E23CBPG/CU-4E27CBPG) -
Page 23: Operation Details (Functions & Protection)
CS-ME7CKPG / CS-ME10CKPG / CS-ME12CKPG / CS-ME14CKPG / CS-ME18CKPG / CU-2E15CBPG / CU-2E18CBPG / CU-3E23CBPG / CU-4E27CBPG 9 Operation Details (Functions & Protection) 9.1. INDOOR UNIT OPERATION 9.1.1. Simultaneous Operation Control 1. Operation modes which can be selected using the remote control unit: Automatic, Cooling, Dry, Heating, Fan operation mode. - Page 24 CS-ME7CKPG / CS-ME10CKPG / CS-ME12CKPG / CS-ME14CKPG / CS-ME18CKPG / CU-2E15CBPG / CU-2E18CBPG / CU-3E23CBPG / CU-4E27CBPG 9.1.2. Room Temperature Control (Compressor Control) The room temperature is adjusted by changing the compressor´s operation frequency in response to the difference between setting temperature of remote control unit and the room temperature (intake air temperature sensor).
-
Page 25: Airflow Direction Control
CS-ME7CKPG / CS-ME10CKPG / CS-ME12CKPG / CS-ME14CKPG / CS-ME18CKPG / CU-2E15CBPG / CU-2E18CBPG / CU-3E23CBPG / CU-4E27CBPG 9.1.3. Airflow direction Control The vertical airflow direction louver is controlled as shown in the table below in response to the operation of the remote control air swing button and the operating conditions. -
Page 26: Indoor Fan Control
CS-ME7CKPG / CS-ME10CKPG / CS-ME12CKPG / CS-ME14CKPG / CS-ME18CKPG / CU-2E15CBPG / CU-2E18CBPG / CU-3E23CBPG / CU-4E27CBPG 9.1.4. Indoor Fan Control · Depending on the airflow selector button setting of the remote control unit and the operating conditions, the operations for indoor fan control are as shown in the table below. - Page 27 CS-ME7CKPG / CS-ME10CKPG / CS-ME12CKPG / CS-ME14CKPG / CS-ME18CKPG / CU-2E15CBPG / CU-2E18CBPG / CU-3E23CBPG / CU-4E27CBPG...
- Page 28 CS-ME7CKPG / CS-ME10CKPG / CS-ME12CKPG / CS-ME14CKPG / CS-ME18CKPG / CU-2E15CBPG / CU-2E18CBPG / CU-3E23CBPG / CU-4E27CBPG 9.1.4.1. Cooling Operation 1. Automatic fan speed This air conditioner comes with a odour removing function. When operation starts or the thermostat is set ON, the fan stops for 40 seconds.
- Page 29 CS-ME7CKPG / CS-ME10CKPG / CS-ME12CKPG / CS-ME14CKPG / CS-ME18CKPG / CU-2E15CBPG / CU-2E18CBPG / CU-3E23CBPG / CU-4E27CBPG 9.1.4.2. Dry Mode Operation 1. Basic fan speed In the cooling zone, the fan speed for cooling operations is used. When it reaches into the dry mode zone, operation is performed at the SLo fan speed.
-
Page 30: Automatic Operation
CS-ME7CKPG / CS-ME10CKPG / CS-ME12CKPG / CS-ME14CKPG / CS-ME18CKPG / CU-2E15CBPG / CU-2E18CBPG / CU-3E23CBPG / CU-4E27CBPG 9.1.5. Automatic Operation · The operation mode (cooling, dry or heating) is selected automatically. · The operation mode is first selected when operation starts and re-selected after each 3-hours period. The temperature, fan speed and airflow direction are set using the remote control. - Page 31 CS-ME7CKPG / CS-ME10CKPG / CS-ME12CKPG / CS-ME14CKPG / CS-ME18CKPG / CU-2E15CBPG / CU-2E18CBPG / CU-3E23CBPG / CU-4E27CBPG · When the operation mode is changed over, the value for t1, t2 and t3 are shifted as follows: Cooling/Soft dry → Heating: -2 °C Heating →...
-
Page 32: Timer Operation
CS-ME7CKPG / CS-ME10CKPG / CS-ME12CKPG / CS-ME14CKPG / CS-ME18CKPG / CU-2E15CBPG / CU-2E18CBPG / CU-3E23CBPG / CU-4E27CBPG 2. Sleep mode operation during heating operation 9.1.7. Timer Operation Delay ON/OFF timer · In accordance with the air-conditioning load, the preparatory operation is performed so that the setting temperature will be reached at the set time. - Page 33 CS-ME7CKPG / CS-ME10CKPG / CS-ME12CKPG / CS-ME14CKPG / CS-ME18CKPG / CU-2E15CBPG / CU-2E18CBPG / CU-3E23CBPG / CU-4E27CBPG 9.1.8. Filter Cleaning Indicator · The blinking filter lamp warns the user that the air filter is dirty. When the air conditioner has operated for a total of 360 hours or so, this lamp blinks during cooling and heating operation and stop.
- Page 34 CS-ME7CKPG / CS-ME10CKPG / CS-ME12CKPG / CS-ME14CKPG / CS-ME18CKPG / CU-2E15CBPG / CU-2E18CBPG / CU-3E23CBPG / CU-4E27CBPG 9.1.9.2. Odour Clear Mode Operation (Off-Season) · By conducting heating operations simultaneously in all the rooms for a short period of time, the odour components are removed, the insides of the indoor units are dried out, and the growth of mold is minimized.
- Page 35 CS-ME7CKPG / CS-ME10CKPG / CS-ME12CKPG / CS-ME14CKPG / CS-ME18CKPG / CU-2E15CBPG / CU-2E18CBPG / CU-3E23CBPG / CU-4E27CBPG (2) Odour clear mode operation (with timer setting) · The POWER lamp lights up if the air conditioner is operated before the odour clear operation, and it goes off if air conditioner has been stop.
-
Page 36: Auto Restart Control
CS-ME7CKPG / CS-ME10CKPG / CS-ME12CKPG / CS-ME14CKPG / CS-ME18CKPG / CU-2E15CBPG / CU-2E18CBPG / CU-3E23CBPG / CU-4E27CBPG 9.1.10. Auto Restart Control · if there is a power failure, operation will automatically be restarted when the power is resumed. It will start with the previous operation mode and airflow direction. - Page 37 CS-ME7CKPG / CS-ME10CKPG / CS-ME12CKPG / CS-ME14CKPG / CS-ME18CKPG / CU-2E15CBPG / CU-2E18CBPG / CU-3E23CBPG / CU-4E27CBPG 9.1.11. Other Indoor Unit Operation Functions · Auto button Proceed with operation when the air conditioner is stopped. (When the auto button is pressed during operation, the air conditioner is stopped.) 1.
- Page 38 CS-ME7CKPG / CS-ME10CKPG / CS-ME12CKPG / CS-ME14CKPG / CS-ME18CKPG / CU-2E15CBPG / CU-2E18CBPG / CU-3E23CBPG / CU-4E27CBPG Setting the air conditioner unit to “B” 1. Press the “AUTO” button for about 11 to 15 seconds. When you hear three short beeps “pep, pep, pep”, release the button.
- Page 39 CS-ME7CKPG / CS-ME10CKPG / CS-ME12CKPG / CS-ME14CKPG / CS-ME18CKPG / CU-2E15CBPG / CU-2E18CBPG / CU-3E23CBPG / CU-4E27CBPG 9.1.12. Self Diagnosis display The diagnostic displays that appear when trouble has occurred can be checked using the remote control unit. When trouble occurs, operation is stopped automatically, and the timer lamp blinks. The diagnosis time has been reduced by warning the user by means of the blinking of the timer lamp.
- Page 40 CS-ME7CKPG / CS-ME10CKPG / CS-ME12CKPG / CS-ME14CKPG / CS-ME18CKPG / CU-2E15CBPG / CU-2E18CBPG / CU-3E23CBPG / CU-4E27CBPG 9.1.12.1. Error Cord Diagnostic Display Abnormality or Protection control Works H 11 Indoor/Outdoor abnormal communication H 12 Indoor unit capacity unmatched H 14 Intake air temp.sensor...
-
Page 41: Outdoor Unit Operation (Cu-2E15Cbpg/2E18Cbpg)
CS-ME7CKPG / CS-ME10CKPG / CS-ME12CKPG / CS-ME14CKPG / CS-ME18CKPG / CU-2E15CBPG / CU-2E18CBPG / CU-3E23CBPG / CU-4E27CBPG 9.2. OUTDOOR UNIT OPERATION (CU-2E15CBPG/2E18CBPG) 9.2.1. Compressor Operation Frequent 9.2.1.1. Cooling, Dry and Heating Operations · The compressor operation frequency is determined by room temperature, capacity rank algebra and model code algebra. -
Page 42: Protection Control
CS-ME7CKPG / CS-ME10CKPG / CS-ME12CKPG / CS-ME14CKPG / CS-ME18CKPG / CU-2E15CBPG / CU-2E18CBPG / CU-3E23CBPG / CU-4E27CBPG 9.2.3. Protection Control 9.2.3.1. Time Delay Safety Control · The compressor does not restart for 3 minutes after stop of compressor. 9.2.3.2. Total Running Current Control 1. - Page 43 CS-ME7CKPG / CS-ME10CKPG / CS-ME12CKPG / CS-ME14CKPG / CS-ME18CKPG / CU-2E15CBPG / CU-2E18CBPG / CU-3E23CBPG / CU-4E27CBPG 9.2.3.5. Over Load Protection Control (Cooling . Dry Mode) · Cooling over load protection control 1. When the temperature of the outdoor unit heat exchanger exceeds 52 °C during a cooling or dehumidifying operation, the compressor frequency is restricted, and when it exceeds 62 °C, the compressor is stopped.
-
Page 44: Outdoor Air Temperature Control
CS-ME7CKPG / CS-ME10CKPG / CS-ME12CKPG / CS-ME14CKPG / CS-ME18CKPG / CU-2E15CBPG / CU-2E18CBPG / CU-3E23CBPG / CU-4E27CBPG 9.2.3.7. 4-way Valve Failure Protection Control (Cooling/Heating Switching Errors) · During a cooling operation 1. If the temperature of the indoor unit heat exchanger exceeds 45 °C 4 minutes after the compressor started, the compressor is stop. - Page 45 CS-ME7CKPG / CS-ME10CKPG / CS-ME12CKPG / CS-ME14CKPG / CS-ME18CKPG / CU-2E15CBPG / CU-2E18CBPG / CU-3E23CBPG / CU-4E27CBPG 9.2.4. Abnormal Wiring or Piping Connection Checking Control 1. Objective To check for Abnormal Wiring or Piping connections during a cooling operation after the air conditioner has been installed.
-
Page 46: Outdoor Unit Operation (Cu-3E23Cbpg/Cu-4E27Cbpg)
CS-ME7CKPG / CS-ME10CKPG / CS-ME12CKPG / CS-ME14CKPG / CS-ME18CKPG / CU-2E15CBPG / CU-2E18CBPG / CU-3E23CBPG / CU-4E27CBPG 9.3. OUTDOOR UNIT OPERATION (CU-3E23CBPG/CU-4E27CBPG) 9.3.1. Room Temperature Control 9.3.1.1. Cooling, Dry and Heating Operations Concerning CU-3E23CBPG and CU-4E27CBPG compressor frequency control 1. Immediately after the compressor has started up during an ongoing operation, the initial frequency is determined on the basis of the information obtained from the heat exchanger capacities of the indoor units (thermostat ON) and the airflows set by their remote controls. - Page 47 CS-ME7CKPG / CS-ME10CKPG / CS-ME12CKPG / CS-ME14CKPG / CS-ME18CKPG / CU-2E15CBPG / CU-2E18CBPG / CU-3E23CBPG / CU-4E27CBPG 9.3.3. Forced Cooling Operation Control · Forced cooling operations can be performed by the outdoor unit. 1. Set the operation mode setting switch (SW2) to COOL.
- Page 48 CS-ME7CKPG / CS-ME10CKPG / CS-ME12CKPG / CS-ME14CKPG / CS-ME18CKPG / CU-2E15CBPG / CU-2E18CBPG / CU-3E23CBPG / CU-4E27CBPG 9.3.4. Wiring Error Check Control The useful wiring error check function automatically corrects Basic knowledge wiring errors using a microcomputer. · The principle operation of this function is as follows: The...
-
Page 49: Installation And Servicing Air Conditioner Using R410A (General Information)
CS-ME7CKPG / CS-ME10CKPG / CS-ME12CKPG / CS-ME14CKPG / CS-ME18CKPG / CU-2E15CBPG / CU-2E18CBPG / CU-3E23CBPG / CU-4E27CBPG 10 Installation and Servicing Air Conditioner Using R410A (General Information) 10.1. OUTLINE 10.1.1. About R410A Refrigerant 1. Converting air conditioners to R410A Since it was declared in1974 that chlorofluorocarbons (CFC), hydro chlorofluorocarbons (HCFC) and other substances pose a destructive danger to the ozone layer in the earthエs upper stratosphere (20 to 40 km above the earth), measures have been... -
Page 50: Tool For Installing / Servicing Refrigerant Piping
CS-ME7CKPG / CS-ME10CKPG / CS-ME12CKPG / CS-ME14CKPG / CS-ME18CKPG / CU-2E15CBPG / CU-2E18CBPG / CU-3E23CBPG / CU-4E27CBPG d. R410A refrigerating machine oil Conventionally, mineral oil or a synthetic oil such as alkylbenzene has been used for R22 refrigerating machine oil. Because of the poor compatibility between R410A and conventional oils like mineral oil, however, there is a tendency for the refrigerating machine oil to collect in the refrigerating cycle. -
Page 51: R410A Tools
CS-ME7CKPG / CS-ME10CKPG / CS-ME12CKPG / CS-ME14CKPG / CS-ME18CKPG / CU-2E15CBPG / CU-2E18CBPG / CU-3E23CBPG / CU-4E27CBPG 10.2.2. R410A Tools 1. Cooper tube gauge for clearance adjustment (used when flaring with the conventional flaring tool (clutch type)) · This gauge makes it easy to set the clearance for the copper tube to 1.0-1.5 mm from the clamp bar of the... - Page 52 CS-ME7CKPG / CS-ME10CKPG / CS-ME12CKPG / CS-ME14CKPG / CS-ME18CKPG / CU-2E15CBPG / CU-2E18CBPG / CU-3E23CBPG / CU-4E27CBPG 5. Charging hose · The pressure resistance of the charging hose has been raised to match the higher pressure of R410A. The hose...
- Page 53 CS-ME7CKPG / CS-ME10CKPG / CS-ME12CKPG / CS-ME14CKPG / CS-ME18CKPG / CU-2E15CBPG / CU-2E18CBPG / CU-3E23CBPG / CU-4E27CBPG 8. Electronic scale for refrigerant charging · Because of the high pressure and fast vaporizing speed of R410A, the refrigerant cannot be held in a liquid...
-
Page 54: Refrigerant Piping Work
CS-ME7CKPG / CS-ME10CKPG / CS-ME12CKPG / CS-ME14CKPG / CS-ME18CKPG / CU-2E15CBPG / CU-2E18CBPG / CU-3E23CBPG / CU-4E27CBPG 10.3. REFRIGERANT PIPING WORK 10.3.1. Piping Materials It is recommended that you use copper and copper alloy jointless pipes with a maximum oil adherence of 40 mg/10m. Do not used pipes that are crushed, deformed, or discolored (especially the inside surface). - Page 55 CS-ME7CKPG / CS-ME10CKPG / CS-ME12CKPG / CS-ME14CKPG / CS-ME18CKPG / CU-2E15CBPG / CU-2E18CBPG / CU-3E23CBPG / CU-4E27CBPG Table 11 R410A flaring dimensions Nominal Outside Wall thickness A (mm) diameter diameter (mm) R410A flaring Conventional flaring tool (mm) tool, clutch type...
-
Page 56: Installation, Transferring, Servicing
CS-ME7CKPG / CS-ME10CKPG / CS-ME12CKPG / CS-ME14CKPG / CS-ME18CKPG / CU-2E15CBPG / CU-2E18CBPG / CU-3E23CBPG / CU-4E27CBPG b. Copper pipes Use only copper pipes with the thickness given in table 10, and with minimal impurities. Because the surface of the pipe is exposed, you should take special care, and also take measures such as marking the pipes to make sure they are easily distinguished from other piping materials, to prevent mistaken use. - Page 57 CS-ME7CKPG / CS-ME10CKPG / CS-ME12CKPG / CS-ME14CKPG / CS-ME18CKPG / CU-2E15CBPG / CU-2E18CBPG / CU-3E23CBPG / CU-4E27CBPG 10.4.2. Transferring (Using New Refrigerant Piping) 1. Removing the unit a. Collecting the refrigerant into the outdoor unit by pumping down The refrigerant can be collected into the outdoor unit (pumping down) by pressing the TEST RUN button, even when the temperature of the room is low.
- Page 58 CS-ME7CKPG / CS-ME10CKPG / CS-ME12CKPG / CS-ME14CKPG / CS-ME18CKPG / CU-2E15CBPG / CU-2E18CBPG / CU-3E23CBPG / CU-4E27CBPG 5. Set the refrigerant cylinder onto the electronic scale, then correct the hose the cylinder and to the connection port for the electronic scale. (1)(2) Precaution: Be sure to set up the cylinder for liquid charging.
- Page 59 CS-ME7CKPG / CS-ME10CKPG / CS-ME12CKPG / CS-ME14CKPG / CS-ME18CKPG / CU-2E15CBPG / CU-2E18CBPG / CU-3E23CBPG / CU-4E27CBPG 10.4.6. Brazing As brazing requires sophisticated techniques and experiences, it must be performed by a qualified person. In order to prevent the oxide film from occurring in the pipe interior during brazing, it is effective to proceed with brazing while letting dry nitrogen gas (N2) flow.
-
Page 60: Installation Information
CS-ME7CKPG / CS-ME10CKPG / CS-ME12CKPG / CS-ME14CKPG / CS-ME18CKPG / CU-2E15CBPG / CU-2E18CBPG / CU-3E23CBPG / CU-4E27CBPG 11 Installation Information 11.1. OUTDOOR UNIT (CU-2E15CBPG/2E18CBPG) 11.1.1. Check Points 11.1.2. The Shapes of the 3-way Valve Caps of the Outdoor Unit have been Changed. -
Page 61: Outdoor Unit (Cu-3E23Cbpg)
CS-ME7CKPG / CS-ME10CKPG / CS-ME12CKPG / CS-ME14CKPG / CS-ME18CKPG / CU-2E15CBPG / CU-2E18CBPG / CU-3E23CBPG / CU-4E27CBPG 11.2. OUTDOOR UNIT (CU-3E23CBPG) 11.2.1. Check Points... -
Page 62: Outdoor Unit (Cu-4E27Cbpg)
CS-ME7CKPG / CS-ME10CKPG / CS-ME12CKPG / CS-ME14CKPG / CS-ME18CKPG / CU-2E15CBPG / CU-2E18CBPG / CU-3E23CBPG / CU-4E27CBPG 11.3. OUTDOOR UNIT (CU-4E27CBPG) 11.3.1. Check Points 11.3.2. The Pipe Diameter for the 4.0 kW or Above Models has been Reduced. · 1/4” and 3/8” pipes are used for models with a rated cooling capacity of up to 5.0 kW. -
Page 63: Piping Length
CS-ME7CKPG / CS-ME10CKPG / CS-ME12CKPG / CS-ME14CKPG / CS-ME18CKPG / CU-2E15CBPG / CU-2E18CBPG / CU-3E23CBPG / CU-4E27CBPG 11.4. PIPING LENGTH (In case of CU-2E15CBPG) -
Page 64: Installation Instruction
CS-ME7CKPG / CS-ME10CKPG / CS-ME12CKPG / CS-ME14CKPG / CS-ME18CKPG / CU-2E15CBPG / CU-2E18CBPG / CU-3E23CBPG / CU-4E27CBPG 12 Installation Instruction 12.1. INDOOR UNIT Required tools for Installation Works 1. Philips screw driver 7. Reamer 14. Torque wrench 2. Level gauge 8. - Page 65 CS-ME7CKPG / CS-ME10CKPG / CS-ME12CKPG / CS-ME14CKPG / CS-ME18CKPG / CU-2E15CBPG / CU-2E18CBPG / CU-3E23CBPG / CU-4E27CBPG Attached accessories. Accessories part Qty. Accessories part Qty. Installation plate Air purifying filter Installation plate fixing screw Solar refreshing deodorizing filter Remote control...
- Page 66 CS-ME7CKPG / CS-ME10CKPG / CS-ME12CKPG / CS-ME14CKPG / CS-ME18CKPG / CU-2E15CBPG / CU-2E18CBPG / CU-3E23CBPG / CU-4E27CBPG HOW TO FIX INSTALLATION PLATE The mounting wall is strong and solid enough to prevent it from the vibration. Wall Wall More than 440 mm More than 425 mm Screw ˇ...
- Page 67 CS-ME7CKPG / CS-ME10CKPG / CS-ME12CKPG / CS-ME14CKPG / CS-ME18CKPG / CU-2E15CBPG / CU-2E18CBPG / CU-3E23CBPG / CU-4E27CBPG INDOOR UNIT INSTALLATION 1. FOR THE RIGHT REAR PIPING Pull out the piping and drain hose Install the Indoor Unit Pull out the Indoor piping...
- Page 68 CS-ME7CKPG / CS-ME10CKPG / CS-ME12CKPG / CS-ME14CKPG / CS-ME18CKPG / CU-2E15CBPG / CU-2E18CBPG / CU-3E23CBPG / CU-4E27CBPG CONNECT THE CABLE TO THE INDOOR UNIT 1. The inside and outside connecting cable can be connected without removing the front grille. 2. Connecting cable between indoor unit and outdoor unit shall be approved polychloroprene sheathed 4 x 1.5 mm...
- Page 69 CS-ME7CKPG / CS-ME10CKPG / CS-ME12CKPG / CS-ME14CKPG / CS-ME18CKPG / CU-2E15CBPG / CU-2E18CBPG / CU-3E23CBPG / CU-4E27CBPG INSTALLATION OF AIR PURIFYING FILTERS CHECK THE DRAINAGE 1. Open the front panel. • Open front panel and remove air filters. 2. Remove the air filters.
-
Page 70: Outdoor Unit (Cu-2E15Cbpg/2E18Cbpg)
CS-ME7CKPG / CS-ME10CKPG / CS-ME12CKPG / CS-ME14CKPG / CS-ME18CKPG / CU-2E15CBPG / CU-2E18CBPG / CU-3E23CBPG / CU-4E27CBPG 12.2. OUTDOOR UNIT (CU-2E15CBPG/2E18CBPG) Attached accessories. Indoor/Outdoor Unit Installation Diagram Accessories part Qty. No. Accessories part Qty. Piping direction Attention not to Installation plate... - Page 71 CS-ME7CKPG / CS-ME10CKPG / CS-ME12CKPG / CS-ME14CKPG / CS-ME18CKPG / CU-2E15CBPG / CU-2E18CBPG / CU-3E23CBPG / CU-4E27CBPG SELECT THE BEST LOCATION (Refer to “Select the best location” section) INSTALL THE OUTDOOR UNIT • After selecting the best location, start installation according to Indoor/Outdoor Unit Installation Diagram.
- Page 72 CS-ME7CKPG / CS-ME10CKPG / CS-ME12CKPG / CS-ME14CKPG / CS-ME18CKPG / CU-2E15CBPG / CU-2E18CBPG / CU-3E23CBPG / CU-4E27CBPG EVACUATION OF THE EQUIPMENT (FOR EUROPE & OCEANIA DESTINATION) WHEN INSTALLING AN AIR CONDITIONER, BE SURE TO EVACUATE THE AIR INSIDETHE INDOOR UNIT AND PIPES in the following procedure.
-
Page 73: Outdoor Unit (Cu-3E23Cbpg/Cu-4E27Cbpg)
CS-ME7CKPG / CS-ME10CKPG / CS-ME12CKPG / CS-ME14CKPG / CS-ME18CKPG / CU-2E15CBPG / CU-2E18CBPG / CU-3E23CBPG / CU-4E27CBPG 12.3. OUTDOOR UNIT (CU-3E23CBPG/CU-4E27CBPG) Accessories Accessories supplied with the outdoor unit: CU-3E23CBPG (A) Drain plug (B) Screw bag (For fixing electrical wire anchor bands) There is on the bottom packing case. - Page 74 CS-ME7CKPG / CS-ME10CKPG / CS-ME12CKPG / CS-ME14CKPG / CS-ME18CKPG / CU-2E15CBPG / CU-2E18CBPG / CU-3E23CBPG / CU-4E27CBPG Outdoor Unit Installation Drawings For installation of the indoor units, refer to the installation manual which was provided with the units. (The diagram shows a wall-mounted indoor unit.)
- Page 75 CS-ME7CKPG / CS-ME10CKPG / CS-ME12CKPG / CS-ME14CKPG / CS-ME18CKPG / CU-2E15CBPG / CU-2E18CBPG / CU-3E23CBPG / CU-4E27CBPG Outdoor Unit Installation Guidelines Where a wall or other obstacle is in the path of outdoor unit’s intake or exhaust airflow, follow the installation guidelines below.
-
Page 76: Installing Outdoor Unit
CS-ME7CKPG / CS-ME10CKPG / CS-ME12CKPG / CS-ME14CKPG / CS-ME18CKPG / CU-2E15CBPG / CU-2E18CBPG / CU-3E23CBPG / CU-4E27CBPG 3P097711-1 (M02B043) Outdoor Unit Installing Outdoor Unit When installing the outdoor unit, refer to “Precautions for Selecting the Location” and the “Indoor/outdoor Unit Installation Drawings.”... - Page 77 CS-ME7CKPG / CS-ME10CKPG / CS-ME12CKPG / CS-ME14CKPG / CS-ME18CKPG / CU-2E15CBPG / CU-2E18CBPG / CU-3E23CBPG / CU-4E27CBPG Flaring the Pipe End (Cut exactly at right angles.) 1. Cut the pipe end with a pipe cutter. Remove burrs 2. Remove burrs with the cut surface facing...
- Page 78 CS-ME7CKPG / CS-ME10CKPG / CS-ME12CKPG / CS-ME14CKPG / CS-ME18CKPG / CU-2E15CBPG / CU-2E18CBPG / CU-3E23CBPG / CU-4E27CBPG Wiring WARNING Do not use tapped wires, stand wires, extensioncords, or starbust connections, as they may cause overheating, electrical shock, or fire. Do not turn ON the safety breaker until all work...
- Page 79 CS-ME7CKPG / CS-ME10CKPG / CS-ME12CKPG / CS-ME14CKPG / CS-ME18CKPG / CU-2E15CBPG / CU-2E18CBPG / CU-3E23CBPG / CU-4E27CBPG Test Run and Final Check Before starting the test run, measure the voltage at the primary side of the safety To test cooling, set for the lowest temperature. To test heating, set for the highest temperature.
-
Page 80: Servicing Information
CS-ME7CKPG / CS-ME10CKPG / CS-ME12CKPG / CS-ME14CKPG / CS-ME18CKPG / CU-2E15CBPG / CU-2E18CBPG / CU-3E23CBPG / CU-4E27CBPG 13 Servicing Information 13.1. TROUBLESHOOTING 13.1.1. Rated Frequency Operation During troubleshooting and servicing, rated compressor operating frequency must be obtained in order to check the specification and technical data. - Page 81 CS-ME7CKPG / CS-ME10CKPG / CS-ME12CKPG / CS-ME14CKPG / CS-ME18CKPG / CU-2E15CBPG / CU-2E18CBPG / CU-3E23CBPG / CU-4E27CBPG...
-
Page 82: Self Diagnosis Display
CS-ME7CKPG / CS-ME10CKPG / CS-ME12CKPG / CS-ME14CKPG / CS-ME18CKPG / CU-2E15CBPG / CU-2E18CBPG / CU-3E23CBPG / CU-4E27CBPG 13.2. SELF DIAGNOSIS DISPLAY 13.2.1. Indoor Unit [Table of diagnosis methods] Symbol Diagnosis Diagnosis method Indoor/Outdoor This trouble display appears when indoor/outdoor unit communication fails to be established after 30 or more abnormal seconds. - Page 83 CS-ME7CKPG / CS-ME10CKPG / CS-ME12CKPG / CS-ME14CKPG / CS-ME18CKPG / CU-2E15CBPG / CU-2E18CBPG / CU-3E23CBPG / CU-4E27CBPG Symbol Diagnosis Diagnosis method Outdoor discharge CU-2E: pipe temp. sensor This trouble display appears when a temperature of under approximately -16 °C or above approximately 200 °C has been detected by the outlet temperature sensor for 2 to 5 seconds.
- Page 84 CS-ME7CKPG / CS-ME10CKPG / CS-ME12CKPG / CS-ME14CKPG / CS-ME18CKPG / CU-2E15CBPG / CU-2E18CBPG / CU-3E23CBPG / CU-4E27CBPG Symbol Diagnosis Diagnosis method Indoor operating unit The restriction on the compressor frequency is started when the indoor unit heat exchanger temperature is freezing between 8 °C and 12 °C.
- Page 85 CS-ME7CKPG / CS-ME10CKPG / CS-ME12CKPG / CS-ME14CKPG / CS-ME18CKPG / CU-2E15CBPG / CU-2E18CBPG / CU-3E23CBPG / CU-4E27CBPG Symbol Diagnosis Diagnosis method Compressor CU-2E: abnormal revolution When the rotation of the compressor is not synchronized with the control signal, the F93 diagnostic display is stored in the memory, and operation stops.
- Page 86 CS-ME7CKPG / CS-ME10CKPG / CS-ME12CKPG / CS-ME14CKPG / CS-ME18CKPG / CU-2E15CBPG / CU-2E18CBPG / CU-3E23CBPG / CU-4E27CBPG Symbol Diagnosis Diagnosis method DC peak detection CU-2E: If the current level exceeds 22.5A after startup, the compressor stops, and it is restarted 3 minutes later. When this occurs on 7 consecutive occasions, operation stops, and the trouble display appears.
- Page 87 CS-ME7CKPG / CS-ME10CKPG / CS-ME12CKPG / CS-ME14CKPG / CS-ME18CKPG / CU-2E15CBPG / CU-2E18CBPG / CU-3E23CBPG / CU-4E27CBPG 13.2.2. OUTDOOR UNIT (CU-3E23CBPG/4E27CBPG)
-
Page 88: Disassembly Of Parts
CS-ME7CKPG / CS-ME10CKPG / CS-ME12CKPG / CS-ME14CKPG / CS-ME18CKPG / CU-2E15CBPG / CU-2E18CBPG / CU-3E23CBPG / CU-4E27CBPG 13.3. DISASSEMBLY OF PARTS 13.3.1. Indoor Unit 1. Remove the control box cover (steel plate). 2. Remove the display P.C. Board (plastic). 3. Disconnect the connectors, rearrange the lead wires, and remove the discharge grille. - Page 89 CS-ME7CKPG / CS-ME10CKPG / CS-ME12CKPG / CS-ME14CKPG / CS-ME18CKPG / CU-2E15CBPG / CU-2E18CBPG / CU-3E23CBPG / CU-4E27CBPG 6. Remove the control board complete. 7. Remove the screw at the particular plate (heat exchanger clamp) on the left of the unit.
- Page 90 CS-ME7CKPG / CS-ME10CKPG / CS-ME12CKPG / CS-ME14CKPG / CS-ME18CKPG / CU-2E15CBPG / CU-2E18CBPG / CU-3E23CBPG / CU-4E27CBPG 9. Remove the four screws that fix the fan motor cover (white), and release the hooks. 10. Hold down the hook of the heat exchanger using a screwdriver or other tool and remove the heat exchanger (while lifting 1, 2).
- Page 91 CS-ME7CKPG / CS-ME10CKPG / CS-ME12CKPG / CS-ME14CKPG / CS-ME18CKPG / CU-2E15CBPG / CU-2E18CBPG / CU-3E23CBPG / CU-4E27CBPG 11. Remove the screw that fix the fan, and then remove the fan motor. 12. Remove the cross-flow fan, and then remove the flucrum.
- Page 92 CS-ME7CKPG / CS-ME10CKPG / CS-ME12CKPG / CS-ME14CKPG / CS-ME18CKPG / CU-2E15CBPG / CU-2E18CBPG / CU-3E23CBPG / CU-4E27CBPG 13.3.2. OUTDOOR UNIT (CU-2E15CBPG/2E18CBPG) 13.3.2.1. Removing the Cabinet Top Plate and Cabinet Front Plate 1. Remove the cabinet top plate (by removing the 4 screws).
- Page 93 CS-ME7CKPG / CS-ME10CKPG / CS-ME12CKPG / CS-ME14CKPG / CS-ME18CKPG / CU-2E15CBPG / CU-2E18CBPG / CU-3E23CBPG / CU-4E27CBPG 13.3.2.3. Removing the Control P.C. Board 6. Remove the control board cover. 7. Remove the 6 screws at the positions on the control P.C. Board indicated by the arrows.
- Page 94 CS-ME7CKPG / CS-ME10CKPG / CS-ME12CKPG / CS-ME14CKPG / CS-ME18CKPG / CU-2E15CBPG / CU-2E18CBPG / CU-3E23CBPG / CU-4E27CBPG 13.3.3. OUTDOOR UNIT (CU-3E23CBPG/CU-4E27CBPG) 13.3.3.1. Removing the Cabinet Top Plate and Cabinet Front Plate I I I I CU-3E23CBPG 1. Remove the cabinet top plate (remove the 4 screws).
- Page 95 CS-ME7CKPG / CS-ME10CKPG / CS-ME12CKPG / CS-ME14CKPG / CS-ME18CKPG / CU-2E15CBPG / CU-2E18CBPG / CU-3E23CBPG / CU-4E27CBPG 13.3.3.2. Remove the Control Board Cover (Right Side Plate for CU-4E27CBPG) I I I I CU-3E23CBPG 3. Remove the control board cover (remove 2 screw).
- Page 96 CS-ME7CKPG / CS-ME10CKPG / CS-ME12CKPG / CS-ME14CKPG / CS-ME18CKPG / CU-2E15CBPG / CU-2E18CBPG / CU-3E23CBPG / CU-4E27CBPG 13.3.3.3. Removing the Control P.C. Board 4. Remove the drip proof cover. 5. Disconnect the connectors (lead wires of the compressor, sensor, and others).
-
Page 97: Technical Data
CS-ME7CKPG / CS-ME10CKPG / CS-ME12CKPG / CS-ME14CKPG / CS-ME18CKPG / CU-2E15CBPG / CU-2E18CBPG / CU-3E23CBPG / CU-4E27CBPG 14 Technical Data 14.1. OPERATION CHARACTERISTICS... - Page 98 CS-ME7CKPG / CS-ME10CKPG / CS-ME12CKPG / CS-ME14CKPG / CS-ME18CKPG / CU-2E15CBPG / CU-2E18CBPG / CU-3E23CBPG / CU-4E27CBPG...
- Page 99 CS-ME7CKPG / CS-ME10CKPG / CS-ME12CKPG / CS-ME14CKPG / CS-ME18CKPG / CU-2E15CBPG / CU-2E18CBPG / CU-3E23CBPG / CU-4E27CBPG...
- Page 100 CS-ME7CKPG / CS-ME10CKPG / CS-ME12CKPG / CS-ME14CKPG / CS-ME18CKPG / CU-2E15CBPG / CU-2E18CBPG / CU-3E23CBPG / CU-4E27CBPG...
- Page 101 CS-ME7CKPG / CS-ME10CKPG / CS-ME12CKPG / CS-ME14CKPG / CS-ME18CKPG / CU-2E15CBPG / CU-2E18CBPG / CU-3E23CBPG / CU-4E27CBPG...
- Page 102 CS-ME7CKPG / CS-ME10CKPG / CS-ME12CKPG / CS-ME14CKPG / CS-ME18CKPG / CU-2E15CBPG / CU-2E18CBPG / CU-3E23CBPG / CU-4E27CBPG...
-
Page 103: Electronic Circuit Diagram
CS-ME7CKPG / CS-ME10CKPG / CS-ME12CKPG / CS-ME14CKPG / CS-ME18CKPG / CU-2E15CBPG / CU-2E18CBPG / CU-3E23CBPG / CU-4E27CBPG 15 Electronic Circuit Diagram 15.1. REMOTE CONTROL Remote Control Transmission Code Change Setting Remarks SEG10 SEG15 At product delivery COM0 SEG16 COM1 SEG17... -
Page 104: Indoor Unit
15.2. INDOOR UNIT INDOOR ETXMJ251X1C ELECTRONIC FUSE 250V 3.15A D3SBA60 SS11V-04350 CONTROLER N3216ZP500T25 ELECTRONIC 250V CONTROLLER TANSH11 3300P 100K 250V (BLACK) UF4005 CWA742966 1/4W 4700P ZNR1 250V 250V 0.01 100K ERZVEAV511 TANSH16 0.22 TANSH12 450V 100K 250V (WHITE) 6.8K 1/4W 4700P 250V 1/4W... - Page 105 INDOOR Timer Table Indoor Microprocessor UPD784956GC-121-8BT Function Time Test mode Pin No. Port No. Description Pin No. Port No. Description 24 hours OFF/ON timer 1 hour 1 min. Cooling FC max 30 min. 3 sec. Buzzer Drive Hot start forced completion 7 min.
-
Page 106: Outdoor Unit (Cu-2E15Cbpg/2E18Cbpg)
15.3. OUTDOOR UNIT (CU-2E15CBPG/2E18CBPG) 2-ROOM OUTDOOR COIL (NH2) CN-PUMP ELECTRONIC 4-WAY VALVES PTC3 CONTROLLER GREEN D4DDE100001 (MAIN) PTC2 D4DDE100001 RY-PWR TERMINAL POWER AC-BLK LF101 FUSE 20.0A COIL BLACK G0B143N00001 C115 HOT1 HOT2 C105 BLACK BLACK 0.047 250VAC TLP620 510K 499K 499K 1/4W 1/4W... - Page 107 2-ROOM OUTDOOR REACTOR GRY2 GRY1 GRAY GRAY DB101 A54D25XB60L LJP101 A67C4053 A67C4054 A67C4054 A67C4053 LJP102 C101 C102 LJP105 LJP106 R100 232K 400V 400V 232K 1/4W 1/4W R101 232K 232K 1/4W 1/4W R117 R105 RB501V-40 R102 T101 232K 100K 1/4W ETXMJ326X1C 232K 1/4W 1/4W LJP103...
- Page 108 2-ROOM OUTDOOR Timer Table Outdoor IC201 Outdoor Microprocessor A52D4956G122 Function Time Test mode Pin No. Port No. Description Pin No. Port No. Description First deice operation time 60 min. 6 sec. Deice operation starting 45 sec. 4.5 sec. Deice forced completion 10 min.
-
Page 109: Outdoor Unit (Cu-3E23Cbpg/Cu-4E27Cbpg)
15.4. OUTDOOR UNIT (CU-3E23CBPG/CU-4E27CBPG) 3, 4-ROOM OUTDOOR S103 S104 TERMINAL BOARD E (GRN/YLW) ECN1 (GRN) AC250V AC250V AC250V D(4) C(3) 0.01 0.01 0.01 AC250V (RED) AC250V 6 mH B(2) A(1) AC250V AC250V AC250V AC230V 0.01 0.01 0.01 50Hz 780NR-14D-201 AC250V 780NR-14D-201 (BLK) 1.5 mH... - Page 110 3, 4-ROOM OUTDOOR DBS25VB60 (YLW) REACTOR HIC7 R204 C205 0.0033 MRM20B ECN2 R120 P1 N1 C201 (BLU) 630V TPCT2 MRM10B 0.22 FU201 AC250V D13 - 16 AC250V 1SS133 R121 AC250V R201 3.15A ETQ19Z60AM 1SS133 S104 TPCT1 C202 C203 C204 450V 450V 450V MRM11B...
-
Page 111: Exploded View & Replacement Parts List
CS-ME7CKPG / CS-ME10CKPG / CS-ME12CKPG / CS-ME14CKPG / CS-ME18CKPG / CU-2E15CBPG / CU-2E18CBPG / CU-3E23CBPG / CU-4E27CBPG 16 Exploded View & Replacement Parts List 16.1. CS-ME7CKPG/ME10CKPG/ME12CKPG/ME14CKPG/ME18CKPG 16.1.1. Exploded View Note: The above exploded view is for the purpose of parts disassembly and replacement. - Page 112 CS-ME7CKPG / CS-ME10CKPG / CS-ME12CKPG / CS-ME14CKPG / CS-ME18CKPG / CU-2E15CBPG / CU-2E18CBPG / CU-3E23CBPG / CU-4E27CBPG 16.1.2. Replacement Parts List <Model: CS-ME7CKPG / CS-ME10CKPG / CS-ME12CKPG / CS-ME14CKPG / CS-ME18CKPG> Ref. Part Name & Description Q’ty Part No. Remarks...
-
Page 113: Cu-2E15Cbpg/2E18Cbpg
CS-ME7CKPG / CS-ME10CKPG / CS-ME12CKPG / CS-ME14CKPG / CS-ME18CKPG / CU-2E15CBPG / CU-2E18CBPG / CU-3E23CBPG / CU-4E27CBPG 16.2. CU-2E15CBPG/2E18CBPG 16.2.1. Exploded View Note: The above exploded view is for the purpose of parts disassembly and replacement. The non-numbered parts are not kept as standard service parts. - Page 114 CS-ME7CKPG / CS-ME10CKPG / CS-ME12CKPG / CS-ME14CKPG / CS-ME18CKPG / CU-2E15CBPG / CU-2E18CBPG / CU-3E23CBPG / CU-4E27CBPG 16.2.2. Replacement Parts List <Model: CU-2E15CBPG / CU-2E18CBPG> Ref. No. Part Name & Description Q’ty Part No. Remarks CU-2E15CBPG CU-2E18CBPG ← ← ← ←...
- Page 115 CS-ME7CKPG / CS-ME10CKPG / CS-ME12CKPG / CS-ME14CKPG / CS-ME18CKPG / CU-2E15CBPG / CU-2E18CBPG / CU-3E23CBPG / CU-4E27CBPG Ref. No. Part Name & Description Q’ty Part No. Remarks CU-2E15CBPG CU-2E18CBPG ← ← ← ← FLARE NUT (1/4) CWT25086 ← ← ← ←...
-
Page 116: Cu-3E23Cbpg
CS-ME7CKPG / CS-ME10CKPG / CS-ME12CKPG / CS-ME14CKPG / CS-ME18CKPG / CU-2E15CBPG / CU-2E18CBPG / CU-3E23CBPG / CU-4E27CBPG 16.3. CU-3E23CBPG 16.3.1. Exploded View Note: The above exploded view is for the purpose of parts disassembly and replacement. The non-numbered parts are not kept as standard service parts. - Page 117 CS-ME7CKPG / CS-ME10CKPG / CS-ME12CKPG / CS-ME14CKPG / CS-ME18CKPG / CU-2E15CBPG / CU-2E18CBPG / CU-3E23CBPG / CU-4E27CBPG 16.3.2. Replacement Parts List <Model: CU-3E23CBPG> Ref. No. Part Name & Description Q’ty Part No. Remarks G G G G SWING COMPRESSOR CW1266081...
- Page 118 CS-ME7CKPG / CS-ME10CKPG / CS-ME12CKPG / CS-ME14CKPG / CS-ME18CKPG / CU-2E15CBPG / CU-2E18CBPG / CU-3E23CBPG / CU-4E27CBPG Ref. No. Part Name & Description Q’ty Part No. Remarks G G G G MOTORIZED EXP. V COIL, ASS’Y CW1313350 COIL, MOTORIZED EXP. VALVE CW1305234 COIL, MOTORIZED EXP.
-
Page 119: Cu-4E27Cbpg
CS-ME7CKPG / CS-ME10CKPG / CS-ME12CKPG / CS-ME14CKPG / CS-ME18CKPG / CU-2E15CBPG / CU-2E18CBPG / CU-3E23CBPG / CU-4E27CBPG 16.4. CU-4E27CBPG 16.4.1. Exploded View Note: The above exploded view is for the purpose of parts disassembly and replacement. The non-numbered parts are not kept as standard service parts. - Page 120 CS-ME7CKPG / CS-ME10CKPG / CS-ME12CKPG / CS-ME14CKPG / CS-ME18CKPG / CU-2E15CBPG / CU-2E18CBPG / CU-3E23CBPG / CU-4E27CBPG 16.4.2. Replacement Parts List <Model: CU-4E27CBPG> Ref. No. Part Name & Description Q’ty Part No. Remarks G G G G SWING COMPRESSOR CW1266081...
- Page 121 CS-ME7CKPG / CS-ME10CKPG / CS-ME12CKPG / CS-ME14CKPG / CS-ME18CKPG / CU-2E15CBPG / CU-2E18CBPG / CU-3E23CBPG / CU-4E27CBPG Ref. No. Part Name & Description Q’ty Part No. Remarks G G G G POWER TRANSISTOR MODULE CW1289921 G G G G THERMISTOR ASS’Y...
Need help?
Do you have a question about the CS-ME7CKPG and is the answer not in the manual?
Questions and answers