Table of Contents
Advertisement
Quick Links
Advertisement
Table of Contents

Related Manuals for KEEWAY QJ50T-21U


Summary of Contents for KEEWAY QJ50T-21U
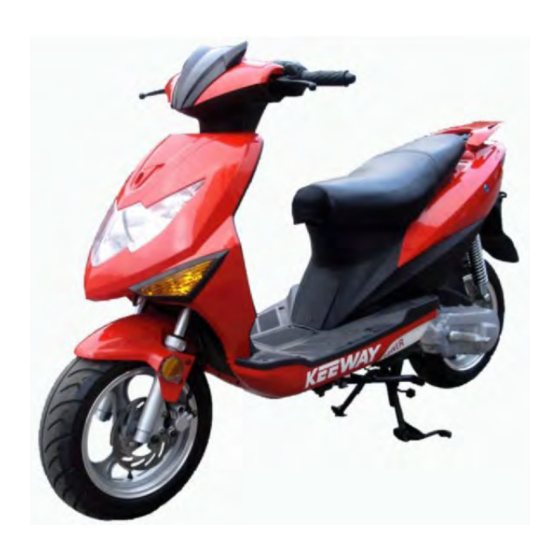
- Page 1 Motorcycle QJ50T-21U Maintenance Manual Qianjiang Motor Corporation Ltd.
-
Page 2: Table Of Contents
Contents Contents ..................................2 Preface ..................................5 Preparing Documents............................6 Inspection/Adjustment ............................38 Inspection and Maintenance of Electrical System ..................... 51 I. Battery/Charging System............................54 1.1 Preparing Documents ........................... 54 1.2 Failure diagnosis ............................55 1.3 Battery ................................. 56 1.4 Charging System ............................57 1.5 Voltage/Current Regulator ........................... - Page 3 6. Body ..................................88 7. Front Wheel / Front Suspension ..........................92 7.1 Preparing Documents ........................... 92 7.2 Failure Diagnosis ............................92 7.3 Front Wheel ..............................93 7.4 Steering Handle ............................95 7.5 Front Fork ..............................96 8. Rear Wheel/Rear Suspension..........................100 8.1 Preparing Documents ..........................
- Page 4 15.1 Preparing Documents ..........................133 15.2 Failure Diagnosis ............................. 133 15.3 Left Crankcase Cover ..........................134 15.4 Drive Face ..............................134 15.5 Clutch/Driven Wheel ..........................136 15.6 Breakdown of Clutch and Driven Wheel ....................137 15.7 Installation ............................... 140 15.8 Kickstart Mechanism ..........................141 16.
-
Page 5: Preface
Please note that photos, pictures or instructions are for your reference only. The actual object may differ from this mentioned here. We will not make notification for any discrepancy. KEEWAY Motor Corporation Ltd. -
Page 6: Preparing Documents
Preparing Documents General Safety Maintenance Rules Specification Table Failure Diagnosis General Safety Carbon monoxide Engine must be started up in a well-ventilated place, not in a closed area. Note Exhaust gas contains poisonous carbon monoxide, which may cause unconsciousness or even death of human. Start up engine in an open place. - Page 7 Maintenance Rules Metric tools are preferable for the maintenance of this motorcycle. Improper tools may cause damage. Clean up the surface of components or assembly parts before removing or opening the shield for maintenance, which can prevent dirt from falling into the engine, chassis or braking system.
- Page 8 Bolts and screws with different length shall be separately used for different assembly parts and shields, and they shall be correctly mounted. Insert a bolt into a hole to check whether it is proper if you are confused. Fill the groove with grease before mounting an oil seal. Check whether the oil seal is smooth or damaged during assembly.
- Page 9 Loose cables threaten electrical safety. Check each cable after it is clamped to another for electrical safety; Wire clamps are not allowed to bend towards welding point; Bind cables at the designated place; Do not deploy cables at the end of frame or at sharp point; Do not deploy cables at the end of bolts or screws;...
- Page 10 Identification 1. The identification number of motorcycle is marked at the frame ① : ;BBB941E?????????. The frame sign and the anti-refitting sticker are fixed at the back of the frame. Take the view from the back of the frame, the frame sign is fixed at the left ②and the on the right③.
-
Page 11: Special Tools
Special Tools Special tools refer to tools which are specially designed for assembling or disassembling some motorcycle parts on special positions. Applicable special tools are necessary for precise adjustment and installation. With them, parts and accessories can be mounted safely, reliably and rapidly, which improves efficiency and saves energy. 1.Tools for repairing the engine Special tools are required for properly disassembling/assembling some engine parts. - Page 12 Fig.1-7 Fig.1-8 Fig.1-9 Fig.1-10 ①handle Fig.1-11 Fig.1-12 ①pliers ②piston Fig.1-13 Fig.1-14...
- Page 13 Fig.1-15 Fig.1-16 2.Tools for repairing the chassis Table and drawing (1-17, 1-18) of ordinary tools and special tools for disassembling/assembling chassis parts are as follows: Table 1-17 Name Remark Torque spanner Fig. 1-19 Inner hexagon spanner Fig. 1-20 Socket spanner Fig.
- Page 14 Fig.1-21 Fig.1-22 Fig.1-23 Fig.1-24 Fig.1-25 Fig.1-26 Fig.1-27 Fig.1-28 (2)Special tools for repairing the chassis: tool for hammering seal of front fork Fig.1-29 (3)Steering nut spanner...
- Page 15 Fig.1-30 3.Tools for electric parts Table and drawings (1-31, 1-32) of special tools for testing electric parts are as follows: Table 1-31 Name Remark Multimeter Fig. 1-33 Ignition tester Fig. 1-34 Table 1-32 (continued) Fig.1-33 Fig.1-34...
- Page 16 Specification(QJ50T-21U) Model QJ50T-21U Engine type QJ1E40QMB-4 Unleaded petrol Length mm 1840 Fuel type (92/95) No. of Width mm cylinder Height mm 1140 ID × stroke 49.2×39.2 Total Wheelbase mm 1270 50cc displacement Forward Engine Startup Electric/kick shaft Weight kg Backshaft...
- Page 17 I.D. of rear brake drum φ110mm (mm) QJ50T-21U...
- Page 18 Failure Diagnosis Diagnosis on failure or difficulty in starting engine Failure or difficulty in starting engine Check ignition system Remove the spark plug and check whether there is carbon fouling between electrode. Sparkover test for spark plug Eliminate carbon fouling Weak spark or no spark between electrode Large blue or bluish purple spark between electrode Screw off spark plug cap and conduct...
- Page 19 1. Check leakage outer 1. Check whether the connections of the engine. air vent in fuel tank 2. Check whether the piston cover is blocked. ring is seized in the groove or 2. Check whether the whether enough fuel filter and the elasticity.
- Page 20 Diagnosis on engine overheating Engine overheating Check whether operation is correct Check whether gasoline grade is Check cooling system improper or gasoline is stored for a long time Check whether the engine works Air-cooled engine at high speed for a long time or with overload during driving Check whether heat sink is spotted or there is too much oil stain...
- Page 21 Remove the spark plug; check the colors of spark plug insulators and judge the proportion of mixed combustible based abnormity The spark plug insulators are black; The spark plug insulators are The spark plug insulators are brown the exhaust muffler emits black white;...
- Page 22 Diagnosis on power shortage of engine Power shortage of engine Raise the main kickstand and suspend wheels; rotate wheels with hands Inflexible rotating Flexible rotating of wheels wheels Check tyre pressure Check whether there is braking drag. Check whether wheel bearing excessively abraded or damaged.
- Page 23 Diagnosis on abnormal idle speed of engine Abnormal idle speed of engine No idle speed High idle speed Unstable idle speed Check compression Check whether the carburetor Check whether ignition is pressure of cylinder throttle is completely closed timely conducted with an with your hand.
- Page 24 Diagnosis on excessive fuel consumption of engine Excessive fuel consumption of engine Check whether operation is correct Raise the main kickstand and Check whether the motorcycle rotate wheels with hands runs with overload or not at economical speed or at low gear.
- Page 25 Diagnosis on dense bluish white smoke from the exhaust muffler of the two-stroke engine The exhaust muffler of the two-stroke engine emits dense bluish white smoke. Check whether the fuel level in the crankcase exceeds the upper limit. Excessive fuel filling into the crankcase. Start up the engine and remove the dipstick when Drain out the excessive part and make it works at high speed.
- Page 26 Diagnosis on transmission gear skip shift Transmission gear skip shift Check whether the positioning wheel spring is ruptured or lacks elasticity. Disassemble crankcase and check whether the engagement Replacement depth for each gear is in accordance with requirements. Proper depth in engaging Insufficient depth in engaging Check whether the engaging end of the cam claw on the engaged gear Check whether the shift fork is...
- Page 27 Diagnosis on malfunction of hydraulic disc brake Malfunction of hydraulic disc brake Check the level of brake fluid inside the brake fluid reservoir. The level of brake fluid is below the The level of brake fluid is beyond the lower limit of the reservoir. lower limit of the reservoir.
- Page 28 Diagnosis on battery charging failure Battery charging failure Remove the connector between the conductor bundle of electromagnetic motor and the cable assembly; measure the resistance between the output conductor terminals of charging coil and check whether it is in accordance with the standard.
- Page 29 Diagnosis on insufficient battery charging Insufficient battery charging Check whether the brake lamp is always light. Adjust or replace the brake Set the ignition switch to “OFF”; remove the negative cable from the battery; lamp switch. connect the negative electrode of the ammeter to the battery negative terminal and the positive electrode to the positive terminal;...
- Page 30 Diagnosis on starter motor failure in rotation Starter motor failure in rotation Turn the ignition switch; press the horn or turn the steering lamp switch. The electric horn does not make The electric horn makes loud sound sound or makes weak sound; the and the steering lamp emits bright steering lamp emits weak light.
- Page 31 Diagnosis on starter motor running weak Starter motor running 起动电机转动无力 weak Turn the ignition switch; press the horn or turn the steering lamp switch. The electric horn does not make The electric horn makes loud sound or makes weak sound; the sound and the steering lamp steering lamp emits weak light.
- Page 32 Diagnosis on motorcycle lamp failure in illumination Motorcycle lamp failure in illumination AC power supply system DC power supply system for illumination for illumination Remove the connector between the conductor Press the horn button or turn the steering lamp bundle of electromagnetic motor and the cable assembly;...
- Page 33 Diagnosis on burnt-out bulbs Burnt-out bulbs Turn the ignition switch; press the horn or turn the steering lamp switch. horn works The horn makes loud sound and abnormally or does not the steering lamp emits bright make sound; the steering light.
- Page 34 Diagnosis on weak light from lamps Weak light from lamps power supply AC power supply system for illumination system for illumination Remove the connector between the conductor bundle Turn the ignition switch; press the horn or turn the of electromagnetic motor and the cable assembly; steering lamp switch.
- Page 35 Diagnosis on steering lamp failure in illumination Steering lamp failure in illumination Steering lamps at one side Steering lamps at one side All the steering lamps are partly not light. are wholly not light. are not light. Remove the lamp covers and Remove the lamp covers Press the horn button and check whether check whether the bulbs are...
- Page 36 Diagnosis on electric horn failure in making sound Electric horn failure in making sound Turn the ignition switch and steering lamp switch; check the work condition of steering lamp. The steering lamp is not The steering lamp emits bright light or emits weak light. light.
- Page 37 Diagnosis on brake lamp failure in illumination Brake lamp failure in illumination Disassemble the cover of brake lamp and check whether the circuit board is burnt. Replace circuit Use a lead wire to short-circuit two terminals or two terminal pins board of brake lamp of brake lamp switch.
-
Page 38: Inspection/Adjustment
Inspection/Adjustment Preparing information Cylinder pressure Periodic Maintenance & Inspection Table Gear oil Engine oil/ Oil filter Replacement of gear oil Fixing steering stem bearing & handlebar Driving belt Inspection & adjustment of throttle cable Free stroke of front/rear brake Air filter Inspection of brake fluid level Spark plug Headlamp... - Page 39 Free stroke of rear brake lever 10-20mm Specification Tyre pressure Front outer 120/70-12 tyre 145-170kpa Tyre pressure unit: Kpa Front rim 3.50×12 QJ50T-21U Rear outer 130/70-12 tyre 170-195kpa Rear rim 3.50×12 Locking nut for front 55-62 N·m Torque wheel spindle...
- Page 40 Periodic Maintenance & Inspection Table Service cycle and time 1000 3000 6000 12000 14500 Tools Inspection item Three Twelve Fifteen month months months months months Air filter Ordinary tools Petrol filter Ordinary tools Fuel filter Ordinary tools Replacement of engine Replacement every 1000KM Ordinary tools fuel...
- Page 41 Throttle inspection Ordinary tools Fuel pipeline inspection Ordinary tools Lighting/metering/electric Visual multimeter devices Main stand bracket Ordinary tools Absorber Ordinary tools Torque force of engine Torque spanner bolts Anticipated Inspection Ignition system—obviously continuous ignition abnormality, engine fire or overheating, which requires inspection and maintenance.
-
Page 42: Air Filter
checking its oil level. •After the engine runs for 2-3 minutes or stops running for about 2-3 minutes, check the oil level. Check the oil level. Add oil to the upper limit when there is an alarm from the oil level sensor. Throttle Cable Inspection/Adjustment Check whether the throttle cable works smoothly. -
Page 43: Spark Plug
* Note • Make sure the air filter cap is well installed before installing the filter. Spark Plug Remove the spark plug. Check whether the spark plug is damaged or stained or has carbon fouling. If yes, please clean it with spark plug cleaner or steel brush. Check spark plug gap. - Page 44 Install it in reverse order. Warning! To prevent short circuit, connect the positive wire first and then the negative wire. Do not remove the battery during commissioning. Otherwise, it may cause damage to inner parts of the vehicle. Check the charging condition (closed circuit voltage) Open the battery box cover.
-
Page 45: Idle Speed Adjustment
Charging current: standard: 0.3A quick: 3.0A Charging time: standard: 10-15 hours quick: 30 minutes Charging completed: open circuit voltage: above 12.8V Carburetor Idle speed adjustment * Note Idle speed adjustment is carried out when the engines warms up. It is carried out when the engines warms up. Operate the engine and connect the engine rotary meter. -
Page 46: Gear Oil
Remove the spark plug. Install the cylinder pressure gauge. At full throttle, measure the cylinder pressure by starting the engine. Following items shall be checked in case of extra-low pressure: —whether the spacer of cylinder cover is damaged; —whether piston ring is damaged; —whether piston ring is worn;... -
Page 47: Gear Oil Replacement
Gear Oil Replacement Remove the dipstick. Remove the drain bolt and gear oil is drained. Install the drain bolt. * Note Make sure whether the bolt is well sealed, slippery or damaged. Add gear oil. Check whether there is oil leakage in any part. Install the dipstick. -
Page 48: Inspection Of Brake Fluid Level
Inspection of Brake Fluid Level Brake to the maximum and check the oil level through the oil sight glass. In case the brake fluid level is at or below the arrow in the picture, certain brake fluid shall be added until it reaches the upper limit. - Page 49 work condition of the clutch. If the motorcycle fails to run or the engine flames out, you should check the clutch block. Replace it if necessary. Front/Rear Suspension System Front Pull the front brake tight; compress the front absorber upwards or downwards for check. Check whether there is oil leakage in the front absorber and whether any component is damaged or loosened.
- Page 50 Check tyre pressure when it is cold. Required pressure Unit: Kpa Specification Tyre pressure Front 120/70-12 outer tyre 145-170 Front rim 3.50×12 QJ50T-21U Rear 130/70-12 outer tyre 170-195 Rear rim 3.50×12 Tyre Specification Front outer 120/70-12 tyre Front rim 3.50×12...
-
Page 51: Inspection And Maintenance Of Electrical System
Fixing Steering Stem Bearing and Handlebar Move the handlebar to confirm there is no wire interference. Rotate the front wheel and move the handlebar freely for check. If the handlear moves unsmoothly, check the steering stem bearing when loosening. Inspection and Maintenance of Electrical System Table of Torque Force of Electrical System Fasteners Name of fastening parts and fasteners Tightening torque(N·m)... - Page 52 Clutch cover bolt of the startup motor Clutch fixing nut of the startup motor Rectifier bolt High-voltage coil fixing bolt Flywheel fixing nut Body guard bolt Charging System...
- Page 53 充电系统 1.12V,3AH battery 2 seat lock 3. horn 4. rectifier 5. power lock assembly 6 CDI igniter 7. relay 8. release resistance 9. flasher 充电系统---charging system...
-
Page 54: Battery/Charging System
I. Battery/Charging System Preparing Documents -------------1.1 Failure Diagnosis -------------1.2 Battery ---------------1.3 Charging System -------------1.4 Voltage/Current Regulator -------1.5 Charging Coil of Magnetor---1.6 Disassembly of Magnetor-----1.7 1.1 Preparing Documents Work Instructions *Note 1. Battery can be charged or discharged repeatedly. If it is placed after discharge, its service life will be shortened and performance is undermined. -
Page 55: Failure Diagnosis
Preparing Principles Item Specifications Capacity/Type 12V-3AH/ dry-charged Voltage Fully charged 13.1V Necessary 12.3V (not working for 1h) (20℃) Magnetor charging Charging current Standard: 0.3A, quick: 3A Charging time Standard: 10-15 hours, quick: 30 mins Capacity 160W/4000rpm Magnetor Impedance of lighting coil Between white-white 0.5Ω-10Ω... -
Page 56: Battery
1.3 Battery 1.3.1 Battery Disassembly Remove fixing screws of the battery box cover. Remove the battery box cover. Remove the negative wire and then the positive wire. Remove the battery. Warning! When the positive wire is disassembled, do not make the tool contact with the frame. -
Page 57: Charging System
• Except emergencies, you should not use emergency charging. • Measure voltage in 30 minutes after the battery is charged. Charging current: standard: 0.3A quick: 3.0A Charging time: standard: 10-15 hours quick: 30 minutes Charging completed: open circuit voltage: above 12.8V 1.4 Charging System 1.4.1 Short-circuit Test Remove the earth lead from the battery. -
Page 58: Voltage/Current Regulator
1.5 Voltage/Current Regulator 1.5.1 Main Wiring Check Remove the 6P plug of the voltage/current regulator. Check conductivity between main wiring terminals as followed.. Item (wire color) Judgment Between With battery Battery(red) and voltage GND of the body Between GND wire (black) and With lead GND of the body Between charging... -
Page 59: Magnetor Charging Coil
1.6 Magnetor charging coil * Note Check the magnetor charging coil on the engine. Check Remove the 3p connector of the magnetor. Measure impedance between the white coil of the magnetor and the body with multimeter. Standard: 1.5-2Ω(20℃) Replace the magnetor coil when the measured value exceeds the standard value. 1.7 Magnetor Lighting Coil *Note Check the magnetor lighting coil on the engine. - Page 60 冷却风扇:cooling fan 风扇盖:fan cover 飞轮:flywheel 1.7.3 Installation Install the stator on the body on the engine. Connect the magnetor joint. Clean up the crankshaft and the taper part of the flywheel. 螺钉 Install the solid key into the groove above the upper crankshaft key and confirm it.
-
Page 61: Ignition System
Ignition System BL/W 点火线圈 火花塞 电子点火器 磁电机 点火系统 1 12V,4AH battery 2 FBT assembly 3 rectifieer 4 power lock assembly 5 CDI igniter 6 starter relay 7 seat lock assembly 8 horn 电子点火器:electronic igniters 磁电机:magnetor 点火线圈:ignition coil 火花塞:sparl plug 点火系统:ignition system... -
Page 62: Preparing Documents
II. Ignition System Preparing Documents--------------2.1 CDI Group ----------------2.4 Failure Diagnosis --------------2.2 Ignition Coil --------------2.5 Ignition System Check----------2.3 Trigger ----------------2.6 2.1 Preparing Documents Work Instructions 1. Check the ignition system following the sequence listed in the table of failure diagnosis. 2. This ignition system is an electronically and automatically angling device. It is solidified in the CDI group and you don’t have to adjust the ignition time. -
Page 63: Failure Diagnosis
Tools Attachments to the Maximum Voltage Table Multimeter 2.2 Failure Diagnosis Non-sparking of spark plug Abnormality Cause (confirm it sequentially as follows) ①The inner resistance is too small and it should be tested by required tester. ②Low speed of the crankshaft. ③... -
Page 64: Ignition System Check
①The inner resistance is too small and it should be tested by required tester. ②Low speed of the crankshaft. ③ Interfered tester (It is normal that voltage is Too low high-voltage always beyond the required value upon several Trigger measurements.) ④... -
Page 65: Cdi Group
* Note Never touch any metal part of the test rod with your finger to avoid electric shock. 2.3.2 Trigger *Note Install the spark plug on the cylinder head and carry out measurement when the compression pressure is normal. Remove 4P and 2P connectors of CDI group. Connect the peak-voltage shunt between the charging coil (blue/white) with 2P connector and the 4P connector (black termincal). -
Page 66: Ignition Coil
2.4.2 Check Remove the CDI Group and check whether the terminal is loose or corrosive. Item Test terminal Standard(20℃) Main switch Red--red/white Conduction when the main switch is “OFF” Trigger Blue/white – white/green 100-200Ω Primary coil of the ignition coil Black/white--black 0.4Ω±10%... -
Page 67: Trigger
2.6 Trigger * Note Check the trigger on the engine. Check Remove the body guard. Remove the trigger terminal. Measure the impedance between the blue/white terminals of the side wire of the engine and the body GND. Standard: 100-200Ω (20℃) Replace the magnetor if the measured value exceeds the standard value. - Page 68 Startup System BRAKE SWITCH BRAKE SWITCH BATTERY RELAY STARTOR MOTOR STARTER SWITCH 启动示意图 1 12V,3AH battery 2 seat lock assembly 3 horn 4 rectifier 5 power lock assembly CDIigniter 7 starting relay 8 release resistance 9 flasher 启动示意图:diagram of startup...
-
Page 69: Startup System
III. Startup System Preparing Documents---------------3.1 Failure Diagnosis -------------------3.2 Startup Motor------------------------3.3 Starter Relay--------------------------3.4 3.1 Preparing documents Work Instructions Disassemble the startup motor on the engine. For the disassembly of the startup clutch, please comply with related regulations. Preparing principles Item Standard Limit for use Length of the brush of the startup 12.5mm... -
Page 70: Failure Diagnosis
3.2 Failure diagnosis Startup failure Weak in rotation No rotation of RE rotary engine of the startup motor of the startup motor • Fuse blow • Low battery • Poor startup clutch • Low battery • Poor wiring contact • Reversal rotation of the startup motor •... - Page 71 3.3.3 Check Check other components. Replace any part with abraded, damaged or burnt surface. Clean the commutator surface if there is metal power attached to it. Check conduction between the surface of other components. Ensure non-conduction between armature shafts of the commutator. Check the conduction of the shell of the startup motor.
-
Page 72: Starter Relay
3.3.5 Installation Install the lead of the startup motor and the dustproof boot. Replace any damaged or abnormal o-ring. Lubricate o-ring with fuel and then install it on the startup motor. Install the wire clip for rear brake. 3.4 Starter Relay 3.4.1 Check Remove the body guard When the main switch is “on”, check there is “click”... - Page 73 3.4.4 Check Connect the starter relay to the battery, and the terminal of the startup motor to the multimeter. Connect fully charged battery between the black wire and the green/yellow wire of the relay. The relay shall sound “click” and the multimeter shall indicate resistance of “zero”.
- Page 74 Bulbs/Switches/Meters Iden. No. of headlamp: E11 005097 Iden. No. of front steering lamp: E11 50R-001555 Iden. No. of tail lamp: E11 50R-001196 Iden. rear steering lamp: E4 50R-000862 Iden. No. of rearview mirror: 001002 1 headlamp 2 front left steering lamp 3 front side reflector 4 meter 5 left rearview mirror assembly...
-
Page 75: Bulbs/Switches/Meters
IV. Bulbs/Switches/Meters Preparing Documents ---------------------4.1 Meters -------------------------4.6 Failure Diagnosis--------------------------4.2 Main Switch ------------------4.7 Replacement of Headlamp Bulbs --------4.3 Horn ---------------------------4.8 Replacement of front steering lamp bulbs------4.4 Handlebar Switch -------4.9 Replacement of tail lamp bulbs---------4.5 4.1 Preparing documents Work Instructions Remove the switch from the vehicle to measure its conduction. 4.2 Failure Diagnosis When the main switch “ON”... -
Page 76: Replacement Of Front Steering Lamp Bulbs
4.3.2 Installation Install the bulb in reverse order. 4.4 Replacement of front steering lamp bulbs Disassembly 4.4.1 Remove the pedal assembly. Remove the front shield, and disconnect the connector. Loosen the fixing nuts of the steering lamp. Remove the bulb socket from the lamp. 4.4.2 Installation Install the bulb in reverse order. -
Page 77: Meter
4.6 Meter Remove the rearview mirror. Remove fixing screws for the decorating covers of the upper/lower handlebar shade. Remove the decorating cover of the upper handlebar shade. Remove the odometer assembly to dismantle the odometer. Install the odometer in reverse order. 。... -
Page 78: Horn
4.8 Horn Check Remove horn wires. It shows good when the horn wire is connected to the battery 4.9 Handlebar Switch Remove the left/right rearview mirror assembly. Remove the fixing screws of the left/right combined switch. Loosen the left/right combined switch. Remove the right grip assembly and the left steering grip. -
Page 79: Inspection And Maintenance Of The Chassis
Inspection and Maintenance of the Chassis Torque Force Table of Chassis Fasteners Name of fastening parts and fasteners Tightening torque(N·m) Fuel pump assembly fixing bolt Mounting bolt of front brake cylinder assembly 22-29 Brake handle fixing bolt Fixing screw of muffler decorating shade Fixing bolt of handlebar weld assembly 40-60 Front wheel spindle locking nut... - Page 80 Front Disc Brake Dia. of front brake disc: 190mm Thickness front brake disc: 4.0 mm Limit for use : 3.0mm Thickness of friction disc:3.0mm Limit for use: 2.0mm Torque for mounting bolt 8: 5-9N·m Torque for mounting nut 25: 22-29N·m Free stroke of brake handle: 10-20mm...
-
Page 81: Rear Drum Brake
Rear Drum Brake Torque for mounting nut 5: 100-113N·m I.D. of brake drum: 110mm Abrasion limit: 111mm Thickness of brake shoe: 4.0mm Limit for use: 3.0mm Free stroke of rear brake handle: 10-20mm Torque for mounting bolt 4: 22-29N·m 1. rear absorber assembly 2. bolt M10Χ1.25Χ40 3. cotter pin 4. bolt M8Χ35 5. nut M14Χ1.5 6. brake shoe assembly 7. -
Page 82: Brake
5. Brake Maintenance instruction ------------------------5.1 Failure diagnosis --------------------------------5.2 Front disc brake ---------------------------------5.3 Rear drum brake --------------------------------5.4 5.1 Maintenance Instruction Work Instructions * Note • Do not stain the brake assembly with oil spots during installation or disassembly. • Clean it with required cleaning agent to maintain the brake performance. * Check brake before riding.* 5.1.1 Specification Item... -
Page 83: Front Disc Brake
Poor brake performance Slow reaction or tight lever 1. Improper adjustment of the brake 1. Improper adjustment of the brake 2. Abraded brake shoe or friction disc assembly 2. Abraded brake shoe or friction disc assembly 3. Improper installation of brake shoe 3. - Page 84 Specification QJ50T-21U Diameter of the front brake disc φ190mm Thickness of the front brake disc 4.0mm * Note • Measurement with micrometer. Measure the thickness of the friction disc assembly. If the thickness of the front brake disc or the friction disc assembly is below the required value for maintenance or it is stained with grease, please replace it.
-
Page 85: Rear Drum Brake
5.4 Rear Drum Brake 5.4.1 Disassembly Remove the muffler. Remove the fixing nuts of the rear wheel. Remove the rear wheel. Remove the brake shoe assembly. * Note • Replace the brake shoe assembly. • If the brake shoe will be used again, mark it before disassembly so as to reinstall it at the original place. - Page 86 Inner diameter of the rear brake drum φ110mm Thickness of rear brake shoe 4.0mm Limit for use: inner diameter of brake drum 111mm brake shoe 3.0mm 制动鼓内径:inner diameter of brake drum 5.4.3 Installation Install the brake shoe assembly. Install the rear wheel. Install the muffler.
- Page 87 Body *Note: Do not damage any body part during disassembly. Do not damage any hook or claw in the body during disassembly. Aim panels in the body at each corresponding groove. Ensure correct installation of each hook or claw part during assembly. Do not damage any part during assembly.
-
Page 88: Body
6. Body Dismantle the body in the following orders: Left/right rearview cover→ odometer shade→ handlebar front shade→ handlebar rear shade→ front fender bracket→ ↓ Front fender→ helmet hook→ license plate cover→ foot protection board → front shield→ headlamp→ rear rack2 ↓... -
Page 89: Front Wheel
Front Wheel Tyre size: outer tyre 120/70-12 Auth. No. of the front wheel outer tyre: E11 75R 000210 Rim size:3.50×12 Rim run-out limit: Vertically: 2.0mm Horizontally: 2.0mm Front wheel spindle bending limit: 0.2mm 1 front wheel spindle 2 left spindle sleeve of front wheel 3 oil seal assembly of front wheel 4 rolling bearing 6201-2RS... -
Page 90: Front Suspension
Front Suspension Torque for mounting N·m bolt 14: 37-44 Torque for mounting N·m bolt 15: 5-9 Number of upper steel balls: 21 pcs Number of lower steel balls:: 21 pcs 1 front right absorber assembly 2 front left absorber assembly 3 weld assembly of lower connecting bracket 4 gland nut 5 dust cover 6 one-piece cup... - Page 91 Handlebar Torque for mounting bolt 2 (handlebar fixing N·m bolts): 40-60 Free stroke of front brake handle: 10-20mm Free stroke of rear brake handle: 10-20mm Free stroke of throttle lever : 2-5mm 1 handlebar weld assembly 2 bolt M10×1.25×45 3 nut M10×1.25 4 left grip 5 throttle lever throttle cable assembly...
-
Page 92: Front Wheel / Front Suspension
7. Front Wheel / Front Suspension Preparing documents-------------------------7.1 Failure diagnosis -----------------------------7.2 Front wheel -----------------------------------7.3 Handlebar -------------------------------------7.4 Front fork assembly -------------------------7.5 7.1 Preparing Documents Before removing the front wheel, you should use jack to support the body bottom and suspend the front wheel which shall not be reversely rotated. -
Page 93: Front Wheel
7.2.2 Unsteady Steering Damaged steering handle bearing. Low tyre pressure. Bending of the front fork or the front wheel spindle. Deformed or unbalanced front tyre. 7.2.3 Front Tyre Shimmy Deformed rim. Loose front wheel bearing. Poor tyre. 7.2.4 Difficulty in Wheel Rolling Failure of wheel bearing or gear housing. -
Page 94: Bearing Replacement
7.3.2 Check 7.3.2.1 Check the Bending of the Wheel Spindle Place the wheel spindle on the V-base and measure the eccentricity ratio with a dial indicator. Limit for use: replacement when beyond 0.2mm 7.3.2.2 Check the Rim Shimmy Place the rim on a precision bracket and check the rim shimmy. -
Page 95: Steering Handle
Install the brake cylinder assembly on the front rim. Tighten the front wheel spindle (shown in the right picture). * Note: for the disassembly and assembly of the front suspension of QJ50T-21U, please see P86. Torque force: Locking nuts for the front wheel spindle 55-62 N·m 7.4 Steering Handle... -
Page 96: Front Fork
Install it in reverse order. Fixing bolt of handlebar weld assembly. Torque force: 40-60 N·m 7.5 Front Fork 7.5.1 Disassembly Remove the front wheel. Remove the body guard. Remove the brake hose and the odometer cable. Remove the handlebar. Remove the gland nut(4)and the dust cover. Remove the one-piece cup and steel balls(7). - Page 97 Install the left/right absorber assembly. Install the handlebar. Install the body guard. Install the front wheel. * Note: for the disassembly and assembly of the front fork of QJ50T-21U, please see P87.
- Page 98 Rear Wheel/Rear Suspension Torque for fixing nut 5 of the rear wheel: 100-113N·m Torque for mounting bolt 4: 22-29N·m Torque for mounting bolt 14: 37-44N·m I.D. of brake hub (friction limit): 111mm Thickness of brake pad (wear limit): 3.5mm 1 outer tyre 130/70-12 2 rim 3.50×12 3 cotter pin 4 bolt M8×31 5 nut M16×1.5 6 brake shoe assembly 7 brake shoe spring...
-
Page 99: Rear Wheel
Rear Wheel Tyre size: 130/70-12 Rim size: 3.50×12 Rim run-out limit: Vertically: 2.0mm Horizontally: 2.0mm Torque of fixing nut 5 of rear wheel: 100-113N·m Auth. No. of rear tyre: E11 75R 000216 1 tubeless tyre 130/70-12 2 rear rim 3 3 valve cap 4 air valve 5 nut M16Χ1.5... -
Page 100: Rear Wheel/Rear Suspension
8. Rear Wheel/Rear Suspension Preparing documents -----------------8.1 Failure diagnosis ----------------------8.2 Rear wheel -----------------------------8.3 Rear absorber --------------------------8.4 8.1 Preparing Documents Work Instructions The surface of the brake drum and brake shoes shall not be stained with oil spots. Preparing Principles Item Standard (mm) Limit for use (mm) Vertically... -
Page 101: Rear Wheel
When the rear wheel shimmy exceeds the limit, the rear wheel bearing is loose, which causes shimmy. Check and replace the rear wheel bearings. 8.3.3 Installation Install the rear wheel in reverse order and lock nuts. Fixing nuts for the rear wheel Torque force: 100-113 N·m QJ50T-21U Reer Wheel... -
Page 102: Rear Absorber
8.4 Rear Absorber 8.4.1 Disassembly Remove the seat and the rear left/right guard. Remove the rear storage box, rear rack assembly and rear fender. Remove fixing bolts of the rear absorber. Remove the rear absorber. 8.4.2 Installation Installation of the rear absorber: Torque force: Upper fixing nut: 37-44 N·m Lower fixing nut: 22-29 N·m... - Page 103 Fuel Tank/Seat Note: disassembly of the fuel tank, turn the fuel switch to “OFF”. Torque for bolt 4: 37-44 N·m Torque for bolt10: 5-9 N·m Torque for bolt12: 5-9 N·m 1 frame weld assembly 2 engine fixed axle 3 nut M12×1.25 4 hanger fixing bolt M10×41×1.25 5 nut M10×1.25...
-
Page 104: Fuel Tank
Fuel Tank Gasoline capacity: 5.0L±0.2L Torque for bolt 2: 5-9N·m Note: for the disassembly of the fuel tank, turn the fuel switch to “OFF”. 1 tank assembly 2 bolt M6×16 3 fuel tank switch assembly 4 fuel tube 1 φ4.5Xφ8.5X80mm thermal-isolating spring 6 clampφ4Xφ8X360mm 8 clamp φ7 9 fuel tube 2 φ4.5Xφ8.5X250mm 10 filter... - Page 105 Seat Torque for bolt 4: 5-9 N·m Torque for bolt 7: 5-9 N·m Torque for bolt 11: 22-29 N·m 1 seat assembly 2 seat hinge assembly 3 seat loose shaft 4 nut M6 5 rubber buffer block 6 helmet box 7 bolt M6×16 8 helmet box base cover 9 rear rack 10 washer 8 11 bolt M8×45...
-
Page 106: Fuel Tank/Seat
9.Fuel Tank/Seat Preparing documents -----------9.1 Failure diagnosis ---------------9.2 Fuel tank/seat -------------------9.3 9.1 Preparing Documents Work Instructions It shall be dismantled far from fire sources. Turn the fuel switch to “OFF” when the fuel tank is dismantled. Tighten all the bolts and screws to the required torque value for assembly. After assembly, check whether all the parts are correctly installed and operated. -
Page 107: Fuel Tank/Seat
9.3 Fuel Tank/Seat 9.3.1 Disassembly Open the seat. Remove (4) fixing bolts of the seat. Remove the machine oil pot guard. Remove the machine oil pot. Remove the seat and the helmet box. Remove the rear storage box rack. Remove the rear left/right guard assembly. Remove the rear rack and helmet box. - Page 108 Disassembly and Installation of Engine torque force of engine stationary axis 55-62N·m torque force of bolt 2: 37-44N·m torque force of bolt4: 22-29N·m 1 engine stationary axis M12×1.25×280 2 bolt M10×1.25×40 3 seat steel rope 4 bolt M8×31 5 rear shock absorber assembly 6 engine assembly 7 rear wheel assembly 8 rear brake rocker arm assembly...
-
Page 109: Removal And Installation Of Motor
10. Removal and Installation of Motor Preparation documents----------------------------------------10.1 Failure diagnosis ----------------------------------------------10.2 Removal of motor/suspension standing clamp------------10.3 Installation of motor------------------------------------------10.4 10.1 Preparation Documents Note Make motorcycle not tilt in removing motor. Remove motor when maintain crankshaft and final drive shaft. When maintaining magnetogenerator, camshaft, carburetor, driving wheel, clutch, driven wheel and oil pump, the motor can stay at the frame and needs not to be removed. -
Page 110: Disassembly Of Motor
10.3 Disassembly of Motor 10.3.1 Disassembly Remove bolt and left crankcase ventilated tube. Disassembly procedures: -remove frame cover. -remove gas filter. -remove primary cable of ignition coil. -remove starter motor cable. -remove fuel tube and vacuum tube. -remove starter valve 2P connector. -remove magnetogenerator/ pulser 3P connector. -
Page 111: Installation
Connect carburetor fuel tube and vacuum tube. Connect the engine suspension assembly to engine assembly. Install bolt and nut of engine suspension temporarily. 10.4 Installation Install according to reversed procedures of “disassembly”. Note: For details, see P104. Torsion value of installation: engine stationary axle 55-62 N·m rear shock absorber standing bolt (upper) 37-44 N·m... -
Page 112: Inspection And Maintenance Of Engine
Inspection and Maintenance of Engine Table of Torque Force of Engine Fasteners Name of fastening parts and fasteners Tightening torque(N·m) Fan cowl locking bolt 10-12 Cylinder cover locking nut 15-18 Spark plug 22-25 Air intake pipe locking bolt 10-12 Cooling fan blade locking screw 10-12 Flywheel locking bolt 45-50... - Page 113 Lubricating System Note: Worm gears and worm wheels shall rotate flexibly without being seized imbalanced tightening. A little axial movement shall allowed for worm wheels. Fuel pump O-ring shall not cut the edge. Machine oil pump plugs shall not leak and sealing gaskets shall be in good condition.
-
Page 114: Lubricaiting System
11.Lubricaiting System Preparation documents-----------11.1 Failure diagnosis -----------------11.2 Machine oil pump ----------------11.3 11.1 Preparation Documents Note: Worm gear and worm wheel shall rotate flexibly without stagnation or single side tightness, while the worm wheel shall allow certain axial movement. Machine oil pump O shape gasket shall not cut the edge. Machine oil pump plugs shall not leak and sealing gasket shall be normal. -
Page 115: Fuel Pump
11.3 Fuel Pump 11.3.1 Disassembly Loose the bolt and remove gas director assembly. 导风罩 gas director 导风罩 Loose screws on fan and remove fan. 风扇 fan 螺钉 screw 风扇 螺钉 Remove magnetogenerator stator, rotor and support. 磁电机定子、转子、支架 Magnetogenerator stator, rotor and support 磁电机定子、... - Page 116 Installation of fuel pump as follows Fuel pump shaft Fuel pump body Plunger spring Plunger Machine oil pump cap Gear 11.3.2 Installation Install according to reversed procedures of removal. 11.3.3 Check Check whether worm wheel teeth are damaged, or whether key slot is damaged.
- Page 117 Carburetor Note: Gasoline very dangerous. Fire is strictly forbidden in workplace. After the carburetor is disassembled, block the intake manifold with cloth in case that any foreign matter enters. 1. screw 2. float chamber 3. needle valve assembly 4. float 5. float pin 6. main metering jet 7. idling jet 8.
-
Page 118: Carburetor
12. Carburetor Preparing documents --------------12.1 Failure diagnosis -------------------12.2 Carburetor disassembly -----------12.3 Carburetor installation ------------12.4 Carburetor adjustment ------------12.5 12.1 Preparing Documents Work Instructions ·Gasoline is very dangerous. Fire is strictly forbidden in workplace. ·Pay special attention to spark. ·Forcibly pulling and bending of wires is not allowed. Distortion and damage will affect their function. ·After the carburetor is disassembled, block the intake manifold with cloth in case that any foreign matter enters. -
Page 119: Carburetor Disassembly
unstable idle speed No fuel in the carburetor Blocked carburetor Blocked oil filter Too dense or dilute mixed gas Blocked oil pipe Secondary air suction into the air intake system Adhesive needle valve Idle speed maladjustment Oil level maladjustment Oil volume maladjustment Blocked idle speed system or electric enrichment valve Too much fuel in the engine Too dilute mixed gas... - Page 120 Electric enrichment valve Fixing screw 组件 Fixing flange 组件 Enrichment valve Check abrasion of electric enrichment 组件 valve and oil needle. Oil needle If it is severe, replace the electric enrichment valve 组件 assembly. Loose screw and remove upper cover. Remove spring and plunger assembly.
-
Page 121: Installation And Adjustment
Screw Float chamber Replace any abrasive or damaged needle valve core. Needle valve Replace the carburetor body if the needle valve seat assembly is abrasive. Float pin Replace any abrasive float tongue. Check whether the carburetor oil needle is abrasive or damaged. - Page 122 Cylinder Cover Note: The cylinder cover bears large bolt pretension to ensure sealing between the cylinder cover and the cylinder body. Pretension: 50Nm 1 spark plug 2 fixing bolt of cylinder cover 3 cylinder cover 4 cylinder gasket 5 cylinder...
-
Page 123: Cylinder Cover
13. Cylinder Cover Preparing documents -----------------13.1 Failure diagnosis ----------------------13.2 Cylinder cover -------------------------13.3 Cylinder cover check -----------------13.4 Installation of cylinder cover --------13.5 13.1 Preparing Documents Work Instructions The cylinder cover bears large bolt pretension to ensure sealing between the cylinder cover and the cylinder body. Pretension: 50Nm. -
Page 124: Cylinder Cover Check
Loosen fixing nuts and spark plug, remove the cylinder cover. Cylinder cover Fixing nut Sprocket cover 13.4 Cylinder Cover Check Check whether cylinder cover is broken. Ruler Check flarness of cylinder cover bottom surface. Limit for use: 0.04mm. Gauge Cylinder cover 13.5 Installation of Cylinder Cover Install it in reverse order. - Page 125 Cylinder Block and Piston Note: all parts shall be cleaned and blown by high pressure air before check. 1. piston 2. piston pin 3. cylinder block 4. cylinder gasket 5. cylinder cover 6. nut 7. spark plug...
-
Page 126: Cylinder Block And Piston
14. Cylinder Block and Piston Preparing documents-----------------14.1 Piston---------------------------14.4 Failure diagnosis --------------------14.2 Piston installation-------------14.5 Cylinder block-----------------------14.3 14.1 Preparing Documents Work Instructions All parts shall be cleaned and blown by high pressure air before check. Function of the cylinder block: cylinder block provides space for gas compression, combustion and expansion, and also guides piston movement. -
Page 127: Failure Diagnosis
Inner diameter of the smaller end of the connecting rod 14.016-14.034 14.06 14.2 Failure Diagnosis Low compression pressure White smoke from the exhaust pipe Abrasive, burnt or ruptured piston Abrasive or damaged piston ring Abrasive or damaged cylinder or piston Abrasive or damaged cylinder or piston Damaged spacer or crankcase leakage Over-high compression pressure... -
Page 128: Piston
14.4 Piston 14.4.1 Disassembly Remove the retainer ring of the piston. Note: during assembly, do not make the retainer ring fall into the crankcase. Remove the piston pin and the piston. Piston pin, retainer Check the piston, piston pin and piston ring. Remove the piston ring. - Page 129 Measure the outer diameter of the piston pin Limit for use: 11.96mm. clearance between the piston pin holr an the piston pin Limit for use:0.02mm. Measure the outer diameter of the piston. Note: The measuring point shall be at 90°with the piston pin, 90°...
-
Page 130: Piston Installation
Measure the inner diameter of the smaller end of th Smaller end of the connecting rod connecting rod. 10.018mm。 Limit for use: 14.06mm. 14.4.2 Piston Installation Install the locating pin. 顶环 Apply fuel to each piston ring and pistion. Install the piston ring with inclined side upward. - Page 131 Drive Face/Clutch/Driven Wheel Note: During operation, the surface of the triangle belt can not be stained with any grease which must removed. It helps avoid slipping between triangle belt and the belt pulley as much as possible. 1 gasket 2 spring 3 friction plate 4 check ring...
- Page 132 Kickstart Mechanism Note: During operation, the surface of the triangle belt can not be stained with any grease which must removed. It helps avoid slipping between triangle belt and the belt pulley as much as possible. 1. snap spring 2. start claw 3. idle gear 4. idler shaft 5. start shaft assembly 6. kickstart shaft spring...
-
Page 133: Drive Face/Clutch/Driven Wheel/Kickstart Mechanism
15. Drive Face/Clutch/Driven Wheel/Kickstart Mechanism Preparing documents -------------------15.1 Clutch/driven wheel ---------15.5 Failure diagnosis --------15.2 Breakdown of clutch and driven wheel -----15.6 Left crankcase cover ----------------15.3 Installation --------------------15.7 Drive face ----------------------------15.4 Kickstart mechanism------------15.8 15.1 Preparing Documents During operation, the surface of the triangle belt cannot be stained with any grease that must be removed. -
Page 134: Left Crankcase Cover
15.3 Left Crankcase Cover Disassembly Remove fixing bolts, spacer and locating pin. Left cover Note: Fixing bolt Fixing bolts should be removed in staggered sequence. Remove the locating pin. 15.4 Drive Face Locating pin 15.4.1 Disassembly Remove fixing nuts for drive face and the left half-drive face. Remove the triangle belt from the drive face. - Page 135 Remove the right half drive wheel assembly Right half drive wheel assembly 15.4.2 Breakdown of Right half Drive Wheel Assembly Check abrasion of the ball. Measure the outer diameter of the ball. Limit for use: 14.4mm.
-
Page 136: Clutch/Driven Wheel
Measure the inner diameter of the right half drive wheel. Limit for use: 26.06mm. Right half drive wheel Measure the outer diameter of the sliding sleeve. Limit for use: 25.94mm. Sliding sleeve 15.5 Clutch/Driven Wheel 14.5.1 Disassembly Install the clutch sleeve with the fixer and remove fixing nuts. Remove the clutch sleeve, clutch/ driven wheel. -
Page 137: Breakdown Of Clutch And Driven Wheel
Check abrasion of the clutch sleeve. Measure the outer diameter of the clutch sleeve. Limit for use: 118.5mm. Check abrasion of the clutch facing Measure the thickness of the clutch facing. Clutch facin Limit for use: 1.5mm. 15.6 Breakdown of Clutch and Driven Wheel Clutch spring compressor must be used for disassembling the clutch spring. - Page 138 Remove the guide pin. Remove the weldment on the left half driven wheel. Weldment on the left half driven Remove the oil seal on the left half driven wheel. Guide pin Oil seal Check the free length of the clutch spring. Limit for use: 68mm.
- Page 139 Note: Removed bearing cannot be used any more. (滚针轴承:needle bearing 弹性挡圈:elastic retainer ring 滚动轴承:rolling bearing) Apply grease evenly to the outer rolling bearing and then place it into the sleeve. Note: Bearing screwdriver Place the outer rolling bearing into the sleeve with its marked side outwards.
-
Page 140: Installation
Combine the left half and the right half-driven wheel Apply grease evenly to the guide pin and then install it into the guide groove. Guide pin Guide groove Install the spring guard. Eliminateleaked grease. (弹簧护套:spring guard) Install the clutch spring and the clutch on the driven wheel. Compress the set with the clutch spring. -
Page 141: Kickstart Mechanism
15.8 Kickstart Mechanism Disassembly/Check Remove the left crankcase cover. Loosen the screw and remove the guard. Remove the start claw assembly. Remove the start shaft assembly. Check abrasion of the start shaft. Check abrasion of stress area of the start shaft sleeve and the idler shaft. - Page 142 Decelerator Function: transfer torque and decide final output torque and rotational speed. 1 middle gear 2 middle shaft 3 main shaft of clutch 4 output shaft gear 5 bearing 6 oil seal 7 bolt 8 gasket 9 gear room cover...
-
Page 143: Decelerator
16. Decelerator Preparing documents -----------------16.1 Failure diagnosis ----------------------16.2 Gearbox --------------------------------16.3 Install-----------------------------------16.4 16.1 Preparing Documents Function: transfer torque and decide final output torque and rotational speed. 16.2 Failure Diagnosis No run after engine startup Broken driving gear Burnt driving gear Leaked gear oil Too much gear oil Damaged oil seal 16.3 Gearbox... -
Page 144: Installation
Remove the spacer and the locating pin. Output shaft gear Remove the clutch spindle and gear of output shaft. Spacer Remove the middle shaft and the middle gear. Clutch Middle shaft spindle Middle gear 16.3.2 Check the Output Gearbox Cover Check abrasion and damage of the clutch spindle, gear and Clutch main shaft bearing. - Page 145 Crankcase Note: The crankcase is thin-section casting thus shall suffer impact during operation which may cause deformation fracture. All components must be cleaned and blown with high-pressure gas before test. Lubricant in the crankcase should drained before operation. 1 crankshaft 2 bolt 3 oil seal 4 location pin...
-
Page 146: Crankcase
17. Crankcase Preparing documents -----------------17.1 Failure diagnosis ----------------------17.2 Crankcase ------------------------------17.3 Install -----------------------------------17.4 17.1 Preparing Documents Work instructions The crankcase is thin-section casting thus shall not suffer impact during operation which may cause deformation or fracture. All components must be cleaned and blown with high-pressure gas before test. Lubricant in the crankcase should be drained out before operation. -
Page 147: Crankcase
Loose or broken parts inside the crankcase Loose crankshaft bearing Loose crankpin bearing Seized clutch 17.3 Crankcase 17.3.1 Removal of Crankcase Loose bolt, remove starting driving gear. Bolt Remove star gear. Starting driving gear Star gear Remove crankcase standing bolt Remove left and right crankcase. - Page 148 Remove oil seal from left crankcase. Oil seal Remove oil seal from right crankcase. Oil seal Check 17.3.2 Right-left clearance of connecting rod big end. Usage limit:0.6mm. 连杆大端测量位置 Measuring location of connecting rod Clearance between X-Y orientation of connecting rod big end.
-
Page 149: Installation
Check whether crankshaft bearing revolution has noise or loose condition. If there is noise or loose condition, replace the crankshaft component. Note: Crankshaft bearing Oil seal disassembled shall not be used again. Use special tools to remove oil seal. 17.4 Installation Assemble crankcase according to reversed sequence of removal. -
Page 150: Inspection And Maintenance Of Exhaust Emission System
Inspection and Maintenance of Exhaust Emission System Muffler Torque for fastening fixing screw 15 of the muffler connecter: 5-9 N·m Torque for fastening fixing bolt 13 of the muffler: 22-29 N·m Torque for fixing bolt 14 of front emission system: 5-9 N·m 1 muffler tube assembly 2 bolt M6×20 3 muffler hoop 4 heat-insulating rubber... -
Page 151: Exhaust Emission & Control System
18. Exhaust Emission & Control System Warranty on the exhaust emission & control system ---------------------------18.1 Instructions on the periodic maintenance/ compliance with standards-------18.2 Mechanical function of the exhaust control system ----------------------------18.3 Catalytic conversion system -------------------------------------------------------18.4 Measures when the idle speed emission value exceeds the standard---------18.5 18.1 Warranty on the Exhaust Emission &... -
Page 152: Mechanical Function Of The Exhaust Control System
3〉Please comply with periodic maintenance requirements. The exhaust control system of this motorcycle is in accordance with the national regulation. For replacement of any component, please use our original parts and have our designated distributor or service center carry out such replacement. 4>... - Page 153 18.4.2 Instruction: 1. The function of convertible catalyst is to converse exhaust gas HC, CO and NO after complete combustion to harmless gas such as H O, CO before emission. 2、 、 2. Convertible catalyst contains rare metal such as platinum and rhodium. Only lead-free gasoline can be used. ※Note that lead gasoline may invalidate catalyst.
-
Page 154: Measures When The Idle Speed Emission Value Exceeds The Standard (Two-Stroke)
18.5 Measures when the idle speed emission value exceeds the standard (Two-Stroke) Qualified Periodic inspection (maintenance plan ) Qualified Measure idle emission (note 1) Qualified Adjust Carburetor (note2) Qualified Qualified for Remove and clean the carburetor delivery (SJ, MJ, SAJ, MAJ, etc.) Qualified Replace the carburetor Dismantle... - Page 156 Electricity Principle Diagram 转向指示灯:Turn signal indicator light 远光指示灯:Beam indicator light 仪表照明灯:Instrument light 机油报警灯:Oil alarm light 油量表:Fuel meter 电子钟:Electric clock 前刹车开关:Front brake switch 后刹车开关:Rear brake switch 电源锁:Power lock 电子风门:Electric damper 机油报警开关:Oil alarm switch 启动继电器:Relay 蓄电池:Battery 整流/稳压器:Rectifier 汽油传感器: Gas sensor 导线颜色:Cable color 温控器接口:Temperature controller interface 释放电阻:Release resistance 前右转向灯:Front right turn light...
Need help?
Do you have a question about the QJ50T-21U and is the answer not in the manual?
Questions and answers