Possum HC2006 SERO Technical Manual
Hide thumbs
Also See for HC2006 SERO:
- Instruction manual (4 pages) ,
- Installation instructions (4 pages)
Table of Contents
Advertisement
Quick Links
HC2006 Technical Manual Issue 4.2 - Company Confidential
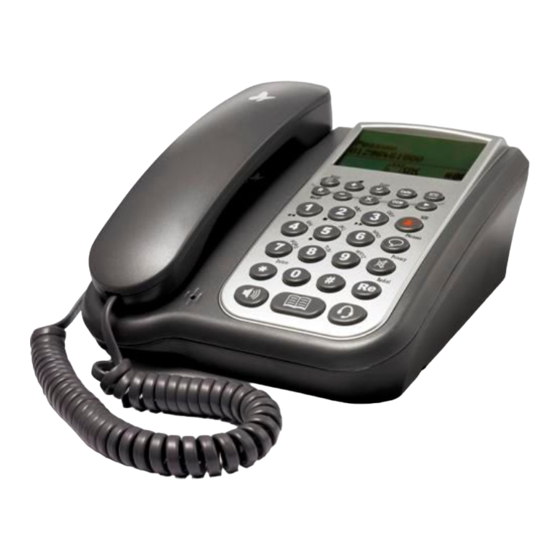
Possum HC2006 SERO! Telephone
Notice
Possum Limited reserves the right to make improvements to this guide or the products it describes at any time and without
further notice. Address queries about the product or this technical manual to Possum Limited at the above address.
This manual is copyrighted and all rights are reserved. No part of this guide or the product it describes may be reproduced
by any means or in any forms, without prior consent in writing from Possum Ltd
Distributed by Technical Solutions Australia
Technical Manual
firmware version 2.00+
TELEPHONE
FAX
E-Mail
WEBSITE
© POSSUM LIMITED, 2009
8 FARMBROUGH CLOSE
STOCKLAKE PARK INDUSTRIAL ESTATE
(from UK)
(International) 00441296461000
sale@possum.co.uk
http://www.possum.co.uk
AYLESBURY
BUCKS
HP20 1DQ
01296 461000
01296 461001
www.tecsol.com.au
Advertisement
Table of Contents

Related Manuals for Possum HC2006 SERO

Summary of Contents for Possum HC2006 SERO
-
Page 1: Firmware Version
Notice Possum Limited reserves the right to make improvements to this guide or the products it describes at any time and without further notice. Address queries about the product or this technical manual to Possum Limited at the above address. -
Page 2: Table Of Contents
CONTENTS PAGE 1. Introduction ........................7 General notes… .............................. 7 ‘Reduced Function’ mode (RF)… ..........................7 2. List of features ......................... 8 3. Getting Started ......................... 9 Battery Connection ............................9 Fitting the internal batteries… ..........................9 External connections ............................9 Telephone line…... - Page 3 Entering the name… ............................. 22 Entering the number… ............................23 Selecting the ‘call type’… ............................23 Selecting ‘VIP’…..............................23 Keep number private… ............................24 Use for ‘emergency contact’… ..........................24 Recording a name… ............................. 24 Editing an ‘existing’ phone book contact… ....................25 Choosing the contact to edit…...
- Page 4 Gewa IR start channel… ............................53 Gewa IR end channel… ............................53 Gewa start function… ............................53 Possum IR group… .............................. 53 ‘Accept’ Old Possum IR codes… ........................... 53 Default to headset… ............................. 53 Enable headset? ..............................53 Hands free mode… .............................. 53 Page 4 of 108 SERO! Technical Manual Issue 4.2...
- Page 5 ‘Possum COMPANION 1800 A/B’… ........................58 ‘Possum Primo!’ / ‘HC1400’… ..........................59 ‘SRS 100’ / ‘Intellec’ – using ‘old’ possum codes… ....................59 ‘SRS Lite’ - using ‘old’ possum codes… ........................ 59 Assigning specific SERO! functions to all SRS controllers… .................. 60 SRS Sero! ‘Capture Record’...
- Page 6 Details of Problem(s): ............................76 19. Internal Jumper Links – Line Selection ..............77 Setting the Jumpers…........................... 77 Incorrect setting… ............................77 20. Power Supply Specifications ..................78 Differences from previous model (as used on phones with serial No <1500)… ..........78 Standard power supply…...
-
Page 7: Introduction
1. Introduction The HC2006 telephone is called SERO! (Latin meaning: “to join”) The SERO! telephone is an enhanced telephone offering many unique functions, which until now have not been available in a remote control telephone. Some of the telephones main features are … The SERO! telephone provides a feature called SSI (Secure Spoken Identity). -
Page 8: List Of Features
2. List of features General… Remote Control… Handset for conventional use IR control of all functions Operate Phone Manually Possum IR code compatible Handset earpiece/microphone volume adjustment Gewa IR Code compatible Standard wireless/wired Headset connection Ringing… Headset earpiece/microphone volume adjustment... -
Page 9: Getting Started
When connecting the telephone to a line which is Broadband (for computer internet access) an ASDL Micro filter must always be used. This is connected between the telephone line wall socket and the telephones jack lead. Possum recommend a BT ADSL MF50 Micro filter (Part Number 034-612). -
Page 10: Mains Adaptor
If the headset is connected subsequently, simply press the Setup key twice (the basic pin is required in reduced function mode) so that the phone detects the headset. Note that there is a longer pause on leaving set-up mode when headset is enabled. - Page 11 Recall Turn “Do Not Disturb” mode on/off (“****” must be dialled first in RF mode). (No function). Delete the last digit entered for dialling. - Enter Prepare to store a Phone Book Entry, Phrase or Outgoing Message etc… (No function in RF mode) - Cancel Clear’s any dialled number shown.
-
Page 12: Display Symbols
Display Symbols Warning Symbols… These are shown for the following conditions: No phone line is connected Running on battery power Low battery voltage (including when under charge) Battery Problem (due to bad or missing back-up battery) Page 12 of 108 SERO! Technical Manual Issue 4.2 Distributed by Technical Solutions Australia... -
Page 13: Using The Telephone
5. Using the Telephone Answering calls… Whilst the phone is ringing, answer the call by either lifting the handset or selecting ‘Hands-Free’ or selecting ‘Headset’. Alternatively send the appropriate IR command from the remote control transmitter. Transferring calls… When connected on a call it is possible to transfer between handset/hands free/headset by pressing the appropriate key or lifting the handset. -
Page 14: Making Calls
If the phone displays “this number is banned” then the phone call will be cancelled (the reason for this is that the phone can programmed by a Possum approved engineer to prevent the phone from dialling numbers with certain digits at the beginning, such as premium rate numbers). -
Page 15: Dialling From The 'Redial List
If the phone displays “this number is banned” then the phone call will be cancelled (the reason for this is that the phone can programmed by to possum approved engineer the phone from dialling numbers with certain digits at the beginning such as premium rate numbers). -
Page 16: Emergency Services Calls
Emergency Services calls… The telephone has stored a list of the numbers used for emergency services in the country-specific Line Configuration file. In order to comply with the regulatory requirements of some countries, calls to emergency service numbers are treated slightly differently from other calls. -
Page 17: Speaker & Microphone/Earpiece Volume Adjustment
6. Speaker & Microphone/Earpiece Volume Adjustment Volume levels can be set for ringer, hands-free speaker, handset, headset & microphone independently. These levels are remembered by the telephone and are adjusted during a call or during ringing. ‘Handset’ volume adjustment… Earpiece Volume: Press to adjust the volume. -
Page 18: Incoming Call And Ringing Options
7. Incoming Call and Ringing Options The typical user may need to be selective about answering incoming calls. For this reason the phone has a number of options for handling incoming calls, though most of these rely on the Caller ID facility being enabled on the line. If caller ID signals are present, the number will be displayed and if matched to a name from the directory, or a name is provided by the public exchange, the name is shown. -
Page 19: Caller 'Name' Announce
Caller ‘name’ announce… If the functionality setting option ‘Announce known caller’ is set to ‘Yes’, the caller’s number is in the phone book and the name was recorded, the SERO! will announce the caller’s name between rings. If ‘Do Not Disturb’ is switched on and a VIP call is received, the VIP callers name is announced repeatedly instead of the ring tone. -
Page 20: The Phonebook
5 seconds long) and are displayed as shown below: Note: Records can be viewed, selected, created, edited or entered without restriction using IR codes from a Gewa or Possum controller, even when scanning. In the descriptions below the words key/press imply key press or send corresponding IR code. -
Page 21: Choosing A Phone Book Contact By Its First Letter
Choosing a phone book contact by its first letter… If not in phone book already select the phonebook by pressing (the first alphabetical entry is shown). Press to put the phone into letter mode (the letter representing the displayed contacts first character will be shown on the right side of the display). -
Page 22: Adding A New Phone Book Contact
Adding a new phone book contact… A new contact can be added to the phonebook only if access to adding/editing the phonebook is enabled (Setup > Set Functionality > Allow PB edit > ‘Yes’). If access is disabled then the phone book will be locked and pressing the key’... -
Page 23: Entering The Number
When the letter/character is correct, press the key to move to the next character to be entered. A cursor shows where a new character is about to be added, (but unlike a mobile phone, the cursor does not move automatically after a delay or when a different key is pressed). This allows the user to select letters slowly (i.e. by scanning) To delete the rightmost character, press Press... -
Page 24: Keep Number Private
= ‘No’ = ‘Yes’ Then press to store and move onto the next parameter Keep number private… If set to ‘Yes’ the phone number is hidden when browsing the phonebook or when a call is received. When viewing the record, this is shown as a ‘–‘, below the name. Press to choose ‘Yes’... -
Page 25: Editing An 'Existing' Phone Book Contact
no change No change to any recording (the phone exits programming and saves the changes). add/edit/replace Continue to record a name, or overwrite existing name (the phone goes to recording mode). delete The recorded name is erased (the phone book details are retained). With the chosen option displayed press to confirm. -
Page 26: Selecting The Contact To Edit
Note: If a letter/character is chosen that is not matched with an entry in the phone book the display will not change. Press to scroll through the list until the contact required is displayed (and also announced, depending on how the phone has been setup). By memory location (00-99)…... -
Page 27: Entering The 'Number
When the letter/character is correct, press to move to the next character to be entered. Then repeat step 3 A cursor shows where a new character is about to be added, (but unlike a mobile phone, the cursor does not move automatically after a delay or when a different key is pressed). -
Page 28: Use For 'Emergency Contact
Alternatively use digit for ‘No’ -or- digit for ‘Yes’ Then press to store and move onto the next parameter Note: With phonebook contacts with numbers set as private, the number cannot be edited or changed, the record should be deleted then redone completely with new details. Use for ‘emergency contact’? The number(s) used for a help call (i.e. -
Page 29: Deleting An 'Existing' Phone Book Contact
Press ¡ ¿ â ä à å á ã ç ð é ê ë è æ ï î ì í ñ ô ö ò ó õ ø ß ü û ù ú ÿ ý Space & Note: The number of characters available on each key varies – grey shading at the end of each row in the above table indicates the end of the list for that key –... -
Page 30: Selecting And Deleting A Contact
By memory location (00-99)… If not in phone book already, select the phone book button (the first alphabetical entry is shown). Press to put the phonebook into number mode (the number representing the displayed contacts memory location will be shown on the right side of the display). Press digits then which correspond to the to the memory location of the required... -
Page 31: Recorded Phrases
9. Recorded Phrases About Phrases… The phone has a capacity of 50 phrase recordings (numbered 00 to 49) each of up to 30 seconds duration and each can have a short descriptive name of up to 22 characters. Phrases are ‘User’ or ‘Carer’ recordable, either using the handset or a connected headset. -
Page 32: Quitting / Exiting Phrase Mode
Quitting / exiting phrase mode… Press to exit phrases. Adding a new phrase… Choosing a phrase ‘location’… There two ways off adding a new phrase: With the phone idle (not in any other mode) press The display will show ‘Store What: P.B/Phrase/O.G.M?’. Press to choose phrases (the first unused phrase number is selected automatically). -
Page 33: Recording A Phrase
Press ¡ ¿ â ä à å á ã ç ð é ê ë è æ ï î ì í ñ ô ö ò ó õ ø ß ü û ù ú ÿ ý Space & Note: The number of characters available on each key varies – grey shading at the end of each row in the above table indicates the end of the list for that key –... -
Page 34: Phrase 'Storage
(Once a recording has been made) – replay the phrase. Rewind (during record / play) recording or playback back to the start. Stop the recording or playback. Save and exit. Adjust volume (only during playback). ... -
Page 35: The Calls & Redial Log
10. The Calls & Redial Log The Calls Log… The ‘Calls Log’ is a list of received calls stored in time + date order in a friendly manner ‘today’ is used in place of full date for calls within the current day ‘yesterday’... -
Page 36: Accessing The Redial Log
‘today’ is used in place of full date for calls within the current day ‘yesterday’ is used for calls on the previous day Just the day of the week is used for older calls made within the last week The log can contain up to 14 entries. -
Page 37: The Answer Phone
15 minutes in duration. The messages are stored on the SD card indefinitely until the user deletes them The SD card is not user accessible, Only cards supplied by Possum Ltd can be guaranteed to work as they require a special format which cannot by implemented using standard Windows applications. -
Page 38: Standard Mode' Key Functions
The most recent message is announced and played automatically, then marked as played. Each subsequent message is then announced and played until there are no more messages. Automatic replay can be stopped by pressing 2. When all messages have been replayed sero waits for key commands from the user. If no commands (key presses occur within 1 minute sero exits the answer phone ‘Standard Mode’... -
Page 39: User' (From The Sero!) Operation Whilst Answering
Caller presses key – Stop the out going message and start recording. Caller presses key – Stop the out going message and request PIN for remote access. ‘User’ (from the Sero!) operation whilst answering… or Lifting Handset - the answer phone will stop playing/recording and transfer the call to the user. - Stop recording and hang up immediately. -
Page 40: Outgoing Messages
Outgoing messages… There are three separate outgoing messages. Message 1 and 2 are alternative messages the caller hears requesting a message to be left, message 3 is used when there is no room for recording or if the user does not want the caller to leave a message (it will ask the caller to try later). -
Page 41: Deleting / Restoring Out Going Messages To Default (Factory) Messages
Press The display will show ‘Store what: PB Entry/Phr./OGM?’ Press the out going message key, this will access the recording screen To start recording (if using the handset) lift the handset and press , or (if using a headset) press To stop recording press or alternatively if auto record is enabled (as indicated on the recording screen), recording will stop automatically when the phone hears 1-2 seconds of silence... -
Page 42: Remote Access
High line voltage (off-hook line voltage is increased if a message is waiting) Stuttered (intermittent dial tone) FSK signal (following line polarity change or ringing) as part of CLI message It should be noted that detection of stuttered dial tone requires the phone to go off-hook to listen to the dial tone pattern. This process takes only a few seconds and occurs a short while after a call is made or received. -
Page 43: Help Call
12. Help Call Help call is a feature that allows the user to make assistance calls automatically at the press of the button on the telephone, or from a single selection from an IR transmitter. There are two ways in which the phone can place a help call, ‘Simple’ & ‘Automatic’ (setup mode allows for the type of call to be set). -
Page 44: Automatic Help Call Operation
Automatic Help Call operation… Upon initial activation of the help call function the phone announces “Making Automatic Help Call, press Cancel to stop” three times (to allow the user to cancel the call if it was made accidentally) The selected number is shown on the display and dialling starts. Once the number has been dialled, the SERO! plays a built-in message telling the called person that this is an automated help call, and asks them to press to hear the message. -
Page 45: Help' Contact Numbers
‘Help’ contact numbers… Numbers dialled during help calls are taken from contacts in the phone book – marked as “Help Call” contacts, entered in the usual way, but with option ‘Use for Help Call?’ set to ‘Yes’. (See adding or editing a phone book contact) In simple mode, the SERO! will dial the number of the first contact (i.e. -
Page 46: Phone Settings (Setup)
Settings can be viewed or changed without restriction either manually using the keypad or using IR codes from a suitable Possum controller, even when scanning is used. In the descriptions below the words key/press imply key press or send corresponding IR code. -
Page 47: Selecting A Group
Use Accented Characters? Gewalink Start Channel GewaLink End Channel Gewa Start Channel Possum IR Group Old Possum IR Codes? Default to Headset? Enable Headset? Hands free mode: Auto secrecy? Caller ID Mode: ... -
Page 48: Changing The Settings Values
Changing the settings values Having pressed a prompt is displayed which shows the keys that can be used to change the value of this setting. There are three main types: Yes / No values. These are changed to ‘No’ by pressing , and ‘Yes’... -
Page 49: Time Display Format
If a mistake is made during entering press to backspace or delete the last (rightmost) digit. When complete press to save and move to time setting. The phone will then exit setup and return to normal idle mode. Time display format…... -
Page 50: Setup Ringing
Setup Ringing… Ringer Volume… Sets the global ringer volume for all ring tone types (as demonstrated when the ring tone is played for the next setting). Ring tone std… Selects the ringing tone for general calls - i.e. not from numbers in the phone book All calls ring with this tone if caller ID is not available Ring tone in PBook…... -
Page 51: Call Lock Pin
to choose, then press to set Call Lock PIN… This sets the 2 to 4 digit PIN code, for when one of ‘Require PIN for calls’ outgoing call restriction options is set. Use digits enter the PIN. Use to delete the last digit if a mistake is made, then select to store the PIN. -
Page 52: Set Functionality (Requires 'Carer' Pin Or Higher)
Set Functionality (requires ‘Carer’ PIN or higher)… For the settings below with setting highlighted use to choose ‘’yes and to choose ‘no’, then press Allow phone book edit? A setting of ‘No’ locks the phone book against any change. Note: The phonebook cannot be edited in RF mode. Sort phone book by name? If set to ‘No’... -
Page 53: Eng. Use Only Settings (Requires 'Engineer' Pin)
The SERO! phone can be fully controlled just using Possum IR Group codes (see previous heading), these are to be preferred to avoid any conflict. When old possum codes are used for other Possum equipment, or multiple SERO! telephones nearby, the phone can be set to ignore them. -
Page 54: Auto Secrecy
Setting 2 should be used in large rooms with pronounced echo, where the user is more than several feet from the phone, or where maximum speaker volume level is needed. See section ‘Optimising hands-free modes’. Auto secrecy… When set to ‘Yes’ the phone mutes the microphone automatically on placing or receiving a call. This option is for users who do not normally use the microphone and would use the phrases feature to communicate. - Page 55 Gewa Start Function 0 to 63 A range of fast codes, group 6, 7,or 8 Possum IR Group Yes or No Old Possum IR Codes? Yes or No Default to Headset? Enable Headset? Yes or No 0 = full duplex small room...
-
Page 56: Optimising Hands-Free Modes
14. Optimising hands-free modes The telephone has three built in modes designed to give the best hands free performance for different situations. In most cases it is suggested that modes ‘0’ and ‘1’ be tried first where possible (since these modes offer the most natural call quality for hands free operation). -
Page 57: Behaviour In Hands-Free Modes
Behaviour in hands-free modes… The hands free processor in the SERO! telephone was originally designed for in-car use. For such application it has a ‘noise suppression’ feature whereby if there is a steady level of background noise (e.g. car engine, computer fans, raining on roof, some forms of music) it will tend to cut this out when you are not speaking over it. If you are at the ‘other’... -
Page 58: Infrared Remote Control Set Up
15. Infrared remote control set up There are many options for IR control with SERO! to suit both possum and gewa controllers. SERO! has been designed to be backward compatible with existing installations and older possum systems The options for setting up the IR operation are found in >Setup>Engineer only settings in sero Using ‘old’... -
Page 59: Possum Primo!' / 'Hc1400
2 (freedom) is set in primo!. However these are pre Sero! units and do not quite match in “p.func” actions so always use “possum” IR code actions for individual functions [refer to Primo! Programming manual for choosing the phone type], From Primo! version 1.05 onwards setting the Primo! to phone type 2 will give correct operation for all built in phone menus... -
Page 60: Assigning Specific Sero! Functions To All Srs Controllers
Using ‘Possum IR Group’ codes… The SERO! is a feature telephone and has many IR functions which the old possum IR codes do not cover, It is possible to have any IR transmitter send these commands but they will need to be learnt by the transmitter using a Primo! controller as the source device as these are embedded into the unit. -
Page 61: Setup Ir Transmitters To Use Possum Ir Group Codes
[applies to firmware version 1.05 Primo! units and later] version 1.03-1.04 cannot be mapped to group 6 codes, only old possum codes so always have the Primo! set to phone type 2. From Primo version 1.06 onwards for group 7 codes use... - Page 62 Primo! “Possum” action codes Phone Function GROUP 6 GROUP 7 GROUP 8 POSSUM CODES Setup Button Help (SOS emergency Dial) Redial List Button Last Number Redial (LNR) Answerphone On/Off O.G.M (play selected OGM) Play Phrase Auto Dial Memory 0 Auto Dial Memory 1...
-
Page 63: Using Srs Controllers With Possum Ir Group Codes
Auto Play Phrase 33 Auto Play Phrase 49 Using SRS controllers with Possum IR Group codes… Only group 6 Fast IR codes are usable with SRS Lite, Intellec, 100. These codes are available from SRS IR Update V3.69 onwards. Group 7 and 8 codes are not supported In the SRS Management software, assign the IR device for telephone as shown below (Refer to SRS management software manuals about assigning IR devices). -
Page 64: Srs Sero! Capture Record For Group 6 'Fast' Ir Codes
SRS Sero! Capture Record for Group 6 ‘fast’ IR codes… Appliance TELEPHONE Appliance Make Possum or Reserved 3 Model Number Sero! [HC2006][ADV] Handset Number Primo! Capture Date June 2008 Captured By Stuart Turner Device Device Function Part 1 Part 2 Position ... -
Page 65: Gewa-Link End Channel
Gewa-link end channel… This is the last key on the Gewa IR transmitter you wish the phone to respond to (check the Gewa transmitter’s user guide to see which Gewalink channels are transmitted on each key). Setting the start and end channels set the range to which the phone will respond to, if the phone is not required to operate from any Gewa channel then this can be achieved by setting the end channel to value which is less than the start channel. -
Page 66: Gewa-Link Setup Examples For Gewa Transmitters
Button 1 = speaker on/off Buttons 2 - 8 = M1- M7 Using Gewa-link channels with Possum IR controllers… Only Primo! controller can control the SERO! using Gewa-link IR codes. With Primo! the controller setup should be set for Phone type 3. -
Page 67: Internationalisation
Content of the text file will be sent to the distributor for meaningful translation. This would be returned to possum for conversion to the appropriate text format for the phone and then reviewed by both the distributor and Possum by viewing the text prompts on the phone. -
Page 68: Voice Prompts
(#LINEI#), then press ‘Setup’. The phone shows the new impedance setting, which takes effect from the next call. The change is remembered indefinitely. if there are no alternative line impedances for the country then the line setting does not change To find the best setting, make a call to a landline using the handset. -
Page 69: Key And Warning Voice Prompts
16. Key and Warning Voice Prompts SERO! can announce warning messages & selected key functions. These recordings are stored on the SD card and can be transferred using the USB link and Hyper terminal, allowing easy field upgrade or language change. The options ‘announce keys’... -
Page 70: List Of Audible Prompts For Keys
The numbers correspond to the various key and warning texts, so the message numbers must be followed carefully. In the tables below, the recording index number is the second in the brackets. While recording the number digits, pretend you are reading the digits of a long number – this will keep the tone and voicing consistent between digits. -
Page 71: List Of Audible Prompts For General Announcement And Warnings
List of audible prompts for general announcement and warnings… Index Number Description “No name/number” “Withheld number” “International number” “No dial tone” “Answer phone” “Please replace the handset” “Phone line is not connected” “Phone line in use” “Running on battery power! Please connect mains adaptor” “Running on low battery! Please connect mains adaptor”... -
Page 72: Text Prompts
“Previous call responses: <x>” (during help call) “Hands free mode – press hash to end call and cancel any outstanding calls or 4 to sound ringing to attract attention” Each recording can be replayed and re-recorded as necessary, then is pressed to move to the next. After pressing for the last recording, press to end. -
Page 73: In-Country' Evaluation Check List
25. Troubleshooting Cannot make calls in headset mode: if selecting headset initiates hands free mode then this is not an error, it because headset has not been enabled in the phone settings [see setup>engineer only>enable headset, is set to ‘yes’] Problems with phrases…... -
Page 74: Testing
Cannot record a contact name… This is because the phone book allows about 60 names to be recorded. Delete the recorded name from another contact if not required. © POSSUM LIMITED, 2009 8 FARMBROUGH CLOSE STOCKLAKE PARK INDUSTRIAL ESTATE AYLESBURY...
Need help?
Do you have a question about the HC2006 SERO and is the answer not in the manual?
Questions and answers