Advertisement
Available languages
Available languages
Advertisement
Chapters

Related Manuals for Nanosonics trophon EPR

Summary of Contents for Nanosonics trophon EPR
- Page 1 ® trophon User Manual L00049 1.0...
- Page 3 ENGLISH ® trophon User Manual L00049 1.0 08/2015...
- Page 4 Read this manual before operating the trophon EPR to determine the correct procedures. For further information, contact your customer service representative or visit the Nanosonics website. All technical specifications and system approvals are listed in Appendix1. ©2015 Nanosonics Limited. All rights reserved.
-
Page 5: Table Of Contents
SECTION C6: DISPOSAL OF TROPHON ................... 15 PART D – TROUBLESHOOTING ......................16 PART E – SERVICE AND WARRANTY ....................17 APPENDIX 1: TROPHON EPR TECHNICAL SPECIFICATIONS, N00010, N00020, N03000 & N04000 ..............................17 APPENDIX 2: PRODUCT WARRANTY TERMS AND CONDITIONS ..........18... -
Page 6: Part A - Warnings, Instructions And Introduction
PART A – WARNINGS, INSTRUCTIONS AND INTRODUCTION SECTION A1: IMPORTANT WARNINGS, LABELS and SYMBOLS A1.1 Labels and Symbols Caution Corrosive Consult instructions for use Warning Start (of action) Single Use Only Fragile / Handle With Care Warning: Hot Surface Do not disassemble Dangerous Voltage Separate collection for electrical and electronic... -
Page 7: A1.2 Instructions
Do not attempt to access the internal mechanics. This may result in electrical shock. Protective Wear and Spills Wear clean disposable gloves when running the trophon EPR and handling: o disinfectant cartridges, as temporary bleaching and/or irritation of the skin may occur if no... -
Page 8: Section A2: Introduction To The Trophon Epr
The contact conditions are fixed cycle parameters that the end user cannot modify. A2.3 Disinfection History Log A disinfection history log can be downloaded from your trophon EPR and printed onto to a PC or laptop via trophon Connect software (optional accessory - available for certain trophon variants only) or provided by your service centre during scheduled preventative maintenance services. -
Page 9: Part B - Overview Of Trophon Features And Installation Guide
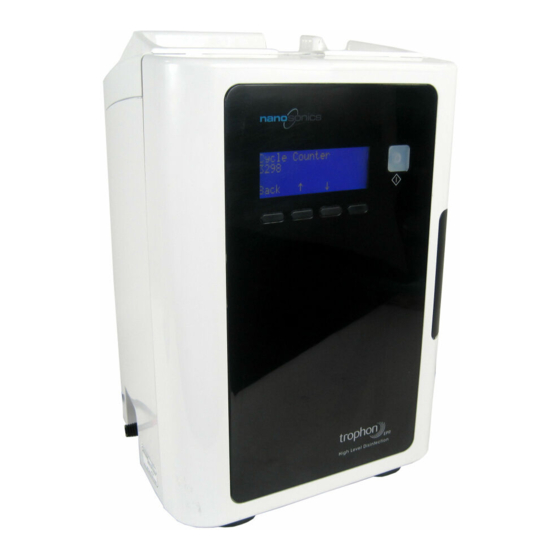
PART B – OVERVIEW OF TROPHON FEATURES AND INSTALLATION GUIDE SECTION B1: TROPHON FEATURES Back Front Figure 2 Figure 1 Chamber Left Side Figure 4 Figure 3 Right Side User display screen Start button Soft key buttons Chamber door handle Adjustable feet (for levelling) Chamber door (opened) Probe in correct position... -
Page 10: Section B2: Installation Guide
SECTION B2: INSTALLATION GUIDE B2.1 Positioning your trophon 1. Ensure the surface can support the weight and allows adequate airflow (see Appendix 1). 2. Ensure the area around your trophon is free from other equipment and clutter. Position as shown in Figure 6 to ensure access to all features. Distance on each side of trophon: A = 250mm... -
Page 11: B2.3 Powering On
B2.3 Powering On 1. Attach the power cable supplied to the trophon power socket. 2. Connect to mains power and switch on. 3. Turn on the power switch, located on the side of the trophon. NOTE: To maximise the life of the disinfectant cartridge, keep your trophon switched on at all times, except when the machine needs to be moved. -
Page 12: Part C - Routine Use, Maintenance And Care
PART C – ROUTINE USE, MAINTENANCE AND CARE SECTION C1: LOADING THE DISINFECTANT CARTRIDGE A trophon disinfectant cartridge needs to be inserted into the trophon EPR before a high level disinfection cycle can commence. Refer to the trophon disinfectant IFU for detailed instructions on how to insert and/ or replace trophon disinfectant cartridges. - Page 13 Coiling the cable neatly and safely around the cable holder on the side of the tray assembly. NOTE: Incorrect positioning of the probe may result in: High-level disinfection will not be achieved during the trophon EPR disinfection cycle Residual disinfectant remaining on the probe surface. This may lead to temporary bleaching and/ or irritation of the skin if no gloves are worn.
-
Page 14: C2.4 Closing The Chamber Door
Figure 12 C2.4 Closing the Chamber Door The door will automatically lock at the start of a high level disinfection cycle. If the door is not properly closed, screen message: Close Chamber Door will be displayed. C2.5 Disinfecting the Probe The next screen message: Is the Probe Clean and Dry? 1. -
Page 15: C2.7 Sleep Mode And Shutdown Procedures
should be taken not to touch the chamber. The probe will feel warm to touch and is safe for handling and use with gloves on. 2. Follow the on screen instructions: Screen message 1: Cycle Complete. Wear Gloves. Remove and Wipe Probe. Screen message 2: Attention: Wear Gloves and Wipe Probe. -
Page 16: Section C3: Purge Cycle
6. Follow the next screen message: Replace Cartridge and Close Cartridge Door. C3.3 Transporting the trophon Before transporting the trophon EPR, you must purge the disinfectant and switch off the trophon at the power switch. Do not move excessively or drag the trophon across the mounting surface. -
Page 17: C4.3 Manual Door Lock Override
Once the service interval of 12 months or 5000 cycles is displayed on the screen, please contact your customer service representative to arrange a service. SECTION C6: DISPOSAL OF TROPHON Contact your distributor or Nanosonics. They will advise you of the collection point for recycling electrical and electronic equipment. L00049 1.0 08/2015... -
Page 18: Part D - Troubleshooting
3. The chamber door will not There is power to the trophon. open. There is no disinfection, warm up or purge cycle running. The probe is validated for use in the trophon EPR – see section 4. The chamber door will not close. A2.1. -
Page 19: Part E - Service And Warranty
Device Service Due, at weekly intervals until a service is performed. Service intervals can also be accessed via the System Information, located in the trophon EPR LCD menu. NOTE: Use only authorised service personnel to service the trophon EPR. -
Page 20: Appendix 2: Product Warranty Terms And Conditions
EPR, regardless of whether or not it is found to be defective. If Nanosonics finds on examination that the trophon EPR is defective in materials and workmanship and is within the warranty period, then we will repair or replace the defective trophon EPR at our discretion. - Page 21 Nanosonics may require you to bear the cost of returning the trophon EPR to you, and the costs of any repairs to the trophon EPR, or replacement trophon EPR, requested by you.
- Page 22 DEUTSCH ® trophon Bedienungsanleitung L00049 1.0 08/2015...
- Page 23 Lesen Sie diese Anleitung vor Inbetriebnahme des trophon EPR aufmerksam durch, um so eine korrekte Verfahrensweise sicherzustellen. Weitere Informationen erhalten Sie von Ihrem Kundendienst oder auf der Website von Nanosonics. Alle technischen Daten und Systemzulassungen befinden sich in Anhang 1. ©2015 Nanosonics Limited. Alle Rechte vorbehalten.
- Page 24 ABSCHNITT C6: ENTSORGUNG DES TROPHON EPR ..............37 TEIL D – FEHLERSUCHE ........................38 TEIL E – WARTUNG UND GARANTIE ....................39 ANHANG 1: TROPHON EPR – TECHNISCHE DATEN, N00010, N00020, N03000 und N04000 ..39 ANHANG 2: BEDINGUNGEN DER PRODUKTGARANTIE ..............40 L00049 1.0 08/2015...
-
Page 25: Teil A - Warnungen, Anweisungen Und Einführung
TEIL A – WARNUNGEN, ANWEISUNGEN UND EINFÜHRUNG ABSCHNITT A1: WICHTIGE WARNUNGEN, KENNZEICHNUNGEN und SYMBOLE A1.1 Kennzeichnungen und Symbole Vorsicht Korrosionsmittel Gebrauchsanweisung Warnung beachten Start (eines Vorgangs) Zur einmaligen Verwendung Vorsicht / Zerbrechlich Warnung: Heiße Oberfläche Nicht zerlegen Stromschlaggefahr Getrennte Entsorgung elektrischer und elektronischer Vor Feuchtigkeit schützen Geräte... -
Page 26: A1.2 Anweisungen
Anhang 1) an. Durch eine falsche Spannung können Beschädigungen entstehen. Verschüttete Flüssigkeit kann zu Stromschlägen führen. Vermeiden Sie das Verschütten von Flüssigkeiten über dem trophon EPR oder um das Gerät herum. Tauchen Sie keine der Teile in Flüssigkeit ein. -
Page 27: Abschnitt A2: Einführung Zum Trophon Epr
Verwenden Sie ausschließlich trophon-Desinfektionspatronen bei der hochwirksamen Desinfektion mit dem trophon EPR. A2.5 Schulung Stellen Sie vor dem Einrichten und der Inbetriebnahme des trophon EPR sicher, dass alle Benutzer: gemäß dieser Anleitung in Sicherheitsverfahren und potenzielle Gefahren eingewiesen und entsprechend geschult wurden. - Page 28 trophon Printer trophon Wall Mount trophon Cart trophon Logbook trophon Curved Probe Positioner (CPP) trophon Clean Cover Verwenden Sie ausschließlich von trophon zugelassenes Zubehör, um die Wirksamkeit des trophon EPR sicherzustellen. *Einige Zubehörteile sind nur für bestimmte trophon-Modelle erhältlich. Weitere Informationen erhalten Sie von Ihrem trophon-Vertreter.
-
Page 29: Teil B - Trophon-Funktionen Im Überblick Und Installationsanleitung
TEIL B – TROPHON-FUNKTIONEN IM ÜBERBLICK UND INSTALLATIONSANLEITUNG ABSCHNITT B1: TROPHON-FUNKTIONEN Rückseite Vorderseite Abbildung 2 Abbildung 1 Kammer Linke Seite Abbildung 4 Abbildung 3 Rechte Seite Benutzeranzeige Starttaste Softkeys Griff der Kammerabdeckung Höhenverstellbare Füße (zur waagerechten Ausrichtung) Kammerabdeckung (geöffnet) Sonde in richtiger Position Kabelklammer Stopfbuchsdichtung Hauptschalter... -
Page 30: Abschnitt B2: Installationsanleitung
1. Vergewissern Sie sich, dass die Fläche das Gewicht des Geräts tragen kann und ausreichend Luftzirkulation gewährleistet (siehe Anhang 1). 2. Stellen Sie sicher, dass die Umgebung um das trophon EPR frei von anderer Ausrüstung und anderen Gegenständen ist. Positionieren Sie das Gerät wie in Abbildung 6 gezeigt, um den Zugang zu allen Funktionen zu gewährleisten. -
Page 31: B2.3 Einschalten
B2.3 Einschalten 1. Schließen Sie das mitgelieferte Netzkabel an der Netzanschlussbuchse des trophon EPR an. 2. Stecken Sie den Gerätestecker in die Steckdose, und schalten Sie das trophon EPR ein. 3. Der Hauptschalter befindet sich an der Geräteseite. HINWEIS: Um die Lebensdauer der Desinfektionspatrone zu maximieren, lassen Sie das trophon EPR stets eingeschaltet, außer wenn das Gerät bewegt oder umgestellt werden muss. -
Page 32: B2.5 Aufwärmzyklus
B2.5 Aufwärmzyklus 1. Der Aufwärmzyklus bereitet das trophon EPR auf den Betrieb vor und startet automatisch, sobald das Gerät eingeschaltet oder der Schlafmodus deaktiviert wird. Bildschirmmeldung Ungefähre Aufwärmzeit (Minuten) Aufwärmen aus Startmodus < 2 Aufwärmen 2–30 Aufwärmen Erweiterter > 30 Start Während dieser Zeit werden möglicherweise zu beachtende Anweisungen auf dem... -
Page 33: Teil C - Routinegebrauch, Wartung Und Pflege
Weitere Informationen finden Sie in der Gebrauchsanweisung des chemischen Indikators. Anschließend können Sie die Sonde in die Kammer einlegen. C2.3 Positionieren der Sonde 1. Wenn das trophon EPR bereit ist, wird auf dem Bildschirm die Meldung Sonde und Indikator einlegen angezeigt. 2. Öffnen Sie die Kammerabdeckung. - Page 34 HINWEIS: Konvexsonden müssen korrekt in das trophon EPR eingelegt werden. Siehe Abbildung 12. Der Curved Probe Positioner (CPP) ist ein Zubehörteil, das für die Positionierung bestimmter Sonden erforderlich ist. Weitere Informationen dazu finden Sie in der Liste der für das trophon EPR zulässigen Sonden.
-
Page 35: C2.4 Schließen Der Kammerabdeckung
5. Der hochwirksame Desinfektionszyklus dauert 7 Minuten. WARNUNG: Wenn wider Erwarten Nebel aus der Kammer austritt, halten Sie einen gewissen Abstand zum trophon EPR, bis der Zyklus abgeschlossen und kein Nebel mehr sichtbar ist. Setzen Sie sich dem Nebel nicht direkt aus. Wenden Sie sich an Ihren Kundendienst (siehe Teil D –... -
Page 36: C2.6 Entnehmen Der Sonde
10. Die Sonde kann nun verwendet oder gelagert werden. C2.7 Schlafmodus und Ausschalten Wenn das trophon EPR 120 Minuten lang nicht verwendet wurde oder eine Sonde für einen längeren Zeitraum im trophon EPR gelassen wird, tritt das Gerät automatisch in den Schlafmodus, um Strom zu sparen. -
Page 37: Abschnitt C3: Entleerungszyklus
Patronenabdeckung schließen. C3.3 Transport des trophon EPR Vor dem Transport des trophon EPR ist das Desinfektionsmittel zu entleeren und das Gerät am Hauptschalter auszuschalten. Bewegen Sie das trophon EPR nicht übermäßig, und ziehen Sie es nicht über die Aufstellfläche. -
Page 38: C4.2 Zyklusfehler
Desinfektionszyklus durchlaufen hat oder anderweitig desinfiziert wurde. Abbildung 14 Abbildung 13 ABSCHNITT C5: ROUTINEPFLEGE UND WARTUNG C5.1 Regelmäßige Reinigung 1. Tauchen Sie das trophon EPR NICHT in Flüssigkeiten, und verschütten Sie keine Flüssigkeiten über dem Gerät. L00049 1.0 08/2015... -
Page 39: C5.2 Wartung
5. Desinfizieren Sie alle zugänglichen Flächen des trophon EPR mit einem Isopropanol-Tuch oder anderem Desinfektionstuch. C5.2 Wartung Ihr trophon EPR muss einmal pro Jahr einer Präventivwartung und alle 5.000 Zyklen einer umfassenden Wartung unterzogen werden. Wenn der Ablauf des Wartungsintervalls von 12 Monaten bzw. 5.000 Zyklen auf dem Bildschirm angezeigt wird, setzen Sie sich bitte mit Ihrem Kundendienst in Verbindung, um die Wartung zu veranlassen. -
Page 40: Teil D - Fehlersuche
Hauptschalter aus und wieder ein (siehe Abbildung 4). Das trophon EPR sollte so die Kammerabdeckung automatisch entriegeln. Ist dies nicht der Fall, schalten Sie das trophon EPR aus, und folgen Sie den Anweisungen in Abschnitt C4.3. Schließen Sie die Kammerabdeckung, bevor Sie das trophon EPR wieder einschalten. -
Page 41: Teil E - Wartung Und Garantie
EPR oder Zubehör Garantie Jedes trophon EPR verfügt über eine umfassende 12-monatige Garantie ab Lieferdatum für Material- und Verarbeitungsfehler. Wartungsplan: Wenn ein Wartungstermin ansteht, wird dies einmal wöchentlich vor Beginn eines Desinfektionszyklus durch die Bildschirmmeldung Wartung fällig angezeigt, bis eine Wartung durchgeführt wird. -
Page 42: Anhang 2: Bedingungen Der Produktgarantie
ANHANG 2: BEDINGUNGEN DER PRODUKTGARANTIE Bedingungen Nanosonics Limited ABN 11 095 076 896, Anschrift: 14 Mars Road, Lane Cove, NSW 2066 Australien (nachfolgend Nanosonics) haftet für dieses Produkt. Nanosonics garantiert, dass das trophon EPR für einen Zeitraum von 12 Monaten ab dem Kaufdatum (Garantiezeit) frei von Material- und Verarbeitungsfehlern ist, die seine Funktionalität bei normaler... - Page 43 Ausschlüsse gilt oder der Garantiezeitraum abgelaufen ist), tragen Sie die Kosten für den Rückversand des trophon EPR an Sie bzw. für die von Ihnen in Auftrag gegebene Reparatur oder für den von Ihnen angeforderten Ersatz des trophon EPR.
- Page 44 FRANÇAIS ® trophon Mode d'emploi L00049 1.0 08/2015...
- Page 45 EPR afin de prendre connaissance des procédures correctes. Pour de plus amples informations, contactez le SAV ou consultez le site Web de Nanosonics. Vous trouverez les caractéristiques techniques et les homologations du système à l'Annexe 1. ©2015 Nanosonics Limited. Tous droits réservés.
- Page 46 PARTIE D – DÉPANNAGE ........................60 PARTIE E – ENTRETIEN ET GARANTIE .................... 62 ANNEXE 1 : CARACTÉRISTIQUES TECHNIQUES DU TROPHON EPR, N00010, N00020, N03000 ET N04000 ............................62 ANNEXE 2 : CONDITIONS GÉNÉRALES DE LA GARANTIE DU PRODUIT ........63...
-
Page 47: Partie A - Avertissements, Instructions Et Présentation
PARTIE A – AVERTISSEMENTS, INSTRUCTIONS ET PRÉSENTATION SECTION A1 : AVERTISSEMENTS IMPORTANTS, ÉTIQUETTES ET SYMBOLES A1.1 Étiquettes et symboles Attention Corrosif Consulter le mode d'emploi Avertissement Démarrage (de l'action) Usage unique exclusivement Fragile / Manipuler avec Avertissement : surface précaution chaude Ne pas démonter Tension dangereuse... -
Page 48: A1.2 Instructions
N'essayez pas d'accéder aux pièces mécaniques internes au risque de subir un choc électrique. Équipement de protection et déversements Portez des gants jetables propres lors de l'utilisation du trophon EPR et de la manipulation : o des cartouches de désinfectant, afin d'éviter une décoloration et/ou irritation temporaire de la peau ;... -
Page 49: Section A2 : Présentation Du Trophon Epr
Pour obtenir des détails sur les sondes que vous pouvez utiliser dans le trophon EPR, reportez-vous : à la liste de sondes homologuées pour le trophon EPR que vous trouverez sur le site Web de Nanosonics. Utilisez uniquement les cartouches de désinfectant trophon lors de la désinfection de haut niveau à... - Page 50 trophon Cart trophon Logbook trophon Curved Probe Positioner (CPP) trophon Clean Cover Utilisez uniquement les accessoires trophon homologués. L'utilisation d'autres accessoires peut compromettre l'efficacité du trophon. *Certains accessoires sont disponibles uniquement pour certains modèles trophon. Contactez votre représentant trophon pour de plus amples informations.
-
Page 51: Partie B - Vue D'ensemble Des Caractéristiques Du Trophon Et Guide D'installation
PARTIE B – VUE D'ENSEMBLE DES CARACTÉRISTIQUES DU TROPHON ET GUIDE D'INSTALLATION SECTION B1 : CARACTÉRISTIQUES DU TROPHON Avant Arrière Figure 1 Figure 2 Chambre de désinfection Côté gauche Figure 3 Figure 4 Côté droit Écran utilisateur Touche Marche Touches contextuelles Poignée d'ouverture de la porte de la chambre de désinfection Pieds réglables (pour la mise à... -
Page 52: Section B2 : Guide D'installation
SECTION B2 : GUIDE D'INSTALLATION B2.1 Positionnement du trophon 1. Assurez-vous que la surface choisie peut supporter le poids de l'appareil et permet une circulation adéquate de l'air (voir Annexe 1). 2. Assurez-vous qu'il n'y a pas d'autre équipement dans la zone autour de l'appareil et que celle- ci n'est pas encombrée. -
Page 53: B2.3 Mise En Marche
B2.3 Mise en marche 1. Branchez le cordon d'alimentation à la prise d'alimentation du trophon. 2. Branchez l'autre extrémité à une prise de courant et, le cas échéant, mettez-la sous tension. 3. Appuyez sur l'interrupteur principal situé sur le côté du trophon pour le mettre en marche. REMARQUE : afin de maximiser la durée de vie de la cartouche de désinfectant, laissez le trophon en marche en permanence, sauf lorsque vous devez le déplacer. - Page 54 3. À la fin du cycle de mise en fonctionnement, le message suivant s'affiche à l'écran : Chargez la sonde et l'indicateur 4. L'appareil est maintenant prêt à l'emploi. L00049 1.0 08/2015...
-
Page 55: Partie C - Utilisation, Maintenance Et Entretien De Routine
ROUTINE SECTION C1 : CHARGEMENT DE LA CARTOUCHE DE DÉSINFECTANT Vous devez charger une cartouche de désinfectant trophon dans le trophon EPR pour que le cycle de désinfection de haut niveau puisse commencer. Reportez-vous au mode d'emploi du désinfectant trophon pour les instructions détaillées de chargement et/ou remplacement de la cartouche de désinfectant trophon. - Page 56 Enroulez correctement le câble autour du support de câble situé sur le côté du bac à câbles. REMARQUE : en cas de positionnement incorrect de la sonde : le cycle de désinfection du trophon EPR risque de ne pas fournir une désinfection de haut niveau ;...
-
Page 57: C2.4 Fermeture De La Porte De La Chambre De Désinfection
Figure 12 C2.4 Fermeture de la porte de la chambre de désinfection La porte se verrouille automatiquement au démarrage d'un cycle de désinfection de haut niveau. Si la porte n'est pas correctement fermée, le message Fermez la porte de la chambre s'affiche à... -
Page 58: C2.6 Retrait De La Sonde
attendez que le brouillard ait complètement disparu. Vous ne devez en aucun cas entrer en contact direct avec le brouillard. Contactez le SAV (voir Partie D – Dépannage). C2.6 Retrait de la sonde 1. Lorsque le cycle est terminé, le trophon émet une alarme sonore. REMARQUE : à... -
Page 59: Section C3 : Cycle De Purge
C3.3 Transport du trophon Avant de transporter le trophon EPR, vous devez impérativement purger le désinfectant et éteindre le trophon au niveau de l'interrupteur principal. Ne déplacez pas excessivement le trophon et ne le faites pas glisser sur la surface de montage. -
Page 60: C4.2 Erreur De Cycle
Après le rétablissement du courant, suivez les instructions affichées à l'écran pour retirer la sonde du trophon en toute sécurité. Jetez l'indicateur chimique usagé et remplacez-le par un neuf. Répétez le cycle de désinfection. S'il est impossible de rétablir le courant et que vous avez besoin d'utiliser la sonde immédiatement, suivez les instructions de la section C4.3. -
Page 61: C5.2 Entretien
à l'écran, contactez le SAV afin de fixer un rendez-vous pour la révision. SECTION C6 : MISE AU REBUT DU TROPHON Contactez votre distributeur ou Nanosonics pour obtenir l'adresse du point de collecte le plus proche acceptant les équipements électriques et électroniques. -
Page 62: Partie D - Dépannage
Si le problème persiste, ÉTEIGNEZ le trophon et suivez les instructions de la section C4.3. Fermez la porte de la chambre de désinfection avant de remettre le trophon EPR EN MARCHE. 6. Impossible d'ouvrir le Le trophon est alimenté en courant. - Page 63 12. Plusieurs cycles du trophon Consignez tous les codes d'erreur, ainsi que la couleur de échouent. l'indicateur, et contactez le SAV. 13. Le trophon met trop de Assurez-vous que la sonde est retirée immédiatement à la fin de temps pour réaliser le cycle chaque cycle.
-
Page 64: Partie E - Entretien Et Garantie
la garantie. Le trophon EPR bénéficie d'une garantie complète contre les défauts de matériaux et de fabrication pendant une période de 12 mois à compter de la date de livraison. Calendrier d'entretien : chaque échéance d'entretien est signalée par l'affichage du message suivant avant un cycle de désinfection : Entretien appareil échu. -
Page 65: Annexe 2 : Conditions Générales De La Garantie Du Produit
12 mois à compter de la date d'achat (ci-après période de garantie). Il est possible que la loi de votre pays vous accorde certains droits en relation avec le trophon EPR. La présente garantie n'affecte pas ces droits. - Page 66 Nanosonics peut vous demander de payer les frais de retour du trophon EPR ou le coût des réparations apportées au trophon EPR sur votre demande ou du trophon EPR de remplacement que vous avez demandé.
- Page 67 NEDERLANDS ® trophon Gebruikershandleiding L00049 1.0 08/2015...
- Page 68 VS en Canada. Sonex-HL is de naam van het trophon ontsmettingsmiddel in de VS en Canada. De technologieën van Nanosonics zijn beschermd door een combinatie van octrooien, handelsmerken en exclusieve eigendomsrechten. Uw verkoopvertegenwoordiger is: Plaats hier een visitekaartje of informatiesticker/-stempel.
- Page 69 PARAGRAAF C6: DE TROPHON WEGDOEN ..................81 HOOFDSTUK D – OPSPOREN EN OPLOSSEN VAN PROBLEMEN ..........82 HOOFDSTUK E – ONDERHOUD EN GARANTIE ................83 BIJLAGE 1: TECHNISCHE SPECIFICATIE TROPHON EPR, N00010, N00020, N03000 & N0400083 BIJLAGE 2: ALGEMENE GARANTIEVOORWAARDEN ..............84 L00049 1.0 08/2015...
-
Page 70: Hoofdstuk Awaarschuwingen, Instructies En Inleiding
– HOOFDSTUK A WAARSCHUWINGEN, INSTRUCTIES EN INLEIDING PARAGRAAF A1: BELANGRIJKE WAARSCHUWINGEN, ETIKETTEN en SYMBOLEN A1.1 Etiketten en symbolen Let op Corrosief materiaal Gebruiksaanwijzingen Waarschuwing raadplegen Uitsluitend voor eenmalig Start (van werking) gebruik Breekbaar/voorzichtig Waarschuwing: heet hanteren oppervlak Gevaarlijke elektrische Niet demonteren spanning Gescheiden inzameling van elektrische en elektronische... -
Page 71: A1.2 Instructies
Beschermende kleding en gemorste vloeistoffen Draag schone wegwerphandschoenen bij het bedienen van de trophon EPR en: o het hanteren van cartridges met ontsmettingsmiddel omdat dit zonder het dragen van handschoenen kan leiden tot tijdelijk verbleken en/of irritatie van de huid o het hanteren van sondes voor en na een ontsmettingscyclus o het legen van de opvangbak. -
Page 72: Paragraaf A2: Inleiding In De Trophon Epr
- uitsluitend leverbaar voor bepaalde trophon varianten) of door uw servicecentrum worden verschaft tijdens gepland preventief onderhoud. A2.4 Gevalideerde sondes en ontsmettingsmiddelen Raadpleeg voor meer informatie over de sondes die in de trophon EPR kunnen worden gebruikt: trophon EPR Validated Probes List op de Nanosonics website. - Page 73 trophon Wall Mount trophon Cart trophon Logbook trophon Curved Probe Positioner (CPP) trophon Clean Cover Gebruik uitsluitend door trophon goedgekeurde accessoires omdat de trophon anders wellicht niet goed werkt. *Sommige accessoires zijn uitsluitend leverbaar voor bepaalde trophon varianten. Neem contact op met uw trophon vertegenwoordiger voor nadere informatie.
-
Page 74: Hoofdstuk B - Overzicht Van Trophon Kenmerken En Installatiegids
– HOOFDSTUK B OVERZICHT VAN TROPHON KENMERKEN EN INSTALLATIEGIDS PARAGRAAF B1: TROPHON KENMERKEN Achterzijde Voorzijde Figuur 2 Figuur 1 Kamer Linkerzijde Figuur 4 Figuur 3 Rechterzijde Displayscherm Startknop Softkey-knoppen Deurgreep van kamer Verstelbare pootjes (voor waterpas stellen) Kamerdeur (geopend) Sonde in correcte positie Snoerklem Pakkingdrukker Stroomschakelaar... -
Page 75: Paragraaf B2: Installatiegids
PARAGRAAF B2: INSTALLATIEGIDS B2.1 Plaatsing van de trophon 1. Zorg ervoor dat het oppervlak het gewicht kan dragen en voldoende luchtcirculatie mogelijk maakt (zie bijlage 1). 2. Zorg ervoor dat er geen andere apparatuur of rommel rondom het apparaat staat of ligt. Plaats hem zoals getoond in figuur 6 om bij alle functies te kunnen. -
Page 76: B2.3 Aanzetten
B2.3 Aanzetten 1. Sluit het netsnoer op de contrastekker van het apparaat aan. 2. Verbinden met het lichtnet en aanzetten. 3. Zet de stroomschakelaar aan de zijkant van het apparaat aan. NB Voor een maximale levensduur van de ontsmettingsmiddelcartridge moet u de trophon te allen tijde aan houden, behalve wanneer de machine moet worden verplaatst. -
Page 77: Hoofdstuk C - Routinegebruik, Onderhoud En Verzorging
VERZORGING PARAGRAAF C1: HET LADEN VAN DE ONTSMETTINGSMIDDEL-CARTRIDGE Er moet een trophon cartridge met ontsmettingsmiddel in de trophon EPR worden gedaan voordat er een hoogwaardige ontsmettingscyclus kan worden gestart. Raadpleeg de instructies bij het trophon ontsmettingsmiddel over het monteren en/of vervangen van de cartridges. - Page 78 Het snoer netjes en veilig om de snoerhouder aan de zijkant van de bak-assemblage te wikkelen. NB Een onjuiste plaatsing van de sonde kan leiden tot: het niet bereiken van een hoogwaardige ontsmetting tijdens de trophon EPR- ontsmettingscyclus. het achterblijven van resten ontsmettingsmiddel op het sonde-oppervlak. Dit kan leiden tot tijdelijke verbleking en/of irritatie van de huid als er geen handschoenen worden gedragen.
-
Page 79: C2.4 De Kamerdeur Sluiten
Figuur 12 C2.4 De kamerdeur sluiten De deur wordt automatisch vergrendeld bij de start van een hoogwaardige ontsmettingscyclus. Als de deur niet goed gesloten is, verschijnt het volgende bericht op het scherm: Kamerdeur sluiten. C2.5 De sonde ontsmetten Het volgende bericht op het scherm: Is de sonde schoon en droog? 1. -
Page 80: C2.6 De Sonde Verwijderen
C2.6 De sonde verwijderen 1. Wanneer de cyclus met succes is voltooid, klinkt er een hoorbaar alarm. NB Na het met succes voltooien van een hoogwaardige ontsmettingscyclus, kunnen de oppervlakken van de sonde en kamer respectievelijk een temperatuur bereiken van maximaal C/ 113 F en 60 C/ 140... -
Page 81: Paragraaf C3: Zuiveringscyclus
6. Volg het volgend bericht op het scherm: Cartridge vervangen en cartridgedeur sluiten. C3.3 De trophon transporteren Voordat u de trophon EPR vervoert, moet u het ontsmettingsmiddel verwijderen en het apparaat met de stroomschakelaar uitschakelen. Verplaats het apparaat niet te veel en versleep hem niet over het montage-oppervlak. -
Page 82: C4.2 Cyclusfout
Als de stroom niet kan worden aangesloten en de sonde dringend nodig is, volg dan paragraaf C4.3. C4.2 Cyclusfout Als er tijdens of aan het einde van de cyclus een probleem optreedt, wordt er een cyclusfout vastgesteld. Volg de berichten op het scherm om de fout te verhelpen en herhaal de ontsmettingscyclus. -
Page 83: C5.2 Onderhoud
PARAGRAAF C6: DE TROPHON WEGDOEN Neem contact op met uw distributeur of Nanosonics. Die kunnen adviseren over het afhaalpunt voor het recyclen van elektrische en elektronische apparatuur. L00049 1.0 08/2015... -
Page 84: Hoofdstuk D - Opsporen En Oplossen Van Problemen
Het apparaat krijgt stroom. Er is geen ontsmettings-, opwarmings- of zuiveringscyclus gaande. 4. De kamerdeur gaat niet dicht. De sonde is goedgekeurd voor gebruik met de trophon EPR - zie paragraaf A2.1 De sonde is correct geplaatst. De kamerdeur zit niet in de 'vergrendelde positie'. Indien in de 'vergrendelde' positie, zie probleem 5 hieronder. -
Page 85: Hoofdstuk E - Onderhoud En Garantie
Neem contact op met uw Nanosonics vertegenwoordiger als u vragen heeft over: De trophon EPR of accessoires De garantie De Trophon EPR biedt vanaf de dag van levering gedurende 12 maanden een uitgebreide garantie voor materiaal- en fabrieksfouten. Onderhoudsschema: Indien onderhoud... -
Page 86: Bijlage 2: Algemene Garantievoorwaarden
BIJLAGE 2: ALGEMENE GARANTIEVOORWAARDEN Voorwaarden Deze garantie wordt gegeven door Nanosonics Limited ABN 11 095 076 896 te 14 Mars Road, Lane Cove, NSW 2066 Australië (Nanosonics). Nanosonics garandeert de klant dat de trophon EPR gedurende 12 maanden vanaf de aankoopdatum (garantieperiode) vrij van materiaal- en fabrieksfouten is die de werking van het apparaat bij normaal gebruik en onderhoud materieel beïnvloeden. - Page 87 Nanosonics vereisen dat u de kosten draagt van de levering van de trophon EPR aan u, plus de kosten van eventuele op uw verzoek uitgevoerde reparaties aan de trophon EPR of een nieuwe trophon EPR.
- Page 88 Italiano ® trophon Manuale per l'utente L00049 1.0 08/2015...
- Page 89 Stati Uniti e Canada. Sonex-HL è il nome di prodotto del disinfettante trophon negli Stati Uniti e in Canada. Le tecnologie Nanosonics sono protette da una combinazione di brevetti, marchi depositati e diritti di proprietà riservata.
- Page 90 SEZIONE C6: SMALTIMENTO DEL TROPHON................102 PARTE D – RISOLUZIONE DEI PROBLEMI: ................... 103 PARTE E - ASSISTENZA E GARANZIA ................... 105 APPENDICE 1: SPECIFICHE TECNICHE DEL TROPHON EPR, N00010, N00020, N03000 e N04000 ..............................105 APPENDICE 2: TERMINI E CONDIZIONI DELLA GARANZIA ............106...
-
Page 91: Parte A - Avvertenze, Istruzioni E Introduzione
PARTE A – AVVERTENZE, ISTRUZIONI E INTRODUZIONE SEZIONE A1: ETICHETTE, SIMBOLI e AVVERTENZE IMPORTANTI A1.1 Etichette e simboli Attenzione Corrosivo Consultare le istruzioni per Avvertenza l'uso Avvio (dell'azione) Monouso Fragile / Maneggiare con cura Attenzione: Superficie calda Non smontare Tensione pericolosa Raccolta separata di apparecchiature elettriche ed Tenere all'asciutto... -
Page 92: A1.2 Istruzioni
Non tentare di accedere ai componenti meccanici interni del trophon. Questo può comportare il rischio di scosse elettriche. Indumenti protettivi e spandimenti Indossare guanti monouso puliti quando si utilizza il trophon EPR e nel maneggiare: o le cartucce di disinfettante, per scongiurare il rischio di imbianchimento o irritazione della pelle;... -
Page 93: Sezione A2: Introduzione Al Trophon Epr
EPR. A2.6 Ambiente e tipologia di utenti Il trophon EPR è indicato per l’uso in strutture sanitarie per la disinfezione di alto livello di trasduttori a ultrasuoni sotto il controllo di personale medico e infermieristico qualificato. - Page 94 trophon Logbook trophon Curved Probe Positioner (CPP) trophon Clean Cover Utilizzare esclusivamente gli accessori approvati trophon, o l’apparecchio potrebbe risultare inefficace. *Alcuni accessori sono disponibili unicamente per particolari modelli di trophon. Rivolgersi al proprio rappresentante trophon per maggiori informazioni. L00049 1.0 08/2015...
-
Page 95: Parte B - Panoramica Delle Funzioni Del Trophon Eguida All'installazione
PARTE B – PANORAMICA DELLE FUNZIONI DEL TROPHON E GUIDA ALL’INSTALLAZIONE SEZIONE B1: FUNZIONI DEL TROPHON Vista posteriore Vista anteriore Figura 2 Figura 1 Camera Lato sinistro Figura 3 Figura 4 Lato destro Display utente Tasto d'avvio Tasti contestuali Maniglia dello sportello della camera Piedini regolabili (per mettere a livello l'apparecchio) Sportello della camera (aperto) Sonda nella posizione corretta... -
Page 96: Sezione B2: Guida All'installazione
SEZIONE B2: GUIDA ALL’INSTALLAZIONE B2.1 Posizionamento del trophon 1. Assicurarsi che la superficie sia in grado di sostenere il peso e consentire un flusso d’aria adeguato (vedere Appendice 1). 2. Assicurarsi che l'area intorno al trophon sia sgombra e non vi si trovino altre apparecchiature. Posizionare il trophon come mostrato in Figura 6 per assicurare l’accesso a tutte le funzioni. -
Page 97: B2.3 Accensione
B2.3 Accensione 1. Fissare il cavo d'alimentazione in dotazione alla presa di corrente del trophon. 2. Collegare alla rete elettrica e accendere. 3. Premere l'interruttore generale sul lato del trophon. NOTA: Per prolungare la durata della cartuccia di disinfettante, tenere il trophon sempre acceso eccetto quando l'apparecchio va spostato. -
Page 98: Parte C - Utilizzo, Manutenzione E Cura Di Routine
Prima di poter avviare un ciclo di disinfezione di alto livello occorre inserire una cartuccia di Vedere le Istruzioni per l’uso del disinfettante trophon per le disinfettante trophon nel trophon EPR procedure dettagliate di inserimento e/o sostituzione delle cartucce di disinfettante trophon. - Page 99 NOTA: Le sonde convesse vanno inserite correttamente nel trophon. Vedere figura 12. Il posizionatore per sonde convesse è un accessorio il cui utilizzo è richiesto per ottenere il corretto posizionamento di alcuni tipi di sonda. Vedere l’elenco delle sonde omologate per il trophon EPR. L00049 1.0 08/2015...
-
Page 100: C2.4 Chiusura Dello Sportello Della Camera
Figura 12 C2.4 Chiusura dello sportello della camera. La serratura dello sportello si chiude automaticamente all'inizio del ciclo di disinfezione di alto livello. Se la chiusura non avviene correttamente, comparirà il messaggio Chiudi sportello camera. C2.5 Disinfezione della sonda Il display mostrerà... -
Page 101: C2.7 Modalità Di Attesa E Procedure Di Arresto
NOTA: A ciclo di disinfezione di alto livello ultimato con successo, le superfici esterne della sonda a ultrasuoni e della camera possono raggiungere rispettivamente temperature fino a 45 e 60 Prestare attenzione a non toccare la camera. Pur essendo calda, la sonda potrà essere maneggiata indossando guanti protettivi. -
Page 102: Sezione C3: Ciclo Di Spurgo
6. Seguire le istruzioni del messaggio successivo, vale a dire Sostituisci la cartuccia e chiudi lo sportello. C3.3 Trasporto del trophon Prima di trasportare il trophon EPR, si dovrà spurgare il disinfettante e spegnere l’unità tramite l'interruttore generale. Non muovere eccessivamente o trascinare il trophon lungo la superficie sulla quale è stato posizionato. -
Page 103: C4.2 Interruzione Del Ciclo
Se si necessita con urgenza della sonda ma è impossibile ripristinare la corrente, seguire le istruzioni alla sezione C4.3. C4.2 Interruzione del ciclo Se si verifica un problema a ciclo in corso o terminato, la macchina rileverà un guasto. Seguire le istruzioni che compariranno sul display per risolvere il problema e ripetere il ciclo di disinfezione. -
Page 104: C5.2 Manutenzione
SEZIONE C6: SMALTIMENTO DEL TROPHON Rivolgersi al proprio distributore o a Nanosonics. Essi sapranno indicare il punto di raccolta preposto al riciclaggio di apparecchiature elettriche o elettroniche presso il quale smaltire l’unità. -
Page 105: Parte D - Risoluzione Dei Problemi
Non è in corso un ciclo di disinfezione, di riscaldamento o di spurgo. 4. Lo sportello della camera La sonda è omologata per l'uso con il trophon EPR (vedere la non si chiude. sezione A2.1). La sonda è caricata correttamente. - Page 106 Lasciare che il trophon porti a termine il ciclo. Spegnere il trophon e staccare il cavo d'alimentazione. Rivolgersi al proprio addetto all'assistenza alla clientela. 12. Il trophon non riesce a Prendere nota dei codici di errore e dei colori dell'indicatore completare una serie di cicli.
-
Page 107: Parte E - Assistenza E Garanzia
Il trophon EPR o i suoi accessori La garanzia Ciascun trophon EPR è garantito da difetti dei materiali e di fabbricazione per 12 mesi dalla data di consegna. Piano di manutenzione: Allo scadere del periodo di manutenzione, il messaggio Scadenza manutenzione compare sul display prima del ciclo di disinfezione. -
Page 108: Appendice 2: Termini E Condizioni Della Garanzia
APPENDICE 2: TERMINI E CONDIZIONI DELLA GARANZIA Termini Il prodotto è garantito da Nanosonics Limited ABN 11 095 076 896 of 14 Mars Road, Lane Cove, NSW 2066 Australia (di seguito Nanosonics). Nanosonics garantisce il trophon EPR da difetti dei materiali e di fabbricazione tali da incidere in modo sostanziale sul suo funzionamento nelle normali condizioni di uso e manutenzione per un lasso di tempo di 12 mesi dalla data di acquisto (di seguito "durata della garanzia"). - Page 109 Spetta al cliente effettuare copie di sicurezza dei dati memorizzati dal trophon EPR, in caso questo necessiti di riparazione. Il cliente rende atto inoltre del fatto che la riparazione del trophon EPR può far sì che i dati generati nel corso dell’utilizzo e memorizzati sull’apparecchio possano andare perduti.
- Page 110 Português ® trophon Manual do utilizador L00049 1.0 08/2015...
- Page 111 é comercializado, com excepção dos EUA e Canadá. Nos EUA e Canadá a designação comercial do desinfectante trophon é Sonex-HL. As tecnologias da Nanosonics encontram-se protegidas por uma combinação de patentes, marcas de serviço e direitos de propriedade exclusivos.
- Page 112 PARTE D – RESOLUÇÃO DE PROBLEMAS ................... 125 PARTE E – ASSISTÊNCIA E GARANTIA ..................126 ANEXO 1: ESPECIFICAÇÕES TÉCNICAS DO TROPHON EPR, N00010, N00020, N03000 e N04000 ..............................126 ANEXO 2: GARANTIA DO PRODUTO TERMOS E CONDIÇÕES ........... 127...
-
Page 113: Parte A - Avisos, Instruções E Introdução
PARTE A – AVISOS, INSTRUÇÕES E INTRODUÇÃO SECÇÃO A1: AVISOS IMPORTANTES, ETIQUETAS e SÍMBOLOS A1.1 Etiquetas e Símbolos Cuidado Corrosivo Consulte as instruções de Aviso utilização Início (de acção) Não reutilizável Frágil/Manusear com cuidado Aviso: superfície quente Não desmontar Tensão perigosa Recolha separada para equipamento eléctrico e Manter seco... -
Page 114: A1.2 Instruções
Não tente aceder aos mecanismos internos. Isto pode causar choque eléctrico. Vestuário de Protecção e Derrames Use luvas descartáveis limpas durante a utilização do trophon EPR e ao manusear: o cartuchos de desinfectante, para não haver possibilidade de sofrer descoloração temporária e/ou irritação da pele;... -
Page 115: Secção A2: Introdução Ao Trophon Epr
A cada ciclo de desinfecção, é necessário utilizar o Indicador Químico. A2.2 Processo de desinfecção No início do ciclo de desinfecção de alto nível, o trophon EPR cria um aerossol de peróxido de hidrogénio concentrado. Este é distribuído pela superfície exposta da sonda, proporcionando uma desinfecção minuciosa e de alto nível do corpo e da pega da sonda. - Page 116 trophon Curved Probe Positioner (CPP) trophon Clean Cover Se não usar apenas acessórios trophon aprovados, o trophon poderá ser ineficaz. * Alguns acessórios só estão disponíveis para determinadas variantes trophon. Contacte o representante trophon para obter mais informações. L00049 1.0 08/2015...
-
Page 117: Parte B - Descrição Das Funcionalidades Trophon Eguia De Instalação
PARTE B – DESCRIÇÃO DAS FUNCIONALIDADES TROPHON E GUIA DE INSTALAÇÃO SECÇÃO B1: FUNCIONALIDADES TROPHON Traseira Frente Figura 2 Figura 1 Câmara Lado esquerdo Figura 3 Figura 4 Lado direito Ecrã do utilizador Botão Iniciar Teclas de função Puxador da porta da câmara Pés reguláveis (para nivelar) Porta da câmara (aberta) Sonda na posição correcta... -
Page 118: Secção B2: Guia De Instalação
SECÇÃO B2: GUIA DE INSTALAÇÃO B2.1 Posicionamento do trophon 1. Assegure-se de que a superfície consegue suportar o peso e que permite um fluxo de ar adequado (consulte o Anexo 1). 2. Certifique-se de que a área em torno do trophon está livre de outros equipamentos e objectos. Posicione-o conforme a Figura 6 para garantir o acesso a todas as funcionalidades. -
Page 119: B2.3 Ligação À Corrente
B2.3 Ligação à corrente 1. Ligue o cabo de alimentação fornecido à tomada de alimentação do trophon. 2. Ligue à alimentação eléctrica e active. 3. Ligue o interruptor de alimentação, que se encontra na parte lateral do trophon. NOTA: para maximizar a vida útil do cartucho de desinfectante, mantenha o trophon sempre ligado, excepto quando for necessário mover a máquina. -
Page 120: Parte C - Utilização, Manutenção E Cuidados De Rotina
Antes de ser possível iniciar um ciclo de desinfecção de alto nível, é preciso inserir um cartucho de desinfectante trophon no trophon EPR. Consulte as Instruções de Utilização do desinfectante trophon para obter instruções detalhadas sobre como inserir e/ou substituir cartuchos de desinfectante trophon. - Page 121 NOTA: o posicionamento incorrecto da sonda pode fazer com que: não se consiga a desinfecção de alto nível durante o ciclo de desinfecção do trophon EPR; fiquem resíduos de desinfectante na superfície da sonda. Se não usar luvas isto pode causar a descoloração temporária e/ou irritação da pele;...
-
Page 122: C2.4 Fecho Da Porta Da Câmara
Figura 12 C2.4 Fecho da porta da câmara A porta é fechada automaticamente no início de um ciclo de desinfecção de alto nível. Se a porta não for devidamente fechada, aparece no ecrã a mensagem: Fechar porta da câmara. -
Page 123: C2.6 Remoção Da Sonda
C2.6 Remoção da sonda 1. Quando o ciclo tiver sido concluído, o trophon emite um alarme sonoro. NOTA: após a conclusão de um ciclo de desinfecção de alto nível bem sucedido, a sonda ecográfica e a câmara podem apresentar temperaturas superficiais de até 45 C/113 F e 60 C/140... -
Page 124: Secção C3: Ciclo De Limpeza
C3.3 Transportar o trophon Antes de transportar o trophon EPR, deve efectuar o ciclo de limpeza do desinfectante e desligar o trophon no interruptor de alimentação. Não desloque excessivamente nem arraste o trophon na superfície de montagem. -
Page 125: C4.2 Falha De Ciclo
Elimine o Indicador Químico usado e substitua por um novo. Repita o ciclo de desinfecção. Se não for possível restabelecer a alimentação e se a sonda for urgentemente necessária, siga a secção C4.3. C4.2 Falha de ciclo Caso ocorra algum problema durante ou no final do ciclo, é detectada uma falha de ciclo. Siga as mensagens apresentadas no ecrã... -
Page 126: C5.2 Assistência
Assim que o intervalo de assistência de 12 meses ou 5000 ciclos for apresentado no ecrã, contacte o representante da assistência ao cliente para agendar a assistência. SECÇÃO C6: ELIMINAÇÃO DO TROPHON Contacte o distribuidor local ou a Nanosonics. Estes indicam-lhe o ponto de recolha aplicável à reciclagem de equipamento eléctrico e electrónico. L00049 1.0 08/2015... -
Page 127: Parte D - Resolução De Problemas
O trophon tem alimentação eléctrica. Não está a ser executado um ciclo de desinfecção, aquecimento ou limpeza. A sonda foi validada para ser utilizada no trophon EPR – consulte a 4. A porta da câmara não fecha. secção A2.1. A sonda foi correctamente colocada. -
Page 128: Parte E - Assistência E Garantia
A garantia Cada unidade trophon EPR dispõe de uma garantia abrangente contra defeitos de material e de fabrico durante 12 meses a contar da data de entrega. Calendário de assistência: quando houver necessidade de assistência, isto será indicado antes do início de um ciclo de desinfecção através da mensagem no ecrã: Efectuar assistência ao dispositivo,... -
Page 129: Anexo 2: Garantia Do Produto Termos E Condições
A presente garantia é concedida pela Nanosonics Limited ABN 11 095 076 896 of 14 Mars Road, Lane Cove, NSW 2066 Austrália (Nanosonics). A Nanosonics garante ao cliente que o trophon EPR se encontra isento de defeitos de material e de fabrico que afectem materialmente a respectiva funcionalidade em condições de utilização e manutenção normais, durante um período de 12 meses a contar da data de aquisição (período de... - Page 130 EPR que apresente defeito. A Nanosonics comportará os custos de devolução ao cliente do trophon EPR reparado ou do trophon EPR de substituição. Se, por algum motivo, não pudermos reparar ou substituir o trophon EPR, debateremos com o utilizador uma solução adequada, incluindo a actualização para um modelo mais recente ou o reembolso do preço...
- Page 131 ESPAÑOL ® trophon Manual del usuario L00049 1.0 08/2015...
- Page 132 EE. UU. y Canadá. Sonex-HL es el nombre comercial del desinfectante de trophon en EE. UU. y Canadá. Las tecnologías de Nanosonics están protegidas mediante una combinación de patentes, marcas y derechos de propiedad exclusivos de la empresa.
- Page 133 APARTADO A1: ADVERTENCIAS, ETIQUETAS Y SÍMBOLOS IMPORTANTES ......132 A1.1 Etiquetas y símbolos ......................132 A1.2 Instrucciones ........................133 A1.3 Advertencias ........................133 APARTADO A2: INTRODUCCIÓN AL TROPHON EPR ..............134 A2.1 Uso previsto ........................134 A2.2 Proceso de desinfección ....................134 A2.3 Registro del historial de desinfecciones ................
-
Page 134: Parte A: Advertencias, Instrucciones E Introducción
PARTE A: ADVERTENCIAS, INSTRUCCIONES E INTRODUCCIÓN APARTADO A1: ADVERTENCIAS, ETIQUETAS Y SÍMBOLOS IMPORTANTES A1.1 Etiquetas y símbolos Atención Corrosivo Consulte las instrucciones de Advertencia Inicio (de la acción) De un solo uso Advertencia: superficie Frágil / Manipular con cuidado caliente No desmontar Voltaje peligroso Recogida separada de... -
Page 135: A1.2 Instrucciones
Equipo de protección y derrames Utilice guantes desechables limpios cuando utilice el trophon EPR y manipule: o cartuchos de desinfectante, ya que si no lo hace, se puede producir un blanqueamiento temporal de la piel, y/o aparecer irritación o sondas antes y después de someterlas al ciclo de desinfección... -
Page 136: Apartado A2: Introducción Al Trophon Epr
Es necesario usar el indicador químico en cada ciclo de desinfección. A2.2 Proceso de desinfección Al principio del ciclo de alto nivel, el trophon EPR crea un aerosol de peróxido de hidrógeno concentrado. Este se esparce por las superficies expuestas de la sonda para proporcionar una minuciosa desinfección de alto nivel tanto del tubo como del mango de la sonda. - Page 137 trophon Logbook trophon Curved Probe Positioner (CPP) trophon Clean Cover Utilice únicamente accesorios aprobados de trophon; de lo contrario, el trophon podría no funcionar. *Algunos accesorios solo están disponibles para ciertos modelos de trophon. Póngase en contacto con su representante de trophon para más información.
-
Page 138: Parte B: Descripción De Las Características Del Trophon Y Guía De Instalación
PARTE B: DESCRIPCIÓN DE LAS CARACTERÍSTICAS DEL TROPHON Y GUÍA DE INSTALACIÓN APARTADO B1: CARACTERÍSTICAS DEL TROPHON Parte posterior Parte delantera Ilustración 2 Ilustración 1 Cámara Lado izquierdo Ilustración 4 Ilustración 3 Lado derecho Pantalla para el usuario Botón inicio Botones programables Tirador de la puerta de la cámara Pies regulables (para nivelar) -
Page 139: Apartado B2: Guía De Instalación
APARTADO B2: GUÍA DE INSTALACIÓN B2.1 Colocación del trophon 1. Asegúrese de que la superficie puede soportar el peso del aparato, y de que hay una corriente de aire adecuada (vea el Apéndice 1). 2. Asegúrese de que no hay otros equipos ni desorden alrededor del trophon. Coloque el trophon tal y como se muestra en la ilustración 6 para garantizar el acceso a todas las funciones. -
Page 140: B2.3 Encendido
B2.3 Encendido 1. Enchufe el cable de alimentación proporcionado a la toma de corriente del trophon. 2. Enchúfelo a la alimentación eléctrica y encienda el interruptor. 3. Encienda el interruptor de encendido, situado en un lado del trophon. NOTA: Para maximizar la duración del cartucho de desinfectante, mantenga el aparato encendido en todo momento, salvo cuando tenga que mover el aparato. - Page 141 Cuando finalice el calentamiento, un mensaje en pantalla dirá: Cargue la sonda y el indicador. El aparato ya está listo para su utilización. L00049 1.0 08/2015...
-
Page 142: Parte C: Uso, Mantenimiento Y Cuidados De Rutina
PARTE C: USO, MANTENIMIENTO Y CUIDADOS DE RUTINA APARTADO C1: CARGAR EL CARTUCHO DE DESINFECTANTE Antes de poder iniciar un ciclo de desinfección de alto nivel, hay que introducir en el trophon EPR un cartucho de desinfectante trophon. Consulte las instrucciones del desinfectante trophon para ver instrucciones detalladas sobre cómo introducir y/o cambiar los cartuchos de desinfectante trophon. - Page 143 NOTA: Las sondas curvadas se deben introducir correctamente en el trophon. Vea la ilustración 12. El posicionador para sondas curvadas de trophon (Curved Prove Positioner - CPP) es un accesorio que sirve para colocar ciertas sondas. Consulte la Lista de sondas aprobadas para el trophon EPR. L00049 1.0 08/2015...
-
Page 144: C2.4 Cierre De La Puerta Del Cartucho
Ilustración 12 C2.4 Cierre de la puerta del cartucho La puerta se cierra automáticamente al principio del ciclo de desinfección de alto nivel. Si la puerta no se cierra correctamente, aparecerá el mensaje en pantalla: Cierre la puerta de la cámara. -
Page 145: C2.7 Procedimientos De Modo De Espera Y Apagado
NOTE: Tras completarse un ciclo de desinfección de alto nivel correctamente, tanto la sonda de ultrasonido como la cámara pueden alcanzar temperaturas de hasta 45 y 60 °C, respectivamente. Tenga cuidado para no tocar la cámara. La sonda estará caliente al tacto, pero es seguro manipularla y utilizarla con los guantes puestos. -
Page 146: Apartado C3: Ciclo De Purgado
6. Siga el siguiente mensaje en pantalla: Cambie el cartucho y cierre la puerta del cartucho. C3.3 Transporte del trophon Antes de transportar el trophon EPR, debe purgar el desinfectante y apagar el interruptor de encendido del trophon. No mueva excesivamente ni arrastre el trophon por la superficie en la que está montado. -
Page 147: C4.2 Fallo En Ciclo
Si no se puede restablecer el suministro eléctrico y necesita la sonda con urgencia, siga lo indicado en el apartado C4.3. C4.2 Fallo en ciclo Si se produce un problema durante el ciclo o al final de este, se detectará un fallo en el ciclo. Siga los mensajes en pantalla para solucionar el fallo y repita el ciclo de desinfección. -
Page 148: C5.2 Revisiones
APARTADO C6: DESECHADO DEL TROPHON Póngase en contacto con su distribuidor de Nanosonics para que le dé información sobre el punto de recogida para reciclar equipos eléctricos y electrónicos. -
Page 149: Parte D: Localización Y Solución De Problemas
No hay ningún ciclo de desinfección, calentamiento ni purgado en ejecución. 4. La puerta de la cámara no La sonda ha sido aprobada para su uso en el trophon EPR se cierra. (consulte el apartado A2.1). Se ha cargado la sonda correctamente. - Page 150 12. Se han producido muchos Apunte todos los códigos de error y el color del indicador químico, ciclos fallidos en el trophon. y póngase en contacto con su representante de atención al cliente. 13. El trophon tarda demasiado Asegúrese de retirar la sonda inmediatamente después de en calentarse entre un ciclo terminar cada ciclo.
-
Page 151: Parte E: Reparación Y Garantía
La garantía El trophon EPR cuenta con una completa garantía que cubre los defectos en el material y la fabricación durante 12 meses a partir de la fecha de entrega. Programa de revisiones: Cuando tenga una revisión pendiente, se le indicará semanalmente antes de comenzar un ciclo de desinfección con un mensaje en pantalla: Revisión dispositivo pendiente,... -
Page 152: Apéndice 2: Términos Y Condiciones De La Garantía Del Producto
11 095 076 896, con domicilio en 14 Mars Road, Lane Cove, NSW 2066, Australia (Nanosonics). Nanosonics otorga al producto trophon EPR una garantía frente a los defectos en el material y en la fabricación que afecten tangiblemente a su funcionamiento en condiciones de uso y mantenimiento normales durante un periodo de 12 meses a partir de la fecha de compra (vigencia de la garantía). - Page 153 EPR defectuoso. Nanosonics correrá con los gastos de devolverle el trophon EPR reparado o de sustitución. Si no somos capaces de reparar o sustituir el trophon EPR por el motivo que fuere, hablaremos con usted para encontrar una solución adecuada, que podría ser, entre otras, cambiar su modelo por uno más nuevo o devolver el importe del precio de compra.
- Page 154 Русский ® trophon Руководство пользователя L00049 1.0 08/2015...
- Page 155 NanoNebulant является названием дезинфицирующего средства trophon, используемым во всех регионах, где продается trophon, кроме США и Канады. Sonex-HL является названием дезинфицирующего средства trophon в США и Канаде. Технологии компании Nanosonics защищены совокупностью патентов, торговых марок и эксклюзивных прав собственности. Ваш торговый представитель: Место...
- Page 156 РАЗДЕЛ C6: УТИЛИЗАЦИЯ АППАРАТА TROPHON ..............169 ЧАСТЬ D – УСТРАНЕНИЕ НЕИСПРАВНОСТЕЙ ................170 ЧАСТЬ E – ОБСЛУЖИВАНИЕ И ГАРАНТИЯ ................172 APPENDIX 1: ТЕХНИЧЕСКИЕ ХАРАКТЕРИСТИКИ TROPHON EPR, N00010, N00020, N03000 & N04000 ..............................172 ПРИЛОЖЕНИЕ 2: ГАРАНТИЯ НА ПРОДУКТ УСЛОВИЯ .............. 173...
-
Page 157: Часть A - Предупреждения, Инструкции И Введение
ЧАСТЬ A – ПРЕДУПРЕЖДЕНИЯ, ИНСТРУКЦИИ И ВВЕДЕНИЕ РАЗДЕЛ A1: ВАЖНЫЕ ПРЕДУПРЕЖДЕНИЯ, МАРКИРОВКА и СИМВОЛЫ A1.1 Маркировка и символы Осторожно Коррозийное Обратитесь к инструкции по Предупреждение применению Только для одноразового Пуск (включение) использования Хрупкое / Обращаться Предупреждение: горячая осторожно поверхность Не разбирать Опасное... -
Page 158: A1.2 Инструкции
Не пытайтесь получить доступ к внутренним механизмам. Это может привести к поражению электрическим током. Защитная одежда и разливы Пользуйтесь чистыми одноразовыми перчатками при работе с trophon EPR и при выполнении следующих операций: o обращение с дезинфицирующим картриджем, так как при отсутствии перчаток... -
Page 159: Раздел A2: Ознакомление С Аппаратом Trophon Epr
поставляется только с некоторыми версиями trophon), или его может предоставить сервисный центр во время проведения планового предупредительного обслуживания. A2.4 Утвержденные зонды и дезинфицирующие средства Чтобы получить сведения о зондах, которые могут использоваться в trophon EPR, ознакомьтесь со следующими материалами: ... -
Page 160: A2.7 Принадлежности
A2.7 Принадлежности Принадлежности*, предназначенные для использования с аппаратом trophon EPR: trophon Connect trophon Printer trophon Wall Mount trophon Cart trophon Logbook trophon Curved Probe Positioner (CPP) trophon Clean Cover Пользуйтесь только принадлежностями, утвержденными для работы с trophon, иначе работа... -
Page 161: Часть B - Краткий Обзор Характеристик Аппарата Ируководство По Установке
ЧАСТЬ B – КРАТКИЙ ОБЗОР ХАРАКТЕРИСТИК АППАРАТА И РУКОВОДСТВО ПО УСТАНОВКЕ РАЗДЕЛ B1: ХАРАКТЕРИСТИКИ TROPHON Задняя панель Передняя сторона Рис.2 Рис.1 Камера Левая сторона Рис. 4 Рис.3 Правая сторона Экран пользователя Кнопка пуска Функциональные кнопки Ручка дверцы камеры Регулируемые ножки (для установки аппарата в горизонтальном... -
Page 162: Раздел B2: Руководство По Установке
РАЗДЕЛ B2: РУКОВОДСТВО ПО УСТАНОВКЕ B2.1 Размещение аппарата trophon 1. Убедитесь, что опорная поверхность способна выдержать вес аппарата, и в месте установки обеспечивается свободное движение воздуха (см. Приложение 1). 2. Убедитесь, что пространство вокруг аппарата trophon не загромождено и там нет другого оборудования. -
Page 163: B2.3 Включение
B2.3 Включение 1. Вставьте кабель питания из комплекта поставки в гнездо электропитания аппарата. 2. Подключите к электросети и включите аппарат. 3. Переведите выключатель, находящийся на боковой стороне аппарата, в положение ВКЛ. ПРИМЕЧАНИЕ: чтобы продлить срок действия картриджа с дезинфицирующим средством, всегда... - Page 164 После завершения цикла прогрева на экране появится сообщение: Load Probe and Indicator (Загрузите зонд и индикатор) Аппарат готов к использованию. L00049 1.0 08/2015...
-
Page 165: Часть C - Повседневное Использование, Обслуживание И Уход
ЧАСТЬ C – ПОВСЕДНЕВНОЕ ИСПОЛЬЗОВАНИЕ, ОБСЛУЖИВАНИЕ И УХОД РАЗДЕЛ C1: ЗАГРУЗКА КАРТРИДЖА С ДЕЗИНФИЦИРУЮЩИМ СРЕДСТВОМ Дезинфицирующие картриджи trophon следует установить в аппарате trophon EPR прежде чем сможет начаться цикл интенсивной дезинфекции. См. «Инструкцию по применению дезинфицирующих картриджей trophon», в которой содержатся подробные указания по... - Page 166 возможно повреждение зонда, если он касается стенки камеры. ПРИМЕЧАНИЕ: необходимо правильно размещать изогнутые зонды в аппарате. См. Рис. 12. Для установки некоторых зондов необходим держатель изогнутых зондов (CPP). См. «Список зондов, одобренных для применения с trophon EPR». L00049 1.0 08/2015...
-
Page 167: C2.4 Закрытие Дверцы Камеры
Рис. 12 C2.4 Закрытие дверцы камеры Дверца автоматически блокируется в начале цикла интенсивной дезинфекции. Если дверца закрыта неправильно, на экране появляется сообщение: Close chamber door (Закройте дверцу камеры). C2.5 Дезинфекция зонда На экране появляется сообщение: Is the probe clean and dry? (Зонд очищен и высушен?) 1. -
Page 168: C2.6 Извлечение Зонда
C2.6 Извлечение зонда 1. После успешного завершения цикла аппарат подаст звуковой сигнал. ПРИМЕЧАНИЕ: после успешного завершения цикла интенсивной дезинфекции температура поверхности ультразвукового зонда и камеры может достигать 45 C/ 113F and F соответственно. Не касайтесь поверхности камеры. Зонд будет теплым на C/ 140 ощупь... -
Page 169: Раздел C3: Цикл Очистки
РАЗДЕЛ C3: ЦИКЛ ОЧИСТКИ В процессе очистки остатки дезинфицирующего средства удаляются из картриджа и самого аппарата, а дезинфицирующее средство превращается в кислород и воду. C3.1 Когда необходим цикл очистки Когда сообщение на экране указывает, что trophon нуждается в очистке. Это происходит... -
Page 170: C4.1 Сбой В Сети Питания
C4.1 Сбой в сети питания Если сетевое питание отключается во время работы аппарата, текущий цикл не будет завершен. После восстановления питания выполните указания на экране, чтобы благополучно извлечь зонд из аппарата. Использованный химический индикатор необходимо выбросить, и на его место поставить новый. -
Page 171: Раздел C5: Повседневный Уход И Обслуживание
Когда на экране появляется сообщение об истечении 12 месяцев или 5000 циклов, свяжитесь со своим представителем из отдела обслуживания клиентов для организации обслуживания. РАЗДЕЛ C6: УТИЛИЗАЦИЯ АППАРАТА TROPHON Обратитесь к своему поставщику или в компанию Nanosonics. Вам предоставят информации о ближайшем пункте сбора электрических и электронных приборов для утилизации. L00049 1.0 08/2015... -
Page 172: Часть D - Устранение Неисправностей
выключателем аппарата выключите и затем включите его (см. Рис. 4). Аппарат должен автоматически разблокировать дверцу камеры. Если вышеописанные действия не помогли, выключите аппарат и следуйте инструкциям в разд. C4.3. Перед повторным включением аппарата trophon EPR закройте дверцу камеры. 6. Дверца картриджа не На аппарат подается питание. открывается... - Page 173 Свяжитесь со своим представителем из отдела обслуживания клиентов. 12. Аппарат не может Запишите информацию о кодах ошибок и цвете химического нормально выполнить индикатора, затем обратитесь к представителю отдела много циклов. обслуживания клиентов. 13. Продолжительность Извлекайте зонд немедленно после окончания каждого цикла. прогрева...
-
Page 174: Часть E - Обслуживание И Гарантия
обслуживания до начала цикла дезинфекции на экране появляется сообщение: Device Service Due (Требуется обслуживание), с недельными интервалами до проведения обслуживания. Периодичность обслуживания можно узнать в разделе Информация о системе в меню на ЖК-дисплее trophon EPR. ПРИМЕЧАНИЕ: обслуживание аппарата trophon должно... -
Page 175: Приложение 2: Гарантия На Продукт Условия
Компания Nanosonics организует возврат вашего аппарата trophon EPR и оплатит соответствующие расходы. Вы несете ответственность за демонтаж, повторную установку и ввод в действие trophon EPR, вне зависимости от того, будет ли оно признано дефектным или нет. Если в результате исследования компания Nanosonics обнаружит, что аппарат trophon... - Page 176 Nanosonics может потребовать от вас возместить стоимость обратной пересылки аппарата trophon EPR в ваш адрес, а также стоимость любого ремонта trophon EPR, или замены trophon EPR, по вашему запросу. Вы несете ответственность за резервное копирование всех данных в аппарате trophon EPR, если...
- Page 177 한국어 ® trophon 사용자 설명서 L00049 1.0 08/2015...
- Page 178 NanoNebulant는 미국 및 캐나다를 제외한 trophon 판매가 허용된 모든 지역에서 사용되는 trophon 소독제의 제품명입니다. Sonex-HL은 미국 및 캐나다에서 사용되는 trophon 소독제의 제품명입니다. Nanosonics의 기술은 특허, 상표 및 독점 소유권 법에 따라 보호를 받습니다. 귀하의 고객 서비스 담당자: 명함이나 안내 스티커/스탬프를 여기에 부착하십시오.
- Page 179 섹션 A1: 중요 경고, 라벨 및 기호 ...................... 179 A1.1 라벨 및 기호 ........................179 A1.2 지침 ............................ 180 A1.3 경고 ............................ 180 섹션 A2: TROPHON EPR 제품 소개 ....................181 A2.1 사용처 ..........................181 A2.2 소독 과정 ........................... 181 A2.3 소독 기록 로그 ........................181 A2.4 인증...
- Page 180 섹션 C6: TROPHON 폐기 ........................194 파트 D – 문제 해결 ..........................195 파트 E – 서비스 및 품질 보증 ......................197 부록 1: TROPHON EPR 기술 사양, N00010, N00020, N03000 & N04000 ........197 부록 2: 제품 보증 약관 ........................198 L00049 1.0 08/2015...
-
Page 181: 파트 A - 경고, 지침 및 소개
파트 A – 경고, 지침 및 소개 섹션 A1: 중요 경고, 라벨 및 기호 A1.1 라벨 및 기호 주의 부식성 사용 지침 참조 경고 (작동) 시작 1회용 파손 위험/취급 주의 주의: 고온 표면 분해하지 마시오 위험 전압 전기 및 전자 장치 분리 수거 습기... -
Page 182: A1.2 지침
액체를 엎지를 경우 감전 사고를 일으킬 수 있습니다. trophon 위 또는 주위에 액체를 흘리지 마십시오. 제품의 일부를 액체에 담그지 않도록 하십시오. 장치의 내부 구성요소에 접근하지 마십시오. 감전될 수 있습니다. 보호 장비 및 유출물 trophon EPR을 사용 및 취급할 때 깨끗한 일회용 장갑을 착용하십시오. L00049 1.0 08/2015... -
Page 183: 섹션 A2: Trophon Epr 제품 소개
섹션 A2: TROPHON EPR 제품 소개 A2.1 사용처 소독제 카트리지가 장착되어 있는 trophon EPR은 본 설명서에 약술된 특정 절차에 따라 인증된 초음파 프로브를 고수준으로 소독하기 위해 고안된 고성능의 장비 소독제 시스템입니다. 본 장치를 명시된 용도 이외에 사용하지 마십시오. 일회용 도구를 재처리하거나 초음파 프로브를 사전 세척하기 위한... -
Page 184: A2.6 환경 및 사용자 프로필
사용자는 Nanosonics 웹사이트의 Trophon-EPR/Login을 방문해 온라인 교육 모듈을 이수하고 trophon EPR 사용자 자격증을 받아야 합니다. A2.6 환경 및 사용자 프로필 trophon EPR은 의료 시설의 초음파 변환기를 고수준으로 소독하기 위해 고안되었으며, 숙련된 전문 의료인의 감독 하에 사용해야 합니다. A2.7 액세서리 액세서리*에는 다음이 포함됩니다. -
Page 185: 파트 B - Trophon 기능 개요 및 설치 안내
파트 B – TROPHON 기능 개요 및 설치 안내 섹션 B1: TROPHON 기능 전면 후면 그림 1 그림 2 좌측 챔버 그림 4 그림 3 우측 사용자 화면 시작 버튼 소프트 키 버튼 챔버 도어 핸들 조절식 다리(수평 조절) 챔버 도어(열림) 올바른... -
Page 186: 섹션 B2: 설치 안내
섹션 B2: 설치 안내 B2.1 trophon의 위치 1. 장치의 무게를 견딜 수 있고 적절한 환기가 이루어지는 환경(부록 1 참조)에 배치하십시오. 2. trophon 주위에 다른 장치나 기타 물건이 없도록 하십시오. 모든 기능에 액세스할 수 있도록 그림 6에 표시된 바와 같이 설치하십시오. trophon 양... -
Page 187: B2.3 전원 켜기
그림 8 그림 7 B2.3 전원 켜기 1. 제공된 전원 케이블을 trophon 전원 소켓에 연결합니다. 2. 주전원에 연결한 다음 전원을 켭니다. 3. trophon의 측면에 위치한 전원 스위치를 켭니다. 참고: 이동이 필요한 경우를 제외하고, 소독제 카트리지 수명을 최대화하기 위해 trophon의 전원을 항상 켜놓는 것이 좋습니다. B2.4 기본... -
Page 188: B2.5 예열 사이클
화면 메시지에 따라 알람 반복 설정 또는 볼륨 설정을 변경합니다. 알람 반복으로 설정했을 때 다음과 같은 경우에는 30초마다 알람이 울립니다. HLD 사이클이 끝난 후에 프로브가 trophon에 남아 있을 경우 b. 오류 메시지가 표시되어 조치가 필요한 경우. 명암대비 까지 스크롤하고 화면에 표시된 메시지를 따라 작업을 수행합니다. ... -
Page 189: 파트 C - 일상 사용, 유지 보수 및 관리
파트 C – 일상 사용, 유지 보수 및 관리 섹션 C1: 소독제 카트리지 삽입 고수준 소독 사이클을 시작하기 전에 trophon 소독제 카트리지를 trophon EPR에 삽입해야 합니다. trophon 소독제 카트리지 삽입 및/또는 교체 방법에 대한 자세한 지침은 trophon 소독제 )을 사용지침(IFU 참조하십시오. - Page 190 또는 피부 자극을 초래할 수 있습니다. 챔버 벽과 접촉될 경우, 프로브가 손상될 수 있습니다. 참고: 특히 곡선 프로브의 경우, trophon에 제대로 삽입해야 합니다. 그림 12를 참조하십시오. 특정 프로브 설치 시 곡선 프로브 삽입 용구(CPP) 액세서리가 필요합니다. trophon EPR 프로브 목록을 참조하십시오. L00049 1.0 08/2015...
-
Page 191: C2.4 챔버 도어 닫기
그림 12 C2.4 챔버 도어 닫기 고수준 소독 사이클이 시작되면 도어가 자동으로 닫힐 것입니다. Close Chamber Door(챔버 문을 닫으세요) 도어가 제대로 닫히지 않으면 라는 메시지가 화면에 나타납니다. C2.5 프로브 소독 Is the Probe Clean and Dry?(프로브가 깨끗하고 건조되어 있습니까?) 다음... -
Page 192: C2.6 프로브 꺼내기
5. 고수준 소독 사이클은 완료까지 7분이 소요됩니다. 경고: 드문 경우이지만 챔버에서 수증기가 나오면, 작동 사이클이 완료되고 수증기가 멈출 때까지 장치에서 떨어져 있어야 합니다. 수증기와 직접 접촉하지 마십시오. 그리고 고객 서비스 담당자에게 문의하십시오(파트 D - 문제 해결 참조). C2.6 프로브 꺼내기 1. -
Page 193: C2.7 휴면 모드 및 종료 절차
C2.7 휴면 모드 및 종료 절차 trophon을 120분간 사용하지 않거나 프로브를 trophon 안에 장시간 놓아 둘 경우, 장치는 전기 절약을 위해 자동으로 휴면 모드로 들어갑니다. trophon을 휴면 모드에서 다시 시작하게 RESTART(다시 시작) 하려면 을 누르십시오 trophon이 휴면 모드에 진입하면 자체 유지 보수 기능을 실행하며 또는... -
Page 194: 섹션 C3: 세정 사이클
카트리지를 꺼낼 수 있습니다. 카트리지 문을 억지로 열지 마십시오. Replace Cartridge and Close Cartridge Door(카트리지를 교체한 후 6. 화면에 표시된 메시지 카트리지 문을 닫으세요) 에 따라 작업을 수행합니다. C3.3 trophon 운반 trophon EPR을 운반하기 전에 소독제를 세정하고 스위치 전원을 꺼야 합니다. L00049 1.0 08/2015... -
Page 195: 섹션 C4: 불완전 또는 불량 사이클
과도한 힘으로 trophon을 이동하거나 장착 표면으로 끌지 마십시오. 운반 중에는 trophon을 항상 세우십시오. 섹션 C4: 불완전 또는 불량 사이클 이 섹션은 사이클이 만족스럽게 완료되지 않았거나 조치가 필요한 가장 일반적인 경우에 대해 설명합니다(파트 D – 문제 해결 참조). C4.1 주 전원 단전 작동... -
Page 196: 섹션 C5: 일상 관리 및 유지 보수
12개월 또는 5,000 사이클 중 하나가 도래되어 정비 서비스 기일을 알리는 화면이 나오면 고객 서비스 담당자에게 연락해 정비 서비스 일정을 잡으십시오. 섹션 C6: TROPHON 폐기 대리점이나 Nanosonics에 연락하십시오. 전기 및 전자 장치의 재활용을 취급하는 수거소를 안내해 드릴 것입니다. L00049 1.0 08/2015... -
Page 197: 파트 D - 문제 해결
전원이 들어와 있지 않나 확인한다. 소독, 예열 또는 세정 사이클이 실행되고 있지 않나 확인한다. 4. 챔버 도어가 닫히지 않는다. 프로브가 trophon EPR에 맞는 인증 제품인지 확인한다 - 섹션 A2.1 참조. 프로브를 올바르게 삽입했는지 확인한다. 챔버 도어가 “잠김 위치”에 있지 않나 확인한다. ‘잠김’ 위치에... - Page 198 시작 버튼을 누르기 전에 프로브가 물기 없이 청결한 상태인지 확인한다. 10. trophon에서 삑 소리가 trophon 내에 꺼내야 하는 프로브가 있는지 확인한다. 난다. 챔버 도어가 열렸는지 확인한다. 화면에 표시된 오류 메시지가 있는지 확인한다. 11. trophon에서 액체가 샌다. 경고: trophon에서 새는 모든 액체는 과산화수소를 포함할 수...
-
Page 199: 파트 E - 서비스 및 품질 보증
EPR 또는 액세서리 품질 보증 모든 trophon EPR은 인도일로부터 12개월 동안 재료 및 제작 기술의 결함에 대한 포괄적인 품질 보증을 제공합니다. 정비 일정: 정비일이 되면 소독 사이클을 시작하기 전에 일주일 간격으로 화면에 Device Service Due(장치 서비스 예정일 도래) 메시지가... -
Page 200: 부록 2: 제품 보증 약관
부록 2: 제품 보증 약관 약관 품질 보증은 Nanosonics Limited ABN 11 095 076 896 (주소: 14 Mars Road, Lane Cove, NSW 2066 Australia)(이하 Nanosonics)에서 제공합니다. Nanosonics는 trophon EPR의 일반적인 사용 및 정비 시 그 기능에 물리적인 영향을 줄 수 있는... - Page 201 부담합니다. 어떤 이유로든 trophon EPR을 수리 또는 교체를 할 수 없을 경우 당사는 신모델로 업그레이드하거나 구매가를 환불하는 등의 적합한 해결책을 고객과 논의할 것입니다. Nanosonics는 시험을 거쳐 trophon EPR의 재료 및 제작 기술에 결함이 없거나 고객이 본 품질 보증 혜택을 받을 수 없다고 판단될 경우(예: 위에 명시된 예외 조항이 적용되거나 보증 기간 외에 보증...
- Page 202 Nanosonics Europe GmbH Manufactured for: Poppenbuetteler Bogen 66 Nanosonics Limited 22399 Hamburg - Germany 14 Mars Road, Lane Cove +49 40 46856885 NSW 2066, Australia www.nanosonics.eu +61 2 8063 1600 info@nanosonics.com.au www.nanosonics.com.au Russian Distributor: AVA Medica Kondratyevskiy prospect 15/3 Office 344,...
Need help?
Do you have a question about the trophon EPR and is the answer not in the manual?
Questions and answers