Table of Contents
Advertisement
Advertisement
Table of Contents
Troubleshooting

Summary of Contents for Geely MR479Q
-
Page 2: Table Of Contents
CONTENTS Chapter 1 Engine Overview ......................01 Section 1 Basic Structure and Working Principle of Engine...............01 Section 2 Structural Characteristic of Engine .....................04 Section 3 Engine Technical Performance and Parameters ..............12 Section 4 Engine Servicing Datasheet .......................18 Section 5 Maintenance of Engine .......................23 Chapter 2 Cylinder Block Assembly ..................26 Section 1 Structural Characteristic of Cylinder Block ................26... -
Page 3: Table Of Contents
Section 1 Make-up of Valve Train & its Design Features ................84 Section 2 Valve Timing ..........................85 Section 3 Make-up of Valve train Assembly and its Features ..............86 Section 4 Service of Valve Train ........................89 Section 5 Common Faults and Troubleshooting of Valve train ..............93 Chapter 7 Fuel Supply System ....................94 Section 1 Makeup and Features of Fuel Supply System for Electronic Fuel Injection Engine ....94... -
Page 4: Table Of Contents
Section 3 Assembly and Adjustment of Clutch and its Operating Mechanism ........155 Section 4 Common Faults and Troubleshooting of Clutch ..............158 Chapter 12 Common Faults and Troubleshooting of Engine ......160 Section 1 Overview .............................160 Section 2 Determination and Elimination of Common Faults in Engine ..........160 Section 3 Determination and Elimination of Abnormal Noises in the Engine ........171 Chapter 13 Power source ......................173... -
Page 5: Chapter 1 Engine Overview
The power to GEELY car comes from the gasoline engine equipped with the electronic fuel injection system. It’s made of the machine unit, crank connecting rod mechanism, valve train, fuel supply system, ignition system, cooling system, lubricating system, startup system and management system. -
Page 6: Cooling System
6. Cooling System The cooling system is composed of pump, radiator, fan, water inlet and outlet pipes, thermostat, the drain valve of cylinder, and the gas water cavity. The cooling system is designed to emit the thermal energy in the heated components to the air, so that the engine can work under thermo-equilibrium with powerful, cost-effective, reliable and durable features. - Page 7 An operational cycle of 4-stroke engine is made of the intake, compression, power and exhaust strokes. When the piston moves from Top Dead Center (TDC) to the Bottom Dead Center (BDC), the crank turns 180°. The distance from TDC to BDC is called piston stroke. 1.
-
Page 8: Section 2 Structural Characteristic Of Engine
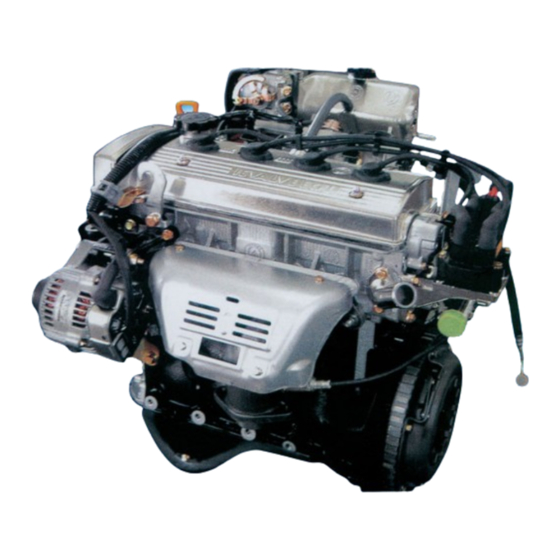
Fig. MR479QA 4 and Fig. 5 are the assembly drawings of engine with power system and auxiliaries respectively. MR479Q Fig. 6 is the layout of electronic control fuel injection system in engine. MR479QA Fig. 2 Assembly Drawing of MR479Q/MR479QA Engine... - Page 9 Fig. 3 Components Assembly Drawing of MR479Q/MR479QA Engine...
- Page 11 MR479Q Fig. 5 Assembly Drawing of Engine and Its Auxiliaries MR479QA...
- Page 13 JL481Q Fig. 7 Front view of Engine MR481QA...
- Page 14 JL481Q Fig. 8 Sectional elevation of Engine MR481QA...
-
Page 16: Section 3 Engine Technical Performance And Parameters
Section 3 Engine Technical Performance and Parameters 1.Major Technical Parameters of MR479Q Engine and MR479QA Engine MR479Q MR479QA Type 4-cylinder in line, water-cooling, dual-roof convex shaft, 16 valves, belt and gear driven, hip-shaped combustion chamber Bore × stroke (mm × mm) 78.7×69... - Page 17 II. Major Technical Parameters of MR481QA Engine and JL481Q Engine MR481QA JL481Q Type 4-cylinder in line, water-cooling, dual-roof convex shaft, 16 valves, belt and gear driven, hip-shaped combustion Bore × stroke (mm × mm) 81×77 81×85.5 Displacement 1.587 1.762 Compression ratio Rotation at idle speed (r/min) 800±50 Ignition timing...
- Page 18 Fig. 10, Fig. 11, Fig. 12 and Fig. 13. Power Torque Me (N.m) Pe(Kw) Fuel Consumption Ratio ge( g/kwh) Rotation Speed r/min Fig. 10 Exterior Feature of MR479Q Engine...
- Page 19 Torque Power Pe(Kw) Me (N.m) Fuel Consumption Ratio ge(g/kwh) Rotation Speed r/min Exterior Feature of MR479QA Engine Fig. 11...
- Page 20 Torque Power Pe(Kw) Me (N.m) Fuel Consumption Ratio ge(g/kwh) Rotation Speed r/min Fig. 12 Exterior Feature of MR481QA Engine...
- Page 21 Torque Power Pe(Kw) Me (N.m) Fuel Consumption Ratio ge(g/kwh) Fig. 13 Exterior Feature of JL481Q Engine...
-
Page 22: Section 4 Engine Servicing Datasheet
Section 4 Engine Servicing Specifications I.MR479Q/MR479QA/JL481Q/MR481QA Engine Servicing Technical Datasheet (Table 1 to Table 4) Table 1 Mechanical Part of MR479Q/MR479QA/JL481Q/MR481QA Engine Servicing Datasheet Name of item Servicing Data Standard 0.030 Lower surface flatness Allowed limit 0.050 (mm) Maximal correction 0.080... - Page 23 Exhaust cam shaft 0.032-0.085 0.040-0.091 Standard Axle clearance (mm) 0.110 0.110 Allowed limit Intake 41.76±0.04 Exhaust 42.01±0.04 Standard MR479Q and Cam height (mm) MR479QA Intake 41.650 Exhaust 41.850 Allowed limit Intake 42.665±0.04 Exhaust 42.01±0.04 (Base circle + lift) Standard JL481Q and MR481QA Intake 42.554...
- Page 24 0.250 Allowed limit φ φ 47.982 – 48.000 Standard Master journal diameter (mm) φ φ 47.745 – 47.755 Allowed limit φ MR479Q φ 39.985 – 40.000 Standard MR479QA φ φ 39.745 – 39.755 Allowed limit MR481QA Connecting rod journal diameter(mm) φ...
- Page 25 2.128 – 2.131 Plus for servicing 2.131 – 2.134 2.134 – 2.137 Table 2 Main Adjusting Parameters for MR479Q/MR479QA/JL481Q/MR481QA Engine Item Adjusting parameter Tension of belts in generator and pump Under pressure of 98N, deflection of 7 to 9mm for new belt, and 11.5 to 13.5mm for used belt...
- Page 26 M10 x 1.25 Nut S=14 Exhaust manifold stand Cylinder block M10 x 1.25 x 20 S=13 Exhaust manifold M6 x 12 S=10 Heat-isolation cover of exhaust pipe MR479Q Cylinder block M10 x 1.25 x 60 S=14 MR479QA Main bearing MR481Q Cylinder block M10 x 1.25 x 60 S=14...
-
Page 27: Section 5 Maintenance Of Engine
Section 5 Maintenance of Engine 1. Maintenance Periods and Maintenance Content n order to extend the engine life, the maintenance shall comply with the following procedures during its running. 1. Daily maintenance Check the gasoline, cooling water and oil levels, and add in if necessary. b Remove the dust or spilled electrolyte on the storage batteries, so as to make sure that the ventilation hole is unblocked. - Page 28 III. Maintenance of Cooling System hen the engine is running, there must be enough cooling water in the cooling system to make sure that the engine works properly. Therefore, before each drive, the driver shall check and add in timely clean soft water, but is not allowed to use the unprocessed hard water with high content of alkali or mineral substances.
- Page 29 Check it per 10,000km of driving (or 6 months) in normal case, and replace it per 20,000km of driving (or 12 months). (1) Check visually whether there’s electrode ablation or screw damage in the spark plug. Replace the spark plug if it’s not in normal condition. The recommended spark plug is: MR479Q/MR479QA DENSO K16R-U, MR481QA/JL481Q K7RF-11.
-
Page 30: Chapter 2 Cylinder Block Assembly
Chapter 2 Cylinder Block Assembly Section 1 Structural Characteristic of Cylinder Block hen the engine is working, the cylinder block withstands high heat and mechanical load. In order to make the engine work in normal and reliable operation, the cylinder block shall be of high strength, enough rigidity, compact structure, low weight and easy servicing. -
Page 31: Section 2 Detach, Assembly And Servicing Of Cylinder Block
+0.01 φ81 MR481QA +0.02 √ Yellow φ81 +0.01 JL481Q +0.03 Blue φ81 +0.02 +0.01 φ78.655 MR479Q MR479QA (18mm +0.02 √ Yellow φ78.655 +0.01 from bottom to up) Piston skirt +0.03 Blue φ78.655 +0.02 diameter +0.01 φ80.955 MR481QA JL481Q(16mm +0.02... - Page 32 +0.005 Total central thickness of +0.011 √ Blue +0.008 crankshaft bearing +0.014 √ Orange +0.011 +0.017 Green +0.014 +0.008 φ43 MR479Q +0.016 Diameter of √ Yellow φ43 MR479QA +0.008 +0.024 connection rod MR481QA Blue φ43 +0.016 +0.006 big end φ51 +0.012...
- Page 33 II. Preparations before Detaching and Checking the Cylinder Block efore disassembling and checking the cylinder block of engine, remove the engine from the chassis. The power system integrates the engine, the clutch and the gearbox as a whole. Therefore, detach the entire engine power assy., then take off the gearbox and the clutch, and disassemble and check the cylinder block from the engine ASSY at last.
- Page 34 6. Remove the cylinder head cover. Detach the generator connector (1), the wire connection(2), the oil pressure switch connector (3), and the wire clip (4). Detach the wire harness, remove the compulsory ventilation PCV hose of crankcase, remove the 4 lock nuts and the seal pad, and remove the cylinder head cover and the gasket (Fig.
- Page 35 (2) Align the hole next to the mark “K” on the camshaft timing pulley with the timing mark “U” at the front edge of exhaust cam bearing cap. If failing to do so, turn the crankshaft a circle (360°) to align. (3)After aligning with the timing mark as mentioned above, make the match marks on the timing belt and the camshaft timing pulley, and draw the clockwise arrow on the exterior side surface of timing belt (Fig.
- Page 36 (4) Detach the bearing cap. In the sequences shown in the Fig., detach and remove the 8 intake camshaft bolts (Fig. 27). After removing the cam bearing cap, if the camshaft can’t be lifted up vertically, re-fix it to the bearing cap with 2 bolts, lift the camshaft gear, and loose and remove the bearing cap bolts alternately.
- Page 37 20. Remove the sub-assy. of cylinder head (1) In the sequences shown in the Fig., screw off and remove the 10 cylinder head bolts by multiple and equal actions (Fig. 33). (2) Lift up the cylinder head off the dowel pin of cylinder block, and put it on the worktable. Be careful to protect the contact surface between cylinder head and cylinder block, and pry inside the bulge between them with the screwdriver during the course of disassembly (Fig.
- Page 38 III. Disassembly, Examination and Servicing of Cylinder Block (I) Detach 1. Detach the 6 bolts and the flywheels (Fig. 35). 2. Detach the 2 bolts and the rear-end cover-plate (Fig. 36). 3. Detach the 2 bolts and the adjusting frame of AC generator (Fig. 37). 4.
- Page 39 0.05mm. If the warp is bigger than the maximal value, replace the cylinder block (Fig. 43). There has been no deformation over-difference in the application of Geely engines. If over-difference occurs, refine the flatness by grind- ing the topside of cylinder block. The cylinder compression ratio may go up if the block top surface is over-ground.
- Page 40 Abrasion characteristics of engine cylinder bore: The abrasion condition reaches the most rigid point at 10mm away from the TDC, and improves gradually along with the piston going downward. The maximal abrasion of cylinder wall happens when the 1st piston ring reaches the TDC. The maximal radial abrasion of cylinder happens in the plain vertical to the crankshaft axis, and at the side near to the intake valve.
- Page 41 (1) .Standard diameter, standard type of dimension groups refers to table 4: (2) .Maximal diameter, standard type: 78.93mm (3) .Extra dimension 0.50 (type): 79.43mm If the diameter is bigger than the maximal value, all the 4 cylinders shall be re-bored. Replace the cylinder block if necessary. 5.
- Page 42 a. Measure the piston diameter vertical to the central line of piston pinhole at 18mm away from the piston bottom side with micrometer (Fig. 51). The standard piston diameter refers to table 4. Extra dimension 0.5 (type): 79.115 to 79.145mm b.
- Page 43 If the cylinder hole wears so much that the cylinder shall be bored, the 4 cylinders must be bored and ground, and equipped with the extra- dimension pistons. Replace all the piston rings to match the extra- dimension pistons. Take MR479Q for example: 1. Install the extra-dimension pistons Diameter of extra-dimension pistons: Extra-dimension 0.50 (type): 79.155 to 79.185mm.
- Page 44 of cylinder = P+C-H. In the formula, P = piston diameter, C = piston oil film clearance as big as 0.075 to 0.095mm, and H = grinding allowance as big as 0.02mm or smaller. 3. Bore and grind the cylinder to meet the calculated dimensions Maximal grinding: 0.02mm.
- Page 45 (2) Mount and screw on the 10 main bearing cap bolts (with a thin layer of engine oil applied on the bolt screw) according to the shown sequence (Fig. 63) by multiple and equal actions, the MR479Q/MR479QA torque is 60N.m, the MR481QA torque is 70N.m, the JL481Q torque is 80N.m.
- Page 46 Fig. 64 Check the Axial Clearance of Crankshaft with the Fig. 63 Sequence to Screw on the Main Bearing Cap plastic oil clearance gauge 9. Install the piston and the connecting rod components (1) Suit the connecting rod bolt with short hose in order to protect the Code mark T of NO.2 compressior ring crankshaft from being damaged.
- Page 47 c. Tighten the locking nut to 65+2.5 N.m; d. MR481QA/JL481Q connecting rod bolts screwing torque; 1) Screwing 30N.m,2st screwing 70±2N.m f. Check whether the crankshaft rotates freely. 11. Check the axial clearance of connecting rod (Fig. 180) The standard axial clearance is 0.15 to 0.30mm, and the maximal axle clearance is 0.35mm.
- Page 48 b. Fasten the bolt by multiple and equal actions in the shown sequence (Fig. 70), with the torque of 78N.m. c. Check whether the clearance between the lower end of speed sensor and the tooth top of flywheel signal disc is 1±0.10mm with a bolt-fastening sensor with the torque of 8N.m.(Complete when mounting the power assembly) Fig.
-
Page 49: Chapter 3 Cylinder Head Assembly
Chapter 3 Cylinder Head Assembly Section 1 Structural Characteristics of Cylinder Head hen the engine works, cylinder head bears relatively high thermal load and mechanical load. In order to ensure supe- rior combustion and reliable work, cylinder head must optimize combustion chamber, intake duct, exhaust duct and cooling water chamber should be arranged rationally. - Page 50 head when engine is warmed up, that is to say, detach it when the engine is in cold state. 2. Remove valve tappet When removing valve tappet (Fig. 72), use a marker to write down sequence number, arrange valve tappet according to the sequence.
- Page 51 Fig. 76 Use wire brush to remove carbon Fig. 75 Don’t scrape surface when eliminating deposit in combustion chamber residual material on contact surface of cylinder head (3) Clean valve guide Use valve guide brush and solvent to clean all valve guides (Fig. 77). (4) Clean cylinder head Use soft brush and solvent to clean cylinder head thoroughly (Fig.
- Page 52 At cylinder block side Fig. 80 Use dye penetrant to check whether there is crack in cylinder head At intake manifold side At exhaust manifold side Fig. 79 Check planeness on three planes of cylinder head Fig. 81 Eliminate fuel combustion residue on valve 5.
- Page 53 6. Check and grind valve 89º sealed cone (1) Grind valve to eliminate pockmark and carbon deposit. Apply a thin layer of valve abrasive paste on the valve seat, then use a handle with a rubber sucker on one end to suck the valve plane tightly. Grasp handle to move upwards and downwards manually and turn the valve, grinding and tapping seat surface.
- Page 54 45ºcarbide ceramic reamer by its own weight, press valve slightly to connect with valve seat. (1) Check fitting quality of valve contact surface and valve seat: a. If red lead oil on valve contact surface is distributed in 360º encircling valve center, it indicates that the valve is coaxial with the surface, otherwise replace the valve.
- Page 55 (4) Clean cylinder head, clean valve Deviation Use kerosene and soft brush to clean cylinder head and valve thoroughly. 8. Check valve spring (1) Use steel L square to measure verticality of valve spring. Allow- able maximum deviation angle: 2º(Fig. 93). If deviation value exceeds the maximum value, replace the valve spring.
- Page 56 Standard height of cam peach-tip refers to Table 1. If the height of peach pit does not meet requirement, replace the camshaft. (3) Check camshaft diameter Use micrometer to measure journal diameter (Fig. 98). Journal diameter: NO.1 Exhaust: 24.949-24.965mm Other: 22.949-22.965mm If journal diameter does not meet requirement, check oil clearance.
- Page 57 7 Check axial clearance of camshaft (Fig. 102); a) Assemble the camshaft; b) Use dial gauge to measure axial clearance while moving the camshaft forwards and backwards; Standard axial clearance: Intake: 0.030-0.085mm; Exhaust: 0.035-0.090mm; Maximum axial clearance: 0.11mm. If axial clearance is larger than the maximum value, replace camshaft, replace the entire set of bearing cap and cylinder head Fig.
- Page 58 Intake Exhaust Fig. 106 Check planeness of junction surface of Fig. 107 Measure the outer diameter of cylinder head bolt intake and exhaust manifold III. Replacement of Valve Guide Max. oil clearance of intake valve: 0.058mm. Max. oil clearance of exhaust valve: 0.058mm. If the clearance is larger than the above maximum value, replace valve and valve guide.
- Page 59 Select new valve guide with outer diameter 0.05mm larger correspondingly. If this pore diameter on cylinder head is larger than 11.050mm, replace the cylinder head. 5. Heat the cylinder head gradually to 80-100 C. Use special servicing tool and hammer to slightly knock new valve guide in.
- Page 60 V. Installation of cylinder head (1) Preparation 1. Cleaning Completely wash all parts to be mounted. Keep work bench clean and make sure parts are placed in order. 2. Lubricating Before installing, smear engine oil onto all sliding and rotating surfaces. 3.
- Page 61 Exhaust Inlet Grey surface Black surface Fig.118 Press in valve new oil seal with servicing tools Fig. 119 Difference between oil seal of intake and exhaust Valve Fig. 120 Assemble valve and spring compo Fig. 121 Method of install valve and spring compo (4) Use hammer of plastic veneer to strike the top end of valve stem to ensure good assembly .(Fig.122) 3.
- Page 62 (2) Tighten the bolts on the cylinder head Not to use bolts with cracks or deformation, and strictly follow the instruction on tightening. Cylinder head shall be tightened with bolts in three steps. a. Smear a thin layer of engine oil onto the below-head part and thread of cylinder head bolts.
- Page 63 Rotate the auxiliary gear of camshaft clockwise using specialized servicing tool, so that holes of camshaft driving gear Auxiliary gear and auxiliary gear can match. Mount the bolt for servicing (Fig. Rotating 128). 6. Mount air inlet/exhaust camshafts As axial clearance of camshaft is very small, it’s important to keep it horizontal when mounting.
- Page 64 Fig. 132 Fastening bearing cap bolt Fig. 133 Installing camshaft seal (2) Mount the intake camshaft on the air inlet side a. Place the exhaust camshaft in a position so that dowel pin rotates to a level that is slightly higher than the top surface of cylinder head (Fig.
- Page 65 h. Detach the servicing bolts. i. Mount the bearing cap of #1 camshaft in arrow direction. If the bearing cap of #1 camshaft is not in correct matching position, use an screw driver to pry the cylinder head from the camshaft gear, and push the camshaft gear backward (Fig. 138).
- Page 66 (2) After the bolt of pulley has been fixed, fix the hex. head of camshaft to fasten the bolt of timing pulley with torque of 59 N. m 9. Install the frame of AC generator Install the frame of AC generator with three bolts with torque of 31N.m. 10.
- Page 67 12. Inspect the belt deflection Requirement: Under a force of 20N, belt deflection shall be 5-6mm (Fig. 146). If deflection fails to meet the above requirement, the belt tensioned shall be re-adjusted. (Fig. 147) 13. Use six bolts to fix #2 and #3 timing belt cover (Fig. 148) with torque of 7.4 N.m. 14.
- Page 68 Protrusion Sealant Fig. 150 Smear sealant to cylinder head Fig.151 Mount new gasket for #2 water inlet flange (2) Connect water inlet hose to water pump. (3) Mount #2 water inlet connection flange with two nuts with torque of 15N.m. 18.
- Page 69 (7) Make sure the rotation of injector is stable. If not, it may be most likely caused by incorrect mounting of O-ring. There- fore, replace such O-ring (Fig. 157). New O-ring Fig. 154 Smear a thin layer of gasoline onto Fig.
- Page 70 (2) Connect fuel return hose to fuel pressure regulator. (Fig. 161) 4. Use two bolts to fix air intake manifold support stay. Torque applied onto 12mm head bolt shall be 21 N. m. Torque applied onto 14mm head bolt shall be 44 N. m. Fig.
- Page 71 (3) Use two bolts and nuts to connect water inlet port with its shield (Fig. 166), with torque of 22 N.m. (4) Connecting of two water bypass hoses. 27. Install RH bracket of engine, with torque of 30 N.m. 28. Mount ignition control device, including phase sensor and ignition coil for MR479Qengine.
- Page 72 (2) Use five nuts to mount the new gasket and air exhaust mani- Sealant Seal diameter of 2-3 mm fold. Tighten the nut with several equal operations. (Fig. 172), with torque of 34 N.m. Use two bolts to assemble the manifold support stay. Tighten the bolt in an alternate way in several equal operations, with torque of 59 N.m.
-
Page 73: Chapter 4 Piston & Connecting Rod Mechanism
Chapter 4 Piston & Connecting Rod Mechanism Section 1 Construction of Piston & Connecting Rod Mechanism he function of piston & connecting rod mechanism is to convert pressure of working substance in the cylinder into power by rotation of the crankshaft and flywheel assy. Piston & connecting rod mechanism mainly consists of piston, piston rings, piston pin, connecting rod body, connecting rod cap, connecting rod bolts, nuts and connecting rod bushing. -
Page 74: Piston Pin
Because of high mechanical and thermal loads and complicated stress distribution on the piston, it’s hard to control the gap width between piston and cylinder body. For achieving steady control of the gap, the piston of engine adopts the structure of drum skirt and elliptic cross section, with long axis vertical to the pin hole and short axis parallel to it. -
Page 75: Connecting Rod
For re-assembly, the parts need to be assembled according to the numbers. The connection between connecting –rod and connecting-rod cap of JL481Q is different from the MR479Q in that nut tightens to screw hole directly. -
Page 76: Section 2 Dismantling And Inspection Of The Connecting-Rod And Its Bearing
Section 2 Dismantling and Inspection of the Connecting-rod and its Bearing 1. Dismantling and Inspection of the Connecting-rod and its Bearing 1. Check the axial clearance of the connecting-rod (Fig. 180) 2. Dismount the connecting-rod cap and check the oil film clearance(0.15 to 0.30mm). - Page 77 (2) Press the pistons and connecting-rod assemblies with correspondingnumbers into the cylinders respectively, with the front end mark of the piston facing forward. 4. Installation of the connecting-rod cap Push down Front end mark (recess)) Fig. 183 Installation of the piston and connecting-rod assy. III.
- Page 78 Serious galling or extremely poor piston lubrication is likely to lead to ablation. In such cases, replace the entire set of piston assembly. In the case of piston deformation, just measure the ellipticity of the skirt of the piston 18mm (MR479Q)/16mm (MR479QA) /20mm (MR481QA,JL481Q) from the piston bottom, in a direction vertical to the pin hole). If the deviation- from the standard value exceeds 0.04mm, replace the piston.
- Page 79 IV. Damage of the Connecting-rod Common faults with the connecting-rod are its bending and twist. Check the straightness of the connecting-rod, as shown in Fig. 184 and 185. Fig. 184 Check twist of the connecting-rod Fig. 185 Check bending of the connecting-rod Max.
-
Page 80: Chapter 5 Crank Mechanism
The function of crankshaft is to receive the force from a connecting-rod, thus creating the torque rotating around its own axes. Engine crankshaft is made of nodular cast iron, installed entirely with support, which has enhanced the rigidity and bending strength of crankshaft. The diameter of MR479Q 5-main bearing journal is 48mm, the diameter of 4- M1-2 M3-4 connecting-rod journal is 40mm. - Page 81 All the hole openings are polished and chamfered. MR479Q Crankshaft stack-up degree ∆ = 9.5mm. Thickness of crank arm = 16.75mm. Width of crank arm =70mm. MR479QA/MR481QA Crankshaft stack-up degree ∆ = 5.5mm. Thickness of crank arm = 16.75mm. Width of crank arm =76mm.
-
Page 82: Crank Mechanism
III. Crankshaft Thrust Washer The crankshaft axial positioning of MR479Q engine adopts the structural form of two-half-circle thrust washer. Crankshaft thrust washer is also of a steel-backed-wear-reducing-layer structure. Steel-backed material is 08F, wear-reducing layer -0.03 material is of high-tin aluminum alloy. The crankshaft thrust washer is 2.5 thick. - Page 83 (Fig. 194). g. Install the main bearing cap (Fig. 195) first in the middle and then two sides, and tighten evenly the bolts diagonally with the torque of 60Nm(MR479Q,MR479QA)/70Nm(MR481QA)/80Nm(JL481Q) Fig. 190 Detaching main bearing cap bolts Fig.191 Detaching main bearing cap Fig.
- Page 84 Plastic oil clearance gauge Fig. 194 Measuring Oil clearance Fig.195 Mounting main bearing cap h. Take down the main bearing cap and measure the oil clearance in the section of largest width. See Fig.196 NO.1 NO.2 NO.3 NO.4 NO.5 Oil clearance: Standard: 0.015-0.033mm Enlarged size by 0.25: 0.016-0.056mm Max.
- Page 85 Place 5 main bearing caps on the proper position (Pay attention to the front mark), (Fig.62); c. Apply a thin layer of engine oil under the head of the main bearing bolts and at the thread; tighten evenly 10 bolts diagonally from the middle to both ends.Torque: (MR479Q,MR479QA)60N.m.(MR481QA)70Nm.(JL481Q)80Nm. Finally, check the crankshaft radial clearance.
- Page 86 2.005-2.008 standard “3” 2.008-2.011 main journal & bearing “4” 2.011-2.014 “5” 2.014-2.017 Table 9 Grouping Data of Connecting-rod Journal and Bearing(MR479QA,MR479Q,MR481QA) Connecting-rod Connecting-rod Wall thickness of connecting Mark big end bore (mm) journal (mm) -rod bearing (mm) -0.010 +0.008 -0.010 -0.014...
-
Page 87: Section 2 Disassembly & Maintenance Of Crank Mechanism
Section 3 Disassembly & Maintenance of Crank Mechanism 1. Cracking & Fracture of Crankshaft To check the cracking of crankshaft: by oil-soaked knocking, that is to immerse the crankshaft in the kerosene for a while and then take out and wipe it dry. Spread some white powder onto the crankshaft and hammer its non-working face. After vibrating, if oil stain appears, it proves the existence of cracking. -
Page 88: Chapter 6 Valve Train
Chapter 6 Valve Train Section 1 Make-up of Valve Train & its Design Features I. Make-up of Valve Train ngine valve train is made up of camshaft timing drive and valve mechanism. The camshaft timing drive mainly includes crankshaft timing pulley, guide wheel, crankshaft timing belt, camshaft timing belt, driving gear, sub gear, gear spring, drive gear, intake and exhaust camshaft, and valve tappet, etc. -
Page 89: Section 2 Valve Timing
II. Characteristics of Valve Train Each cylinder has 4 valves, laid in two columns. The intake path takes up a relatively large area and as a result, this increases the rotation speed at maximum power, rotation speed atmaximum torque and its litre power, and decreases the thermal load of the exhaust gas. -
Page 90: Section 3 Make-Up Of Valve Train Assembly And Its Features
Exhaust Intake Fig. 199 MR479Q Engine valve-timing diagram Section 3 Make-up of Valve train Assembly and its Features 1. Make-up of Valve Train Assy. and its Features The assembly is designed to open and close the intake and exhaust valve according to the planned time and ensure that they have enough lift stroke and follow the stipulated rules. -
Page 91: Timing Belt
The MR479Q/MR479QA cam base circle is 34mm in diameter, intake cam lift is 7.81mm and exhaust cam lift 8.06mm. -
Page 92: Valve Spring
Fig. 200 Intake and Exhaust Valve 2. Valve seat insert As shown in fig. 201, valve seat insert is used to seal the cylinder by the close contact of its internal conic surface with the valve conic surface. Valve seat insert applies the powder metallurgy steel, which has good cutting perfor- mance and small thermal deformation. -
Page 93: Section 4 Service Of Valve Train
Section 4 Service of Valve Train 1. Valve tappet (see Section 2 of Chapter 3 for reference) Measure the tappet bore of cylinder head with a caliper and its diameter with a micrometer caliper. The actual oil film clear- ance is deduced by subtracting the tappet diameter from the tappet bore. If the oil film clearance is bigger than the maximum value, the tappet shall be replaced. -
Page 94: Timing Gear
Common Troubles: If the timing belt breaks away too early, you should check whether it is properly installed and whether the deflection of belt is proper. If the belt tooth is fractured or damaged, you need to check whether the camshaft or water pump is blocked. If the belt is worn or damaged only on one side, you need to check the belt guide wheel and the positioning of all belt pulleys. - Page 95 Check whether the mark on the timing belt placed during detaching is properly aligned with the matching mark on the crankshaft pulley. If not, you need to move the mesh portion on the timing pulley until it is precisely aligned. Align the timing belt with the matching mark of crank- shaft timing pulley.
- Page 96 Max. 24.949-24.965mm No. 1 exhaust Journal dia. 22.949-22.965mm Others Camshaft 0.03mm Max. Circle run-out & eccentricity 41.72-41.80mm Intake Camshaft peach MR479Q MR479QA Standard 41.97-42.05mm Exhaust tip height 42.645-42.685mm Intake (Base circle + lift ) MR481QA JL481Q Standard 41.99-42.030mm Exhaust 0.020-0.200mm...
- Page 97 Section 5 Common Troubleshooting of Valve train I. Valve leakage It is possibly caused by: (1) Wearing, scorching or leakage caused by rough surface (due to corrosion) at the interface between valve and valve seat. If the working face seal belt of valve seat is worn to be wider than 1.4mm and has spots and pits, it is necessary to ream and smoothly grind it.
-
Page 98: Chapter 7 Fuel Supply System
Chapter 7 Fuel Supply System Section 1 Makeup and Features of Fuel Supply System for Electronic Fuel Injection Engine I. Excellent Features of Fuel Supply System for Electronic Fuel Injection Engine s a control mode, fuel supply system for electronic fuel injection engine is used to electronically control gasoline engine. It has a lot of excellent features compare with carburetor engine lacks. - Page 99 9. Convenient to cut off fuel supply Measurement of fuel quantity does not depend on vacuum degree within venturi, so it is still possible to cut off fuel supply even if the engine is running during intake stroke. This provides convenience for cutting off fuel supply in the event of overspeed and employing the engine to brake down a long slope.
- Page 100 Negative pressure in ntake pipe Fig. 208 Fuel supply system based on multiport injection 1. Fuel tank 2. Electronic fuel pump 3. Fuel filter 4. Fuel deliver pipe (fuel rail) 5. Fuel injector 6. Fuel-pressure regulator Electronic fuel pump, immersed in fuel tank levelly, is fed electricity to through fuel pump relay by battery. This relay’s switch-on/off is controlled by ECU.
-
Page 101: Fuel Filter
Fig. 209Electronic fuel pump 1. Pump 2. Motor 3. Pump cover 3. Fuel filter As a sophisticated device, injector allows of no impurity in fuel. Solid particles in fuel will make it worn while moisture content in fuel will cause its corrosion and bulging. -
Page 102: Fuel Injector
In order to minimize environmental pollution of evaporative emission, each Geely series car must be equipped with an evaporative emission control system for fuel tank (See Fig. 213). -
Page 103: Section 2 Matters Needing Attention In Use And Maintenance Of Electronic Fuel Injection System
Section 2 Matters Needing Attention in Use and Main- tenance of Electronic Fuel Injection System I. Matters Needing Attention in Use of EFI System 1. EFI system in use shall be adjusted and maintained according to maintenance methods and instructions described in its operation manual. - Page 104 (1) Carefully handle high-voltage wires. (2) After repair, check that all related connecting wires are firmly connected to terminals of ignition coils. (3) When cleansing the engine compartment, you shall be careful enough to prevent the electric system from contacting water.
- Page 105 8.Fuel system (1) A large amount of gasoline will flow out when the high-pressure fuel pipe is disconnected. Therefore, you shall follow the following instructions: Rubber pulg a. Place a container under the connector; b. Slowly unscrew the fuel pipe connector; c.
-
Page 106: Section 3 Troubleshooting The Electronic Fuel Injection System
(2) Switch on the ignition but do not start the engine. (3) Catch the fuel return hose (See Fig 221) and the pressure in the high-pressure fuel pipe will ascend to about 392KPa. Check whether there is any fuel leakage under the pressure. Note: avoid its bending when pinching the hose because this will lead to hose bursting. - Page 107 (9) Measure the fuel pressure; it should range from 265Kpa-304KPa. If the pressure exceeds 304KPa, you shall replace fuel pressure regulator; if the pressure is lower than 265KPa, you shall check the following parts: the fuel hose and its connectors, the fuel pump, the fuel filter, and the fuel pressure regulator.
- Page 108 Fuel pressure o-ring regulator Hose for vacuum sensor Fuel return hose Fig. 224 Detaching and separating fuel pressure regulator...
- Page 109 New O-ring Fig. 225 Fix a new O-ring on the fuel pressure regulator Fig. 226 Install the fuel pressure regulator on the fuel transmission pipe 4. Start the engine and check whether there is any fuel leakage. II. Injector Examination Examination on the car: 1.
- Page 110 Washer Fuel pipe Fuel inter hose O-ring Linjector O-ring Clip Spacer PVC hose PVC hose Lnjector terminal Hose for vacuum sensor Fuel return hose Fig. 230 Detaching and disassembling injector and fuel delivery pipe...
- Page 111 2. Remove the No. 2 PCV hose (a forced ventilation hose for the crankcase) (See Fig. 231). 3. Remove the fuel inlet hose from the transmission pipe (See Fig. 232) Fig. 231 Remove the PCV hoses (the forced ventilation Fig. 232 Remove the fuel inlet hose from the fuel delivery pipe hoses for the crankcase) and the hose for vacuum sensor and the fuel return hose from the fuel pressure regulator Remove the connection bolt and two washers, and then remove the fuel inlet hose from the delivery pipe.
- Page 112 Connection Washer SST(connect) SST(hose) FUel filter regulator Pressure Pressure regulator SST(hose) Fuel retuon hose SST(connector) Injector Fuelfilter Fig. 235 Assemble the pipe system for examining injectors (2) Connect a special connector and hose for maintenance (SST in Fig. 235b) to the outlet of the fuel filter with two washers and a connection bolt.
- Page 113 2. Examine injector leakage (1) Remove a special line for maintenance and the check whether the injector has fuel leakage; the allowable amount of leakage is no more than a drop of fuel per minute. (2) Switch off the ignition. (3) Remove the negative-pole cable from the battery, along with the special maintenance tools.
- Page 114 III. Examination of Throttle Body Examination on the car 1. Examine the throttle body Check whether the connecting rod for the throttle body can rotate smoothly (See Fig.240). 2. Examine the throttle position sensor (1) Remove the connector of the throttle position sensor. (2) Measure the resistances between various terminals of the throttle position sensor by the multi-meter (See Fig.
- Page 115 Valve-chamber vent hose (SXE7130-1109221) Washer Throttle Connector of the thralfle positon sensor Connecter of ISC Vawe Bypass hose for water cootant Hose and cover for the air fiter Fig. 243 Detaching and disassembling throttle body Fig. 245 Remove the connector of the throttle position sensor Fig.
- Page 116 (5) Detach the hose of air filter from the throttle body, and remove it along with the air filter cover. 4. Remove the throttle body (1) Remove the connector of the throttle position sensor and the connector of the idling speed control (ISC) valve (See Fig. 245).
- Page 117 IV. Examination of Idling Speed Control (ISC) Valve Examination on the car: Examine the working condition of ISC valve (1) Prerequisite: the engine has a normal working temperature, the idling speed setting is correct, the transmission is neutral, and the A/C switch is off. (2) Examine the terminals TE1 and E1 of the check connector by using a special jumper for servicing.
- Page 118 (3) Check whether the ISC valve can open, close and semi-open automatically within 0.5 second. If not so, replace ISC valve. Engine ECU (4) Turn the ignition switch to “off” position. (5) Remove the ISC valve connector from the ISC valve. Idle Regulator (6) Switch off the ignition and remove the ECU plug.
- Page 119 Apply voltage to the terminal 1 and 3 of the battery. Check whether there is a connection between 2 and 4 by using a multimeter; if not, you shall replace the main relay. 4. Reinstall the EFI main relay and its case cover. VI.
- Page 120 Vacuum solenoid valve(vsv)for evaprative emission contrd (VSV) connector Evaporative emission hose Fig. 259 Layout diagram of the evaporative emission control system VSV Examination 1. Remove the VSV valve (1) Remove the two evaporative emission hoses from the VSV valve. (2) Remove the VSV valve connector and wire clips. (3) Remove the bolt and the VSV valve.
- Page 121 4. Examine the VSV valve’s working condition (1) Check whether the air flows smoothly from the gas port E to the Ohmmeter gas port F (See Fig. 262). (2) Connect the positive and negative poles of the battery respec- tively to the two terminals of the VSV valve; and then examine the airflow from the gas port E to the gas port F(See.
- Page 122 Simple measurement method: Temperature sensor:(Removing the joint) place the multimeter at ohm gear, and connect 2 terminals respectively to 1# pin and 2# pin of sensor, and rated resistance at 20 C is 2.5kΩ±5%, and other corresponding resistance values could be measured according to the characteristic curve in above drawing.
- Page 123 IX. Examination of Knock Sensor (KNK) Examination: 1. Remove the knock sensor Remove the knock sensor’s connector. Use a special servicing tool (SST) to remove the knock sensor (Fig. 270). 2. Examine the knock sensor Use a multimeter to check whether its terminal is not connected with its housing (See Fig.271).
- Page 124 Table 13 SMA car series M7.9.7 system pin voltage definition Voltage properties Voltage properties E(ECU connects the ground when operating) E(ECU connects the ground when operating) A/C vaporizer. E(ECU ignition ground 1) (+12) V E(ECU connects the ground when operating) (+12) V Pulse voltage(0-12V) Pulse voltage(0-12V)
- Page 125 tachometer check connector Fig. 274 Correct tachometer connection Fig. 275 Examine the injector’s working noi XII.Examination of Oxygen Sensor Due to errors in engine manufacturing and deterioration in car using condition (such as wear and tear of piston ring, carbon deposit in cylinder, etc.), the real control effect of EMS (Engine Management System) will deviate from the designed ideal condition, thereby leading to increased fuel consumption, worsened exhaust or decreased efficiency.
- Page 126 To the groucd wire for the car bady Measurement connector relay Oxygen sensor From the battey From the ignition suitch Fig. 276 Circuit schematic diagram for oxygen sensor a) Correct voltage waveform b) Voltage waveform of a damaged oxygen sensor Fig.
- Page 127 EFI main relay Open-loop relay EFI fuse Gasoline pump Lgnition switch Neutral shift switch Fuse (Automatic shift) (Manual shift) Starting relay Fuse Starting signal Ne signal Starter Battery Fig. 278 fuel pump system circuit diagram The current that flows through the FC terminal and the open-loop relay coil makes this relay closed, and the fuel pump begins to work.
-
Page 128: Section 4 Evaporative Emission & Positive Crankcase Ventilation Control System
Section 4 Evaporative Emission & Positive Crankcase Ventilation Control System 1. Purpose of Evaporative Emission & Positive Crankcase Ventilation Control System This control system is designed for two purposes: to reduce emission of carbon dioxide, hydrocarbon and nitrogen oxide in engine crankcase into the atmosphere and to reduce emission of fuel vapor from fuel tank into the atmosphere. - Page 129 II. Examination of Positive Crank- case Ventilation System 1. Remove the PCV valve Remove the PCV hose and then the PCV check valve. 2. Install the cleansing hose onto the PCV valve’s side connecting to the cylinder head. 3. Examine the PCV’s working condition. (1) Blow the air into the PCV valve from the side near the cylinder cover(Fig 282a), and check whether the airflow is smooth.
- Page 130 Before doing this, shut off other pipes positioned above the carbon canister and blow the air through the fuel tank pipe into it. Note: never attempt to cleanse the active carbon canister, otherwise active carbon may probably leak out. (4) Install the active carbon canister 3.Check the vacuum solenoid valve (Refer to Chapter 7 Section 4)of the Evaporative Emission control Purging pipe Fuel tank pipe...
-
Page 131: Chapter 8 Ignition System
Electronic gasoline injection engine adopts a non-contact electronic ignition system that has no pulse generator or igniter; ECU-controlled electronic ignition system can be divided into two types: distributor-type electronic ignition system and non-distributor-type electronic ignition system. MR479Q/MR479QA/MR481QA/JL481Q engine adopts the ECU-controlled distributor-type ignition system based on sequential ignition (1) ECU. -
Page 132: Section 2 Troubleshooting Of Ignition System
(2) Ignition module. The ignition module drives the power transistor according to the ignition signal from ECU, thereby controlling the poweron and poweroff of the primary current for the ignition coil. It also sends the ignition-timing (IGT) signal to ECU for confirming whether the ignition operation is normal. (3) Ignition coil. - Page 133 2. Examination of high voltage wires (1) Remove the high-voltage wire from the spark plug and distributor cover, i.e. from the rubber bushes on them. Note: do not pull the wire so as not to damage the core body inside the high voltage wire (See Fig. 287). (2) Use a multimeter to measure the resistance of the high voltage wire (See Fig.
- Page 134 3. Examination of spark plugs (1) Remove the high voltage wire from the spark plug. Use a 16mm spark plug socket wrench to remove the spark plug. (2) Use a spark plug cleaner or tinsel brush to clean the spark plug (See Fig. 290). And visually check whether there is any electrode erosion, screw thread damage or insulation damage.
- Page 135 The ignition coil is composed of double ignition coil, see Fig.293) and Controlled by ECU , it produces high voltage and makes spark plugs within two cylinders spark jump. It ignites the mixture gas during compression stroke. In the cylinder which is in exhaust stroke.
-
Page 136: Chapter 9 Lubrication System
Chapter 9 Lubrication System Section 1 Makeup and Features of Lubrication System he purpose of engine lubrication system is to continuously deliver lubricating oil onto various kinematic pairs’ surfaces so as to reduce friction and abrasion between relatively kinematic parts, thereby enabling them to work normally. In addition, the flowing lubrication oil can perform many other functions, including chip removal, cooling, sealing and rust protection. - Page 137 lubrication. The other path leads upwards along the cylinder block’s upper oil passage and the cylinder head’s connection bolt to the No.1 bearing seat for intake and exhaust camshafts. This firstly lubricates the journals and bearings. Then the lubricating oil enters into the main oil passage for camshafts and is sprayed out from various oil holes to lubricate various journals and bearing seats.
- Page 138 in Fig. 296. Its pump body is made of cast aluminum. At the front of its oil seal seat there is an oil return hole, through which the lubricating oil scraped down by the oil seal as the crankshaft rotates will flow back to the oil sump. When the pressure within the chamber of oil pump is higher than 0.49MPa, the pressure relief valve will open, the pressure within the oil cham- ber will decrease, and partial lubricating oil will flow back to the oil sump through the oil release hole of the pressure relief valve.
- Page 139 IV. Influence of Positive Crankcase Ventila- tion (PCV) on Engine Oil Lubrication Effect When the engine is running normally, partial combustion gas within the cylinder will inevitably flee through the gap between the piston and the cylinder into the crankcase, thereby increasing its internal gas amount and pressure.
-
Page 140: Section 2 Examination & Maintenance Of Lubrication System
Section 2 Examination & Maintenance of Lubrication System 1. Examination and Maintenance of Engine Oil Pump Removal: Note: when repairing the oil pump, you shall remove and clean the oil sump and the oil strainer. 1. Drain the engine oil. 2. - Page 141 7. Remove the engine oil strainer (Fig. 301). Remove the two bolts, the two nuts, the strainer and the gasket. 8. Remove the oil pump (1) Remove the seven bolts (See Fig. 302) (2) Use a hammer with plastic-face overlays to gently strike the pump body and remove the oil pump (See Fig.
- Page 142 (3) Examine the side clearance of the oil pump rotor Use a thickness gauge and the precision leveling ruler to measure the clearance between the oil pump rotor and rotor (See Fig. 307) The standard side clearance ranges from 0.025mm to 0.075mm; the maximum side clearance is 0.10mm.
- Page 143 (2) Smear new sealant onto the oil sump, and use 19 bolts and two nuts to install the oil sump. The torque is 4.9Nm. II. Engine Oil Examination & Engine Oil Filter Troubleshooting Examination: 1. Examine the engine oil quality Check whether the engine oil has been deteriorated, soaked, discolored or become thin.
- Page 144 1. Drain the engine oil (1) Remove the oil filler cover. (2) Remove the oil drain screw plug and drain the engine oil into the container. 2. Replace the engine oil filter (1) Use a special servicing tool to remove the engine oil filter (See Fig.
-
Page 145: Troubleshooting
III.Common Lubrication System Maintenance Data (Table 14) Section 3 Common Faults of Lubrication System and Troubleshooting 1. Over-low Engine Oil Pressure Over-low engine oil pressure will lead to poor lubrication or dry friction, easily resulting in intensified abrasion of kinetic parts within the engine or even its burnout. - Page 146 2. Use the oil level dipstick to drip a drop of engine oil onto a white filter paper. If the oil drop’s diffusion area is large and its peripheral part’s color is light, then you can conclude that the engine oil has been diluted by fuel. If its central part appears to be black, then it indicates that the engine oil has deteriorated.
-
Page 147: Chapter 10 Cooling System
1. Structure & Features of radiator MR6370 radiator belongs to tube and strap type. The structure is characterized by high radiation efficiency, light-weight, easiness to manufacture, etc. The size of heat radiator adopted by MR479Q engine is shown on Table 16. - Page 148 Specification of MR6370 Table 16 Item MR479Q engine 5.3 (total volume of coolant, 0.9 of which is Water capacity of radiator (L) the capacity of radiator) 158 (when the fan power is 1kw) Radiation efficiency (kJ/h) Radiation area (m2) 388 x 350 x 32 Size of the radiator core (W X H X T) (mm) II.
- Page 149 Table 18 Specification of Thermostat Model of thermostat Wax type Temperature in °C (valve begins to opened) 82±2 Temperature in °C (valve fully opened) Valve lift stroke mm without passing through radiator. The above process is called a small circulation, with limited magnitude. If coolant temperature is higher than 80°C, wax 7 will be liquefied.
- Page 150 IV. Temp.control electric fan Specification of electric cooling fan is shown as Table 19, while components are shown as Fig 320. Specification of electric cooling fan Table 19 Engine model MR479Q engine Item Model DC motor Direction of rotation Clockwise (from driver cab)
-
Page 151: Section 2 Inspection And Maintenance Of Cooling System
Table 20 Radiator temperature detect switch type Wax type Cut on temperature 101±2 Cut off temperature 95±2 Color mark black Section 2 Inspection and Maintenance of Cooling System 1. Cleaning and Maintenance of Radiator Clean the radiator with compressed air or water. Make sure fan motor is not moistened. (Better offer protection to the motor) 1. - Page 152 The upper limit for air valve’s opening pressure is 58.5kPa, while standard value is 73.5-102.9kpa. If malfunction is found, such valve shall be replaced. Deformation and defect Bending or defomation of valve or valve seat of sealing gasket Water rust between valve and valve seat Fig.
- Page 153 IV. Inspection & maintenance on temperature-controlled electric fan Connect positive pole and negative pole of electric fan to positive Ampere meter pole and negative pole of the battery .Electric fan shall be able to rotate freely after the fan motor was connected with the battery. Inspect the electric current with ampere meter 5.7-7.7A,see Fig 326 .
-
Page 154: Chapter 11 Clutch
Chapter 11 Clutch Section 1 Structure of Clutch and Its Operating Mechanism 1. Clutch Function 1. During automobile starting, it helps the engine to be engaged with drive train and enables smooth starting. 2. During gear shifting, it separates engine from drive train, reduces the impact between gears in transmission for easy shifting. - Page 155 mounts a torsional vibration damper which is a corrugated plate to make the clutch engagement more smooth. The struc- ture of clutch Friction plate Assy is shown in Fig.329. 3. Release Mechanism The release lever is the main part of release mechanism. The clutch release fork is fixed on the clutch shaft with bolt. The release bearing is pressed into the bearing sleeve.
-
Page 156: Section 2 Clutch Troubleshooting
III. Structure of Clutch Operating Mechanism The part between clutch pedal and clutch cable is called clutch operating mechanism. It operates the release mechanism to make driving/driven parts engaged or disengaged. The structure of clutch cable is shown in Fig. 331. The clutch pedal free stroke can be adjusted at the transmission end of the cable. - Page 157 Detaching: (1) Detach the transmission assy. from the vehicle. (2) Detach the locking plate and bolts (3) Pull out clutch release lever, take down the bushing, torsion spring, release bearing spring, release bearing assy. and release fork. (4) Take down the clutch pressure plate assy. from the flywheel, take out clutch friction plate. II.
- Page 158 3. Check the clutch friction plate for wear and axial run-out; the allowed wear limit is 0.33 mm (rivet depth), the allowed axial run-out limit is 1.34mm. Mount the clutch plate on new input shaft before measurement of axial run-out(see Fig 336). 4.
-
Page 159: Section 3 Assembly And Adjustment Of Clutch And Its Operating Mechanism
Wear damage Damage Damage or deformation 2. Maintenance Clutch operating mechanism needs periodical inspection and maintenance replace, replace worn or damaged parts in time. Wear damage Fig. 340 Check clutch cable Section 3 Assembly and Adjustment of Clutch and its Operating Mechanism 1. - Page 160 When making adjustment, minimize the number of adjusted pawls. (3) Assemble the clutch release bearing and release bearing circlip onto clutch release fork. a. Put the notch of the clutch release fork against circlip b. Under conditions specified in a), turn the clutch release fork 180° and assemble them together(Fig. 344). Smear lithium base grease on the relative slip surfaces of clutch release fork and release bearing, and the relative slip surfaces between release bearing and release sleeve (Fig.
- Page 161 (4) Install spacing/adjusting bolt (5) Tightening bolt (Fig. 350), tightening torque: 14.7-21.56Nm (6) Depress clutch pedal 2-3 times, adjust clutch pedal stroke as specified. (7) Install brake pedal assy. Engine compartment Fig. 349 Install cable bracket Fig. 350 Tightening nut II.
- Page 162 Fig.353 Adjust clutch pedal free stroke Fig. 354 Adjust the distance between clutch pedal and cowl panel. The clutch pedal free stroke is the distance between the point where the clutch pedal starts to be depressed the point where slight resistance is felt. Clutch pedal free stroke should be within 15-30mm and the pedal lever ratio is 5.16. 5.
- Page 163 II. Clutch Can’t Seperate or Incomplete Release Cause Elimination method 1. Clutch pedal free stroke inappropriate Adjust free stroke 2. Diaphragm spring failure or it’s pawl wear Replace or repair 3. Clutch pressure plate and flywheel friction Grinding the surface of pressure plate and surface warpage flywheel or replace 4.
-
Page 164: Section 1 Overview
Chapter 12 Common Faults of Engine and Troubleshooting Section 1 Overview ngine is the heart of automobile. Its working performance relates directly tonormal operation of the entire automobile. Therefore, it is necessary to provide regularmaintenance and service to engine, so as to eliminate troubles as they begin to develop. - Page 165 d. Pressure in oil passage is too low; e. Irrational starting operation. f. Throttle position sensor is damaged or circuit of throttle position sensor is broken, no signal is returned to ECU. g. Ignition system fails. h. Compression pressure of the engine is too low. (3) Fault diagnosis and elimination a.
- Page 166 i. Air filter is clogged; j. Fuel leaks from injector; k. Compression pressure of the cylinder is a low; l. Intake temperature sensor is damaged. (3) Analysis, diagnosis and elimination of fault a. For electric injection engine, ignition timing in cold start mode is normally fixed, but when ignition timing is changed for certain cause, cold start will be difficult, now make corrections;...
- Page 167 Engine cannot start If there is fault, repair or replace it Check start system Check high voltage spark No high voltage spark or high voltage spark Normal is too weak With ignition signs or not Check ignition system Without ignition signs With ignition signs Check whether electric petrol pump works or not Check filter element of the air filter...
- Page 168 (3) Fault analysis and troubleshooting d. If spark is too weak, check the general high voltage coil, a. Firstly conduct self-diagnosis for fault, check whether branch high voltage wire, spark plug gap and whether there is there is any fault code, if there is, find cause according to accumulated carbon in spark plug etc.
-
Page 169: Insufficient Power
III. Oil and Circuit Faults that Reduce Engine Performance Poor engine performance mainly appear as insufficient power, poor acceleration, larger fuel consumption, poor idle speed and overheating of engine etc. 1. Insufficient Power (1) Symptom of fault: The engine is basically normal when operates without load, but acceleration is slow when it runs with load, powerless when it climbs a slope, even if the throttle valve is treaded down to the end, power is still insufficient, speed cannot be increased and cannot reach max. - Page 170 Insufficient power Cannot open completely Insufficient Check whether throttle could be opened Adjust completely Normal Clogged Check whether air filter is clogged or not Clean or replace Normal Abnormal Check whether throttle position sensor fails or not Repair or replace Normal Incorrect Check ignition timing...
- Page 171 Poor acceleration Poor Check ignition timing Adjust to original ignition advance angle Normal Abnormal Restore Check tightness of intake system Normal Clogg Check whether air filter is clogged or not Clean or replace Normal Abnormal Check whether throttle position sensor fails or not Adjust or replace Normal Abnormal...
- Page 172 i. Incorrect ignition timing, adjust it; d. Poor airtightness of intake system, repair it; j. Vacuum pressure sensor failure, repair or replace it. e. Inaccurate ignition timing, adjust it; 5. Idle Speed Is Not Stable, Tends to Flame- f. High voltage spark too weak, carbon accumulation in spark plug or electrode gap too small, (1) Symptom of fault: repair, remove or adjust it;...
- Page 173 6. Idle Speed of Cold Auto Is Not Stable, Tends to Flameout (1) Symptom of fault: When the engine operates in cold auto, idle speed is unstable, tends to flameout, after the auto is warmed up, idle speed becomes normal. (2) Cause of fault and elimination a.
-
Page 174: Engine Overheats
10. Engine Overheats Item Symptom Cause Elimination method Insufficien Evaporation exists due to imperfect Repair, replace t coolant radiator cap Defective radiator hose Replace it Defective radiator hose band Repair welding, otherwise replace it Defective head gasket Replace it Crack on cylinder body Use impregnation process for remedy or replace it Defective seal of water pump... -
Page 175: Section 3 Determination And Elimination Of Abnormal Noises In The Engine
3. Exhaust Smoke Is White This is caused by water vapor or fuel vapor in the exhaust gas. The main cause is that head gasket is broken, thus allowing cooling water to permeate slowly into the cylinder and participate in combustion, then water vapor enters exhaust pipe. Now replace the head gasket in time, restore it to normal condition. - Page 176 Part with Cause of abnormal noise Elimination method abnormal noise Radial gap between connecting rod Abnormal noise in Replace the bearing bearings is too large connecting rod bearing Tighten Bolt on connecting rod cap is loose Dimension of connecting rod bearing Replace bushing bushing is not consistent, which causes rotation or rupture...
-
Page 177: Chapter 13 Power Source
Chapter 13 Power source he power source of the automobile is composed of battery, alternator regulator. Every electrical equipment is powered by the battery and alternator. When the alternator doesn’t generate electricity, the energy of the automobile is directly provided by the battery; when the engine works, it drives the alternator run. All the energy of the electrical equipment of the automobile is energized by the alternator while the surplus energy is supplemented to the battery. - Page 178 2. Driving End Frame Assy.: The driving end frame is used to support the rotor with which the alternator is mounted on the engine. In order to improve the cooling performance of the alternator. The ventilating hole is on the rear cover and front cover.
-
Page 179: Section 2 Battery
At present, battery for MR479Q/MR479QA engine is the maintenance free battery(don’t need add distillated water )produced by Shanghai Delphi International Battery Co., Ltd. If the battery is not used for a long time, detach it from the automobile. -
Page 180: Section 3 Normal Malfunction Of Charging System And Troubleshooting
4. Active substance falling off in large amount: Charging of high current will cause electrolysis of pure water, producing vast amount of oxygen and hydrogen. When hydrogen rushes out from the pores of the negative plate, the active substance will fall off in large amount. When electrolyte density increases and lead dioxide of t6570he positive plate falls off, brown substance of the electrolyte will go up to the surface of the electrolyte. -
Page 181: Chapter 14 Starter
Chapter 14 Starter tarting system includes starter motor and its accessory parts. Its function is to rotate the static crankshaft by outside force until the crankshaft has reached the speed required for cylinder combustion expansion so as to enable the engine running by itself. -
Page 182: Section 2 Working Principle Of Starter
Section 2 Working Principle of Starter When the ignition switch is switched on, the electric current is flowed into hold-in winding and suction winding of the magnetic switch. The field of the two windings has created very strong magnetic force in the same direction, attracting the contact plate to move by overcoming the rebounding force of spring, so that the drive lever fork plucks the over running- clutch to put the pinion and ring gear into the meshed state. -
Page 183: Section 4 Troubleshooting Of Starter
1.5min and starting time interval each operation should be 30s.otherwise battery and starter will be easily damaged. In case that the engine still cannot be started despite several attempts, it is necessary to check some of its circuits ,fuel supply system and the ignition system. -
Page 184: Chapter 15 Engine Management System
Chapter 15 Engine Management System Section 1 System Profile ngine management system is normally divided into three parts, i.e. sensor, controller andactuator. Sensor: converts physical parameters of the engine into electric signals (digital or analog), so as to monitor operating status and environmental conditions of the engine, and transmits these signals to the controller. -
Page 185: Section 2 System Composition And Working Principle
Control mode of ignition advance angle is normally an open loop control. However, this open loop control is not the same as common open loop control. While ECU controls in open loop mode and outputs command of ignition advance angle, it also monitors knocking signal from time to time through the knocking sensor. - Page 186 Microcomputer of ECU is an integration of microprocessor, memory, clock generator, timer, input/output (I/O) interface and A/D converter in input stage in a large-scale integrated chip, i.e. single-chip microcomputer. 1. Input stage Input stage of input signal from sensor performs preprocessing. Input signal is firstly sent to protective circuit, in some cases through signal converter and amplifier, and then sent to microcomputer.
- Page 187 Output stages to control idle speed control valve, solenoid valve of carbon canister and failure indicator etc. Idle speed controls in both Model MR479Q/MR479QA and Model MR481QA/JL481Q belong to closed loop control system. Their fuel injection and ignition controls also belong to closed control system.
-
Page 188: Chapter 16 Engine Electronic Control System
M1.5.4 and Mybo car etc (3) ECU transmits two signals to control cooling fan at low speed and high speed individually.For example, SMA car series with M7.9.7 and Mybo car etc The mounted position of ECU is different. ECU of Geely series is mounted under dashboard. ECU of most SMA’s car types is mounted inside engine. - Page 189 coil, thus generating a magnetic field to overcome the pressure of the return spring. Gravity of the valve needle and friction lift the valve needle, and fuel is injected under the fuel pressure. As long as the pressure difference between the inlet and outlet ports of the fuel injector remains unchange, the fuel flow rate will remain unchanged, and the injection volume can be determined through the power-on duration.
-
Page 190: Performance Data
Stepper motor Throttle bypass section Fig.368 Stepper motor actually is a micro motor. The steel stator is a multiphase coil winding and the rotor is a permanent magnet. When electrifying stator coil, the permanent magnetism stator will rotate towards corresponding direction on the impact of the electromagnetic power. - Page 191 (1) Mount with two M5 x 0.8 x 14 bolts (2) Tighten to bolt torque 4.0±0.4N.m (3) Mount with spring washer and bond it with adhesive (4) Don’t try to press or pull out shaft by any forces for axialSymptom of fault and judgment (5) Symptom of fault: idle revolution is a bit high, idle flameout etc.
- Page 192 5280~6570 20 C 5280~6570 40 C 5280~6570 60 C 5280~6570 12 C Temperature sensor characteristic curve Technical Parameters of DS-S/TF Pressure Sensor Table 26 Pressure range 25kPa-115kPa Input voltage 5.0±0.5V Mass About 18g-27g Vibration resistance Harmonics: 250m/s , peak: 600m/s Current Sensor resistance at 200C 2.5kΩ±5%...
-
Page 193: Ignition Coil
6. Speed sensor (Fig. 371) The soft magnetic core of the sensor surrounded by a coil is installed opposite to a pulse toothed ring, leaving a narrow air gas between them. The soft magnetic core is connected with a permanent magnet, and the magnetic field extends up to the ferromagnetic pulse toothed ring. - Page 194 Table 29 Technical Parameters of ZS-K2 x 2 Ignition Coil Resistance (20°C~25°C ) R pri.=0.55±0.08Ω, Rsec.=13.5±1.5kΩ Inductance (200C~25°C , f=1kHz, parallel) Lpri.=4.1±0.6mH. Lsec.=31±3H Output: 50PF load Uz≥30kV 8. Pressure regulator (Fig. 374) Fig. 374 Schematic Diagram of the Pressure Regulator It has the function to keep constant the difference between the pressure of the assembly system of the fuel distribution and the pressure in the inlet air pipe.
-
Page 195: Throttle Position Sensor
Current Is flowing through a semi-conductor wafer , magnetic B generates Hall voltage UH, with a value proportional to magnetic induction intensity B and current value Is (B, UH and Is are mutually vertical). Hall voltage is affected by variation of magnetic induction intensity B. - Page 196 Table 32 Technical parameters of DKG1 throttle valve position sensor Range of rotor angle ≤96 degrees Rotational direction Operating voltage Operating temperature -30°C~ +110°C, -40°C~ +120°C (short time) Swing arm protection resistance 710Ω-1380Ω Permissible current of the swing arm ≤18μA Product life cycle 2,000,000 cycles 11.
-
Page 197: Oxygen Sensor
Table 34 Technical parameters of TEV2 carbon canister control valve Flow 2~3m3/h, pressure 200mbar Air tightness <2000 cm3/h Control frequency 30Hz Min. control pulse Current consumption 0.5A for 13.5V Resistance 26Ω Operating voltage 9V~16V Inductance 48mH at f=1kHz Operating temperature -30°C~ +120°C 13. - Page 198 Table 31 Technical parameters of PG-1 phase sensor Tightening torque 40Nm~60Nm 3 grooves Protective tube Ceramic probe 200°C~850°C Hex nut ~570°C Cable outlet ~250°C Plug ~120°C Temperature gradient in the ceramic probe Max.100K/s Life cycle >160,000km 14.Electric fuel pump (Fig. 381) The electric fuel pump has the function to deliver fuel from the fuel tank to the engine, and provide adequate fuel pressure and abundant fuel.
Need help?
Do you have a question about the MR479Q and is the answer not in the manual?
Questions and answers