
Related Manuals for Thermomax THX-DL


Summary of Contents for Thermomax THX-DL
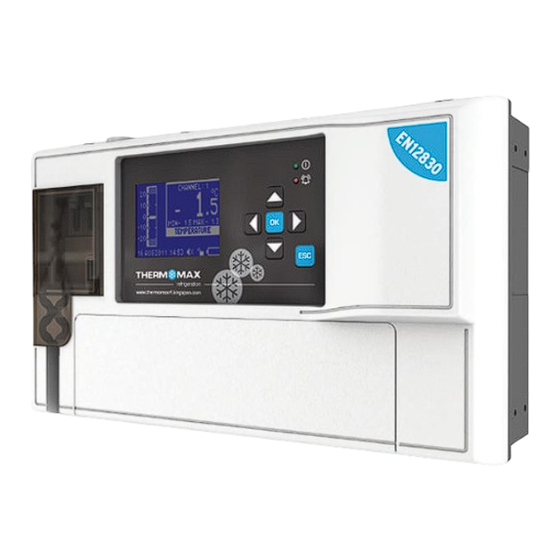
- Page 1 THX-DL Data Logger USER & INSTALLATION MANUAL V3.2016 www.thermomax-refrigeration.com Refrigeration...
-
Page 2: Table Of Contents
Contents Presentation PRESENTATION Summary of Features COMMS. AREA INSTALLATION Service Screen Safety Precautions Test THX Unit Contrast BACK Sensors Keypad Alarm Relay Relay Power Connection and Wiring Diagram Language Select Battery Sample Period Wall & Panel Mount Panel Mount diagrams Unit Information FRONT New Email Connectivty Setup... -
Page 3: Installation
Installation Installation Note: This installation procedure is for guidance only, and its suitability should be verified by the installer. (iv) Power Connections and Wiring Diagram Note: This device should be properly earthed. Flexible wires simplify connection to the terminals. All connections should be secure and adequately tightened. SAFETY PRECAUTIONS It is good practice to keep mains cables away from sensor cables and other low voltage signal cables. -
Page 4: Wall & Panel Mount
Installation Installation WALL MOUNT PANEL MOUNT (required panel mount kit) 1. Drill four holes in the wall, according to the template and insert 1. Cut a hole in the panel with the described dimensions, 296mm the wall plugs (see page 7) 2. - Page 5 Example: High Alarm threshold set at in settings on THX-DL, – when the above temperature has been exceeded CPU 2.0GHZ or above – The THX-DL will initiate the Email Alert. Memory Size: 256MB or above Display Card: 64M or above...
-
Page 6: Thx Operation
THX-DL Operation THX-DL Operation In order to fully understand the operation of the unit, this section should be read carefully. 1.2 Door Summary ▼ From the Main Screen, press the key, followed by the key to select Door Summary in the menu. Confirm selection using the key to reveal the Door Summary Screen. -
Page 7: Channel View
THX-DL Operation THX-DL Operation 3.0 ALARM SETTINGS 1.4 Daily Max/Min Readings ▼ From the Main Screen, press the key, followed by the key to select Daily Max/Min in the menu. ▼ From the Main Screen, press the key to select Alarms Settings from the main menu. -
Page 8: Settings
THX-DL Operation THX-DL Operation 4.0 SETTINGS 4.3 Channel On/Off ▼ From the Main Screen, press the key to select Settings from the main menu. 4.1 Set Clock ▼ From the Main Screen, press the key to select Settings from the main menu. -
Page 9: Door On/Off
THX-DL Operation THX-DL Operation 4.5 Door On/Off 4.7 Relay Setup ▼ ▼ From the Main Screen, press the key to select Settings from the main menu. From the Main Screen, press the key to select Settings from the main menu. -
Page 10: Calibration
THX-DL Operation THX-DL Operation 4.9 Calibration 4.10 Network ▼ ▼ From the Main Screen, press the key to select Settings from the main menu. From the Main Screen, press the key to select Settings from the main menu. ▼ ▼... -
Page 11: History
THX-DL Operation THX-DL Operation 6.0 SERVICE 5.2 History ▼ From the Main Screen, press the key to select Plot from the main menu. 6.1 Test ▼ From the Main Screen, press the key to scroll down to the second page of the menu. Select Service from the main menu. -
Page 12: Relay
THX-DL Operation THX-DL Operation 8.0 SAMPLE PERIOD 6.4 Relay ▼ From the Main Screen, press the key to scroll down to the second page of the menu. Select Service from the main menu. ▼ From the Main Screen, press the key to scroll down to the second page of the menu. -
Page 13: Diagnostics
THX-DL Operation 10.0 DIAGNOSTICS THX data logger can transfer data to/from a USB memory stick. The user can download the logged data and the unit settings to any USB memory device in FAT 32 format. 10.1 Databank The USB memory key can also be used to load new unit settings; this is useful, for example, for importing the settings from a previously ▼... -
Page 14: Download Setup
Web Server 2. Download Setup To connect with unit’s embedded Web Server, connect unit to the network (switch, hub, router etc.) using Ethernet CAT-5 cable or directly ▼ to the network adapter on your computer and open a web browser - Windows Internet Explorer (version 8.0 or higher) or Firefox. Input the From the Main Screen, press the key, followed by the key to select Download Setup in the menu and then confirm selection... -
Page 15: Live Data
Web Server Web Server 1. Live Data 3. Setup Live data screen displays the current temperature/humidity readings of each of the connected channels and indicates if that channel is in alarm or not. The status of each of the 12 digitals inputs is also displayed, indicating whether it is OPEN, CLOSED or OFF. To change the language, click on the suitable flag as outlined below. -
Page 16: User
Web Server Web Server 6. Graph 4. User User screen allow user to change the username and password and to restore factory settings. To change the password enter old username and password, then enter new username and password, confirm password and click Graph screen allow user to generate multiple channel graph. -
Page 17: Specification
8. Download Specification ELECTRICAL SENSORS: Supply Voltage: 110-240V AC Single Phase Type: SX™ PT 100 Platinum Film Fuses: 1A 20mm Slow Blow Glass Fuse Compensation: 3 wire compensated WALL MOUNT TEMPLATE Relay Output: Alarm: 5A changeover 2 pin isolated Cable Length: A variety of lengths are available –... - Page 19 Head Office Kingspan Environmental 180 Gilford Road Portadown Co. Armagh BT63 5LF Tel: +44 (0) 28 3836 4400 UK Sales/Technical Enquiries: Tel: +44 (0) 28 3836 4596 Email: thermomaxref@kingspan.com Europe Sales/Technical Enquiries Tel: +49 (0) 6102 3686712 Email: thermomaxrefeurope@kingspan.com In keeping with Company policy of continuing research and development and in order to offer our clients the most advanced products, Kingspan Environmental reserves the right to alter specifications and drawings without prior notice.
Need help?
Do you have a question about the THX-DL and is the answer not in the manual?
Questions and answers