
Related Manuals for Compumatic xl1000

Summary of Contents for Compumatic xl1000
- Page 1 TO PLACE AN ORDER CALL: 866-487-4751 OR VISIT: WWW.TIMECLOCKEXPERTS.COM CALCULATING TIME RECORDER USER’S MANUAL...
-
Page 2: Table Of Contents
TO PLACE AN ORDER CALL: 866-487-4751 OR VISIT: WWW.TIMECLOCKEXPERTS.COM TABLE OF CONTENTS 1. INTRODUCTION……………………………………………………. 2. FEATURES …………………………………………………………. 3. PREPARATION……………………………………………………… (1) Structure …………………………………………………………. (2) Installation………………………………………………………… 4. DAILY OPERATION ………………………………………………… 5. QUICK EASY SETUP ……………………………………………… 6. SETTING THE TIME………………………………………………... 7. SETTING THE DATE……………………………………………….. 8. -
Page 3: Introduction
TO PLACE AN ORDER CALL: 866-487-4751 OR VISIT: WWW.TIMECLOCKEXPERTS.COM 1. INTRODUCTION The details of this User’s Manual are subject to change without prior notification. 2. This User’s Manual has been prepared with the utmost care to cover all aspects of the time recorder’s use. However, if there are some explanations that are inadequate, unclear, or difficult to understand, please do not hesitate to contact the dealer or the store from which you have purchased your Time Recorder. -
Page 4: Features
TO PLACE AN ORDER CALL: 866-487-4751 OR VISIT: WWW.TIMECLOCKEXPERTS.COM 2. FEATURES ● This unit has two work type that can be selected (employee and part-time). ● This unit has the ability to calculate elapsed time between IN/OUT punches. There are two calculation mode, (punch and hourly) that can be selected. ●... -
Page 5: Preparation
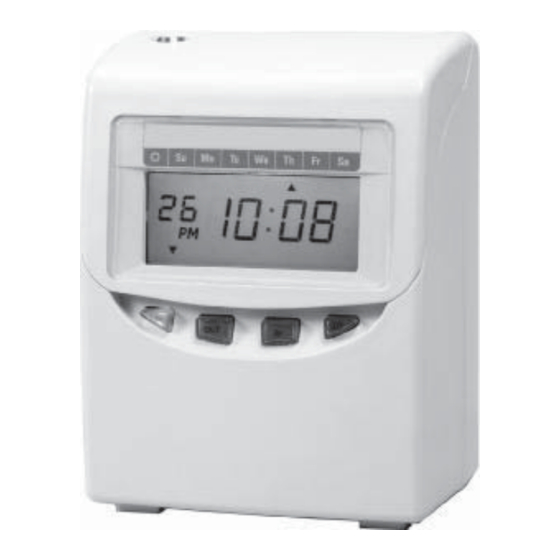
TO PLACE AN ORDER CALL: 866-487-4751 OR VISIT: WWW.TIMECLOCKEXPERTS.COM 3. PREPARATION (1) Structure Front view Back view Display... -
Page 6: Installation
TO PLACE AN ORDER CALL: 866-487-4751 OR VISIT: WWW.TIMECLOCKEXPERTS.COM (2) Installation ●Power Source 1) Use a power source with a stable voltage. 2) Use a power source which is independent from other equipment. ●Installation Avoiding installing the machine in any of the following places: 1) Subject to high humidity and dust. -
Page 7: Daily Operation
TO PLACE AN ORDER CALL: 866-487-4751 OR VISIT: WWW.TIMECLOCKEXPERTS.COM 4. DAILY OPERATIONS ● When the power cord is plugged in, the time recorder can be used immediately with the basic functions. The basic functions include the work type (employee), pay period (monthly) and pay ending day (31). ●... -
Page 8: Quick Easy Setup
TO PLACE AN ORDER CALL: 866-487-4751 OR VISIT: WWW.TIMECLOCKEXPERTS.COM 5. QUICK EASY SETUP (1) Plug the Ac cord into the Ac (3) Unlock with key and remove the outlet. top cover. *The socket-outlet should be installed near the equipment and should be easily accessible. -
Page 9: Setting The Time
TO PLACE AN ORDER CALL: 866-487-4751 OR VISIT: WWW.TIMECLOCKEXPERTS.COM 6. SETTING THE TIME Example: Change the time from PM 10:20 to AM 11:30 (2) Setting the “Minute” Press the [F] button, and position the “▲” under the Press the [+] or [-] button to “TIME”... -
Page 10: Setting The Date
TO PLACE AN ORDER CALL: 866-487-4751 OR VISIT: WWW.TIMECLOCKEXPERTS.COM 7. SETTING THE DATE Example: Change the Date from January 1, 2006 to June 10, 2006. (3) Setting the “Date” Press the [F] button, and position the “▲” under the Press the [+] or [-] button to “DATE”... -
Page 11: Setting Time System
TO PLACE AN ORDER CALL: 866-487-4751 OR VISIT: WWW.TIMECLOCKEXPERTS.COM 8. SETTING TIME SYSTEM Time system can be select from 01~02 (see chart below). Time System LCD Display 01 12 hour PM 6:00 02 24 hour 18:00 If you select 12 hour, for example PM 6:00: It will print 06:00P. -
Page 12: Setting Print Format
TO PLACE AN ORDER CALL: 866-487-4751 OR VISIT: WWW.TIMECLOCKEXPERTS.COM 9. SETTING PRINT FORMAT This function allows you to set, type of work, pay periods and pay ending day. *If you try to change the setting, make sure the time recorder has no punch recorded, otherwise the error code “E-49”... - Page 13 TO PLACE AN ORDER CALL: 866-487-4751 OR VISIT: WWW.TIMECLOCKEXPERTS.COM (1) Example: Setting Type of Work is employee, pay period is Monthly, Pay ending day is 20. After the pay ending day, the first punch will on the front side of the time card in the 1’st row.
- Page 14 TO PLACE AN ORDER CALL: 866-487-4751 OR VISIT: WWW.TIMECLOCKEXPERTS.COM (2) Example: Setting Type of Work is employee, pay period is Weekly, Pay ending day is Friday. Today Date May 2 May 3 May 4 May 5 May 6 May 7 May 8 Day of week Wed.
- Page 15 TO PLACE AN ORDER CALL: 866-487-4751 OR VISIT: WWW.TIMECLOCKEXPERTS.COM (3) Example: Setting Type of Work is employee, pay period is Bi- Weekly, Pay ending day is following Friday. Today Date May 2 May 3 May 11 May 12 May 14 May 15 Day of week Wed.
- Page 16 TO PLACE AN ORDER CALL: 866-487-4751 OR VISIT: WWW.TIMECLOCKEXPERTS.COM (4) Example: Setting Type of Work is part-time, Pay ending day is 20. *Pay ending day will printed on time card’s 32’th row. After the Pay ending day, the first day imprint will be on the time card’s 2’nd row. a.
-
Page 17: Setting The Time Of Day Change
TO PLACE AN ORDER CALL: 866-487-4751 OR VISIT: WWW.TIMECLOCKEXPERTS.COM 10. SETTING THE TIME OF DAY CHANGE The time of day change refers to the time when the print shift to the next line on a time card for the next day. This function allows the time recorder to imprint the punch out time on the same line of previous working day, even if leaving time is after midnight. -
Page 18: Setting The Common Schedule
TO PLACE AN ORDER CALL: 866-487-4751 OR VISIT: WWW.TIMECLOCKEXPERTS.COM 11. SETTING THE COMMON SCHEDULE This function has 11 items that can be programmed. You may not necessary have to program all of them. (1) Item define: Item1 (start): The daily work time start counting. Item2 (* start): Setting time to start printing special mark (*) for late in or early out. - Page 19 TO PLACE AN ORDER CALL: 866-487-4751 OR VISIT: WWW.TIMECLOCKEXPERTS.COM a. Setting the item1 (Start): Example: the start time is set at 08:00. (a) Setting the “Item” (c) Setting the “Minute” Press the [F] button, and position Press the [+] or [-] button to set the “▲”...
- Page 20 TO PLACE AN ORDER CALL: 866-487-4751 OR VISIT: WWW.TIMECLOCKEXPERTS.COM b. Setting the item2 (* Start): Example: print * start time is set at 08:01. (a) Setting the “Item” (c) Setting the “Minute” Press the [F] button, and position Press the [+] or [-] button to set the “▲”...
- Page 21 TO PLACE AN ORDER CALL: 866-487-4751 OR VISIT: WWW.TIMECLOCKEXPERTS.COM c. Setting the item3 (* End): Example: print * end time is set at 17:00 (a) Setting the “Item” (c) Setting the “Minute” Press the [F] button, and position Press the [+] or [-] button to set the “▲”...
- Page 22 TO PLACE AN ORDER CALL: 866-487-4751 OR VISIT: WWW.TIMECLOCKEXPERTS.COM d. Setting the item4 (End): Example: the end time is set at 17:00. (a) Setting the “Item” (c) Setting the “Minute” Press the [F] button, and position Press the [+] or [-] button to set the “▲”...
- Page 23 TO PLACE AN ORDER CALL: 866-487-4751 OR VISIT: WWW.TIMECLOCKEXPERTS.COM e. Setting the item5 (Max. in value): Example: maximum in value is set at 12 hours. Max. in value 12 hours No calculation (a) Setting the “Item” (b) Setting the “Hour” Press the [F] button, and Press the [+] or [-] button to set position the “▲”...
- Page 24 TO PLACE AN ORDER CALL: 866-487-4751 OR VISIT: WWW.TIMECLOCKEXPERTS.COM f. Setting the item6 (Break1 start): Example: break1 start time is set at 10:00. (a) Setting the “Item” (c) Setting the “Minute” Press the [F] button, and position Press the [+] or [-] button to set the “▲”...
- Page 25 TO PLACE AN ORDER CALL: 866-487-4751 OR VISIT: WWW.TIMECLOCKEXPERTS.COM g. Setting the Item7 (Break1 End) Example: end time for break1 is set at 10:15. (a) Setting the “Item” (c) Setting the “Minute” Press the [F] button, and position Press the [+] or [-] button to set the “▲”...
-
Page 26: Setting The Extra Schedule
TO PLACE AN ORDER CALL: 866-487-4751 OR VISIT: WWW.TIMECLOCKEXPERTS.COM 12. SETTING THE EXTRA SCHEDULE (1) Under the employee mode, you can set up a flexible work schedule time for one particular working day of the week. a. Item define: item1 (Day of the week): One day of the week’s schedule to set differently. Item2 (Start): Extra schedule, start of counting time. - Page 27 TO PLACE AN ORDER CALL: 866-487-4751 OR VISIT: WWW.TIMECLOCKEXPERTS.COM a. Setting item1 (select a day of the week): Day of week Code (b) Setting “The day of the week” (a) Setting the “Item” Press the [+] or [-] button to set Press the [F] button, and position at “05”...
- Page 28 TO PLACE AN ORDER CALL: 866-487-4751 OR VISIT: WWW.TIMECLOCKEXPERTS.COM b. Setting the item2 (Start): Example: the start time is set at 08:00. (a) Setting the “Item” (c) Setting the “Minute” Press the [F] button, and position Press the [+] or [-] button to set the “▲”...
- Page 29 TO PLACE AN ORDER CALL: 866-487-4751 OR VISIT: WWW.TIMECLOCKEXPERTS.COM c. Setting the item3 (* Start): Example: print * start time is set at 08:01. (a) Setting the “Item” (c) Setting the “Minute” Press the [F] button, and position Press the [+] or [-] button to set the “▲”...
- Page 30 TO PLACE AN ORDER CALL: 866-487-4751 OR VISIT: WWW.TIMECLOCKEXPERTS.COM d. Setting the item4 (* End): Example: print * end time is set at 12:00. (a) Setting the “Item” (c) Setting the “Minute” Press the [F] button, and position Press the [+] or [-] button to set the “▲”...
- Page 31 TO PLACE AN ORDER CALL: 866-487-4751 OR VISIT: WWW.TIMECLOCKEXPERTS.COM e. Setting the item5 (End): Example: the end time is set at 12:00. (a) Setting the “Item” (c) Setting the “Minute” Press the [F] button, and position Press the [+] or [-] button to set the “▲”...
- Page 32 TO PLACE AN ORDER CALL: 866-487-4751 OR VISIT: WWW.TIMECLOCKEXPERTS.COM f. Setting the item6 (Max. in value): Example: maximum in value is set at 6 hours. Max. in value 6 hours No calculation (a) Setting the “Item” (b) Setting the “Hour” Press the [F] button, and Press the [+] or [-] button to set position the “▲”...
- Page 33 TO PLACE AN ORDER CALL: 866-487-4751 OR VISIT: WWW.TIMECLOCKEXPERTS.COM g. Setting the item7 (Break1 Start): Example: break1 start time is set at 10:00. (a) Setting the “Item” (c) Setting the “Minute” Press the [F] button, and position Press the [+] or [-] button to set the “▲”...
- Page 34 TO PLACE AN ORDER CALL: 866-487-4751 OR VISIT: WWW.TIMECLOCKEXPERTS.COM h. Setting the Item8 (Break1 End) Example: break1 end time is set at 10:15. (a) Setting the “Item” (c) Setting the “Minute” Press the [F] button, and position Press the [+] or [-] button to set the “▲”...
- Page 35 TO PLACE AN ORDER CALL: 866-487-4751 OR VISIT: WWW.TIMECLOCKEXPERTS.COM (3) Under the part-time mode a. Item define: item1: Setting the working hours and requiring a break time. Item2: Setting the break time deduction hours. Example: Setting the working hours 7:30 with a break time of 30 minutes. b.
- Page 36 TO PLACE AN ORDER CALL: 866-487-4751 OR VISIT: WWW.TIMECLOCKEXPERTS.COM b. Setting the item2 (break time) (c) Setting the “Minute” (a) Setting the “Item” Press the [F] button, and position Press the [+] or [-] button to set at “30” and press [E] button. the “▲”...
-
Page 37: Setting The Rounding Punch
TO PLACE AN ORDER CALL: 866-487-4751 OR VISIT: WWW.TIMECLOCKEXPERTS.COM 13. SETTING THE ROUNDING PUNCH In this function, you can select the types of rounding and set the rounding unit. *If you need to change the setting, make sure the time recorder has no punch recorded, otherwise the error code “E-49”... - Page 38 TO PLACE AN ORDER CALL: 866-487-4751 OR VISIT: WWW.TIMECLOCKEXPERTS.COM Example: Types of rounding: “Punch” and “Rounding unit” is 20 minutes. (3) Setting the “Rounding unit” (1) Press the [F] button, and position the “▲” next the “ROUNDING Such as example, Press the [+] or [-] button to set at “20”, PUNCH”...
-
Page 39: Setting The Daylight Saving Time
TO PLACE AN ORDER CALL: 866-487-4751 OR VISIT: WWW.TIMECLOCKEXPERTS.COM 14. SETTING THE DAYLIGHT SAVING TIME * At 2:00 AM on the first day of summer time, the clock automatically gains one hour to show 3:00 AM. At 3:00 AM on the last day of summer time, the clock automatically loses one hour to show 2:00 Am. - Page 40 TO PLACE AN ORDER CALL: 866-487-4751 OR VISIT: WWW.TIMECLOCKEXPERTS.COM Set the starting date (2) Setting the “Year” (4) Setting the “Date” Such as example, press the Press the [+] or [-] button to set at “25”, and press the [E] [E] button because the year 2007 is not to be changed.
- Page 41 TO PLACE AN ORDER CALL: 866-487-4751 OR VISIT: WWW.TIMECLOCKEXPERTS.COM Set the ending date (7) Setting the “Date” (5) Setting the “Year” Press the [+] or [-] button to Such as example, press the [E] set at “30”, and press the [E] button because the year 2007 is button.
- Page 42 TO PLACE AN ORDER CALL: 866-487-4751 OR VISIT: WWW.TIMECLOCKEXPERTS.COM Deleting the Daylight Saving Time setting To delete the daylight saving time setting, change the displayed starting “month” setting to “- -”. Example: To delete the daylight saving time setting. (1) Press the [F] button and position (4) Press the [E] button twice.
-
Page 43: Setting The Print Language
TO PLACE AN ORDER CALL: 866-487-4751 OR VISIT: WWW.TIMECLOCKEXPERTS.COM 15. SETTING THE PRINT LANGUAGE If pay periods was selected in Weekly or Bi-weekly, the date of imprint will print the language for day of the week. Initial value of the language is 01. Example: Change Date of imprint from 01 to 02. -
Page 44: Setting The Buzzer Period
TO PLACE AN ORDER CALL: 866-487-4751 OR VISIT: WWW.TIMECLOCKEXPERTS.COM 16. SETTING THE BUZZER PERIOD Buzzer period feature is only available when setting common schedule (start, end, break time start and end) and extra schedule (start, end, break time start and end). This function is to set the duration of External Time Signal (Option) and Built-in Melody. -
Page 45: Setting The Vertical Adjust
TO PLACE AN ORDER CALL: 866-487-4751 OR VISIT: WWW.TIMECLOCKEXPERTS.COM 17. SETTING THE VERTICAL ADJUST If the printing is off the center of the row, you can use this function to adjust it. Increase the value +1 will print upwards 0.375mm, decrease the value-1 will print downwards 0.375mm. -
Page 46: Time Card Number Transfer
TO PLACE AN ORDER CALL: 866-487-4751 OR VISIT: WWW.TIMECLOCKEXPERTS.COM 18. TIME CARD NUMBER TRANSFER When the time card is damaged, lost or fully printed before the pay ending day, you can use this function to make a new card number to replace the old card number. -
Page 47: Time Card Number Delete
TO PLACE AN ORDER CALL: 866-487-4751 OR VISIT: WWW.TIMECLOCKEXPERTS.COM 19. TIME CARD NUMBER DELETE When you want to delete a time card data or all the time cards data in time recorder, you can use this function. Example: to delete time card No. 12. 1) Open the cover then press 3) If you want to delete all the both the “F”... -
Page 48: Print Sample
TO PLACE AN ORDER CALL: 866-487-4751 OR VISIT: WWW.TIMECLOCKEXPERTS.COM 20. PRINT SAMPLE (1) Part-time mode Example 1: ● Print format: Part-time mode, pay ending day 25 ● Time system: 24 hours. ● Printing line: 5:00. ● Rounding: Hourly/Rounding unit 20 minutes. ●... - Page 49 TO PLACE AN ORDER CALL: 866-487-4751 OR VISIT: WWW.TIMECLOCKEXPERTS.COM Example 2: ● Print format: Part-time mode, pay ending day 25 ● Time system: 12 hours. ● Printing line: 5:00. ● Rounding: Punch/Rounding unit 20 minutes. ● Common schedule: Work start: 8:00, Work end: 17:00, at 8:01, * off: 17:00, Break time 12:00~13:00.
- Page 50 TO PLACE AN ORDER CALL: 866-487-4751 OR VISIT: WWW.TIMECLOCKEXPERTS.COM (2) Employee mode: Example 1 ● Print format: Employee mode, weekly, pay ending day Tuesday. ● Time system: 12 hours. ● Printing line: 8:00. ● Rounding: Hourly/Rounding unit 15 min. ● Common schedule: Break time 12:00~13:00.
- Page 51 TO PLACE AN ORDER CALL: 866-487-4751 OR VISIT: WWW.TIMECLOCKEXPERTS.COM Example 2 ● Print format: Employee mode, weekly, pay ending day Tuesday. ● Time system: 24 hours. ● Printing line: 8:00. ● Rounding: Punch/Rounding unit 15 min. ● Common schedule: Break time 12:00~13:00.
-
Page 52: Reset
TO PLACE AN ORDER CALL: 866-487-4751 OR VISIT: WWW.TIMECLOCKEXPERTS.COM 21. RESET ●Press this switch when operation has become abnormal. Operation will return to normal without affecting the present time and program memory. ●If abnormal display or operation should persist even after Reset switch is pressed, press Reset switch and E button at the same time, then release reset switch first, then release the E button, the program will return to the factory defaults. -
Page 53: Replacing The Ribbon Cartridge
TO PLACE AN ORDER CALL: 866-487-4751 OR VISIT: WWW.TIMECLOCKEXPERTS.COM REPLACING THE RIBBON CARTRIDGE Unlock the key and remove the Turn the knob of the new cartridge cover. in direction of the arrow (clockwise) to tighten the ribbon. Installing the ribbon cartridge so that the ribbon is between the print head and ribbon mask. -
Page 54: Connecting The External Time Signal (Optional)
TO PLACE AN ORDER CALL: 866-487-4751 OR VISIT: WWW.TIMECLOCKEXPERTS.COM 23. CONNECTING THE EXTERNAL TIME SIGNAL (OPTIONAL) Unlock the key and remove the Install the External time signal PC cover. Board inside the front case. Then attach the connecting cable from the Ext. PC Board to the connector on the Main PC Board. -
Page 55: Installing The Battery Pack (Optional)
TO PLACE AN ORDER CALL: 866-487-4751 OR VISIT: WWW.TIMECLOCKEXPERTS.COM INSTALLING THE BATTERY PACK (OPTIONAL) Push the centre of the lid Insert the battery pack into the upwards and then remove the time recorder as show in the lid from the two clasps. figure. -
Page 56: Troubleshooting
TO PLACE AN ORDER CALL: 866-487-4751 OR VISIT: WWW.TIMECLOCKEXPERTS.COM 25. TROUBLESHOOTING (1) The time recorder does not work and LCD shows no display. 1) Ensure the power code is properly plugged into the AC outlet. 2) Check for blown fuse on the main PC board (F1). (2) The time recorder has become abnormal Press the Reset switch.
Need help?
Do you have a question about the xl1000 and is the answer not in the manual?
Questions and answers