Table of Contents
Advertisement
Quick Links
Advertisement
Table of Contents

Related Manuals for Charnwood W813


Summary of Contents for Charnwood W813
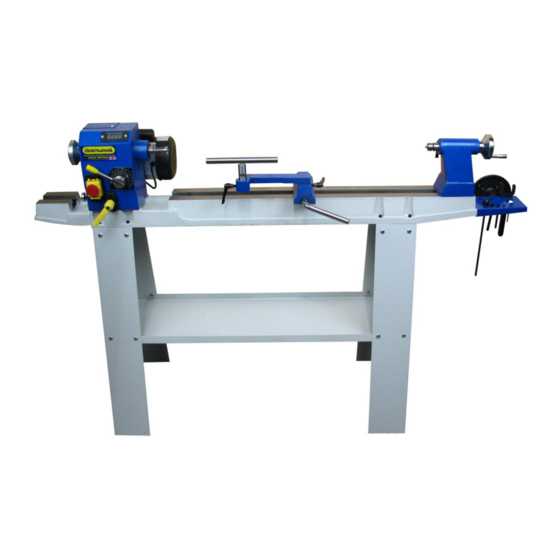
- Page 1 FLOORSTANDING LATHE OPERATORS MANUAL MODEL: W813 Charnwood, Cedar Court, Walker Road, Hilltop Industrial Estate, Bardon Hill, Leicestershire, LE67 1TU Tel. 01530 516 926 Fax. 01530 516 929 email: sales@charnwood.net website: www.charnwood.net...
-
Page 2: General Safety Rules
GENERAL SAFETY RULES WARNING: Do not attempt to operate the machine until you have read thoroughly and understood completely all instructions, rules, etc. contained in this manual. Failure to comply may result in accidents involving fire, electric shock, or serious personal injury. Keep this owner's manual and review frequently for continuous safe operation. - Page 3 15. Disconnect the machine from power source before servicing and when changing the drive belt. 16. To avoid accidental starting, make sure the switch is in the OFF position before plugging in the mains cable. 17. Never leave the machine running unattended. Turn the power off. Do not leave the machine until it comes to a complete stop.
-
Page 4: Specification
Specification 900mm (36”) Distance between centres 310mm (12”) Maximum diameter over bed 375mm (15”) Maximum diameter (with head rotated) Motor (induction) 550W (3/4hp), 240v Speeds (10) 500 to 2,000 RPM 3/4” x 16tpi Spindle thread Head and tailstock tapers Hollow Centres 10mm diameter Dimensions (WxDxH) 1700 x 450 x 1120mm... -
Page 5: Assembling The Floor Stand
Assembling the Floor Stand Important: All nuts and bolts should only be fastened finger tight until assembly is complete. Using the coach bolts, nuts and plain washers, fix the four legs to the tray, noting that the legs are left and right handed. Bolt on the top plates, which fit inside the legs. Square up the assembly and tighten all the nuts and bolts. - Page 6 Fit the yellow lever onto the headstock locking shaft. Secure it in place with the spring and fixing screw. Tighten the fixing screw firmly. When engaged, this lever will unlock the headstock. Pull the lever away from the headstock to rotate it without engaging the shaft.
-
Page 7: Operation
Bolt on the accessory storage tray using the 2 fixing bolts. Operation Headstock Drive Centre Tail Centre Tailstock RPM Display Tool Rest Winding Handle Speed Control On/Off Switch Extension Bed Rotation Plunger Accessory Tray Rotation Lock Starting and Stopping Slide up the red switch cover and lift the cover. Press the green ‘on’ button to start the lathe. -
Page 8: Speed Control Lever
It is recommended that the lathe is always retuned to the slowest speed before stopping the lathe. Leaving the lathe at a higher speed when starting, puts more strain on the motor and may shorten the life span of the motor. Speed Control Lever On/Off Switch... - Page 9 Align the Centres It is now necessary to check the alignment of the tailstock to the headstock. Fit both centres and slide the tailstock down towards the headstock until both centres touch and lock the tail centre in place. If the 2 centres do not meet correctly, undo the yellow headstock rotation locking lever and move the headstock slightly until the...
-
Page 10: Recommended Turning Speeds
Recommended Turning Speeds Diameter (mm) Roughing RPM General Cutting RPM Finishing RPM Under 50 1500 3200 3200 50 – 100 1600 2500 100 – 150 1000 1700 150 – 200 1250 200 -250 1000 250 – 300 300 - 350 350 - 400 Maintenance Changing the Drive Belt... -
Page 11: Optional Accessories
Optional Accessories There are a wide range of optional accessories available for lathes. Viper 3 Geared Scroll Chuck A chuck is used for bowl turning projects, when the work piece is held from one end only. The Viper 3 sized chuck is a perfect match for the size and power of this lathe. -
Page 13: Declaration Of Conformity For Ce Marking
Declaration of Conformity for CE Marking Charnwood Declare that Woodworking Lathe, Model W813 Conforms with the following Directives: Machinery Directive 2006/42/EC Low Voltage Directive 2006/95/EC EMC Directive 2004/108/EC And further conforms to the machinery example for which the EC type examination Certificate No. - Page 14 Charnwood W813 Parts Diagram...
- Page 15 Charnwood W813 Parts List Description Description Headstock Casting Tool Rest Post 25mm Diameter Ratchet Handle – Tool Rest Drive Centre 1MT Faceplate Ratchet Handle - Tailstock Headstock Spindle Tool Rest Extension Tool Rest Body (Banjo) Bearing 6205Z Tool Rest Locking Handle...
- Page 16 Charnwood, Cedar Court, Walker Road, Hilltop Industrial Estate, Bardon Hill, Leicestershire, LE67 1TU Tel. 01530 516 926 Fax. 01530 516 929 email: sales@charnwood.net website: www.charnwood.net...
Need help?
Do you have a question about the W813 and is the answer not in the manual?
Questions and answers