
Related Manuals for LG WM3770H*A


Summary of Contents for LG WM3770H*A
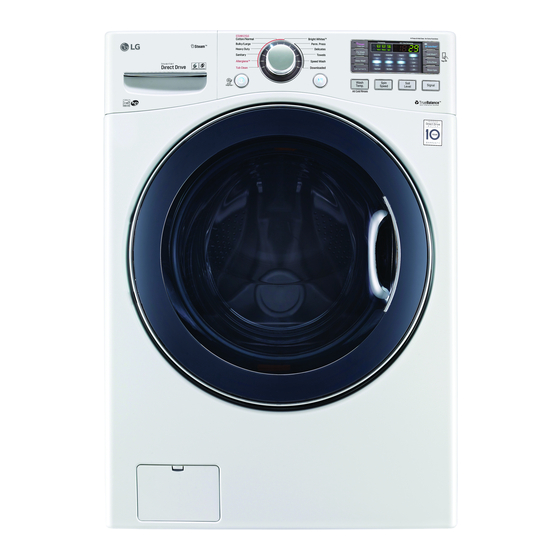
- Page 1 OWNER’S MANUAL WASHING MACHINE Please read this owner's manual thoroughly before operating and keep it handy for reference at all times. WM3770H*A www.lg.com MFL68639737...
-
Page 2: Product Features
The Tag On feature works on most NFC equipped smart phones by communicating with your Tag On equipped LG appliance. Using the LG Smart Laundry application, the Tag On feature allows you to diagnose your appliance, download new cycles, and see the status of your appliance by simply touching the smart... -
Page 3: Table Of Contents
TABLE OF CONTENTS TABLE OF CONTENTS - Rinse + Spin PRODUCT FEATURES - Extra Rinse - Delay Wash - Steam IMPORTANT SAFETY INSTRUCTIONS - Cold Wash™ BASIC SAFETY PRECAUTIONS - Turbo Wash™ GROUNDING INSTRUCTIONS Setting Options During Cycle SAFETY INSTRUCTIONS FOR INSTALLATION - Child Lock SAFETY INSTRUCTIONS FOR USE, CARE, - Add Garments... -
Page 4: Important Safety Instructions
IMPORTANT SAFETY INSTRUCTIONS IMPORTANT SAFETY INSTRUCTIONS READ ALL INSTRUCTIONS BEFORE USE WARNING For your safety, the information in this manual must be followed to minimize the risk of fire or explosion, electric shock, or to prevent property damage, injury to persons, or death. Your safety and the safety of others are very important. -
Page 5: Grounding Instructions
IMPORTANT SAFETY INSTRUCTIONS IMPORTANT SAFETY INSTRUCTIONS READ ALL INSTRUCTIONS BEFORE USE WARNING For your safety, the information in this manual must be followed to minimize the risk of fire or explosion, electric shock, or to prevent property damage, injury to persons, or death. GROUNDING INSTRUCTIONS This appliance must be grounded. -
Page 6: Safety Instructions For Installation
IMPORTANT SAFETY INSTRUCTIONS IMPORTANT SAFETY INSTRUCTIONS READ ALL INSTRUCTIONS BEFORE USE WARNING For your safety, the information in this manual must be followed to minimize the risk of fire or explosion, electric shock, or to prevent property damage, injury to persons, or death. SAFETY INSTRUCTIONS FOR INSTALLATION WARNING To reduce the risk of fire, electric shock, or injury to persons when using this appliance, follow basic... -
Page 7: Safety Instructions For Use, Care, Cleaning, And Disposal
IMPORTANT SAFETY INSTRUCTIONS IMPORTANT SAFETY INSTRUCTIONS READ ALL INSTRUCTIONS BEFORE USE WARNING For your safety, the information in this manual must be followed to minimize the risk of fire or explosion, electric shock, or to prevent property damage, injury to persons, or death. SAFETY INSTRUCTIONS FOR USE, CARE, CLEANING, AND DISPOSAL WARNING To reduce the risk of fire, electric shock, or injury to persons when using this appliance, follow basic... -
Page 8: Product Overview
Part Number NOTE Contact LG Customer Service at 1-800-243-0000 (1-888-542-2623 in Canada) if any accessories are missing. For your safety and for extended product life, use only authorized components. The manufacturer is not responsible for product malfunction or accidents caused by the use of separately purchased unauthorized components or parts. -
Page 9: Control Panel Features
PRODUCT OVERVIEW Control Panel Features Operation Display Cycle selector Power Start/ Water Spin Soil Signal Temperature Speed Level Sound Button Pause Selection Selection Selection Selection Button Button Button Button Button Operation Button Description Turns the washing machine on and off. (During the wash cycle) stops operation, and cancels the settings. -
Page 10: Display
PRODUCT OVERVIEW Operation (continued) Button Description Pre-wash heavily soiled laundry (See page. 26). (Press and hold during wash cycle) Lock/unlock the button (See page. 27). Use this option to save time (See page.27). (Press before wash cycle) Add an extra rinse to the selected cycle (See page. 26). (Press before wash cycle) Use this option to rinse detergent from load (See page. -
Page 11: Installation
INSTALLATION INSTALLATION Installation Overview Choosing the proper Unpacking and Connecting the water line location removing shipping bolts Connecting the drain line Leveling the washer Connecting to the power supply Testing the washer WARNING Washer is heavy! Two or more people are required when moving and unpacking the washer. Failure to do so can result in back or other injury. -
Page 12: Choosing The Proper Location
INSTALLATION Choosing the Proper Location NOTE The floor must be strong and rigid enough to Install the washing machine on a solid floor that is support the weight of the washer, when fully strong and rigid enough to support the weight of the loaded, without flexing or bouncing. -
Page 13: Unpacking And Removing Shipping Bolts
INSTALLATION Unpacking and Removing Shipping Bolts Starting with the bottom two shipping bolts, use the wrench (included) to fully loosen all four shipping bolts by turning them counterclockwise. When removing the washer from the carton base, be Remove the bolt assemblies by wiggling them sure to remove the foam drum support in the middle of slightly while pulling them out. -
Page 14: Connecting The Water Lines
Use new hoses when you install the washing machine. Do not reuse old hoses. LG does not recommend the use of aftermarket hoses. WARNING Periodically check the hoses for cracks, leaks Do not overtighten. -
Page 15: Connecting The Drain Line
INSTALLATION Using a Laundry Tub Connecting the Drain Line Clip the end of the hose into the elbow bracket. Secure the drain hose in place to prevent moving - Connect the elbow bracket within 4 inches (10 and leaking. cm) from the end of the drain hose. If the drain hose is extended more than 4 inches (10 cm) NOTE beyond the end of the elbow bracket, mold, or... -
Page 16: Leveling The Washer
INSTALLATION Leveling the Washer Check again that the washer is level. - Push or rock the top edges of the washing The washer tub of your new washing machine machine gently to make sure that the washing spins at very high speeds. To minimize vibration, machine does not rock. -
Page 17: Connecting To The Power Supply
INSTALLATION Connecting to the Power Supply Testing the Washer Make sure to ground the washing machine to Check if the washing machine is properly installed prevent a short circuit or an electric shock when and run a test cycle. plugging in. Load the washing machine with 6 pounds of laundry. -
Page 18: Preparation
PREPARATION PREPARATION Sorting Wash Loads Read and observe the following to prevent shrinkage or damage to clothes. Check all pockets to make sure that they are Brush heavy soil, dust, or hair off fabrics before empty. washing. - Items such as clips, matches, pens, coins, and - Laundry may not wash clean if there is dirt or keys can damage both the washer and your sand on the fabrics, or particles may rub against... -
Page 19: Fabric Care Labels
PREPARATION Fabric Care Labels Most articles of clothing feature fabric care labels that include instructions for proper care. Category Label Directions Hand Wash Machine Wash, Normal Cycle Use Permanent Press/Wrinkle Resistant washing machine setting (which has a cool down or cold spray before the slower spin) Use Gentle/Delicate washing Washing... -
Page 20: Using Detergent/Fabric Softener
PREPARATION Using Detergent/Fabric Softener Loading the Dispenser The detergent dispenser drawer of the washing Recommended Detergent machine has a dispenser compartment for each detergent type. Add each detergent to its appropriate Make sure to use HE (High-Efficiency) detergent compartment. for front-loading washing machines. HE detergents dissolve more efficiently and produce fewer suds to Pull out the detergent dispenser drawer. - Page 21 PREPARATION Pre-wash Detergent Compartment Liquid Bleach Compartment Add liquid or powdered detergent to this This compartment holds liquid chlorine bleach, compartment when using the pre-wash option. which will be dispensed automatically at the proper Always use HE (High-Efficiency) detergent with the time during the wash cycle.
-
Page 22: Operation
OPERATION OPERATION Using the Washer Load the laundry into the washing machine and close the door. Press - The lights around the cycle selector knob will illuminate and a chime will sound. Turn to the desired cycle. - The proper default option is automatically set according to the wash cycle. See page 23, Cycle Guide, for more detailed default options for each cycle. -
Page 23: Cycle Guide
OPERATION Cycle Guide The cycle guide below shows the options and recommended fabric types for each cycle. = Available option BASIC OPTION ( =DEFAULT) ADDITIONAL OPTIONS CYCLE FABRIC TYPE Wash Spin Soil Extra Cold Turbo Fresh Steam Temp. Speed Level Wash Rinse Wash™... -
Page 24: Wash Cycles
OPERATION Heavy Duty Wash Cycles : Heavily Soiled Items This cycle is for washing heavily soiled laundry You can wash laundry items more thoroughly by through more powerful tub rotation. selecting the wash cycle that best suits the type Perm. Press of items to be washed. -
Page 25: Cycle Modifier Buttons
OPERATION Cycle Modifier Buttons Spin Speed The spin speed for each cycle has been set Each cycle has preset settings that are selected automatically. To change the spin speed for a cycle, automatically. You may also customize the settings follow the instructions below. using the cycle modifier buttons. -
Page 26: Signal
OPERATION Signal Extra Rinse The washing machine plays a melody when the You can add an extra rinse cycle to the default rinse cycle. wash cycle is finished. The buttons make a sound each time a button is pressed. Use this option to Press and turn to the desired cycle. -
Page 27: Cold Wash
OPERATION NOTE Setting Options During Cycle The steam option cannot be used with all cycles. You can add the desired options during the wash Steam may not be clearly visible during the cycle. steam cycles. This is normal. Too much steam could damage clothing. -
Page 28: Add Garments
OPERATION Add Garments Fresh Care Use this function when you are not able to take out Use this function to add garments or remove foreign your clothes as soon as the wash cycle ends. objects like coins or keys after the cycle has started. This function provides periodic tumbling for up to about 19 hours to prevent wrinkles. -
Page 29: Maintenance
MAINTENANCE MAINTENANCE Regular Cleaning Press - Drain the water from the washing machine for Care After Wash 1 minute. Not all of the RV antifreeze will be expelled. After the cycle is finished, wipe the door and the Press to turn off the washing machine and pull inside of the door seal to remove any moisture. -
Page 30: Cleaning
MAINTENANCE Thawing Frozen Drain Lines Cleaning Pour hot water in the washer tub and close the Periodically clean the washing machine to help door. maintain its performance and to minimize the chance - Leave it for 10 minutes. of malfunction. Press after 10 minutes. -
Page 31: Cleaning The Detergent Dispenser Drawer
MAINTENANCE Automatic Alert Cleaning the Detergent Dispenser Drawer When the power is on and the O message blinks, it means the washer tub needs cleaning. Use Tub Leaving detergent in the detergent dispenser drawer Clean to clean the washer tub. The automatic for an extended period of time or using the washing indication alert for cleaning the washer tub depends machine for a long period of time may cause the... -
Page 32: Cleaning The Water Inlet Filters
If you use the washing machine in an area with hard water, the inlet filter may clog due to lime Turn off the faucets connected with the water buildup. Contact your nearest LG customer inlets. service center if the inlet filter is not clean or is missing. -
Page 33: Cleaning The Drain Pump Filter
MAINTENANCE Cleaning the Drain Pump Filter Recap the plug onto the drain hose and reattach the drain hose. The washing machine fails to drain if the drain pump filter is clogged. Periodically clean the drain filter to prevent clogging with foreign objects. Press to turn off the washing machine and pull out the plug. -
Page 34: Cleaning The Door Seal
MAINTENANCE Cleaning the Door Seal Clean the door seal once a month to prevent build- up of dirt in the door seal. Wear rubber gloves and protective goggles. Dilute 3/4 cup (177 ml) of liquid chlorine bleach in 1 gallon (3.8 L) of water. Soak a sponge or a soft cloth in this diluted solution and wipe all around the door seal. -
Page 35: Troubleshooting
Allow the washing machine to stand for a while and restart the cycle. Unplug the power cord and contact your nearest LG service center if the same error message appears. To clean up the tub, please run the Tub Clean cycle. -
Page 36: Before Calling For Service
Unplug the power cord and contact your nearest LG service center if the noise persists. Thumping sound Is the washing machine overloaded? This sound is normal and occurs Is the load out of balance? when the load is out of balance. -
Page 37: Specifications
If the drain hose is not installed properly, the odor may be emitted because of a backflow of drainage into the tub. Make sure that the drain hose is not kinked or clogged. SPECIFICATIONS Model WM3770H*A Description Front-Loading Washer Electrical requirements 120 VAC @ 60 Hz. -
Page 38: Using Smart Diagnosis
Should you experience any problems with your washer, it has the capability of transmitting data to a smart phone using the LG Smart Laundry Application or via a telephone to the LG call center. Smart Diagnosis™ cannot be activated unless the washer is powered on by pressing the POWER but- ton. -
Page 39: Using The Tag On Function
Using the Application Use LG Smart Diagnosis™, Download Cycle, Laundry Stats, Cycle Set, and other functions by touching the LG appliance's Tag On logo with an NFC-equipped smart phone. Cycle Set Choose the best cycle and settings based on laundry needs. -
Page 40: Warranty
(90) days, whichever is longer. Please retain dated receipt or delivery ticket as evidence of the Date of Purchase for proof of warranty (you may be required to submit a copy to LG or authorized representative). - Page 41 FOLLOWING CASES With regard to damages or failures resulting from misuse, improper installation, maintenance, natural disaster or repair (unauthorized technician or parts, as specified by LG), customer will be charged for the repair. Strange vibration or noise Remove the shipping caused by not removing bolts and tub support.
- Page 42 WARRANTY Lack of power caused by Reconnect the power loose connection of power cord or change the cord or electrical outlet electrical outlet. problem. Service trips to deliver, pick The warranty covers Level up, install the product or manufacturing defects for instruction on product only.
- Page 43 LG Customer Information Center 1-800-243-0000 1-888-542-2623 CANADA This product qualifies for ENERGY STAR in the “factory default (Home Use)” setting. Register your product Online! Changing the factory default settings or enabling other features may increase power consumption that could www.lg.com...
Need help?
Do you have a question about the WM3770H*A and is the answer not in the manual?
Questions and answers