Advertisement
Available languages
Available languages
auto-fit
7", 8," & 10"
Keyboard Instructions
*WARRANTY REGISTRATION
Your ZAGG® Auto-Fit keyboard comes with a one-year manufacturer's warranty. In order
to activate the warranty, you must register your Auto-Fit as well as keep your purchase
receipt. If you purchased your ZAGG Auto-Fit from ZAGG.com, ZAGG® has already
registered it and has a copy of your proof of purchase.
NEED MORE HELP? PLEASE SEE OUR FAQ SECTION AT: www.ZAGG.com/faq
Advertisement
Table of Contents

Subscribe to Our Youtube Channel
Related Manuals for Zagg auto-fit 7”


Summary of Contents for Zagg auto-fit 7”
- Page 1 Keyboard Instructions *WARRANTY REGISTRATION Your ZAGG® Auto-Fit keyboard comes with a one-year manufacturer’s warranty. In order to activate the warranty, you must register your Auto-Fit as well as keep your purchase receipt. If you purchased your ZAGG Auto-Fit from ZAGG.com, ZAGG® has already registered it and has a copy of your proof of purchase.
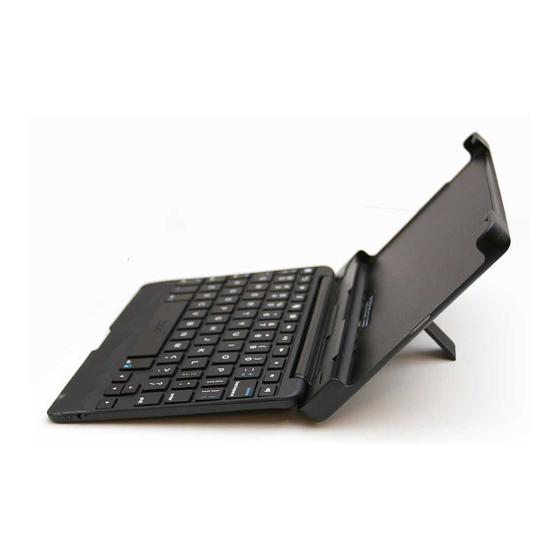
- Page 2 INTRODUCTION Your ZAGG Auto-Fit Bluetooth® keyboard features a unique spring-loaded cover that allows it to work with small-form tablets that use Android ™ and Windows® operating systems. Simply press your tablet into the cover and the springs automatically adjust to secure it. Now you can use one convenient Bluetooth keyboard for all your tablet needs.
-
Page 3: Powering On And Off
2. Press the PAIR button (a blue LED on the right of the keyboard will begin flashing). 3. While the blue LED is flashing, press fn + W. 4. Continue the pairing process as described in the “Pairing Your ZAGG Auto-Fit” section. -
Page 4: For Android
4. Press the PAIR button on your Auto-Fit keyboard. A blue LED on the right of the keyboard will flash until your Auto-Fit and tablet are paired. 5. When “ZAGG Auto-Fit” is displayed on your tablet as an available device, select it and touch PAIR. - Page 5 Android. If your device was previously paired to an Android device, press fn + W to switch to Windows. 4. Complete the normal pairing process as described in Pairing Your ZAGG Auto-Fit. CHARGING Your Auto-Fit features a powerful lithium polymer battery that lasts up to 1 year of normal use between charges*.
-
Page 6: Battery Life
BATTERY LIFE As mentioned, the Auto-Fit features a powerful, rechargeable battery that lasts up to 1 year between charges. To check your Auto-Fit’s remaining battery power, simply hold down the function (fn) key and press the battery key (also the alt key). The left LED indicator will flash one of three ways. 1. - Page 7 DELETE – Deletes text from left to right. THE FUNCTION (FN) KEY – The fn key operates all functions printed in blue on a key that features multiple symbols. To activate these functions, hold the fn key while you press the desired function key. fn + CAPS –...
-
Page 8: Troubleshooting
3. After charging, turn your Auto-Fit on. If the left LED status light does not illuminate, and your keyboard doesn’t operate correctly, please contact ZAGG’s customer service. 4. Forget and re-pair your Auto-Fit. On your tablet select: SETTINGS > BLUETOOTH > ON > SCAN. If you see “ZAGG Auto-Fit” listed as an... - Page 9 5. Push the PAIR button on your Auto-Fit and watch for the right LED status light to flash blue. 6. Your tablet should display “ZAGG Auto-Fit” or your keyboard’s serial number as an available device. Select it. 7. If your tablet gives you an error message, repeat the pairing process*.
- Page 10 Votre clavier ZAGG® Auto-Fit est livré avec une garantie d’un an du fabricant. Afin d’activer la garantie, vous devez enregistrer votre Auto-Fit et conserver votre reçu d’achat. Si vous avez acheté votre ZAGG Auto-Fit de ZAGG.com, ZAGG l’a déjà enregistré et a une copie de votre preuve d’achat.
- Page 11 INTRODUCTION Votre clavier Bluetooth® ZAGG Auto-Fit est doté d’un couvercle à ressort qui lui permet de s’adapter à des tablettes de petit format qui fonctionnent avec les systèmes d’exploitation Android™ et Windows®. Il vous suffit d’insérer votre tablette dans le couvercle et les ressorts s’ajusteront automatiquement pour la sécuriser.
-
Page 12: Mise Sous Tension Et Hors Tension
Android est le système d’exploitation par défaut. Si vous possédez une tablette Android, vous pouvez donc procédez au « Couplage de votre ZAGG AutoFit ». POUR WINDOWS 1. Assurez-vous que votre clavier Auto-Fit est activé. - Page 13 4. Appuyez sur le bouton PAIR de votre clavier Auto-Fit. Un voyant DEL bleu sur le côté droit de votre clavier clignotera jusqu’à ce que votre Auto-Fit et votre tablette soient couplés. 5. Lorsque ZAGG Auto-Fit apparaît sur votre tablette comme appareil disponible, sélectionnez-le et appuyez sur PAIR.
- Page 14 MODIFICATION DU SYSTÈME D’EXPLOITATION DE VOTRE AUTO-FIT Votre ZAGG Auto-Fit peut rapidement et facilement alterner entre les systèmes d’exploitation Android et Windows. Pour modifier votre système d’exploitation, suivez les instructions ci-dessous. 1. Faites en sorte que votre appareil oublie l’Auto-Fit en sélectionnant : PARAMÈTRES >...
-
Page 15: Autonomie De La Batterie
AUTONOMIE DE LA BATTERIE Comme mentionné, l’Auto-Fit dispose d’une batterie rechargeable puissante qui dure jusqu’à un an entre les charges. Pour vérifier la puissance restante de la batterie de votre Auto-Fit, il suffit de maintenir la touche de fonction (fn) enfoncée et d’appuyer sur la touche de la batterie (qui est également la touche alt). - Page 16 VOLUME FORT – Augmente le volume de votre tablette. suppr. – Supprime le texte de gauche à droite. LA TOUCHE FONCTION (fn) – La touche fn exploite toutes les fonctions imprimées en bleu sur les touches qui disposent de multiples symboles. Pour activer ces fonctions, maintenez la touche fn enfoncée et appuyez sur la touche désirée.
-
Page 17: Dépannage
Si aucune des informations de cette section ne résout votre problème, veuillez contacter le service à la clientèle de ZAGG, et l’un de nos professionnels qualifiés sera heureux de vous aider. 1. Redémarrez votre tablette. 2. Mettez votre Auto-Fit hors tension et rallumez-le. Vous devriez voir le voyant d’état DEL de gauche s’allumer brièvement;... - Page 18 * Si vous recevez continuellement le même message d’erreur lors du couplage, ou si les suggestions ci-dessus ne fonctionnent pas, veuillez contacter le service à la clientèle de ZAGG pour obtenir de l’aide. Pour obtenir plus d’aide, veuillez visiter notre FAQ à l’adresse : www.ZAGG.com/faq Pour joindre un représentant au service à...
- Page 19 Su teclado ZAGG® Auto-Fit viene con un año de garantía del fabricante. Para poder activar la garantía, deberá registrar su Auto-Fit y mantener el recibo de compra. Si compro su ZAGG Auto Fit en ZAGG.com, ZAGG ya registro su producto y tiene una copia del comprobante de compra.
- Page 20 INTRODUCCIÓN Su teclado ZAGG Auto-Fit con Bluetooth® ofrece una cubierta única de resortes que le permite trabajar con la mayoría de las tabletas pequeñas. Simplemente presione su tableta a la cubierta y los resortes se ajustaran automáticamente para asegurarla. Ahora puede utilizar un teclado Bluetooth conveniente para cubrir todas las necesidades de su tableta.
-
Page 21: Encendido Y Apagado
POWER en la posición de apagado OFF. SELECCIONAR SU SISTEMA OPERATIVO El ZAGG Auto-Fit funciona con los sistemas operativos Android y Windows y se puede alternar fácilmente entre ambos. Deberá elegir el sistema operativo correcto antes de que su Auto-Fit se sincronice con su dispositivo. Para elegir el sistema operativo apropiado, siga las instrucciones a continuación. - Page 22 Auto-Fit y su tableta. 3. Su tableta mostrara el numero de serial del teclado como un dispositivo disponible. Seleccione esta opción para completar la sincronización. una vez su Auto-Fit este sincronizado, usted vera al “ZAGG Auto-Fit” en la lista de dispositivos. PARA WINDOWS Acceda al amuleto de su dispositivo.
- Page 23 CAMBIAR EL SISTEMA OPERATIVO DE SU AUTO-FIT Su ZAGG Auto-Fit puede rápida y fácilmente cambiar entre los sistemas Android y Windows. Para cambiar su sistema operativo seleccionado, siga las instrucciones a continuación. Haga que su dispositivo se de sincronice del teclado Auto-Fit seleccionando: CONFIGURACIÓN →...
-
Page 24: Vida De La Batería
VIDA DE LA BATERÍA Como se menciono anteriormente, el Auto-Fit presenta una poderosa batería recargable que dura hasta un año antes de necesitar carga. Para revisar la carga restante de la batería del Auto- Fit, simplemente mantenga presionada la tecla función (fn) y la tecla de batería (también la tecla alt). - Page 25 del – Borra el texto de izquierda a derecha. LA TECLA DE FUNCIÓN (fn) – La tecla de fn opera todas las funciones impresas de color azul en las teclas que muestran varios símbolos. Para activar estas funciones, mantenga presionado la tecla fn y presione la tecla de función deseada. fn + CAPS –...
-
Page 26: Resolución De Problemas
Por favor utilice la siguiente guía para ayudar a resolver su problema. Si la información de esta sección no soluciona su problema, por favor comuníquese con atención al cliente de ZAGG y uno de nuestros profesionales entrenados lo ayudaran. - Page 27 5. Presione el botón de SINCRONIZAR en su Auto-Fit y espere que la luz de LED a la derecha parpadee azul. 6. Su tableta deberá mostrar al “ZAGG Auto-Fit” o el numero de serial de su teclado como dispositivo disponible. Selecciónelo.
- Page 28 052714 | ANS7IN-BB0 | ANS8IN-BB0 | ANS1IN-BB0...
Need help?
Do you have a question about the auto-fit 7” and is the answer not in the manual?
Questions and answers