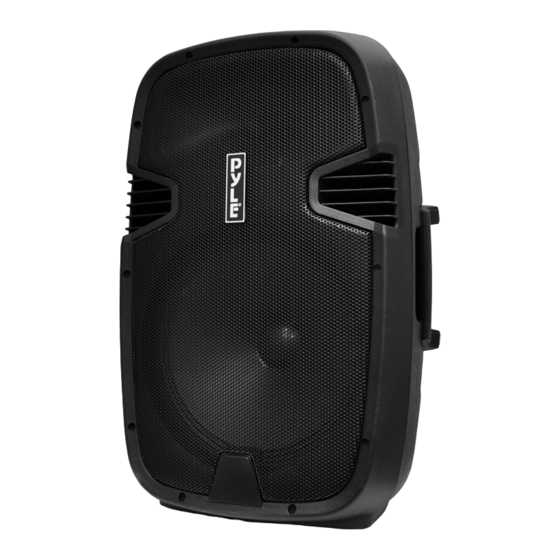
Summary of Contents for PYLE Audio PPHP122BMU
- Page 2 Safety Notes Protect the unit from moisture or rain. Keep the unit in a well ventilated environment and keep away from, direct sunlight to prevent unit from overheating. Don't use volatile or dangerous chemical cleaners on the unit (like toluene, alcohol, gasoline etc.) Use gentle cleaners. Do not open chassis! Extremely dangerous! Do not put your hands inside the chassis. If the device begins to malfunction do not attempt to repair, unplug the unit and contact Pyle immediately. Carefully handle, plug and unplug the power cable when handling. Hold the plug with a firm grip and when plugging or unplugging from sockets. Correct power must be used to operate this unit properly, do not use any other powering options, cords or methods. Power On The PA speaker can be powered when connected to main power or using the internal 12V battery. 1.Connect the power cable to the rear of the unit. 2.Connect the other end of power cable to main power. 3.Turn on the main power point. 4.The unit will automatically power on when connected to main power. Notes: If you wish to use the internal battery to power the unit, just simply turn on the Power switch located on rear panel. Charging Before using the PA speaker for the first time, charge the unit at least 8 hours. 1.Connect the power cable at the rear of the panel. 2.Recharge indicator light will be on when it is charging. Notes: The internal battery will charge while the unit is being operated and the power switch is on. It is better to charge the unit while the power switch is off. Using the Wired Microphone You can connect the wired microphone to this unit using the MIC INPUT located on the rear panel of the unit. 1.Turn on the unit. 2.Connect your wired microphone to the MIC INPUT located at the rear panel of the unit. 3.Adjust the microphone volume by tuning the MIC VOL/ECHO knobs located at the rear panel of the unit. NOTES: You can use the wired microphone and wireless microphone at the same time. www.PyleAudio.com ...
- Page 3 USB/SD Card Playback You can play music from USB stick or SD Card using the USB/SD slot on the PA speaker. 1.Turn on the unit. 2. Insert your USB or SD card into the slot. 3. Once inserted the USB or SD card unit will automatically play. 4. You can use the PRE/NEXT/PLAY/PAUSE to control and play music. NOTES: The speaker system can play the following audio file formats: MP3,The USB/SD Card no more than 32GB. Operation may be slower when searching large memory files. It will need several seconds to respond when your USB/SD Card full of contents. Bluetooth You can connect your Bluetooth phone or other device to the PA speaker. 1. Turn on the unit. 2. Press the INPUT button which is located on top control panel. 3. The Bluetooth is on when you hear two “tone” indicator sound. 4. Use your Bluetooth phone or other device to search for the PA speaker. It will displayed as BT SPEAKER. 5.Connnect your devices with BT SPEAKER, it will pair with unit automatically. 6.You do not need a password to connect with the unit. 7.Play music on your phone or device, sound will come from the speaker through the BLUETOOTH wireless connection. You can use the VOLUME/BASS/TREBLE to adjust the sound level for BLUETOOTH, also you can adjust the Bluetooth music sound through your own phone or other device. NOTES: If there is no sound through the PA speaker during Bluetooth, Check the volume controller both on the unit and on your phone or other device. Use of External Power To use the PA speaker longer than the internal battery life, you can connect the PA speaker to a external 12V Battery Source. 1.Find the INPUT DC 12V on the top control panel. 2.Use the correct cable connect the INPUT DC 12V. NOTES: The PA speaker will consume the internal battery first, when it is low, the LOW BATTERY indicator light located on the control panel will turn on, you can use the external 12V battery to power on the unit. The external 12V battery will also charge the internal battery while in use. www.PyleAudio.com ...
- Page 4 Control & Layout Front Panel & System 1 EQ Switch 2 Bass Control 3 Treble Control 4 Volume Control 5 Line‐in (Aux) Input 6 dB Display 7 Mic Input Jack 8 Mic Volume Control 9 Echo Control 10 SD Card Input 11 Previous Songs / Volume Down 12 Auto Scan for Radio Stations 13 Next Song / Volume Up 14 Input Selectors 15 Display Screen 16 USB Input 17 EQ Control 18 Speaker Handle 19 Metal Corner 20 ...


Need help?
Do you have a question about the PPHP122BMU and is the answer not in the manual?
Questions and answers