Vonets VAP11G User Manual
Usb network adapter/wifi bridge
Hide thumbs
Also See for VAP11G:
- Step-by-step manual (34 pages) ,
- User manual (15 pages) ,
- User manual (11 pages)

Subscribe to Our Youtube Channel
Related Manuals for Vonets VAP11G


Summary of Contents for Vonets VAP11G
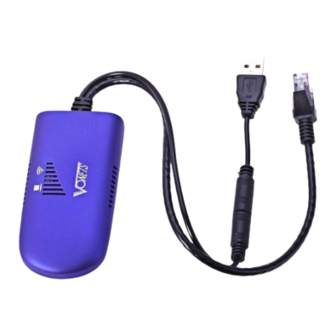
- Page 2 1. Introduction Thanks for choosing VAP11G WiFi Bridge. With this portable device, IP Camera and other IT products with Ethernet RJ45 port can access wireless network easily. Two kinds of application topology of VAP11G are shown as below.
- Page 3 VAP11G provides users a combination of Ethernet network and power cable, VAP11G uses the original power supply of IP Camera or some other IT products’ power supply which has DC 2.0 power jack (5-15V, 1.5W). One power supply can power VAP11G, as well as the IP Camera adapter.
- Page 4 2. Setup Please set this VAP11G before using it, you can connect it to PC and run the VAP11G_Setup.exe in the CD. The Physical Connection for Setup as below:...
- Page 5 Running the Setup Wizard 1) Please put into the CD-ROM, the systerm will automatically eject the disk and guide page, please refer to the right picture and click the corresponding label. 2) Please click Install Software label to run the set up program, if it’s shown the right picuture, please click Next, Click Cancel to exit...
- Page 6 the installation Wizard. 3) If it’s shown the right picture, please click Yes to install WINPCAP program. 4) Please click Next, don’t need to do other settings until Finish.
- Page 7 5) After the installation is complete, please double click the desktop icon , the right picture shows it is searching the product MAC. 6) The right picture shows it is complete to search MAC, please Click Next.
- Page 8 7) The right picture shows the product has searched the WiFi network, please choose the correct WiFi Network. WPA automatically uses TKIP with dynamic encryption keys. Enter a passphrase on this screen. Encryption - TKIP is automatically selected as the encryption method. Click Next to proceed, or click...
- Page 9 Enter a passphrase on this screen. Encryption - AES is automatically selected as the encryption method. Click Next to proceed, or click Back to return to the previous screen. WEP (128-Bit) or WEP (64-Bit) Enter a passphrase in the Passphrase field and click Next. If you want to manually enter a WEP key, leave the Passphrase field blank and click Next.
- Page 10 Next to save your new settings. 9) VAP11G will attempt to connect the wireless network with the new settings. Make sure the Bridge’s Wireless LED is solidly lit or flashing. This indicates that the Bridge has connected to the wireless network. If the attempt succeeds, proceed to screen 12.
- Page 11 Exit to exit the installation Wizard. To make sure VAP11G is working, cut off all other internet connection to the PC (only reserve the connection between the PC and VAP11G). If you setup VAP11G successfully, the PC can view internet now.
Need help?
Do you have a question about the VAP11G and is the answer not in the manual?
Questions and answers