
Related Manuals for Italtherm 18 K


Summary of Contents for Italtherm 18 K
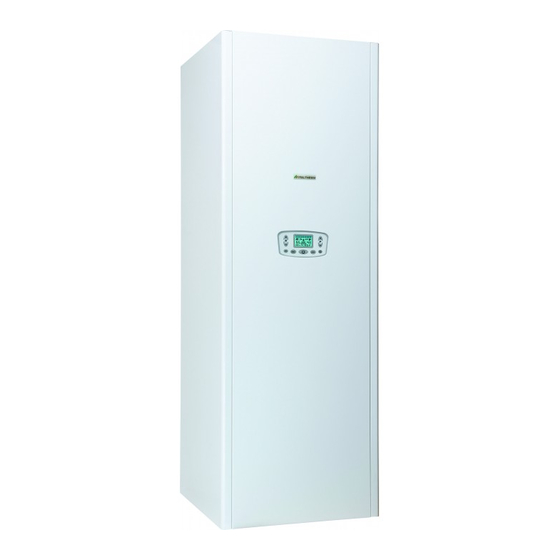
- Page 1 IMPORTANT! Install the gasket in- cluded in the documents bag, on the inlet/outlet flange, as shown on page 27. 18 K 35 K...
-
Page 2: Table Of Contents
Table of Content Moving the boiler . . . . . . . . . . . . . . . . . . . . . . . . 20 Siphon overflow drain . -
Page 3: Safety Warnings
Safety warnings This instructions manual is an essential and complementary part of the product and it is supplied to- gether with the boiler. Carefully read the manual, achieving all important information for a safe installation, use and servicing. f Carefully keep the manual, together with the documentation of all the accessories of the boiler and of the system, for any further consultation you may need. -
Page 4: Safety Warnings Symbols Legend
Safety warnings symbols legend Generic safety Electrical danger Physical danger warning (fulguration) (personal damage) Thermal danger General warning or advice to avoid material damage (burns) or to achieve improvements References to Laws and Norms All the references to norms and national laws mentioned in this handbook are indicative as laws and norms are subject to issues and integrations by the authorities in charge. -
Page 5: User Warnings
It must never be used with butane gas G30 (that can be present, pure or mixed with Propane G31, in the portable gas bottles for cookers). **(except model 18 K) The User must not touch sealed items nor break the seals. Only specialized technicians and the official technical service can break the seals of sealed items. -
Page 6: Installation, First Starting Up, Maintenance And Servicing
f Do not expose the wall hung gas boiler to water or other liquids sprinklings, or to vapours directly coming from gas cookers/hobs. f Do not obstruct the air inlet or flue outlet terminals, even momentarily or partially. f Do not put any object on the gas boiler and don't leave any flammable liquid or solid materials, (e.g. paper, clothes, plastic, polystirene) in its proximity. -
Page 7: User Guide
User guide Keyboard buttons Note: the here below keyboard features are referred to the standard way of working. When accesso- ries are installed, a few special settings are in progress or, in case of being in the technician Menu, buttons may perform differently. Stand –by/Way of functioning At every press, the boiler switches its mode from OFF to summer or winter or heating-only mode. -
Page 8: Multi-Function Display
Multi-function display Weekly day … Showed during the CH setting program. Otherwise, days are showed on the dis- play if the reference function (to make them displayed) is activated. CH – winter mode If flashing, it means that the boiler is functioning in CH mode. -
Page 9: Commands Outside The Boiler
Note: ITALTHERM offers (as accessory) a vanguard room thermostat, with weekly set having many levels of temperatures available to be set and other ahead functions. Moreover available, there are two version of this device in GSM and wireless way of functioning. -
Page 10: Typical Use
Typical use Preliminary operations f Be sure the gas cock is opened. f Be sure the boiler is electrically powered and set in OFF: only OFF has to be displayed on the screen. Boiler activation f Press the button • once to set the boiler in summer mode only (DHW only). Summer mode is recognizable by the only symbol presence on the display and not by the symbol presence •... -
Page 11: Anti-Legionella Function
f DHW storage adjustment: the buttons set the temperature of the storage below which the boiler intervenes when the solar contribution is too little or lacking. The set value is shown on the display under the symbol . When the solar contribution is enough, you can set a middle- high temperature. -
Page 12: Dhw Storage Forced Heating
DHW storage forced heating By pressing the button you can activate immediately the DHW storage heating cycle (and/or speed it up, depending on the case). This function is automatically deactivated at the end of the cycle. f if the storage was active for a short time (even in standard or scheduled mode) the function speeds up the storage heating (the symbol blinks) and ends when the storage reaches the tempera- ture;... -
Page 13: Info Menu
use the buttons for modifying the starting time of the first time slot of DHW heat- ing activation (10 minutes steps), and then press Note: timings are stored exclusively by pressing the button . Besides, this will position the programming on the following event. the symbol as well as another time appears, which means that the first deactivation is set on that time;... -
Page 14: Holiday Menu
f press the button : to get to the page (infor- mation about the boiler settings): • heating, DHW: they support the numeric in- dications; • indicator number 1: Primary CH flow temperature set value, or, if outdoor probe is installed, ig- nore this value;... -
Page 15: Spa Function
Always address yourselves to qualified personnel. Boilers must be always equipped with original accessories only . ITALTHERM Srl is not responsible for damages caused by the incorrect, wrong or unreasonable use of not original materials . The burner doesn’t turn on f if the room thermostat (or programmable room thermostat, or similar) is installed, check that it is really requiring the room heating;... -
Page 16: Boiler Inactivity
Boiler inactivity The effects of the periods of inactivity can be relevant in particular situations such as in flats used only for some months per year, most of all in cold places. The user will have to decide to put the boiler in the SAFETY SHUT OFF state disconnecting all the sup- plies, or to leave it on OFF mode (but electrically supplied) in order to let the Anti Frost Function work. -
Page 17: Ambient Anti-Frost" Function
ATTENTION: the anti-frost protections cannot intervene in the absence of electricity. If you an- ticipate this possibility, we recommend you add a good brand of anti-freeze to the heating sys- tem, following the producer’s instructions. We recommend to ask directly the installer/technician about the type of antifreeze product put in the heating system during installation. -
Page 18: Dimensions And Connections
L Indicative position for electrical power supply 20 ÷ 35 wirings SC Indicative position for the condensate drain Pump capacity diagram 00235 Mod . 18 K The graph is referred to the capacity available to the system. by-pass auto by-pass closed... -
Page 19: Specifications For Inlet Air
00149 Mod . 35 K The graph is referred to the capacity available to the system. by-pass auto by-pass closed 1000 1200 1400 water flow (l/h) Note: the diagram MAX is referred to the maximum working power of the pump, the diagram MIN depends on electronics. -
Page 20: Warnings For The Installation Of Optional Kits Or Special Systems
ITALTHERM S.r.l. will not be held responsible for consequent damages. Instruct the User about the antifreeze function of the boiler and about the antifreeze product added in the heating system. - Page 21 Remove the side panels: on the boiler's upper side, unscrew the screws 5 and and remove the panel 6 upwards, then unscrew the screws 7 and and remove the panel 8 upwards; d) Remove the boiler from the pallet and screw the adjustable screw pads 9 in the positions shown in picture;...
-
Page 22: Siphon Overflow Drain
Siphon overflow drain The boiler’s siphon is equipped with a supplementary safety discharge SCD that protects the burner in the very situation in which the condense does not from correctly from the drain pipe downstream from the siphon. Since this is easily accessible from the rear of the boiler, evaluate the opportunity to use it or not before installing the boiler, by connecting to it a section of flexible hose 1 suitable for condense. -
Page 23: Hydraulic System (Dhw And Heating)
(consider that 1 mm of limestone incrustations reduces of 18% the thermal exchange of the heating element on which it has been formed). ITALTHERM guarantees its products only if the characteristics of the water comply with UNI 8065, re- ported also in laws on energy saving. -
Page 24: Heating System
Heating system f Connect the safety evacuation ducts of the boiler to an evacuation funnel. If safety valves are not connected to an evacuation device, their intervention could flood the room. The manufacturer can- not be held responsible for any damage arising from that situation. Condense drain Insert the flexible pipe of condense outlet inside the outlet funnel (or other inspectable connection de- vice) properly installed for this purpose, or in the outlet funnel of the safety valve, in case of the above... -
Page 25: Gas Connection
Propane G31**. A qualified technician can convert it to operate with one of these two types of gas above said . **(except model 18 K) It must never be used with Butane gas G30 (that can be present, pure or mixed with Propane G31,... -
Page 26: Electrical Connections
ITALTHERM S.r.l. declines any responsibility for damages to persons, animals or things caused by the faulty or missing connection of the boiler earthing and by failure to comply with the rules. -
Page 27: Flue Systems
Flue systems Installation of the flue inlet/outlet flange gasket IMPORTANT: For a correct and safe opera- tion of the boiler it’s necessary to install, on the inlet/outlet flange 2, the gasket 1 includ- ed in the boiler’s documents bag. Before inserting the flue outlet pipe it’s therefore very important to correctly place the gasket on its seating as indicated in the figure. - Page 28 In case you foreseen to discharge the combustion products through a chimney (for single user) or a common flue (for multiple users) the part of the evacuation system (the chimney or the flue) to which the outlet duct of the condensing boilers is con- nected, must be declared suitable for this purpose by its producer.
-
Page 29: Dimensioning The Inlet And Outlet Ducts
Dimensioning the inlet and outlet ducts In the list that follows, you will the characteristic losses of load of the original flue accessories, ex- pressed as equivalence in meters (m). If additional, original flue accessories, aside from the ones pictured, are used, the total system length should be calculated considering the sum of the equivalent characteristic losses of load, expressed in meters in the following list. -
Page 30: Flue System Types
Split pipe system (C Original*** split pipe system Ø80mm Mod. Example of split pipe AS+SC min÷max (m) SC max (m) system (C 18 K 2 ÷ 51 35 K 2 ÷ 51 Original*** split pipe system Ø60mm 18 K 2 ÷ 11 35 K 2 ÷... -
Page 31: Examples Of Installation Of Inlet And Outlet Ducts
Examples of installation of inlet and outlet ducts We give you some correct and wrong examples of installation of inlet and outlet ducts for condensing boilers (the slope are voluntarily represented in an exaggerated way). A = Inlet; S = Outlet. 1: the most functional and economic solution is to let the condense come back towards the boiler. -
Page 32: Adjustment And Maintenance
ATTENTION: the operations described below must be carried out only by qualified personnel [authorized by ITALTHERM]. When regulation/measuring is over, remember to tighten pressure tapping point screws and to verify the absent of gas leakages only from net pressure plug (PIN, see the picture of the gas valve) and from the connection upwards the gas valve. -
Page 33: Maintenance Operations
f verify the presence of the permanent air/ventilation outlets, correctly dimensioned and working, as foreseen by the National and Local laws depending on the appliances installed; f verify that the evacuation flue duct corresponds to the National and Local laws and that is in good and efficient conditions;... -
Page 34: Access To The Inside Of The Boiler
f verify the correct functioning of the system of the outlet condense, also in the external parts of the boilers, i.e. the eventual condense collector installed on the flue outlet: verify that the liquid flow is not obstructed and that there are not inlets of gaseous combustion products inside the system itself; f verify that the conditions for the air inlet are granted, in case of a boiler placed inside a piece of furniture;... -
Page 35: Venting The Primary Exchanger
Venting the primary exchanger When commissioning and cleaning the combustion unit, it is a good idea to check that there is no air in the primary circuit of the combustion unit and, if necessary, to eliminate it by opening the valve 4 lo- cated on the top of the unit. -
Page 36: Pcb Parameters Settings (Technician Menu)
f unscrew the 4 nuts 1 which fix the burner group 13 (composed of fan, hose and burner) to the pri- mary exchanger. Remove the burner group; Do not disassemble the burner group and do not dismount the ceramic fibre plate from the bot- tom of the exchanger. -
Page 37: Main Boiler Parameters (Pc)
Description eter range (factory setting) Type of GAS supply: **(except model 18 K) 0-1 (*) Value 0 = for Natural Gas (G20) supply Value 1 = for Commercial Propane (G31)** supply Note (*): The factory setting depends on the gas type arranged in factory for the boiler. - Page 38 Param- Adjustment Description eter range (factory setting) 1…10 (3) Pre-ventilation time Just before the burner ignition, the combustion chamber gets pre-ven- tilated with air, for a time that allows to remove eventual residuals of the previous combustion and so to optimise the ignition itself. Practi- cally, the factory setting suits all the cases, and we suggest to leave it unchanged .
-
Page 39: Combustion Test And Adjustment
Combustion test and adjustment Before checking the combustion, clean the burner and the exchanger as described in the para- graph "Combustion group cleaning" on page 35 (except for the case of first ignition). To check and adjust the boiler you need a flue analyser, correctly calibrated (in the condensing boiler, the precision and the correctness of the measures is particularly important). -
Page 40: Max Heating Power Adjustment
Natural gas G20 Commercial propane G31 Heat input CO2 % Fan rpm x 100 CO2 % Fan rpm x 100 Reduced Qr 8.7 ±0.5 see "Power input / dis- 9.6 ±0.5 see "Power input / dis- play / fan rpm tables" play / fan rpm tables" Nominal Qn 9.2 ±0.5 10.3 ±0.5... -
Page 41: Power Input / Display / Fan Rpm Tables
enter the technician menu (see "PCB parameters settings (technician menu)" on page 36), select the parameter 04 and get ready to change its value. The burner ignites; set the parameter 04 to the value that corresponds to the required power input (refer to the "Pow- er input / display / fan rpm tables"... -
Page 42: Electronic Settings
P1 fully turned clockwise and P2 fully counterclockwise, as shown in the figure. Gas conversion ATTENTION: the operations described below must be carried out only by qualified personnel [authorized by ITALTHERM S.r.l.] . For gas conversion, use the components supplied by boiler manufacturer only . - Page 43 It must never be used with Butane gas G30 (that can be present in the portable gas bottles for cookers) therefore, it's important to inform, about this, the supplier of the fuel. Enter the technician menu (see "PCB parameters settings (technician menu)" on page 36) and set the parameter 01 on the required gas kind the boiler is required to work with: 0 = Natural gas (G20), •...
-
Page 44: Draining The System
Draining the system When it is necessary to drain the system, use the draining tap 1: f Unscrew the cap 3; f connect a rubber pipe to the draining tap terminal 4 ; f put the other end of the pipe in a suitable drain or sink; f open the draining tap by turning the nut 5 counterclockwise;... - Page 45 Operations accompanied by the symbol are always reserved to the Technician. Operations with grey background are reserved to the Technician . Signal Probable causes Suggested solutions Boiler just installed Retry the ignition several times: use the button. (air mixed to gas). When the 5 reset possibilities are over, to have 5 more, it's possible to switch off the electrical supply to the boiler for 30 seconds, by using the purposed external switch.
- Page 46 Signal Probable causes Suggested solutions The overheat ther- Solve the problem that caused the overheating, then replace the mal fuse of the combustion assembly. combustion assem- Note for the TECHNICIAN: the condensing combustion assembly has overheated and the relevant thermal fuse has blown. This is an extreme protection that bly has triggered normally is anticipated by other safety thermostats.
- Page 47 Signal Probable causes Suggested solutions Automatic filling in During the automatic filling in (see “E18”) the system pressure does not completed after not achieve the right value within the preset time. Maybe due to: 4 minutes. • inlet water pressure from the net is not sufficient (see "Tech- nical data"...
- Page 48 Signal Probable causes Suggested solutions Floor heating sys- The floor heating system and the floor cladding can be damaged by tem safety thermo- temperature shocks, so a good quality system includes one or more stat triggering: safety thermostats that, if necessary, trigger and lock the boiler. system flow tem- Try a boiler reset by using the button (eventually wait for a...
- Page 49 Signal Probable causes Suggested solutions Suspected freezing The display shows the alarm code 39 while the boiler inhibits the ignition of the burner and activates the circulator, forcing water to After a power fail- circulate in the hydraulic circuits. ure, the boiler de- tected tempera- If, during this time, the temperatures measured by the probes rise...
- Page 50 Signal Probable causes Suggested solutions Electric supply out of Verify, with qualified person, that Electric Supply and its tolerances tolerance for 3 times are respecting "Technical data" on page 52. in last 5 minutes. Failure to the solar Check the cabling of the solar collector temperature probe (outside collector tempera- the boiler).
-
Page 51: Warnings For Servicing
Signal Probable causes Suggested solutions Filling in not com- The boiler detected an excessive amount of water entered in the pleted - reached heating system during the filling cycle(s). the water amount If you don't detect traces of leaks (that might be the cause of the limit. -
Page 52: Technical Data
Clean casing with soapy water only. Do not clean casing, other painted or plastic surfaces with thin- ner. f In any case of parts replacement, it is mandatory to use ITALTHERM original spare parts. ITALTHERM declines any responsibility in case of non-original spare parts utilization. - Page 53 TECHNICAL DATA (cont'd) Time Solar 18 K Time Solar 35 K U .M . Gas type HEATING Temperature selection range °C 35÷78 / 20÷45 35÷78 / 20÷45 (min÷max) Main heating circuit, normal range / low temp. range Temperature selection range °C...
- Page 54 TECHNICAL DATA (cont'd) Time Solar 18 K Time Solar 35 K U .M . Gas type DIMENSIONS Width - Height - Depth "Dimensions and connections" on page 18 Weight CONNECTIONS Hydraulic and gas connections "Dimensions and connections" on page 18 see "Flue systems"...
-
Page 55: Boiler Internal Components
Boiler internal components Flue overheat fuse 25 Drain valve (heating system) Combustion assembly overheat fuse (connector) 26 DHW expansion vessel #1 27 Gauge Ignition Electrode Electronic igniter 28 Safety valve 3 bar Air/Gas Mixing System 29 Pump, modulating 30 System pressure transducer Filter on system return By-pass 31 Automatic Venting Device... -
Page 56: Electrical Diagram
Electrical diagram Main board Green Heating Technology... - Page 57 Green Heating Technology...
-
Page 58: Solar Controller Board
Optional external devices: SS Solar collector temperature probe CR Remote control: Terminals of the original ITALTHERM remote control device. See also page 60. To install, open the junction on the wires and connect them to the device terminals (eventually, extend the cable) TA1 Room thermostat:... -
Page 59: Addendum
Addendum Outdoor Sensor Kit Installation and setting The Outdoor Sensor manages automatically the CH flow temperature** as a function of the outdoor temperature, thus avoiding the user to adjust it manually. This function is also named "shifting tempera- ture". that's the temperature of the heating elements. Don't mistake it with the room temperature (managed by the room thermo- stat or by the Remote Control, but not by the boiler) that doesn't depend on the first one. -
Page 60: Remote Control Kit
Remote Control Kit This remote control is more than a simple room thermostat. Thanks to this, it is possible to manage the boiler in all its set- tings like DHW and CH temperature adjustment, boiler reset in case of boiler block, and of course it works as a room thermo- stat both in manual and weekly program mode. - Page 61 Notes Green Heating Technology...
- Page 62 Notes Green Heating Technology...
- Page 63 Notes Green Heating Technology...
- Page 64 ITALTHERM Srl Via S. D’Acquisto, snc • 29010 Pontenure (PC) - IT Tel. +39.0523.575611 • Fax +39.0523.575600 www.italtherm.it • e-mail: info@italtherm.it UNI EN ISO 9001:2008...
Need help?
Do you have a question about the 18 K and is the answer not in the manual?
Questions and answers