Advertisement
Size 16 Instructions
Please read these instructions in
their entirety before attempting
to use this product.
A product of Central Aquatics
Owner's Manual
(Division of Central Garden & Pet Company)
Franklin, WI 53132
888.255.4527 coralifeproducts.com
Coralife is a registered trademark
of Central Garden & Pet Company
©2016 Central Garden & Pet Company
Advertisement
Table of Contents

Related Manuals for Coralife LED BioCube

Summary of Contents for Coralife LED BioCube
- Page 1 A product of Central Aquatics Owner’s Manual (Division of Central Garden & Pet Company) Franklin, WI 53132 888.255.4527 coralifeproducts.com Coralife is a registered trademark of Central Garden & Pet Company ©2016 Central Garden & Pet Company...
-
Page 2: Important Safety Instructions
IMPORTANT SAFETY INSTRUCTIONS 1. WARNING – To guard against injury, basic safety precautions should be observed, including the following: READ AND FOLLOW ALL SAFETY INSTRUCTIONS. 2. DANGER – To avoid possible electric shock, special care should be taken since water is employed in the use of aquarium equipment. - Page 3 IMPORTANT SAFETY INFORMATION: Please read the following precautions before use! 1. To reduce the risk of electric shock, always unplug the pump and power cords before performing any maintenance. Do not submerse canopy. 2. Never allow small children to touch, climb-on, or play with the aquarium or its stand. Adult supervision is required.
-
Page 4: Parts Diagram
PARTS DIAGRAM FIGURE 2 Note: Parts 1-12 are pre-assembled. Expanded view is for parts identification, specification and replacement. -
Page 5: Parts Identification
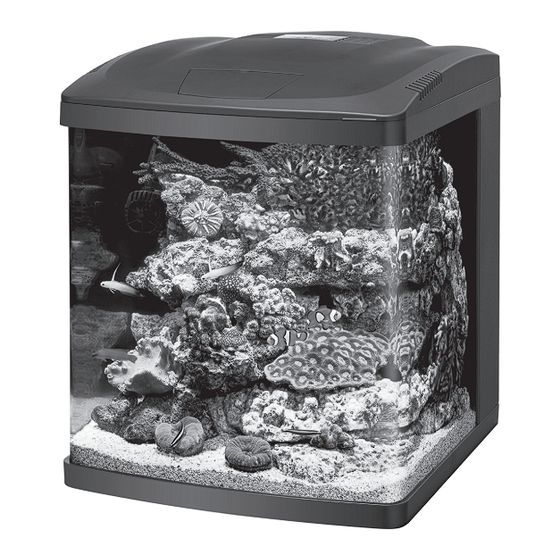
14, 16, 29 and 32) ® Output Discharge Nozzle Flexible 0.5" I.D. Tubing Media Tray Water Pump Sponge Filter Glass Aquarium PRODUCT SPECIFICATION LED BioCube Size 16 ® Item No. 100115661 UPC No. 096316156616 Dimension 15" L x 16.75" W x 17.5" H Cooling Fan 50 mm, 15.83 CFM, 25.5 Db... - Page 6 ASSEMBLY Safety Precautions: Overflow Tray 1. Do not plug BioCube into an outlet or power ® source until setup and installation is completed. 2. Visually inspect the aquarium and canopy prior to installation to make sure it has not been Media Tray damaged.
-
Page 7: Timer Instructions
TIMER INSTRUCTIONS Lighting Startup Operation 8. Press MENU to move to minutes. Use the arrow keys UP or DOWN to set the minutes. 1. Plug the power supply into an acceptable outlet or power source. Be sure to incorporate 9. Press MENU to move to ‘off’ time for channel 1. a “drip loop”... -
Page 8: Operation
OPERATION Cooling Fan Wet/Dry Filter Start-Up Operation 1. Make sure that the cooling fan is on and blowing 1. Open canopy and remove filter cartridge. Rinse across the unit. thoroughly with cool freshwater and reinstall in 1st chamber. FIGURE 4 2. Rinse substrate, sand, gravel, rocks, driftwood, Cooling Fan Air Discharge plants and ornaments and add to aquarium. - Page 9 WET/DRY FILTRATION OPERATION Wet/Dry Filtration Step 4: Observe and make sure that the water circulation is Water goes through the sponge filter into flowing properly from the aquarium section through the water pump. the wet/dry section. FIGURE 10 Step 1: Water proceeds into surface and bottom intake. FIGURE 7 Water Pump Surface Intake Sponge Filter (Micro-Bubble...
-
Page 10: Maintenance
MAINTENANCE WARNING! FIGURE 13 Make sure LEDs are turned off and unplug power cords from power source or outlet before performing any maintenance. Filter Cartridge FIGURE 12 Sponge Filter Minimum Water Level Front Back Daily Maintenance 1. Visually observe the BioCube lighting and ®... - Page 11 MAINTENANCE 4. Disassemble pump and impeller. Rinse and wipe down all parts to dislodge debris and particulate matter (Figure 15). Note: If calcium buildup is present, soak in a vinegar solution with 1 part vinegar : 1 part water for 1 hour and rinse thoroughly. FIGURE 15 Pump Pump...
-
Page 12: Limited Warranty
This warranty will not be effective unless and until the Coralife product is shown to have been used in accordance with the safety and installation instructions accompanying the product, including the requirement that the product be placed on a flat, level surface designed to support the product.
Need help?
Do you have a question about the LED BioCube and is the answer not in the manual?
Questions and answers