Advertisement
Quick Links
Advertisement

Related Manuals for Vortec P-10M

Summary of Contents for Vortec P-10M
- Page 1 P-10M Bike Manual...
- Page 2 IMPORTANT SAFETY INSTRUCTIONS IMPORTANT SAFETY INSTRUCTIONS IMPORTANT SAFETY INSTRUCTIONS IMPORTANT SAFETY INSTRUCTIONS SAVE THESE INSTRUCTIONS SAVE THESE INSTRUCTIONS SAVE THESE INSTRUCTIONS SAVE THESE INSTRUCTIONS READ ALL INSTRUCTIONS BEFORE USING THIS EXERCISE EQUIPMENT. * Keep children off your bike at all times. * When the bike is in use, young childred and pets should be kept at least 10 feet away.
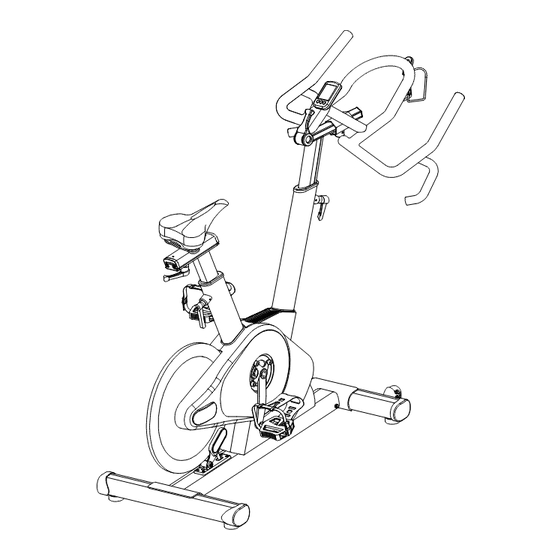
- Page 3 P-10M – INSTRUCTIONS FOR USE The model P-10M bike is designed to be used as a group cycle in fitness studios and health clubs. It has a fixed wheel driven flywheel and should only be used under professional supervision. Installation – it is important that the P-10M bike is correctly assembled and we recommend that installation and assembly be carried out by suitably qualified personnel.
- Page 4 P-10M ASSEMBLY DIAGRAMS...
- Page 5 P-10M ASSEMBLY Step 1 (foot) Attach the front foot (7) to the frame using the bolt (3) and washer (4). Step 2 (foot) Attach the rear foot (2) to the frame using the bolt (3) and washer (4). STEP 1 STEP 2 Step 3.
- Page 6 Step 4. &5 (handlebar & stem) and Console assemble Insert stem into frame main tube then adjust handlebar stem (16) to a proper position then using lock lever (21) to fixed . Open safety screw(73) on the stem sliding tube then insert handlebar(11) onto stem's sliding tube , move handlebar forward or backward until at a propor position then use sliding tube's lock lever(21) to fix it and screw back the safety screw(73) .
- Page 7 Step 6&7. (saddle & seat post) Insert seat post (32) into frame's seat tube and move upward or downward until at a propor position then use stem lock lever(21) to fix it . Assembly saddle (23) on saddle top slider (30) , sliding saddle in forward or backward until at a propor postioon then use lock lever (31) to fix it .
- Page 8 Front Foot Tube 60×86×3t×545L Front Foot Tube 60×86×3t×545L Screw M5×P0.8×10L Stainless Screw M5×P0.8×10L Stainless Screw M5×P0.8×10L Stainless Screw M5×P0.8×10L Stainless Vortec #8109 Consol Vortec #8109 Consol Vortec #8109 Consol Vortec #8109 Consol 10 Handlebar sliding tube's F/R sleeve Handlebar sliding tube's F/R sleeve...
- Page 9 Item/Description Item/Description Item/Description Item/Description Unit Unit Q'ty Q'ty Remark Remark Unit Unit Q'ty Q'ty Remark Remark 41 Washer Washer ψ ψ ψ ψ 27× 27×ψ ψ ψ ψ 13×3t 13×3t CP CP CP CP Washer Washer 27× 27× 13×3t 13×3t 42 Washer Washer Washer...
- Page 10 Item/Description Item/Description Item/Description Item/Description Unit Unit Unit Unit Q'ty Q'ty Q'ty Q'ty Remark Remark Remark Remark 81 Battery cover Battery cover Battery cover Battery cover 82 Screw M6×P1.0×10L Screw M6×P1.0×10L Screw M6×P1.0×10L Screw M6×P1.0×10L Stainless Stainless Stainless Stainless 83 Screw M5×P0.8×15L Screw M5×P0.8×15L Stainless Stainless...
- Page 11 P-10 Explode Diagrams 110L 107 108 110R 60 61 60 61 66 65 62 6 89 86 89 90 89 90 74 75 45 52 46 45 51 52...
Need help?
Do you have a question about the P-10M and is the answer not in the manual?
Questions and answers