Table of Contents
Advertisement
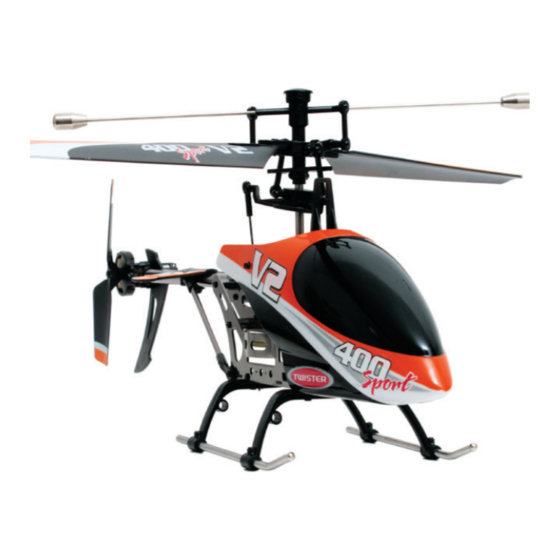
Ready to fly 4 channel R/c helicopteR
Assembly & Flight Training guide
SpecificationS
Main rotor diameter..................................................... 400mm
Helicopter length.......................................................... 430mm
Flying weight (excl. trainer undercart) ............around 250g
R/C transmitter......................................... Twister 400 2.4GHz
Cyclic steering ..................................hi-torque micro servos
On-board electronic control........3-in-1 receiver/ESC/gyro
On-board power ........... 7.4V 700mAh Li-polymer (with cell
balancer lead)
Flight time per charge ........................... around 8-9 minutes
Kit contentS
Twister 400 Sport V2 ready-built helicopter .......................1
Twister 400 Sport V2 2.4GHz transmitter .............................1
Twister 7.4V lithium polymer battery pack ..........................1
Twister Lithium polymer 12V DC balancer charger ...........1
Twister 400 mains power supply ..........................................1
Twister 400 Sport V2 instruction manual .............................1
FREE training undercart .................................................. 1 set
RequiRed but not Supplied
AA transmitter batteries ........................................................6
Small crosshead screwdriver ...............................................1
V1.0
Advertisement
Table of Contents

Subscribe to Our Youtube Channel
Related Manuals for Twister 400 SPORT V2


Summary of Contents for Twister 400 SPORT V2
-
Page 1: Specifications
Flight time per charge ......around 8-9 minutes Kit contentS Twister 400 Sport V2 ready-built helicopter .......1 Twister 400 Sport V2 2.4GHz transmitter ......1 Twister 7.4V lithium polymer battery pack ......1 Twister Lithium polymer 12V DC balancer charger ...1 Twister 400 mains power supply ..........1... -
Page 3: Table Of Contents
A. Binding your helicopter ....18 occur and neither J. Perkins Distribution Ltd nor it’s B. Flying with other Twister 400 pilots 18 distributors will be held liable for any loss or damage Parts List............19 arising from the use of this model or for any loss or Exploded view..........20... -
Page 4: Introduction
Thank you for buying the Twister Although the Twister 400 Sport V2 is 400 Sport V2. It is the latest 400 size relatively easy to fly, please note that we fixed pitch helicopter with 4-channel do not guarantee that by following the R/C, 2.4GHz radio and possesses... -
Page 5: Vital Safety Precautions
Do not fly near electrical or wireless operating your Twister 400 Sport V2. equipment or magnetic objects. Radio controlled models can reach high f Always let the battery cool down speeds and cover significant distances before recharging. -
Page 6: Specifications
Weight (inc. Battery) ....................around 250g Charging time..................... approx. 120 minutes Flying time ....................around 8-9 minutes On board power................7.4V 700mAh LiPo battery Radio ................Twister 400 Sport V2 4, 2.4GHz 4-ch Range .......................around 25 metres Required Transmitter batteries ................6 x 1.5V AA batteries Tools ........................small screwdriver... -
Page 7: Transmitter Parts (Modes 1 & 2)
Mode 2 stick —Throttle & yaw Mode 2 stick—Left/right cyclic & Fore/aft Cyclic Mode 1—Yaw trim Mode 2—Yaw trim Mode 1—Left/right cyclic trim Mode 2—Left/right cyclic trim On/Off Switch Battery compartment access Twister 400 Sport V2 Instruction Manual... -
Page 8: Helicopter Connectors
Note: Your helicopter is fitted with a high power lithium polymer battery (lipo). Charge the lipo battery in your Twister 400 Sport V2 before use. Carefully connect the POLARISED white charge plug on the heli to the charger ▼... -
Page 9: Lithium Polymer Battery Safety
▼ WARNING: Do not leave the helicopter unattended whilst charging! We recommend that you use only the supplied twister charger with this battery. over-discharging will shorten the life of the battery or damage it. Stop flying immediately the helicopter has insufficient power to lift off. Recharge the battery. -
Page 10: Beginner And Advanced Mode
The Twister 400 Sport V2 transmitter features a beginner/advanced mode button. Advanced mode with LED lit makes the Twister 400 Sport V2 more responsive and should only be used by experienced pilots. fliGht pRepaRation A. SWItCHING oN 1. -
Page 11: Transmitter Aerial Positioning
WARNING: If there are two or more twister 400 Sport V2 helicopters to be operated in the one area, please refer to BINDING tRANSmIttER to RECEIVER section before switching on! B. -
Page 12: Flight Controls
C. FLIGHt CoNtRoLS Each dual axis stick unit of your transmitter controls 2 helicopter functions (complete with digital trimmers on each function) giving you control about all 4 axes of flight. RIGHt StICK (mode 1) LEFt StICK (mode 1) Climb Forward cyclic Yaw Right Left cyclic... - Page 13 Push the rudder stick left to yaw the nose of the helicopter to the left and push to the right to yaw the nose right. Your Twister 400 Sport V2 helicopter is fitted with a micro piezo gyro and electronic mixing system which automatically helps stabilise the tail making for much easier flight.
-
Page 14: Learning To Fly
leaRninG to fly A. tHRottLE CoNtRoL If you have never flown an R/C helicopter before, we recommend learning to fly in Beginner mode before progressing to Advanced mode. 1. Place the helicopter on flat even ground no closer than 10 foot from people or ▼... -
Page 15: Fore/Aft Cyclic Control
The possibilities are endless. ENJOY! 4. When you have finished flying, turn off the helicopter FIRST, then the transmitter. ▼ Twister 400 Sport V2 Instruction Manual... -
Page 16: Trimming The Helicopter (Mode 1)
F. tRImmING tHE HELICoPtER (moDE 1) The model should be stable and centred in the hover to produce the best flight performance. If you find that your model has a tendency to drift out of the hover then you can use the digital transmitter trims to correct it. The transmitter features digital trims. -
Page 17: Trimming The Helicopter (Mode 2)
If the model rolls to the left or right, press the trim slider to correct it, e.g., If the model drifts to the left, press the trim slider to the right, until the model is centred. Twister 400 Sport V2 Instruction Manual... -
Page 18: Binding Transmitter To Receiver
Your helicopter is now ready for use. B. FLyING WItH otHER tWIStER 400 PILotS It is possible to have up to five Twister 400 Sport V2 helicopters operating in the same vicinity at one time. WARNING: it is very important to turn on the heli’s one at a time (i.e. not all at once!) Proceed as follows: 1. -
Page 19: Parts List
6605950 Main frame set with screws and spacers 6605972 Swash guide/motor mount 6605974 Transmitter Mode 2 6605976 Moulded main chassis parts 6605978 Main rotor centre hub 6605932 Twister 400 Sport battery charger UK 6605934 Twister 400 Sport battery charger EU Twister 400 Sport V2 Instruction Manual... -
Page 20: Exploded View
exploded View Flybar Links Rotor blade Centre hub Swashplate Swash guide Main shaft Main motor Collet Metal main frames Fittings Bearing Canopy Links Tail blades Main PCB Servos Horiz. fin Moulded chassis Tail boom Drive gear Moulded fitting Boom support Tail gearbox ass’y Switch Moulded chassis... - Page 24 European agents: J Perkins Distribution, Lenham, England www.jperkinsdistribution.co.uk...
Need help?
Do you have a question about the 400 SPORT V2 and is the answer not in the manual?
Questions and answers