Advertisement
Owner's Manual
Assembly
Usage
Parts
CAUTION: Exercise of a strenuous nature, as is customarily done on this equipment,
should not be undertaken without first consulting a physician. No specific health claims
are made or implied as they relate to the equipment. Measurements made by the equipment
are believed to be accurate, but only the measurements of your physician should be relied upon.
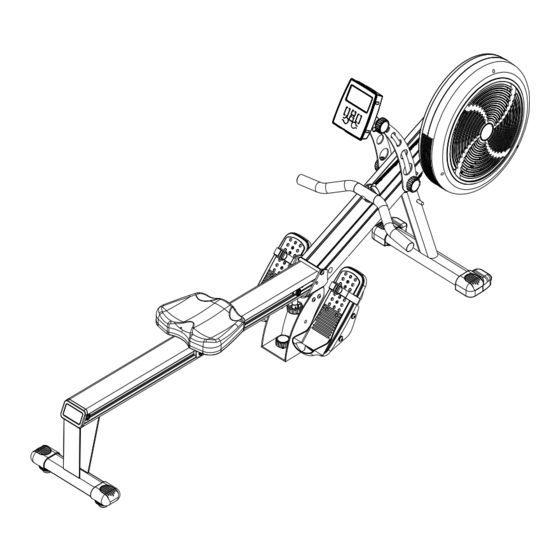
Freedom Air Rower
Advertisement
Table of Contents

Related Manuals for JTX Fitness Freedom Air Rower

Summary of Contents for JTX Fitness Freedom Air Rower
- Page 1 Freedom Air Rower Owner’s Manual Assembly Usage Parts CAUTION: Exercise of a strenuous nature, as is customarily done on this equipment, should not be undertaken without first consulting a physician. No specific health claims are made or implied as they relate to the equipment. Measurements made by the equipment...
-
Page 2: Table Of Contents
Table of Contents ■ Safety Precautions ■ Hardware Packing List ■ Pre-assembly Check List ■ 5~10 Assembly ■ 11~13 Monitor instruction 14-15 ■ Parts List ■ Exploded Drawing ■ How to row ■ Trouble Shooting ■ 19~21 Training Guideline ■ 22~23 Warm Up - 1 -... -
Page 3: Safety Precautions
SAFETY PRECAUTIONS Thank you for purchasing our product. Even though we go to great efforts to ensure the quality of each product we produce, occasional errors and/or omissions do occur. In any event should you find this product to have either a defective or a missing part please contact us for a replacement. This product has been designed for home use only. -
Page 4: Hardware Packing List
HARDWARE PACKING LIST Q’TY PART DESCRIPTION SKETCH Seat track end cap Spacer Knob Flat washer M8 Cap nut M10 Nylon nut M10 Flat washer M10 Spring washer M8 Allen head bolt M8*25mm Flat washer M8 Spring washer M10 Allen head bolt M8*15mm Nut M8 Hex head bolt M8*85mm Seat Carriage Stopper... - Page 5 PRE-ASSEMBLY CHECK LIST PART NO. DESCRIPTION Front frame with air mag. drive system set 6/28(R/L)/24 Front stabilizer w/transportation wheels, anti-slippery pads 5/20(R(L)/98 Rear stabilizer w/end caps, level knobs 12/7/113(R/L)/125 Foot plate w/foot pedal, pedal straps, elastic velcro straps 4/3/120 Seat track w/connected bracket, count sensor wire 13/8/17 Seat w/carriage wheel set 84/83...
-
Page 6: Assembly Instruction
ASSEMBLY INSTRUCTION GENERAL REMOVE ALL THE PARTS OF YOUR ROWER FROM THE CARTON AND PLACE THEM ON THE FLOOR CAREFULLY. ASSEMBLING YOUR ROWER IS SIMPLE. FOLLOW THESE INSTRUCTIONS CAREFULLY AND IT SHOULD TAKE YOU AROUND 20-25 MINUTES. STEP 1 Secure with knob (105) & washer (26) on monitor support bracket (9) and front main frame (1). - Page 7 STEP 2 1) Slide the seat (13) with seat carriage set (8) into the rower seat track (4) which direction is from end of seat track (4). 2) Put one bolt (123) with one stopper (22) through the two side hole of rower seat track (4) and tighten with another stopper (22) and nut (122).
- Page 8 STEP 4 1) Connect the socket of count sensor wire (120) of seat track (4) to the plug of count sensor wire (129) of front main frame (1). 2) Attach front connected bracket (3) of seat track (4) to the “U” shape welded bracket of front main frame (1) and tighten with allen head bolts (110) and flat washers (26) on two side of U shape bracket.
- Page 9 STEP 5 1) Put white pivot shaft (75) through the upper welded sleeve tube of U support bracket (2). 2) Put black pivot shaft (109) through the lower welded sleeve tube of U support bracket (2). 3) Attach right side foot plate (7) with foot pedal (12) which is pre-assembled with elastic velcro straps (125) and right pedal straps (113R) to the two pivot shaft (75/109) and tighten them with two washers (78) and two bolts (117).
- Page 10 STEP 6 Remove the pre-assembled four screws (83) from back of monitor (84). Insert plug of system wire cable (102) to the socket of monitor (84). Attach monitor (84) to the top adjustable monitor bracket (11) and tighten with previously removed four screws (83) again.
- Page 11 Now the rower is finished completely. HOW TO STORE YOUR ROWER 1) Loosen knob (24) with spacer (23) to leave 20mm distance and slide seat (13) to the front end of seat track (4). 2) Push the two monitor support bracket (11) with monitor (84) forward a little bit to front main frame (1).
-
Page 12: Monitor Instruction
MONITOR INSTRUCTION QUICK START: 1. Press the “display mode” button to activate the computer console. 2. Begin rowing. 3. Adjust the resistance level with the “+” / “-‘ key 4. The values of time, distance, calories, count, will start counting upwards. DISPLAY AND FEEDBACK: The user age has been set. - Page 13 BUTTON FUNCTIONS: Button Pre-workout During workout Display Switch different mode values Select display mode Mode Program Press repeatedly to select a program (p1~p8) Confirm current target values setting reset Reset current setting value, press & hold total reset Increase values setting in “target setting” mode Increase the resistance level Decrease values setting in “target setting”...
- Page 14 H.R.C. (Heart Rate Control): HRC program works by automatically adjusting the resistance to keep you working out at your target heart rate. To do this the console will need your pulse reading throughout the exercise, which it gets from you wearing a chest strap transmitter. If your heart rate is too high the resistance is decreased.
-
Page 15: Parts List
PARTS LIST Q’TY Q’TY DESCRIPTION DESCRIPTION (PCS) (PCS) MAIN FRAME BUSHING MAIN FRAME SUPPORT BRACKET SLEEVE CONNECTED BRACKET ELASTIC CORD ROWER SEAT TRACK M8*35mm ALLEN HEAD BOLT REAR STABILIZER CHAIN GUIDE PULLEY FRONT STABILIZER SHORT ELASTIC TUBE FOOT PLATE FLAT WASHER SEAT CARRIAGE BRACKET CLIP MONITOR POST BRACKET... - Page 16 DECORATION PLATE DECORATION PLATE BRACKET DECORATION PLATE PEDAL STRAPS (R/L) DECORTION STRIPE M10 SPRING WASHER PIVOT SAHFT (SHORTER) POWER SUPPLY CABLE NYLON NUT M10 M8*15mm ALLEN HEAD BOLT FLAT WASHER M10 M5*10mm MACHINE SCREW FLAT WASHER COUNTSENSOR BRACKET WIRELESS CHEST BELT COUNTSENSOR WITH WIRE M8*140mm CARRIAGE BOLT ROWER SEAT TRACK FIX PLATE...
-
Page 17: Exploded Drawing
EXPLODED DRAWING - 16 -... -
Page 18: How To Row
HOW TO ROW: EXERCISE No. 1 THE COMPLETE ROWING ACTION This exercise will help tone and strengthen the muscle groups in your legs, arms, shoulders, back and stomach. Start as shown in Fig.1 with the rowing-grip fully ‘home’. Slide down on the seat, knees bent and grasp the rowing- grip. -
Page 19: Trouble Shooting
TROUBLE SHOOTING Problem Cause Correction Power supply doesn’t Insert the plug of adaptor into Monitor doesn’t display connect well between the wall supply. monitor and wall power. Securely plug sending unit into Sending unit not connected the socket of monitor No speed or distance Sending unit not working Replace sending unit... -
Page 20: Training Guidelines
TRAINING GUIDELINES Exercise Exercise is one of the most important factors in the overall health of an individual. Listed among its benefits are: Increased capacity for physical work (strength endurance) Increased cardiovascular (heart and arteries/veins) and respiratory efficiency ... - Page 21 Specificity Different forms of exercise produce different results. The type of exercise that is carried out is specific both to the muscle groups being used and to the energy source involved. There is little transfer of the effects of exercise, i.e. from strength training to cardiovascular fitness.
- Page 22 Don’t push yourself too hard to reach the figures on this table. It can be very uncomfortable if you overdo it. Let it happen naturally as you work through your program. Remember, the target is a guide, not a rule, a little above or below is just fine. Two final comments: (1) don’t be concerned with day to day variations in your pulse rate, being under pressure or not enough sleep can affect it;(2) your pulse rate is a guide, don’t become a slave to it.
- Page 23 STRETCHING Stretching should be included in both your warm up and cool down, and should be performed after 3-5 minutes of low intensity aerobic activity or callisthenic type exercise. Movements should be performed slowly and smoothly, with no bouncing or jerking. Move into the stretch until slight tension, not pain, is felt in the muscle and hold for 20-30 seconds.
- Page 24 INNER THIGH STRETCH TOE TOUCHES Sit with the soles of your feet together with your Slowly bend forward from your waist, letting knees pointing outward. Pull your feet as close your back and shoulders relax as you stretch Into your groin as possible. Gently push your toward your toes.
Need help?
Do you have a question about the Freedom Air Rower and is the answer not in the manual?
Questions and answers
Chain keeps jumping off sprocket how to adjust chain tension , jtx freedom air rower with lcd screen
The chain has lost all tension on retracting. It is not in the manual how to fix this