Table of Contents
Advertisement
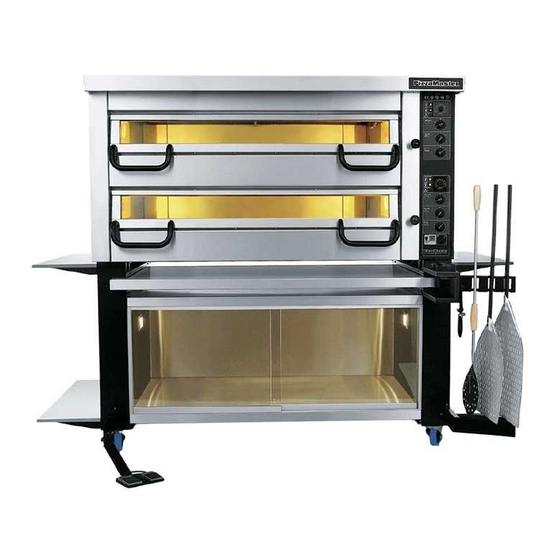
Instruction for installation,
operation and maintenance
Series 700
PM 721E – PM 722E – PM 723E
PM 731E – PM 732E – PM 733E
PM 741E – PM 742E – PM 743E
Series 800
PM 821E – PM 822E – PM 823E
PM 831E – PM 832E – PM 833E
PM 841E – PM 842E – PM 843E
Model No.
Serial No.
Voltage
Control Voltage
Output kW
Date
Hz
Rev. 2007/06
Advertisement
Table of Contents

Related Manuals for PizzaMaster PM 721E


Summary of Contents for PizzaMaster PM 721E
-
Page 1: Warranty And Service
Instruction for installation, operation and maintenance Series 700 Model No. PM 721E – PM 722E – PM 723E PM 731E – PM 732E – PM 733E Serial No. PM 741E – PM 742E – PM 743E Voltage Series 800 Control Voltage PM 821E –... -
Page 2: Table Of Contents
Index Index Page Serial No / Oven rating plate ............. 1 Warranty and service ..............2 Index ..................3 Capacities and technical data / Positioning the oven ....4 Unpacking / Packing list ............. 5 Installation – Assembly .............. 6 Installation –... -
Page 3: Capacities And Technical Data / Positioning The Oven
14" External Internal 10" 16" 18" 1105 PM 721E 1125 x 905 x 480 13.4 PM 722E 1125 x 905 x 820 710 x 710 x 195/235 PM 723E 1125 x 905 x 1160 20.1 1105 PM 731E... -
Page 4: Unpacking / Packing List
Unpacking / Packing list Unpacking / Packing list Please make sure the following items are present and un-damaged. Standard equipment Optional equipment 1. Oven ............14. Clock timer........... 2. Lockable wheel ..........15. Extra sliding shelf ........3. Non-lockable wheel ........16. -
Page 5: Installation - Assembly
Assembly Assembly Tip! If possible, use a forklift truck to lift the oven to fit Important! Fit the 2 legs with the lockable wheels to the front of the oven, and the 2 legs with non-lockable the legs. Alternatively, lift the oven manually on to a wheels to the rear. -
Page 6: Installation - Assembly Accessories
Assembly – Accessories Assembly – accessories All PizzaMaster® accessories can be mounted on either the left- or right-hand side of the oven. Peel holder 1. Fit the lower bracket, using the self-tapping screws provided (3 pcs). 2. Peel off the backing from the soft pad and stick the pad to the lower bracket, as shown in the illustration. -
Page 7: Installation - Assembly Divisible Oven
Assembly – Divisible oven Assembly – Divisible oven Note: A divisible oven is a 2- or 3-deck oven in which the decks (or oven chambers) can be separated (divid- ed) for the purpose of moving the oven through narrow doorways and corridors. 10b 10c... - Page 8 Assembly – Divisible oven Important! Do not remove the wooden supports for the hearth- Info! stones until you reach point 20 below. Weight per oven deck: approx. 150 kg Do not use the oven-door handles or oven-vent knobs to lift the oven, for it can damage the oven. Disassembly Assembly 1.
-
Page 9: Installation - Electrical Connection
Electrical connection Electrical connection Important! For reasons of safety and the validity of the war- ranty, all electrical work must be carried out by a qualified electrician. The oven must be connected via an external main swich with min. 3mm gap.e of at least 3 mm for each power supply cable. -
Page 10: Installation - Evacuation Connection
Evacuation connection Evacuation connection Important ! Local inspectors, ventilation- and environmental specialists should be consulted so that the design and the installation conforms to local regulations. The oven is designed to be connected to an extraction system. The capacity of the extractor depends on the number of decks per oven. -
Page 11: Control Panel
Control panel Control panel – Instruction Thermostat Regulates the baking temperature. A yellow lamp indi- cates that the heating element is on. Turbo – quick start up function The turbo-start function, engaged automatically at start up, brings the oven up to temperature very quickly. When the desired temperature has been reached, the turbo-start shuts off automatically. -
Page 12: First-Time Start-Up / Maintenance / Changing Of Oven Lamp
First-time start-up / Maintenance / Changing of oven lamps First-time start-up of oven Care and maintenance Before putting the oven into operation, it should be A well maintained oven lasts longer and looks like new switched on and brought up to temperature to burn off for a long time. -
Page 13: Oven Settings And Baking Tips
To minimize the incidence of uneven baking, all • When the oven is fully loaded, the vent should PizzaMaster® ovens are optimized for a certain size of pizza. Accordingly, each hearthstone is dimen- be opened fully in order to avoid soft pizza and sioned to accommodate 2 pizzas of that size, one at unnecessarily high electricity consumption. -
Page 14: Troubleshooting
The table below will help to make baking easier, sim- plify adjustments of the oven and help in the event of problem. If solution is not found please contact your nearest PizzaMaster® distributor or contact our service Symptom Possible cause... -
Page 15: Clock Timer
When using the clock timer, the oven’s main switch instructions must be in position A. All PizzaMaster® ovens can be equipped with a 7-day clock that switches the oven on and off automatically. Info! This ensures that the oven is always hot at the start of •... -
Page 16: Clock Timer
Clock timer Programming new start- and stop times. Tip! Important! Before starting to program the clock timer, write down Read tip, recommendations and example your start and stop times for each day of the week. (opposite) before commence programming. Recommendations 1. -
Page 17: Parts List
Parts list Parts list When ordering spare parts, please have the oven serial number and model at hands, to help us locate the parts needed for your oven. 1. Vent handle knob 15. Main switch 29. Soft pad – peel holder 2.
Need help?
Do you have a question about the PM 721E and is the answer not in the manual?
Questions and answers