Table of Contents
Advertisement
Quick Links
Download this manual
See also:
Setup Manual
User's Manual
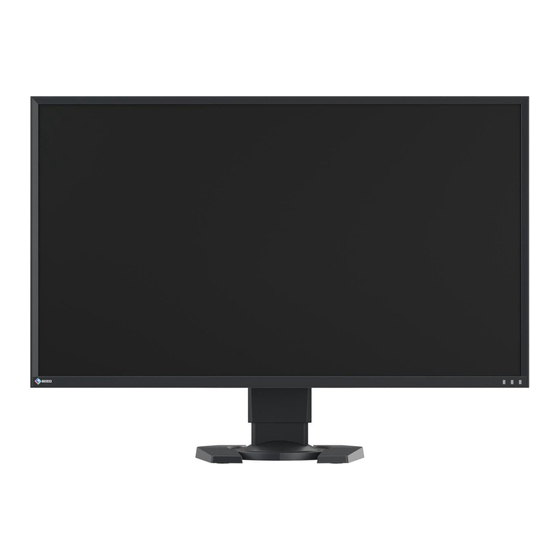
Color LCD Monitor
Important
Please read PRECAUTIONS, this User's Manual, and the Setup Guide
(separate volume) carefully to familiarize yourself with safe and
effective usage.
• Please refer to the Setup Guide for basic information ranging from
connection of the monitor to a PC or external device to using the
monitor.
• The latest User's Manual is available for download from our web site:
http://www.eizoglobal.com
Advertisement
Table of Contents

Related Manuals for Eizo foris FS2735


Summary of Contents for Eizo foris FS2735
- Page 1 User’s Manual Color LCD Monitor Important Please read PRECAUTIONS, this User’s Manual, and the Setup Guide (separate volume) carefully to familiarize yourself with safe and effective usage. • Please refer to the Setup Guide for basic information ranging from connection of the monitor to a PC or external device to using the monitor.
- Page 2 EIZO Corporation is under no obligation to hold any submitted material or information confidential unless prior arrangements are made pursuant to EIZO Corporation’s receipt of said information. Although every effort has been made to ensure that this manual provides up-to-date information, please note that EIZO monitor specifications are subject to change without notice.
-
Page 3: Introduction
The backlight of the LCD panel has a fixed lifetime. When the screen becomes dark or begins to flicker, please contact your local EIZO representative. Do not press on the panel or edge of the frame strongly, as this may result in display malfunctions, such as interference patterns, etc. -
Page 4: To Use The Monitor Comfortably
When the monitor is cold and brought into a room or the room temperature goes up quickly, dew condensation may occur on the interior and exterior surfaces of the monitor. In that case, do not turn the monitor on. Instead wait until the dew condensation disappears, otherwise it may cause some damage to the monitor. -
Page 5: Table Of Contents
DisplayPort Signal Input .........21 Settings Menu ..........40 ● HDMI (PC signal), DVI-D Signal Input ...21 ● ● Showing and Hiding the EIZO Logo ....40 HDMI (video signal) Input ......22 ● ● Locking Operation Buttons ......40 Audio Signal ..........22 ●... - Page 6 7-2. Enabling/Disabling Automatic Brightness Adjustment ......45 Chapter 8 Troubleshooting ......46 8-1. No Picture ............ 46 8-2. Imaging Problems ........47 8-3. Other Problems ........... 48 Chapter 9 Attaching/Detaching the Parts ..49 9-1. Optional Arm ..........49 ● Attaching the Optional Arm (Optional Stand) 49 ●...
-
Page 7: Chapter 1 Product Features
• 144 Hz refresh rate (vertical scan frequency), offering a high response speed for videos *1 To use the recommended resolution at 144 Hz, the FORIS FS2735 must be connected to DisplayPort. • The Color Mode function allows the user to select the display mode optimum to the displayed image. -
Page 8: Controls And Functions
- HDMI Supports PC signals via HDMI input. The HDMI input receives both image signals and audio signals via a single HDMI cable. • Equipped with a USB 3.0 hub function. Supports high-speed data transfers of up to 5 Gbps. Massive amounts of data can be transferred in a short time, e.g. -
Page 9: Rear
● Rear 9 10 5 6 7 This handle is used to carry the monitor. Attention 1. Handle • Firmly grasp and hold the monitor by the bottom while grabbing the handle, and carefully convey the monitor so as not to drop it. 2. -
Page 10: Color Adjustment Software
G-Ignition An application that allows the user to adjust, set, and operate the monitor from a PC. G-Ignition and its User’s Manual (PDF) are on your EIZO LCD Utility Disk CD-ROM. Features • The monitor's color adjustment function can be controlled from the application installed on your PC. -
Page 11: G-Ignition Mobile
• G-Ignition Mobile is capable of posting a notification as an icon whenever you receive a call or message on your smartphone. You no longer have to worry about missing an important call or e-mail during a game. Hardware Requirements For the latest hardware requirements, refer to our web site. http://gaming.eizo.com Chapter 1 Product Features... -
Page 12: Basic Operations And Functions
1-4. Basic Operations and Functions ● Basic Operation of the Setting Menu This section explains how to manipulate the basic settings menu. For details on how to operate the Administrator Settings menu, see “5-11. Configuring Administrator Settings” (page 40). Displaying the operation guide 1. - Page 13 Displaying the Setting menu 1. Press the control button. The Setting menu appears. Adjusting/setting 1. Choose a menu to adjust/set by pressing the control button up or down, and then press the control button. The Sub menu appears. Note • You can choose a menu by pressing the control button right. 2.
-
Page 14: Functions
Exiting 1. Select "Exit" by using the control button, and then press the control button to accept your setting. Note • You can exit the Setting menu when you press the control button left. ● Functions The following table shows the Setting menu and setting items of each menu. Basic Settings Main menu Sub menu... -
Page 15: Administrator Settings
Main menu Sub menu Reference Preferences Auto Input Detection “5-1. Identifying Input Signal Automatically” (page Menu Rotation “3-3. To Change the Orientation of the Setting Menu” (page 24) Power Save “7-1. Setting Power Saving” (page 44) Indicator “5-7. Setting the Brightness of Indicators” (page EcoView Settings “7-2. -
Page 16: Chapter 2 Connecting
Chapter 2 Connecting 2-1. Connecting the Monitor to a Smartphone via Bluetooth To operate the monitor through G-Ignition Mobile, the monitor must be connected (paired) to your smartphone via Bluetooth. This section explains how to pair the monitor with your smartphone via Bluetooth. All operations are to be performed using the control button (see “Basic Operation of the Setting Menu”... -
Page 17: Checking The Connection Information
● Checking the Connection Information Press the control button while the operation guide is displayed. The Setting menu appears. Choose “Bluetooth” and press the control button to accept your selection. The connection information appears on the bottom of the "Bluetooth" sub menu. Chapter 2 Connecting... -
Page 18: Connecting Multiple External Devices
2-2. Connecting Multiple External Devices The product has multiple connections to external devices and allows you to switch to one of the connections for display. Connection examples HDMI DVI-D DisplayPort connector connector connector Digital (DisplayPort) Digital Digital To ext. (HDMI) (DVI) device 1 Signal cable PP200... -
Page 19: Connecting External Speakers
Required System Environment • A PC (including a device with USB host) compliant with USB Specification Revision 3.0 and OS • EIZO USB cable (UU200SS (USB 3.0)) Attention • This monitor may not work depending on the PC, OS, or peripheral devices to be used. For USB compatibility of peripheral devices, contact their manufacturers. -
Page 20: Connection Procedure (Setup Of Usb Function)
● Connection Procedure (Setup of USB Function) 1. First, connect the monitor to a PC using the signal cable, then start the PC. 2. Connect the USB cable between the USB downstream port of the PC and the USB upstream port of the monitor. -
Page 21: Chapter 3 Setting Screens
Chapter 3 Setting Screens 3-1. Compatible Resolutions/Formats The monitor supports the following resolutions and signal format. ● DisplayPort Signal Input The compatible resolutions vary depending on the setting of "Signal Formats" (page 41). FreeSync FreeSync DisplayPort DisplayPort Resolution Vertical Scan Frequency (High) (Low) Ver.1.2... -
Page 22: Hdmi (Video Signal) Input
● HDMI (video signal) Input Vertical Scan Frequency Formats Resolution Scanning Method 24 Hz 50 Hz 60 Hz 640 x 480 Progressive √ 480p 720 x 480 Progressive √ 480i 720 x 480 Interlaced √ 576p 720 x 576 Progressive √... -
Page 23: Screen Size Changing
3-2. Screen Size Changing ● DisplayPort Signal Input, DVI-D Signal Input, HDMI (PC signal) Input The image with the resolution other than the recommended resolution is displayed at full screen size automatically. You can change the screen size by using the “Picture Expansion” function. Setting Function Full Screen... -
Page 24: Hdmi (Video Signal) Input
● HDMI (video signal) Input The screen size can be changed using the “Picture Expansion” function. Setting Function Screen Display Auto The monitor automatically changes the screen size according to the aspect ratio and resolution information from the external device. This can only be set for HDMI input. -
Page 25: Chapter 4 Adjusting Color
Chapter 4 Adjusting Color 4-1. To Select the Display Mode (Color Mode) This function allows easy selection of a desired mode according to monitor application. Mode Selection Mode Purpose User1 Select one of these user modes to define a desired set of parameter settings. User2 User3 User4... -
Page 26: To Perform Advanced Adjustments
4-2. To Perform Advanced Adjustments The “Color” menu of the Setting menu allows you to set and save the independent color adjustment for each mode. Attention • The monitor will take about 30 minutes before its internal electric components stabilize. Wait 30 minutes or more after turning the monitor power on before starting adjustment. -
Page 27: To Adjust Brightness
4-3. To Adjust Brightness The screen brightness is adjusted by changing the brightness of the backlight (light source from the LCD back panel). Setting range 0 to 100 Procedure All operations are to be performed using the control button (see “Basic Operation of the Setting Menu”... -
Page 28: To Adjust Color Temperature
4-5. To Adjust Color Temperature Color temperature can be adjusted. The color temperature is normally used to express the hue of “White” and/or “Black” with a numerical value. The value is expressed in degrees “K” (Kelvin). The screen becomes reddish at low color temperatures and bluish at high color temperatures, similar to the temperatures of a flame. -
Page 29: To Adjust Hue
4-7. To Adjust Hue Hue can be adjusted. Adjustable range -100 to 100 Procedure All operations are to be performed using the control button (see “Basic Operation of the Setting Menu” (page 12)). 1. Press the control button while the operation guide is displayed. The Setting menu appears. -
Page 30: To Adjust Gain
4-9. To Adjust Gain The brightness of each red, green, and blue color component is referred to as “Gain”. The hue of “white” can be changed by adjusting the gain. Adjustable range 0 to 100 Procedure All operations are to be performed using the control button (see “Basic Operation of the Setting Menu”... -
Page 31: To Reduce Motion Blur
4-11. To Reduce Motion Blur Motion blur, or unsharp images in motion, can be reduced. Motion blur occurs when the eye recognizes liquid crystal transitions that come from changing screens (frames). When "Blur Reduction" is set to "On", the backlight flickers in sync with liquid crystal transition so the change cannot be seen, thereby creating clear images with less blur. -
Page 32: To Set Overdrive Intensity
4-13. To Set Overdrive Intensity This function allows you to set overdrive intensity based on the use of the monitor. For example, you can reduce image lags by setting the adjustment level to “Enhanced” when displaying fast moving images such as game images. Adjustable range Enhanced, Standard, Off Procedure... -
Page 33: Setting Color Format
4-15. Setting Color Format The color format for DisplayPort and HDMI signal can be specified. If the correct color is not displayed, change the setting to other than “Auto”. DisplayPort signal input Setting Function Auto Automatically identifies the color format of the input signal (recommended). Converts the color format of the input signal to a YUV format. -
Page 34: Setting Grayscale Tones
4-16. Setting Grayscale Tones The grayscale tones can be specified. Setting Function Auto The monitor automatically switches grayscale tones according to the signal that is input. Full The monitor displays the entered grayscale tone as it is. Limited The monitor displays the entered grayscale tone in 255 tones. Procedure All operations are to be performed using the control button (see “Basic Operation of the Setting... -
Page 35: Chapter 5 Setting Monitor
Chapter 5 Setting Monitor 5-1. Identifying Input Signal Automatically This function sets the monitor to automatically identify the input signal. The monitor switches input signals from HDMI 1, HDMI 2, DisplayPort, to DVI and, when it detects an input signal, displays it on the screen. Setting Function The monitor automatically identifies the connector through which signals are input and... -
Page 36: Excluding A Specific Color Mode From Selection
5-3. Excluding a Specific Color Mode from Selection Setting a specific color mode to "Skip" allows it to be skipped when the color modes are switched. Procedure All operations are to be performed using the control button (see “Basic Operation of the Setting Menu” (page 12)). 1. -
Page 37: Adjusting Volume
5-5. Adjusting Volume This function allows you to adjust the volume. Adjustable range 0 to 30 Procedure All operations are to be performed using the control button (see “Basic Operation of the Setting Menu” (page 12)). 1. Press the control button up or down while the operation guide is displayed. The volume adjustment menu appears. -
Page 38: Setting The Brightness Of Indicators
5-7. Setting the Brightness of Indicators The brightness of the indicators (power and message indicators) on the front of the monitor can be adjusted. Adjustable range Off, 1-7 Procedure All operations are to be performed using the control button (see “Basic Operation of the Setting Menu”... -
Page 39: Resetting The Monitor To The Default Settings
5-9. Resetting the Monitor to the Default Settings This function resets all adjustments to the default settings. Attention • After resetting, you cannot undo the operation. Note • For details on default settings, see “Main Default Settings” (page 56). • For information on how to reset only color adjustment values, see “4-14. -
Page 40: Configuring Administrator Settings
The Administrator Settings menu disappears and the screen changes to its normal view. ● Showing and Hiding the EIZO Logo When the monitor is turned on, the EIZO logo appears on the screen. You can choose to show or hide the display of the EIZO logo. Procedure For details on the basic operation of the Administrator Settings menu, see “Basic Operation of the... -
Page 41: Switching Signal Formats
● Switching Signal Formats This function allows you to set the compatible resolution, vertical scan frequency, and the DisplayPort version of the monitor when the DisplayPort signal is input. Use this function in the following cases: • To change the vertical scan frequency range at which FreeSync operates •... -
Page 42: Chapter 6 Using Smart Function
Chapter 6 Using Smart Function 6-1. Adjustable Settings in Each Mode The adjustable settings depend on the mode. (Non-adjustable or non-settable function cannot be selected.) For instructions on how to adjust or set each function, refer to subsequent pages. √: Adjustable -: Not adjustable Color Mode Function User 1 to User... -
Page 43: Setting The Automatic Brightness Correction
6-3. Setting the Automatic Brightness Correction "Smart Insight Demolition" is used to analyze the images and correct the brightness for each pixel to make dark areas of images and areas that are too bright more visible. In addition, "Saturation Enhancer" can be used to correct the saturation for each pixel. You can make less-visible faint areas more visible. -
Page 44: Chapter 7 Power Saving Functions
Chapter 7 Power Saving Functions 7-1. Setting Power Saving ● Monitor This function allows you to specify whether to set the monitor into the power saving mode, depending on the state of an external device connected to it. When the monitor has shifted to the power saving mode, the images on the screen are not displayed. -
Page 45: Enabling/Disabling Automatic Brightness Adjustment
7-2. Enabling/Disabling Automatic Brightness Adjustment The ambient light sensor on the front side of the monitor detects the environmental brightness to adjust the screen brightness automatically and comfortably by using the Auto EcoView function. Attention • Be careful not to block the sensor on the lower side of the monitor when using the Auto EcoView function. Procedure All operations are to be performed using the control button (see “Basic Operation of the Setting... -
Page 46: Chapter 8 Troubleshooting
Chapter 8 Troubleshooting If a problem still remains after applying the suggested remedies, contact your local EIZO representative. Please refer to our web site (http://gaming.eizo.com) as well. 8-1. No Picture Problem Possible cause and remedy 1. No images are displayed •... -
Page 47: Imaging Problems
26)). (The LCD monitor backlight has a limited life span. When the screen becomes dark or begins to flicker, contact your local EIZO representative.) • If the screen is too bright, try changing the Auto EcoView setting to “On” (see “7-2. -
Page 48: Other Problems
19)). • Change the USB port to another one. If the PC or peripheral devices work correctly by changing the USB port, contact your local EIZO representative. (Refer to the manual of the PC for details.) • Reboot the PC. -
Page 49: Chapter 9 Attaching/Detaching The Parts
Chapter 9 Attaching/Detaching the Parts 9-1. Optional Arm An optional arm (or an optional stand) can be attached by removing the stand. Please refer to our web site for the corresponding optional arm (or optional stand). http://www.eizoglobal.com Attention • When attaching an arm or stand, follow the instructions in the respective User’s Manual. •... -
Page 50: Attaching The Original Stand
● Attaching the Original Stand Detach the fixing screws on the optional arm (or optional stand) and remove the optional arm (or optional stand). Lay the LCD monitor on a soft cloth spread over on a stable surface with the panel surface facing down. Attach the original stand. As shown below, insert the four tabs on the stand into the square holes on the back panel (1) and slide the stand towards the upper portion of the monitor until you hear a click (2). -
Page 51: Stand Base
9-2. Stand Base ● Detachment Procedure The stand base that was attached during setup can be detached using the following procedures. Lay the LCD monitor on a soft cloth spread over on a stable surface with the panel surface facing down. Raise the lever on the bottom of the stand base. - Page 52 Attach the stand base onto the stand brace. Turn the stand base clockwise until it makes a clicking sound. Click! Chapter 9 Attaching/Detaching the Parts...
-
Page 53: Cable Holder
9-3. Cable Holder A cable holder is supplied with this product. Use the cable holder to organize the cables connected to the monitor. ● Attachment Procedure Pass the cables through the cable holder. Shut the bottom of the cable holder. While holding the shut section, insert the cable holder into the stand base. -
Page 54: Detachment Procedure
● Detachment Procedure Shut the bottom of the cable holder. While holding the shut section, lift the cable holder upward to remove it from the stand base. Chapter 9 Attaching/Detaching the Parts... -
Page 55: Chapter 10 Specifications
Chapter 10 Specifications Specifications LCD Panel Type IPS (Anti-Glare) Backlight Size 68.5 cm (27.0 inch) (68.5 cm diagonal) Resolution 2560 dots x 1440 lines Display Size (H × V) 597 mm × 336 mm Pixel Pitch 0.233 mm Display Colors 16.77 million colors 8-bit colors: Viewing Angle... -
Page 56: Main Default Settings
Physical Dimensions 618.8 mm × 405.1 to 550.1 mm × 253.2 mm (W × H × D) (Tilt: 35˚) Specifications 618.8 mm × 393.7 to 548.7 mm × 197.9 mm (W × H × D) (Tilt: 0˚) Dimensions (Without 618.8 mm × 362.1 mm × 56.3 mm (W × H × D) Stand) Net Weight Approx. -
Page 57: Outside Dimensions
56.6 (VESA) 53.9 122.6 197.9 Accessories Signal cable DD200DL (DVI-DVI) (Dual Link) Signal cable PM200 (Mini DisplayPort-DisplayPort) Signal cable HH200HS (HDMI-HDMI) Cleaning Kit EIZO “ScreenCleaner” For the latest information about accessories, refer to our web site. http://www.eizoglobal.com Chapter 10 Specifications... -
Page 58: Chapter 11 Glossary
Chapter 11 Glossary Color Space YUV and RGB, etc. are available. YUV expresses the color by using the luminance (Y), the color difference of Blue (U), and the color difference of Red (V). RGB does this by using the gradation of the 3 colors, Red (R), Green (G), and Blue (B). DisplayPort This is the interface standard for image signals standardized in accordance with VESA. - Page 59 HDCP (High-bandwidth Digital Content Protection) Digital signal coding system developed to copy-protect the digital contents, such as video, music, etc. This helps to transmit the digital contents safely by coding the digital contents sent via the DVI or HDMI connector on the output side and decoding them on the input side. Any digital contents cannot be reproduced if both of the equipments on the output and input sides are not applicable to HDCP system.
-
Page 60: Appendix
Forum, Inc. EIZO, the EIZO Logo, ColorEdge, DuraVision, FlexScan, FORIS, RadiCS, RadiForce, RadiNET, Raptor, and ScreenManager are registered trademarks of EIZO Corporation in Japan and other countries. ColorNavigator, EcoView NET, EIZO EasyPIX, EIZO Monitor Configurator, EIZO ScreenSlicer, G-Ignition, Re/Vue, Screen Administrator and UniColor Pro are trademarks of EIZO Corporation. -
Page 61: License / Copyright
All other company and product names are trademarks or registered trademarks of their respective owners. License / Copyright A round gothic bold bit map font designed by Ricoh is used for the characters displayed on this product. Appendix... -
Page 62: Fcc Declaration Of Conformity
Trade name: EIZO Model: FORIS FS2735 is in conformity with Part 15 of the FCC Rules. Operation of this product is subject to the following two conditions: (1) this device may not cause harmful interference, and (2) this device must accept any interference received, including interference that may cause undesired operation. -
Page 63: Fcc Caution / Canadian Notice
FCC CAUTION / Canadian Notice FCC CAUTION Changes or modifi cations not expressly approved by the party responsible for compliance could void the user’s authority to operate the equipment. This transmitter must not be co-located or operated in conjunction with any other antenna or transmitter. Canadian Notice This device complies with Industry Canada license-exempt RSS standard(s). -
Page 64: Ce Declaration Of Conformity
Direktive 1999/5/ES. pertinentes de la directive 1999/5/CE. Hér með lýsir EIZO Corporation yfi r því EIZO Corporation týmto vyhlasuje, že að Monitor er í samræmi við grunnkröfur Íslenska Slovensky Monitor spĺňa základné... -
Page 65: Limited Warranty
Warranty. EIZO and Distributors will cease to hold or store any parts (excluding design parts) of the Product upon the expiration of fi ve (5) years after the production of such parts is discontinued. In repairing the monitor, EIZO and Distributors will use renewal parts which comply with our QC standards. - Page 66 Rahmen dieser Garantie hinaus hinsichtlich des Produkts keinerlei Haftung oder Verpfl ichtung dem Erstkäufer oder Dritten gegenüber. Nach Ablauf von fünf (5) Jahren nach Ende der Produktion solcher Teile werden EIZO und Vertriebshändler keine Teile (mit Ausnahme von Konstruktionsteilen) mehr vorhalten und lagern. EIZO und seine Vertriebspartner verpfl ichten sich, bei einer etwaigen Reparatur des Monitors ausschließlich Produkte gemäß...
- Page 67 EIZO et ses distributeurs utiliseront des pièces de rechange conformes à nos normes de contrôle qualité. Si l'unité ne nden Teil nicht peut pas être réparée en raison de son état ou de la rupture de stock d'une pièce adéquate, EIZO et ses Distributeurs sch gegen ein peuvent proposer le remplacement par un produit aux performances équivalentes au lieu de le réparer.
- Page 68 EIZO y los distribuidores utilizarán repuestos que cumplan con nuestros estándares de control de calidad. Si no utilizzeranno p se puede reparar la unidad debido a su estado o si se han agotado las existencias de una pieza importante, EIZO y sus causa delle su distribuidores podrían ofrecerle sustituirlo por un producto con rendimiento equivalente en lugar de repararlo.
-
Page 69: Garanzia Limitata
GARANZIA LIMITATA EIZO Corporation (a cui si farà riferimento da qui in poi con “EIZO”) ed i Distributori autorizzati da EIZO (a cui si farà riferimento da qui in poi con “Distributori”) garantiscono, secondo i termini di questa garanzia limitata (a cui si farà... - Page 70 Nät skärmen repareras använder EIZO och distributörer reservdelar som uppfyller våra kvalitetsstandarder. Om enheten inte kan repareras på grund av skicket eller att en del inte fi nns i lager kan EIZO och dess leverantörer erbjuda sig att byta ut produkten mot en produkt med likvärdig prestanda istället för att reparera den.
- Page 71 «Εγγύηση»), στον αρχικό αγοραστή (στο εξής «Αρχικός Αγοραστής») ο οποίος αγόρασε το προϊόν που καθορίζεται στο παρόν έγγραφο (στο εξής «Προϊόν») από την EIZO ή τους Διανομείς, η οποία εξασφαλίζει ότι η EIZO και οι Διανομείς, σύμφωνα με τη διακριτή ευχέρειά τους, είτε θα επισκευάσουν είτε θα αντικαταστήσουν το Προϊόν χωρίς χρέωση εάν ο...
- Page 72 этой Гарантии. Компания EIZO и ее дистрибьюторы хранят детали изделия (за исключением деталей внешней конструкции) не более 5 (пять) лет после прекращения его выпуска. В случае ремонта монитора EIZO и Дистрибьюторы будут 本保证书仅对于 использовать запчасти, которые соответствуют нашим стандартам QC (контроль качества). Если устройство...
- Page 73 有限责任保证书 EIZO Corporation(以下简称 EIZO )和 EIZO 授权的经销商(以下简称 经销商 ) ,接受并依照本有限责任保证书(以 下简称 保证书 )之条款,向从 EIZO 和经销商购买本文中所规定产品(以下简称 产品 )的原买方(以下称 原买方 ) 提供保证 : 在保证期内(规定如下) ,如果原买方发现按本产品所附使用说明书(以下简称 用户手册 )所述方式正常使 用本产品过程中,本产品出现故障或损坏,EIZO 和经销商根据其独自的判断免费修理或更换该产品。 本保证期限定为 (i) 自本产品购买之日起的五 (5) 年期间或限定为到达 (ii) 使用本产品 3 万小时的期限 (以下简称 保证期限 ) 。...
-
Page 74: Recycling Information
Cuando desee deshacerse de este producto, póngase en contacto con un distribuidor o una fi lial de su país. Encontrará las direcciones de contacto en el sitio web de EIZO que se indica a continuación. http://www.eizoglobal.com Informazioni sul riciclaggio Per lo smaltimento e il riciclaggio del presente prodotto, attenersi alle normative vigenti nel proprio paese per ridurre l’impatto ambientale. - Page 75 Ten produkt po zużyciu powinien być zbierany i przetwarzany zgodnie z krajowymi przepisami dotyczącymi ochrony środowiska. Wyrzucając ten produkt, należy skontaktować się z lokalnym dystrybutorem lub partnerem. Adresy kontaktowe można znaleźć we wskazanej poniżej witrynie internetowej fi rmy EIZO. http://www.eizoglobal.com...
- Page 76 Při likvidaci produktu musí být produkt vyzvednut a recyklován podle zákonů příslušné země, aby nedocházelo k zatěžování životního prostředí. Zbavujete-li se produktu, kontaktujte distributora nebo pobočku ve své zemi. Kontaktní adresy jsou uvedeny na následující webové stránce společnosti EIZO. http://www.eizoglobal.com Ringlussevõtu alane teave...
- Page 77 вашата страна за да се намали замърсяването на околната среда. Когато искате да се освободите от този продукт, моля свържете се с търговския му представител или със съответните органи отговарящи за това във вашата страна. Данните за връзка с нас са описани на следния Интернет сайт на EIZO: http://www.eizoglobal.com Informaţie referitoare la reciclare Acest produs, când debarasat, trebuie colectat şi reciclat conform legislaţiei ţării rspective ca să...
- Page 78 3rd Edition-March, 2016 03V25577C1 Copyright © 2015-2016 EIZO Corporation All rights reserved. (U.M-FS2735)
Need help?
Do you have a question about the foris FS2735 and is the answer not in the manual?
Questions and answers