Table of Contents
Advertisement
Advertisement
Table of Contents

Subscribe to Our Youtube Channel
Related Manuals for ECOVACS DEEBOT R95


Summary of Contents for ECOVACS DEEBOT R95
- Page 1 Instruction Manual...
- Page 2 Instruction Manual, please contact our Customer Service Center where a technician can address your specific problem or question. For more information, please visit the ECOVACS ROBOTICS official website: www.ecovacs.com The Company reserves the right to make technological and/or design changes to this product for continuous improvement.
-
Page 3: Table Of Contents
Contents 1. Important Safety Instructions.................2 2. Package Contents and Technical Specifications..........4 2.1 Package Contents....................4 2.2 Specifications......................4 2.3 Product Diagram.....................5 3. Operating and Programming...................7 3.1 Notes Before Cleaning..................7 3.2 Quick Start.......................9 3.3 Cleaning Mode Selection...................12 3.4 Programming the Robot..................14 3.5 Additional Settings....................15 3.6 Optional Advanced Wet/Dry Mopping System..........16 3.7 Voice Reporting....................18 4. -
Page 4: Important Safety Instructions
1. Important Safety Instructions When using an electrical appliance, basic precautions should always be followed, including the following: READ ALL INSTRUCTIONS BEFORE USING THIS APPLIANCE. SAVE THESE INSTRUCTIONS 1. This Appliance is not intended to be used by children under 8 or anyone lacking knowledge on proper use. - Page 5 28. When not using the Charging Dock for a long period of time, please unplug it. 29. The Appliance must be used in accordance with the directions in this Instruction Manual. ECOVACS ROBOTICS cannot be held liable or responsible for any damages or injuries caused by improper use.
-
Page 6: Package Contents And Technical Specifications
2. Package Contents and Technical Specifications 2.1 Package Contents Instruction Manual Robot Charging Dock Instruction Manual (4) Side Brushes (2) Advanced Wet/ Advanced Wet/Dry Measuring Cup App Leaflet Dry Cleaning Cloths Reservoir Reservoir Cleaning Direct Suction Option Solution 2.2 Specifications Model DR95 14.8V DC... -
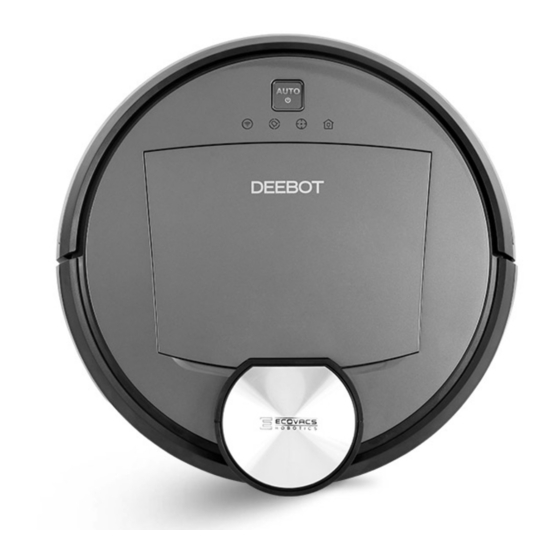
Page 7: Product Diagram
2. Package Contents and Technical Specifications 2.3 Product Diagram Robot 14 16 1. Top Cover 7. Charging Contacts 14. Multi-Function Cleaning 2. AUTO Mode Button 8. Side Brushes Tool 9. Main Brush 3. Anti-Collision Sensors 15. RESET Button and Bumper 10. - Page 8 2. Package Contents and Technical Specifications Charging Dock 1. Infrared Signal Generators 2. Charging Dock Pins Dust Bin 1. Dust Bin Handle 2. Filter Net 3. High Efficiency Filter 4. Dust Bin Cover 5. Dust Bin Lock Advanced Wet/Dry Cleaning Cloth and Advanced Wet/Dry Reservoir 1.
-
Page 9: Operating And Programming
3. Operating and Programming 3.1 Notes Before Cleaning DEEBOT uses SMART NAVI technology (a proprietary laser scanning and mapping system) to scan and generate a map of the home environment. Before operating DEEBOT, take a few moments to survey the area to be cleaned and remove any obstacles. - Page 10 3. Operating and Programming Please be aware that DEEBOT may climb Please be aware that DEEBOT needs at on objects of less than 1.8cm (0.7") height. least an 11cm (4.3”) clearance to clean under Please remove these objects if possible. furniture without complications.
-
Page 11: Quick Start
3. Operating and Programming 3.2 Quick Start Remove the protection strip from the robot’s Bumper before use. Charging Dock Placement Place the Charging Dock on a level floor surface against the wall with the base perpendicular to the ground. Keep the immediate area 1.5m (5’) in front of the charger and 0.5m (1.6’) on both sides of the charger clear of objects and... - Page 12 3. Operating and Programming Power ON Open the Top Cover. Move the Power Switch to the “ ” position. The Control Panel illuminates, DEEBOT plays a musical tune and the AUTO Mode Button flashes. DEEBOT is powered ON when the AUTO Mode Button stays illuminated.
- Page 13 3. Operating and Programming Attach a Cleaning Cloth, if Desired To use the robot’s optional Advanced Wet/ Dry Mopping System, attach the Advanced Wet/Dry Reservoir and an Advanced Wet/ Dry Cleaning Cloth before use. When using the mopping feature, fold area rug edges under themselves so DEEBOT avoids the rug.
-
Page 14: Cleaning Mode Selection
DEEBOT has several Cleaning Modes to choose from to effectively clean different floors. Cleaning Modes are selected using the ECOVACS App or using the AUTO Mode Button on the robot’s Control Panel. For more information on the ECOVACS App, see the separate ECOVACS App leaflet. - Page 15 DEEBOT can also be sent back to the Charging Dock at any time by pressing the Return to Charger Mode Button on the main screen of the ECOVACS App. When the Mapping Indicator on DEEBOT is illuminated, DEEBOT is in the process of generating the map, and cannot be sent back to the Charging Dock.
-
Page 16: Programming The Robot
Schedule the Cleaning Time Using Time Scheduling DEEBOT can be programmed weekly to clean once per day at specific times using the ECOVACS App. Open the ECOVACS App. Press “ ” in top right corner on the App’s main screen. Set new... -
Page 17: Additional Settings
3. Operating and Programming 3.5 Additional Settings Virtual Boundary A Virtual Boundary blocks DEEBOT from cleaning a specified area. To set a Virtual Boundary, press on the App’s map screen. Press and hold the Virtual Boundary to delete. DEEBOT can be manually directed to blocked areas using in the App. -
Page 18: Optional Advanced Wet/Dry Mopping System
3. Operating and Programming 3.6 Optional Advanced Wet/Dry Mopping System DEEBOT has an optional mopping system that uses an Advanced Wet/Dry Cleaning Cloth attached to the Advanced Wet/Dry Reservoir. The Advanced Wet/Dry Cleaning Cloth automatically damp mops and then dries the floor to a spotless clean. Do not use the mopping system on carpet. - Page 19 3. Operating and Programming Attach the Advanced Wet/Dry Reservoir to the bottom of the robot. Insert the tabs on the Advanced Wet/Dry Reservoir into the Advanced Wet/Dry Reservoir Slots on the bottom of the robot until you hear a click. Start Remove Select the desired Cleaning Mode.
-
Page 20: Voice Reporting
3. Operating and Programming 3.7 Voice Reporting Voice Report Situation or Solution My Cleaning time is scheduled. Scheduled cleaning time is set. My Cleaning time is cancelled. Scheduled cleaning time is cancelled. Place the robot on an even surface so it can regain My Driving Wheel is suspended. -
Page 21: Maintenance
4. Maintenance Before performing cleaning and maintenance on DEEBOT, power OFF the robot and unplug the Charging Dock. 4.1 Dust Bin and Filters Open the robot’s Top Cover and remove the Dust Bin. Open the Dust Bin Lock and empty the Dust Bin. Remove the filters. -
Page 22: Advanced Wet/Dry Cleaning Cloth And Advanced Wet/Dry Reservoir
If the Advanced Wet/Dry Reservoir does not run out of water after DEEBOT cleans for 60 minutes, the water outlets on the Reservoir are clogged. Clean the Reservoir with the provided ECOVACS Reservoir Cleaning Solution according to the instructions on the bottle of the solution. -
Page 23: Main Brush And Side Brushes
4. Maintenance 4.3 Main Brush and Side Brushes * A Multi-Function Cleaning Tool is provided for easy maintenance. Handle with care, this cleaning tool has sharp edges. Main Brush Turn the robot over. Push both buttons under the Main Brush towards the center of the robot. Remove the main brush cover. -
Page 24: Other Components
4. Maintenance 4.4 Other Components Use the Multi-Function Cleaning Tool to cut Wipe the Anti-Drop Sensors with the brush off and remove any hair tangled around the or the felt side of the Multi-Function Cleaning Universal Wheel. Tool to maintain their effectiveness. Wipe the Charging Contacts and Charging Dock Pins clean with the brush or the felt side of the Multi-Function Cleaning Tool to maintain their effectiveness. -
Page 25: Troubleshooting
5. Troubleshooting Please use this chart to troubleshoot common problems using DEEBOT R9. Malfunction Possible Causes Solutions DEEBOT is not powered ON. Power ON DEEBOT. Be sure that the robot’s Charging Contacts have made a connection DEEBOT has not made a with the Charging Dock Pins. - Page 26 Update your smartphone’s operating Your smartphone’s operating system. The ECOVACS App runs on iOS system needs to be updated. 9.0 and above, Android 4.0 and above. To reset DEEBOT, press the RESET Button using a needle for 5 seconds. DEEBOT is...
- Page 28 DR95-000-IM2016R01...
Need help?
Do you have a question about the DEEBOT R95 and is the answer not in the manual?
Questions and answers