Advertisement
Quick Links
Advertisement

Related Manuals for LENCO PO DO-153


Summary of Contents for LENCO PO DO-153
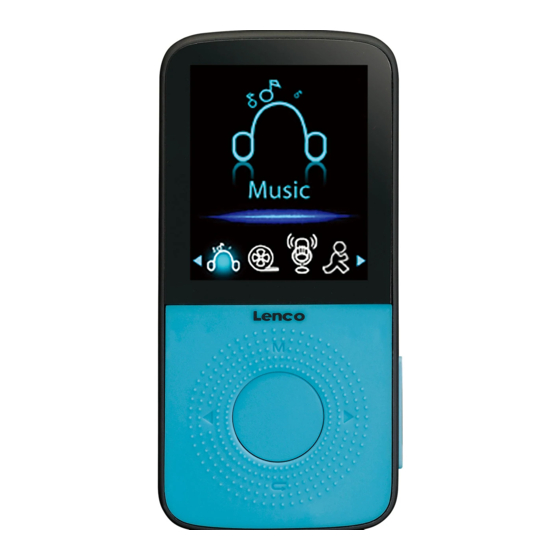
- Page 1 USER’S MANUAL PODO-153 Media Player with Pedometer For more information: www.lenco.com...
- Page 2 Lenco suggest retaining the packaging in case for future transport of the product. If at any time in the future you should need to dispose of this product please note that: All batteries and accumulators need to be removed from this product (Removal of Waste Batteries and Accumulators).
- Page 3 1. Get to know the controls on Player Item Description TFT LCD Display M Button (Call Menu) Center ( ) Button (On / Off, Play / Pause, Enter) Button (Previous / Fast-Rewind) Button (Next / Fast-Forward) Button (Previous Menu / Exit) Earphone Output Jack (3.5mm Stereo) Micro SD Memory Card Slot Micro USB Port (PC Connection / Charge)
- Page 4 a. Charging the Battery: You can charge the player battery in two ways: • Connect player to your computer. Or, • Use the USB power charger. (not included) b. Connection and Charging: • Once you have connected player with computer / power charger, then you will see the “Connect”...
- Page 5 the player. Or, • If you’re using a Windows PC, you can also eject player in My Computer or by clicking the “Safely Remove Hardware” icon in the Windows system tray, select the correspondence name of USB Device and choose “Stop”...
- Page 6 Setup Game eBook 5. Use Setup Menu You might need to set date & time or change some default setting as you desired in setup menu before you start to use the player. • To go into setup menu, from main menu, choose “Setup” by using and Center ( ) buttons, a “Setup”...
- Page 7 • To change LCD backlight, choose “LCD set” > choose “Dark mode”, a level bar with number appear then chose “0 (always On) / 5 / 10 / 15 / 20 / 25 / 30 / 35 / 40 / 45 / 50 seconds” as you desired by using the Center ( buttons.
- Page 8 • From main menu, choose “Music” by using the and Center ( button, a “Music Now Playing” screen appears to use. Music Now Playing a. To Play Music • In Music Now Playing screen, press the Center ( ) button to start the play.
- Page 9 7. Use Music Submenu in Music Stop Mode You might need to selecting folders for music play and delete music files. To do this: • In Music Now Playing screen, press the Center ( ) button to stop the playing music if player is in playing. Then, •...
- Page 10 h. Exit • Select Exit to back to music now playing screen. 8. Use Music Submenu in Music Playing Mode You might need to do some changes for music playing, such as repeat, EQ settings for music files… etc. To change setting: •...
- Page 11 10. Use Movie Submenu in Movie Stop Mode You might need to selecting folders, delete movie files and set repeat for movie play. To do this: Press the Center ( button to stop the playing movie and return • to Movie Now Playing screen; Then, Press the M button, a movie submenu appear, then choose “Local / •...
- Page 12 If your video file is different or you found format error, convert it to the correct format through the included “AMV Video converter” as follows. This tool can be used to transform those video files into AMV format files on the computer before upload them to your player.
- Page 13 then click OK to confirm. • Click to start converting. • After conversion, the AMV files will play automatically for preview. • And now the converted AMV file is ready to transfer, you can simply copy and place those converted AMV files to the media player. Note: Only pixels in can be supported.
- Page 14 13. Use Record Submenu (in Stop Mode) You might need to change the folder locations which want to store the record file and / or change record quality to better compression values. • In Now Recording screen at stop mode, press the M button to pop-up a the “Record Submenu”...
- Page 15 Running”, a level bar with number appear to choose; • Input your average stride length, for example 80 (cm) by using the and Center ( ) buttons. (Refer to “Stride Length Measurement” mentioned as below.) • Once average stride length is set, it will return to pedometer menu. (Adjustment range can be set from 10 ~ 200 (cm) by increase / decrease 1 cm step) •...
- Page 16 • To exit pedometer counts function and Save the personal counts record, press the M button, a confirm screen appear, then choose “Yes” to confirm and the screen will return to main menu. The record is saved. Or, • Choose “No” to cancel and continue the pedometer counts. c.
- Page 17 • For hearing protection; a beep warning will be heard from earphone, or display warning pop-up on TFT screen, when every time you increase the volume level and reach to the default setting level which may exceed 85dB. Press the M button to accept the warning and enter into the volume control for increase the level and until to maximum level.
- Page 18 g. The unit may not count steps correctly in the following conditions: The unit is not positioned correctly. • When the front of the main unit is placed in the angle of less than 60° or horizontal to the ground. NOTE: The unit can count steps even if it is slanted or placed upside-down, or if the main unit is perpendicular to the ground.
- Page 19 Voice Now Playing a. To Play and Pause Recorded Voice files • In Voice Now Playing screen; • Press the Center ( ) button to start play the recorded file. • Press the Center ( ) button to pause • Press it again to resume. b.
- Page 20 Then press the Center ( ) button to play. b. Delete File • Choose “Delete file” a list menu appear, and then choose which voice file that you want to delete by using the and Center ( ) buttons; • Once file is selected, press the Center ( ) button and choose Yes to confirm or No to cancel.
- Page 21 choose; a. Local Folder • Choose “Local folder” a list menu appear, and then choose your desired folder and file by using the and Center ( ) button. • Once photo file is selected, press the button again to play. b.
- Page 22 21. Use eBook Menu You can use the player as a text reader with supported file format (.TXT). a. To open eBook • From main menu, choose “eBook” by using the and Center ( buttons, a list menu appears to use; •...
- Page 23 confirm; • All eBook files will be deleted once “YES” is selected and confirmed, a “Deleting” screen appear for a while and deleting process is in progress, then “Empty disk!” message will show on screen for few seconds. e. Exit Select Exit for back to eBook list menu screen.
- Page 24 be existed for choose. Go into the card folder and choose you desired folder(s) and file(s) to • play. To take out the Micro SD memory card, please turn Off the player before • you do so. 25. Reset the Device In some circumstances, the device may encounter dead halt during use.
- Page 25 Freq. Responses 20Hz to 20000Hz > 60dB Music Format MP3 / WMA 32Kbps – 320kbps Movie Format 160x128 (max.) Recorder Coding 32 / 64 / 128 / 256kbps Picture Format JPEG / BMP eBook Format Sensor 3 Axis Accelerometer Display Steps Record, Distance, Speed, Pedometer Calories Burned and Time used...
- Page 26 See picture illustrate show as below for reference: 30. Guarantee Lenco offers service and warranty in accordance with the European law, which means that in case of repairs (both during and after the warranty period) you should contact your local dealer.
- Page 27 Directive (2014/30/EU) and the Low Voltage Directive (2014/35/EU) issued by the Commission of the European Community. Hereby, Lenco Benelux BV, Thermiekstraat 1a, 6361 HB Nuth, The Netherlands, declares that this product is in compliance with the essential requirements and other relevant provisions of Directive 1999/5/EC.
Need help?
Do you have a question about the PO DO-153 and is the answer not in the manual?
Questions and answers