Alto-Shaam 7.14 Installation And Maintenance Manual
Combination oven/steamer
Hide thumbs
Also See for 7.14:
- Installation manual (39 pages) ,
- Installation manual (38 pages) ,
- Installation manual (37 pages)
Table of Contents
Advertisement
I NSTALLATION
7 • 14 , 10 • 18
W 1 6 4 N 9 2 2 1 W a t e r S t r e e t
: (262)251-3800 (800)558-8744
P H O N E
.
.
.
P R I N T E D I N U
S
A
C O M B I T H E R M
COM BI NATION OVEN / STEAM ER
E L E C T R I C M O D E L S
E L E C T R O N I C C O N T R O L
®
G
P. O . B o x 4 5 0
.
.
./
U
S
A
C A N A DA
®
and
MAI NTENANC E
2 0 • 2 0
&
E C
G
M e n o m o n e e F a l l s , W i s c o n s i n 5 3 0 5 2 - 0 4 5 0
G
: (262)251-7067 (800)329-8744
FA X
E C
G
U . S . A .
G
.
.
./
www.alto-shaam.com
U
S
A
C A N A DA
#6004/18 • 1/02
Advertisement
Table of Contents

Related Manuals for Alto-Shaam 7.14


Summary of Contents for Alto-Shaam 7.14
- Page 1 M e n o m o n e e F a l l s , W i s c o n s i n 5 3 0 5 2 - 0 4 5 0 U . S . A . : (262)251-3800 (800)558-8744 : (262)251-7067 (800)329-8744 www.alto-shaam.com P H O N E FA X C A N A DA C A N A DA #6004/18 •...
-
Page 2: Table Of Contents
COMBITHERM INSTALLATION MAINTENANCE ® Installation Transportation............... 1 Installation Site . -
Page 3: Installation
COMBITHERM INSTALLATION SPECIFICATIONS ® TRANSPORTATION TRANSPORTATION Upon receipt of the Combitherm Combination Oven- Steamer, check the exterior of the shipping crate for any physical damage that could result in damage to the contents. If the oven was not received from the carrier in an upright position, there is a stronger possibility of THIS SIDE UP concealed damage. -
Page 4: Electrical Installation
COMBITHERM INSTALLATION SPECIFICATIONS ® ELECTRICAL INSTALLATION ELECTRICAL INSTALLATION An electrical wiring diagram is located behind the control panel on the left side of the oven. The oven must be installed by a qualified electrician. This appliance must be branch circuit protected with proper ampacities, in accordance with the wiring diagram located in the electrical compartment of the oven. -
Page 5: Water Drainage
COMBITHERM INSTALLATION SPECIFICATIONS ® WATER DRAINAGE WATER DRAINAGE The oven must discharge through an indirect waste pipe by means of an air gap. The drain thread is 1-1/4" NPT. A union is required. Install a 1-1/4" (32mm) diameter drain line. The drain line must always be a positive gradient away from the Combitherm oven and not more than 12"... -
Page 6: Installation Checklist
COMBITHERM INSTALLATION SPECIFICATIONS ® I M M E D I A T E L Y F O L L O W I N G I N S T A L L A T I O N : B E F O R E S W I T C H I N G P O W E R S W I T C H “ O N ” ✔... -
Page 7: Installation Data
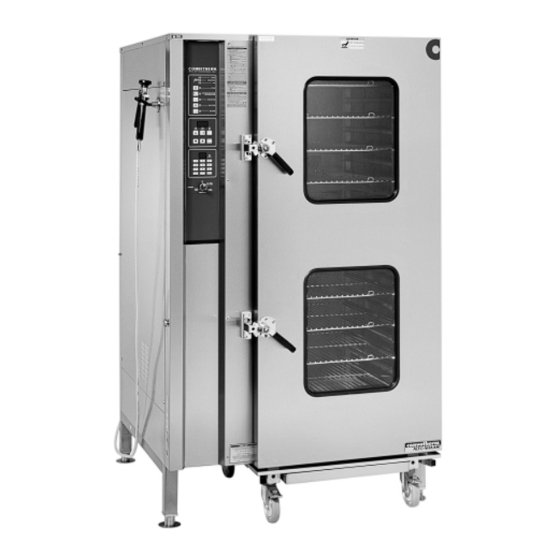
COMBITHERM INSTALLATION SPECIFICATIONS ® Model 7•14 10•18 20•20 Installation Data Type of unit Counter-top Counter-top Floor Standing Pan capacity 7 Full-size sheet pans* 10 Full-size sheet pans* 20 Full-size sheet pans* (18" x 26" x 1") (18" x 26" x 1") (18"... -
Page 8: Installation Dimensions
COMBITHERM INSTALLATION SPECIFICATIONS ® Dimensions 7•14 10•18ec 20•20ec A Unit depth 40-3/16" (1020mm) 40-3/16" (1020mm) 45-7/16" (1153mm) B Unit width 40-5/16" (1030mm) 40-5/16" (1030mm) 43-7/16" (1100mm) C Unit height 32-1/2" (825mm) 44" (1118mm) 74-13/16" (1900mm) D Electrical connection (E1) 4" (100mm) 4"... -
Page 9: Accessories / Options
COMBITHERM INSTALLATION SPECIFICATIONS ® Options and Accessories Description 7•14 10•18 20•20 Chicken Roasting Rack — 6 chicken capacity (fits on full-size pan) SH-23000 SH-23000 SH-23000 — 8 chicken capacity (fits on full-size pan) SH-23619 SH-23619 SH-23619 — 10 chicken capacity SH-22634 SH-22634 SH-22634... -
Page 10: Control Panel Operating Functions
Key used to set oven cooking time in 1. STEAM YELLOW ® minutes. Steam generator is activated. Indicator will DIST. BY ALTO-SHAAM INC. ® 14. DOWN ARROW flash until steam generator is in the stand-by Key used to decrease the time or mode with a water temperature of 150°F (65°C). -
Page 11: Fahrenheit Or Celsius Selection
COMBITHERM ELECTRONIC CONTROL OPERATION ® Fahrenheit or Celsius Selection Turn Power Switch " " and wait a minimum of two minutes. FULL SPEED After two minutes, press the Temp Key, the Timer Key, and the HALF DRAIN SPEED OPEN COOL DOWN Start/Stop Key at the same time. - Page 12 COMBITHERM ELECTRONIC CONTROL OPERATION ® Cooking Programs CONTINUED Superheated Steam and Convection Program (212° to 482°F/100° to 250°C) Press Superheated Steam and Convection Program Key. The indicator light will illuminate. Press Temperature Key. The main display will indicate the last set cooking temperature.
- Page 13 COMBITHERM ELECTRONIC CONTROL OPERATION ® Cooking Programs CONTINUED Retherm Program (212° to 482°F/100° to 250°C) Press Retherm Program Key and indicator light will appear. Press Temperature Key. Last set cook temperature is displayed. To reset the cook temperature from the previous operation, press the Up and Down Arrow Keys to change the value shown in the display.
-
Page 14: Cool Down Function
COMBITHERM ELECTRONIC CONTROL OPERATION ® Cooking Programs CONTINUED Core Temperature Program (34° to 210°F/ 1° to 99°C) As an alternative to timer operation, this option can be used in any program mode to cook by sensing internal product temperature. In any program mode other than steam, it is necessary to preheat the oven for a minimum of 5 minutes before loading product. -
Page 15: Programmable Menu ( Deluxe Model Option )
COMBITHERM ELECTRONIC CONTROL OPERATION ® Programmable Menu DELUXE MODEL OPTION Programming Begin programming with the oven with the power switch in the FULL SPEED " " position. HALF DRAIN SPEED Turn oven power switch " " to the full fan speed position. Two OPEN COOL DOWN flashing points will appear in the Main display and a buzzer will... - Page 16 COMBITHERM ELECTRONIC CONTROL OPERATION ® Programmable Menu CONTINUED Previewing a Preset Cooking Program Enter the assigned program number on the Program Keypad that you wish to review. The Main display will indicate the selected program number preceded by the letter "P." The Program Display will indicate the total number of cooking steps programmed.
- Page 17 COMBITHERM ELECTRONIC CONTROL OPERATION ® Programmable Menu DELUXE MODEL OPTION Cooking Note: After programming a specific product into memory in the Programmable Menu, it is very important to make a permanent record of the product and the program number assigned. Turn oven Power Switch "...
-
Page 18: Cleaning And Maintenance
COMBITHERM CLEANING and MAINTENANCE ® Establishing a routine cleaning and maintenance schedule will help keep the oven running at top operating efficiency and is an absolutely essential part of a comprehensive sanitation program. Good equipment maintained and kept clean works better and lasts longer. PROTECT YOUR INVESTMENT. -
Page 19: Oven Cleaning
7. Rinse the interior and all sprayed components STEAM EXIT with the hand-held hose. Make certain to PORT thoroughly rinse all surfaces to remove any COMBITHERM ® MFG. BY ALTO-SHAAM INC. ® STEAM STEAM BY- cleaning solution residue. Use a non-abrasive CONVECTION... -
Page 20: Steam Generator Flush / Back-Flush
Decalcification DECALCIFICATION PORT PERFORM ONCE A MONTH STEAM EXIT PORT in place of the daily steam generator flush. COMBITHERM ® MFG. BY ALTO-SHAAM INC. WITH THE OVEN AT ROOM TEMPERATURE ® STEAM STEAM BY- CONVECTION PASS PORT 1. Turn the power switch to the "Drain Open"... -
Page 21: Preventive Maintenance
COMBITHERM CLEANING and MAINTENANCE ® Preventive Maintenance In addition to the routine maintenance procedures to prevent scale and lime build-up from forming in the steam generator system, there are several other steps to be taken for both sanitation purposes, and to keep the oven running at top operating efficiency. These additional safeguards will help prevent inconvenient down-time and costly repairs. -
Page 22: Trouble Shooting Checklist
COMBITHERM SERVICE and TROUBLE SHOOTING ® T R O U B L E S H O O T I N G C H E C K L I S T P R I O R TO S TA R T I N G S E RV I C E W O R K , OV E N M U S T B E D I S C O N N E C T E D F R O M T H E P OW E R S O U R C E . P R O B L E M P O S S I B L E C A U S E R E M E D Y... - Page 23 COMBITHERM SERVICE and TROUBLE SHOOTING ® P R O B L E M P O S S I B L E C A U S E R E M E D Y S T E A M G E N E R ATO R T RO U B L E 5.
-
Page 24: Motor Trouble
COMBITHERM SERVICE and TROUBLE SHOOTING ® P R O B L E M P O S S I B L E C A U S E R E M E D Y S T E A M G E N E R ATO R T RO U B L E 8. -
Page 25: Convection Trouble
COMBITHERM SERVICE and TROUBLE SHOOTING ® P R O B L E M P O S S I B L E C A U S E R E M E D Y C O N D E N S E R T RO U B L E ( CONTINUED 12. - Page 26 C O M B I T H E R M S E RV I C E a n d T RO U B L E S H O OT I N G ® P R O B L E M P O S S I B L E C A U S E R E M E D Y G E N E R A L T RO U B L E (...
-
Page 27: Parts List
C O M B I T H E R M S E RV I C E a n d T RO U B L E S H O OT I N G ® C O M B I T H E R M R E P L A C E M E N T PA R T S D e s c r i p t i o n 7 •... - Page 28 COMBITHERM SERVICE and TROUBLE SHOOTING ® C O M B I T H E R M R E P L A C E M E N T PA R T S D e s c r i p t i o n 7 •...
-
Page 29: Rack Management Parts List
R a c k M a n a g e m e n t Tr o l l e y S y s t e m 7 • 1 4 C o m b i t h e r m a n d 1 0 • 1 8 W Wa r m e r DESCRIPTION QUAN. - Page 30 R a c k M a n a g e m e n t Tr o l l e y S y s t e m 1 0 • 1 8 C o m b i t h e r m a n d 1 0 • 1 8 W Wa r m e r DESCRIPTION QUAN.
- Page 47 # 6 0 0 4 / 1 8 C O M B I T H E R M I N S TA L L AT I O N A N D M A I N T E N A N C E M A N UA L .
- Page 48 # 6 0 0 4 / 1 8 C O M B I T H E R M I N S TA L L AT I O N A N D M A I N T E N A N C E M A N UA L .
- Page 49 This warranty is in lieu of all other warranties expressed or implied and Alto-Shaam, 7. Save any packages and packing material for further inspection Inc. neither assumes or authorizes any persons to assume for it any by the carrier.
Need help?
Do you have a question about the 7.14 and is the answer not in the manual?
Questions and answers