Table of Contents
Advertisement
Quick Links
ADDING
NEW
DIMENSIONS TO KINETICS
This guide provides an introduction to the use of the
It covers the running of simple experiments
Email: techsup@photophysics.com
NEW
DIMENSIONS TO KINETICS
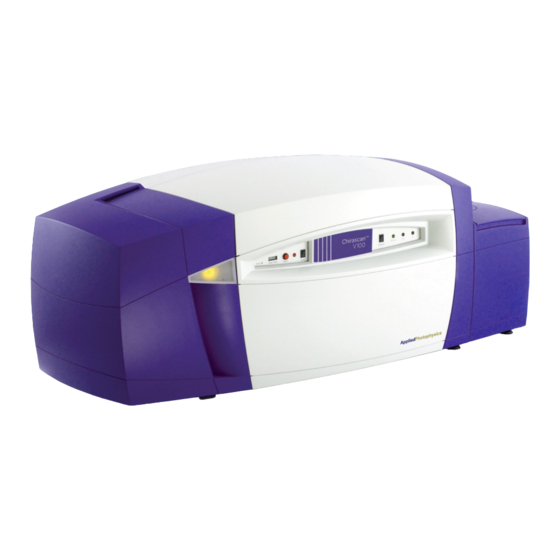
Chirascan
Quick Start
Chirascan CD Spectrometer.
and the basic use of the software.
Applied Photophysics Limited
203/205 Kingston Road
Leatherhead KT22 7PB
United Kingdom
Tel: +44 (0)1372 386537
(USA) 1- 800 543 4130
Fax: +44 (0)1372 386477
URL: www.photophysics.com
2.1
ADDING
Updated January 2006
Advertisement
Table of Contents

Related Manuals for Applied Photophysics Chirascan CD

Summary of Contents for Applied Photophysics Chirascan CD
-
Page 1: Quick Start
ADDING Chirascan Quick Start DIMENSIONS TO KINETICS This guide provides an introduction to the use of the Chirascan CD Spectrometer. It covers the running of simple experiments and the basic use of the software. Applied Photophysics Limited 203/205 Kingston Road... -
Page 2: Table Of Contents
Contents 2.0 Introduction........................ 3 2.1 Purging........................3 2.2 Power-up........................4 2.3 Launching the software....................6 2.3.1 Measuring a CD baseline and spectrum..............7 2.3.1.1 The CD baseline....................7 2.3.1.2 The CD spectrum ....................10 2.4 Viewing and manipulating spectra and traces............11 2.4.1 Viewing spectra .................... -
Page 3: Introduction
2.0 Introduction APL recommends that new users read this guide to familiarise themselves with the basic operation of the instrument. The operations covered are start up of hardware and software, use of the Chirascan instrument control and data acquisition software to collect CD spectra and baselines, use of the graphics software to carry out common operations on the data and to save data appropriately and conversion of data formats for export to third-party programs. -
Page 4: Power-Up
The lamp housing and monochromator are hermetically sealed, which means that once the initial purge is complete, you should not need to repeat the high flow-rate purge, unless the hermetic seals are broken (during service or lamp replacement) or if the instrument has been left idle for many days. - Page 5 NB Once the lamp is struck, it is strongly recommended that it be left on for the duration of the work planned for the day. Repeated powering up and powering down will lead to instabilities (see previous paragraph) and will reduce the life of the lamp. However, if it is necessary to restart the lamp after running, it must be allowed to cool for about 15 minutes before re-ignition is attempted.
-
Page 6: Launching The Software
2.3 Launching the software On starting the computer, among other icons on the desktop, you will see two associated with the Chirascan. They are called Chirascan and Chirascan Viewer. Double-click on the Chirascan icon to launch the Pro-Data interface. The Pro-Data interface The Pro-Data interface enables you to configure the instrument and to manage experiments. -
Page 7: Measuring A Cd Baseline And Spectrum
function. In addition, there is an unlabelled panel for controlling shutter function and detector high voltage. 2.3.1 Measuring a CD baseline and spectrum NB When you put a sample into the sample chamber, it is inevitable that a small quantity of air will be introduced to the low-volume light path within the purge tubes in the sample chamber. - Page 8 spectrum of the sample. Note that Circular Dichroism, millidegrees and Absorbance are selected by default. Monochromator panel in the Pro-Data interface Set the lower and upper wavelength limits of the scan range for your experiment in the Monochromator panel of the Pro-Data interface – these will normally be the same for both CD baseline and CD spectrum.
- Page 9 In general, when working at the instrument, it is recommended that you launch Pro-Data Viewer from Pro-Data using the icon in the toolbar. This will ensure that local communication is established, that Pro-Data viewer will work correctly as a real-time display and that the data will be saved to a DataStore in the current working directory.
-
Page 10: The Cd Spectrum
2.3.1.2 The CD spectrum Once you have measured the CD baseline, replace the blank with your sample. As the conditions for the measurement of the sample will be identical to those for the blank, go straight to the Spectrum panel of the SPC and click on Start. The CD spectrum will be recorded under the conditions applied to the blank and stored as a file called Spectrumxxxx.dsa, unless you have specified a different seed name (see previous paragraph). -
Page 11: Viewing And Manipulating Spectra And Traces
2.4 Viewing and manipulating spectra and traces If you have just measured a CD spectrum, the Pro-Data viewer launchpad and graphical display will be running and the CD spectrum will be displayed. If Pro-Data viewer is not running, launch it using the icon in the Pro-Data interface toolbar or, if the Pro-Data interface is not running either, from the desktop icon (see note at end of section 2.3.1.1). -
Page 12: Viewing Spectra
2.4.1 Viewing spectra With the Pro-Data viewer launchpad open, navigate in the usual way until you find the file of interest and double click on it. In the above figure, the file ‘Lyso 0_5mm PL0009.dsa’ has been chosen; Pro-Data viewer graphical display opens and displays the data contained in the file (below). -
Page 13: Comparing Spectra
interest, e.g. absorbance, from the Window, New Window… menu. Alternatively, right- click on the y-axis label and choose the property from the pop-up menu that appears. Choosing another property – here, absorbance will be displayed 2.4.2 Comparing spectra If you have collected some spectra that you wish to compare, simply drag-and-drop the files of interest to the graphical display window. -
Page 14: Manipulating Spectra
2.4.3 Manipulating spectra There are simple rules governing the manipulation of spectra in Pro-Data Viewer. Firstly, choose Selection On from the Trace menu. Alternatively, you can click the Trace Selection icon from the toolbar or toggle selection on and off using the space-bar on the keyboard when the display window is active. - Page 15 With one or more traces thus selected, click the right mouse button anywhere in the display panel to open the select mode. Trace selected (note marks), right-click mouse button to reveal pop-up menu. Click on Select All if you wish to select every trace that is displayed; click on Save All if you wish to save every trace that is displayed, regardless of selection;...
- Page 16 Selecting traces using the Select… drop-down menu. In the above figure there are six traces displayed, three overlaying spectra and three overlaying baselines. To select a trace, simply click on the trace name and then on OK or Select. To select more than one trace, hold down the Ctrl key and click on the trace names of interest or, if the traces appear in the list sequentially, select the first one and ν...
- Page 17 Three spectra selected Once the traces are selected, choosing the Select sub-menu (below) will enable you to carry out certain operations on the selected traces. Click on Save if you wish to save the selected trace or traces, which will be saved to a new file.
- Page 18 Example displaying the Select sub-menu Click on Subtract baseline (Add baseline) if you wish to subtract (add) a previously defined baseline from the selected trace or traces. A new trace or set of traces will appear in the display window: these are the baseline-subtracted (added) spectra. NB the only reason that you might wish to add a baseline is if you have previously subtracted one in error.
- Page 19 and fine structure of the spectrum. It is important that inspection of the residual be carried out to ensure that an appropriate smooth has been applied. As the original raw data is left intact, the cycle can be repeated and the number of points quickly optimised. Smoothed spectrum of vitamin B12, showing residual randomly distributed about zero.
- Page 20 Spectrum of vitamin B12, original (red) and offset by 5mdeg (blue). Choosing Convert CD Units… in the Select sub-menu opens a dialogue box enabling you to convert the units in which the circular dichroism is expressed. For example, if you made your measurement in millidegrees, open the drop-down menu to choose from delta absorbance (delta A), mean residue molar delta A, mean residue molar ellipticity, molar delta A or molar ellipticity.
-
Page 21: Example Of Spectrum Manipulation
2.4.4 Example of spectrum manipulation A typical experiment will yield a CD spectrum and the corresponding CD baseline. Data manipulation might well involve baseline subtraction followed by a Savitsky- Golay smooth. The operations are described below. With Pro-Data viewer open, double click on the file that contains the CD spectrum data –... - Page 22 Now select the trace from which you wish to subtract the baseline and choose Subtract baseline. A third trace will appear - the baseline-subtracted CD spectrum. Subtracting a baseline from a spectrum. To leave the baseline-subtracted spectum only on the display, select the original spectrum and using the drop-down menu, click on Remove.
- Page 23 Select and remove the trace which is not baseline-subtracted… …to leave the baseline-subtracted spectrum only. 2.23 Updated January 2006...
- Page 24 To complete the example manipulation, we will now smooth the baseline-subtracted data. Select this spectrum and choose the Select sub-menu Smooth option. Smoothing the background-corrected CD spectrum. For the conditions under which the CD spectrum in this example was collected, a limited Savitsky-Golay smooth is appropriate –...
- Page 25 Smoothed spectrum, showing residual randomly distributed about zero. The data represented in the above figure can be saved as a new file. Note that all original data is left intact and can be restored at any time. Note also that the random distribution of points about zero in residual trace proves that the smoothing has not distorted the data in any way.
-
Page 26: Saving Data
2.5 Saving data If you have performed one of the operations in Pro-Data viewer (e.g. smoothing, averaging or baseline subtraction), added comments, or altered the data in any other way you may want to save the data. This can be done using the Save All or Select sub- menu Save option in Pro-Data viewer, as described in Section 2.4.4 and shown below. -
Page 27: Converting Data For Use With Third-Party Programs
2.5.1 Converting data for use with third-party programs This icon is installed on your desktop and will start the APL data converter. The APLDataConverter program has explicit instructions written in the window. In default configuration, it will convert one or more DataStore (Chirascan) files into spreadsheet-friendly comma-separated-variable (.CSV) files that will be written back to the same directory as the original files, which are left intact. -
Page 28: Printing
2.6 Printing The Print icon in Pro-Data viewer will print the current Pro-Data viewer display together with the principal experimental parameters and any comments you have added to the file. 2.7 Operating notes and hints 2.7.1 Selecting Step Size (SS) The step size will determine the number of data points that make up a spectrum. -
Page 29: Selecting Pathlength And Concentration
decreases) with decreasing wavelength. The SBW range for the shorter wavelengths are given in the table below. Wavelength SBW range 170nm 0.1nm < SBW < 3nm 180nm 0.1nm < SBW < 4nm 200nm 0.1nm < SBW < 6nm 2.7.3 Selecting pathlength and concentration The pathlength and concentration of a sample should be chosen so the absorbance value at any given point in the spectrum does not exceed 2 absorbance units (a.u). -
Page 30: Nitrogen Purge Flow-Rate
2.7.5 Nitrogen purge flow-rate It is essential that the system be purged with nitrogen constantly whilst the lamp is on. Failure to do this will result in the formation of ozone, which is damaging to health and to the optical components in Chirascan (see Section 2.1). N2 flow-rates* (start-up) Lmin N2 flow-rates (normal) Lmin Lamp housing... -
Page 31: Example Spectra
There are several files installed on the hard disk that can be used as templates to set up the Pro-Data interface or as didactic tools to familiarise oneself with the use of Pro-Data viewer. The files are held in C:\Program Files\Applied Photophysics\Chirascan\Examples\ and can be accessed using the icon from the Pro-Data interface toolbar and in Pro-Data viewer by navigating to the directory in the launchpad. -
Page 32: Alcohol Dehydrogenase
2.8.1 Alcohol dehydrogenase Scan range 260 – 175 nm Spectral bandwidth 1 nm Step size 0.5 nm Pathlength 0.1 mm Concentration 1 mg/mL Solvent Water Time per point Total N2 flow 5 Lmin-1 2.32 Updated January 2006... -
Page 33: Bovine Serum Albumin
2.8.2 Bovine serum albumin Scan range 260 – 175 nm Spectral bandwidth 1 nm Step size 0.5 nm Pathlength 0.1 mm Concentration 1 mg/mL Solvent Water Time per point Total N2 flow 5 Lmin-1 2.33 Updated January 2006... -
Page 34: Cytochrome C
2.8.3 Cytochrome C Scan range 260 – 175 nm Spectral bandwidth 1 nm Step size 0.5 nm Pathlength 0.1 mm Concentration 1 mg/mL Solvent Water Time per point Total N2 flow 5 Lmin-1 2.34 Updated January 2006... -
Page 35: Lysozyme
2.8.4 Lysozyme Scan range 260 – 185 nm Spectral bandwidth 2 nm Step size 0.5 nm Pathlength 0.5 mm Concentration 0.2 mg/mL Solvent Water Time per point 1s, 3-scan average Total N2 flow 5 Lmin-1 2.35 Updated January 2006... -
Page 36: Vitamin B12
2.8.5 Vitamin B12 Scan range 600 - 200 nm Spectral bandwidth 1 nm Step size 1 nm Pathlength 1 mm Concentration 1 mg/mL Solvent Water Time per point Total N2 flow 5 Lmin-1 2.36 Updated January 2006... -
Page 37: Tris(Ethylenediamine) Cobalt Chloride
2.8.6 Tris(ethylenediamine) cobalt chloride Scan range 800 - 250 nm Spectral bandwidth 1 nm Step size 1 nm Pathlength 10 mm Concentration 1 mg/mL Solvent Water Time per point 0.5 s Total N2 flow 5 Lmin-1 2.37 Updated January 2006... -
Page 38: Camphor Sulphonic Acid
2.8.7 Camphor sulphonic acid Scan range 300 - 180 nm Spectral bandwidth 0.5 nm Step size 0.5 nm Pathlength 1 mm Concentration 0.6 mg/mL Solvent Water Time per point 1.75 s Total N2 flow 5 Lmin-1 2.38 Updated January 2006... -
Page 39: R)-3-Methylcyclopentanone
2.8.8 (R)-3-methylcyclopentanone Scan range 350 - 175 nm Spectral bandwidth 0.1 nm Step size 0.1 nm Pathlength 10 mm Concentration Vapour Solvent Time per point Total N2 flow 5 Lmin-1 2.39 Updated January 2006... -
Page 40: Troubleshooting
2.9 Troubleshooting If the instrument does not operate properly, please use the following table to eliminate trivial causes of incorrect function. There is also a ‘frequently asked questions’ section on the website (http://www.photophysics.com/faqch.php) to which you should refer if the table below does not help. If the symptoms persist, please contact Applied Photophysics Technical Support (contact details at front of manual) with a detailed description of your difficulty and the name of your spectrometer. -
Page 41: Notes
2.10 Notes Use these blank pages for your own notes. 2.41 Updated January 2006... -
Page 42: Updated January
2.42 Updated January 2006...
Need help?
Do you have a question about the Chirascan CD and is the answer not in the manual?
Questions and answers