
Subscribe to Our Youtube Channel
Related Manuals for Horizon Hobby A-10


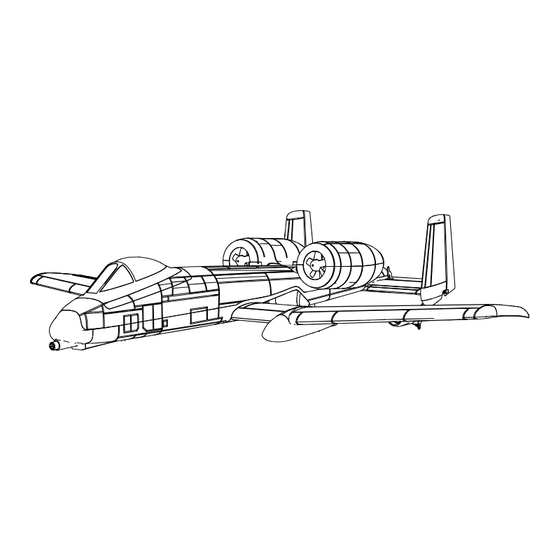
Summary of Contents for Horizon Hobby A-10
- Page 1 A-10 ™ Instruction Manual Bedienungsanleitung Manuel d’utilisation Manuale di Istruzioni...
- Page 2 Do not use with incompatible components or alter this product in any way outside of the instructions provided by Horizon Hobby, LLC. This manual contains instructions for safety, operation and maintenance. It is essential to read and follow all the instructions and warnings in the manual, prior to assembly, setup or use, in order to operate correctly and avoid damage or serious injury.
-
Page 3: Table Of Contents
Table of Contents Transmitter and Receiver Binding ......4 Post Flight Checklist ...........12 Low Voltage Cutoff (LVC) ........4 Troubleshooting Guide ........12 ESC/Receiver Arming, Battery Installation and Troubleshooting Guide (Continued) ......13 Center of Gravity ...........5 Limited Warranty ..........13 Control Centering ..........6 Warranty and Service Contact Information ..15 Factory Control Horn Settings........6 IC Information .............15 Dual Rates and Expos ...........6... -
Page 4: Transmitter And Receiver Binding
Transmitter and Receiver Binding For a list of compatible DSM2/DSMX transmitters, please visit www.bindnfly.com Binding Procedure CAUTION: When using a Futaba transmitter with a Spektrum DSM module, you must reverse the ® throttle channel and rebind. Refer to your Spektrum module manual for binding and failsafe instructions. Refer to your Futaba transmitter manual for instructions on reversing the throttle channel. -
Page 5: Esc/Receiver Arming, Battery Installation And Center Of Gravity
ESC/Receiver Arming, Battery Installation and Center of Gravity NOTICE: Always keep material or debris away from the intake. When armed, the rotor will turn in response to throttle movement and could ingest in any loose objects. Arming the ESC/receiver also occurs after binding as previously described, but subsequent connection of a flight battery requires the following steps. -
Page 6: Control Centering
Control Centering Before the first flights, or in the event of an accident, make sure control surfaces are centered when the transmitter controls and trims are neutral. The transmitter sub-trim must be set to zero. Adjust the linkages mechanically if the control surfaces are not centered. Use of the transmitter sub-trims may not correctly center the aircraft control surfaces due to the mechanical limits of linear servos. -
Page 7: Landing Gear Removal
Landing Gear Removal 1. Carefully pull the gear straight out of the retainer clip that secures it into the fuselage. When needed, assemble in reverse order. When the landing gear is reinstalled, make sure the nose gear is angled forward as shown. -
Page 8: Control Direction Test
Control Direction Test You should bind your aircraft and Transmitter Aircraft Reaction transmitter before doing these tests. Command Move the controls on the transmitter to Down make sure the aircraft control surfaces Elevator move correctly and in the proper direction. Make sure the tail linkages move freely and that paint or decals are not adhered to them. -
Page 9: As3X Direction Test
AS3X Direction Test Aircraft You should bind your aircraft and AS3X Reaction movement transmitter before doing these tests. Move the controls on the transmitter to make sure the aircraft control surfaces move correctly and in the proper direction. Make sure the tail linkages move freely and that paint or decals are not adhered to them. -
Page 10: Flying Tips And Repairs
(5–10 degrees above the horizon). After the model gains altitude, decrease the throttle as you desire. The A-10 has a high thrust line. If the model is not launched with enough airspeed or the throttle is added quickly at very low airspeed the aircraft will pitch down slightly. -
Page 11: Motor Service
Motor Service Disassembly CAUTION: DO NOT handle the rotor or motor while the flight battery is connected. Personal injury could result. 1. The lower half of the nacelle hatch is secured to the top half using glue and clear tape. Carefully cut the clear tape and follow the seam with a knife to cut the glue and remove the bottom half of the nacelle. -
Page 12: Post Flight Checklist
Post Flight Checklist 1. Disconnect the flight battery from the ESC 5. Store the flight battery apart from the (Required for safety and battery life). aircraft and monitor the battery charge. 2. Power OFF the transmitter. 6. Make note of the flight conditions and flight plan results, planning for future flights. -
Page 13: Troubleshooting Guide (Continued)
What this Warranty Covers OTHER THAN THE EXPRESS WARRANTY ABOVE, HORIZON MAKES NO OTHER WARRANTY OR Horizon Hobby, LLC, (Horizon) warrants to the REPRESENTATION, AND HEREBY DISCLAIMS ANY original purchaser that the product purchased (the AND ALL IMPLIED WARRANTIES, INCLUDING, “Product”) will be free from defects in materials and... - Page 14 Horizon reserves the right to inspect any and all that provides tracking and insurance for lost or Product(s) involved in a warranty claim. Service or damaged parcels, as Horizon is not responsible for replacement decisions are at the sole discretion merchandise until it arrives and is accepted at our of Horizon.
-
Page 15: Warranty And Service Contact Information
877-504-0233 websales@horizonhobby.com Sales 800-338-4639 sales@horizonhobby.co.uk Units 1–4 , Ployters Rd, Service/Parts/Sales: Staple Tye Harlow, Essex, United Kingdom Horizon Hobby Limited +44 (0) 1279 641 097 CM18 7NS, United Kingdom Horizon Technischer service@horizonhobby.de Service Christian-Junge-Straße 1 Germany 25337 Elmshorn, Germany Sales: Horizon Hobby... -
Page 16: Compliance Information For The European Union
Compliance Information for the European Union Instructions for disposal of WEEE by users in the European Union EFL UMX A-10 BNF Basic (EFLU3750) This product must not be disposed EU Compliance Statement: Horizon Hobby, LLC of with other waste. Instead, it is the hereby declares that this product is in compliance user’s responsibility to dispose of their... -
Page 17: Replacement Parts
13.500 Kv, 100 mm 13,500Kv, 100mm turbine, câble 13.500 Kv, cavo 100 Kabel Wire 100mm Main Wing: UMX Hauptflügel: UMX A-10 UMX A-10 BL - Aile Ala principale: UMX EFLU3701 A-10 BL principale A-10 BL Fuselage w/ UMX A-10 BL - Fusoliera con Rumpf mit Zubehör:... -
Page 18: Optional Parts And Accessories
– Optional Parts and Accessories – – Optionale Bauteile und Zubehörteile – – Pièces optionnelles et accessoires – – Parti opzionali e accessori – Part # • Nummer Description Beschreibung Description Descrizione Numéro • Codice Charger Lead with E-flite Ladekabel m/ Câble de charge avec Cavo di carica con EFLA230... - Page 19 © 2016 Horizon Hobby, LLC. E-flite, AS3X, UMX, DSM, DSM2, DSMX, ModelMatch, Bind-N-Fly, Celectra and the Horizon Hobby logo are trademarks or registered trademarks of Horizon Hobby, LLC. The Spektrum trademark is used with permission of Bachmann Industries, Inc. Futaba is a registered trademark of Futaba Denshi Kogyo Kabushiki Kaisha Corporation of Japan.
Need help?
Do you have a question about the A-10 and is the answer not in the manual?
Questions and answers