
Related Manuals for SanDisk CLIP VOICE


Summary of Contents for SanDisk CLIP VOICE
- Page 1 Clip+UM809-ENG ® SanDisk Clip Voice Wearable MP3 Player & Voice Recorder User Manual 2016...
- Page 2 • To prevent possible hearing damage, do not listen to high volume levels for long periods. • Fully understand user manual before use. • Ensure your player is at low volume levels or power off when not in use. For more information on safety, go to: www.sandisk.com/support/clipvoice...
-
Page 3: Table Of Contents
SanDisk Clip Voice Overview ............. 8 Features ....................8 Minimum System Requirements ............... 8 Package Contents .................. 8 Clip Voice MP3 Player & Voice Recorder: At-A-Glance ........9 Playback Screen ................9 Main Menu Options: Six Core Functions ............ 11 Product Capacities ................. 12 Battery .................... - Page 4 Chapter 5 ................17 Music Loading Music ..................17 Drag and Drop (Windows) ..............17 Drag and Drop (Mac) ................18 Playing Music ..................18 Options Menu ..................19 Add Song to GoList ................19 Remove Song from GoList ..............19 Repeat ....................
- Page 5 Chapter 10 ................35 Learn More, Service, and Warranty Information ......... 35 Getting Technical Support ............... 35 THIRD PARTY INTELLECTUAL PROPERTY NOTICE ........35 MANUFACTURER’S LIMITED WARRANTY ........... 36 FCC REGULATION ................. 36...
-
Page 6: Chapter 1
Your MP3 player is equipped with a variety of features. To help you maximize your listening pleasure, SanDisk would like to advise you that it is important to use the headphones with your MP3 player at a safe hearing level. - Page 7 Battery This product contains Lithium-ion polymer battery. The battery should be replaced only by SanDisk and its authorized service providers. SanDisk and its authorized service providers will ensure the spent battery is recycled properly, since batteries should always be recycled or disposed separately from household waste.
-
Page 8: Chapter 2
Congratulations on your purchase of a SanDisk Clip Voice! The SanDisk® Clip Voice MP3 player is a voice recorder that doubles as an MP3 player. With 16GB* capacity, it holds up to 4,000 songs2 or 100 hours of voice recordings1. It also delivers up to 20 hours of continuous music or voice playback on a single charge3 and it is light and durable so you can take it wherever you go. -
Page 9: Clip Voice Mp3 Player & Voice Recorder: At-A-Glance
Clip Voice MP3 Player & Voice Recorder: At-A-Glance Tips & Troubleshooting... -
Page 10: Playback Screen
Playback Screen 1-Play/Pause 6-Song No./ all songs 2-Battery Indicator 3-Album Art 5-Song progress- Shuffle 4-Artist Name/ Song name Play/Pause Displays the music or recording playback status. Battery Indicator Displays the battery status. Album Art Displays the picture of the Album Art of currently playing content. Artist name/ song Displays the artist name and the song name name... -
Page 11: Main Menu Options: Six Core Functions
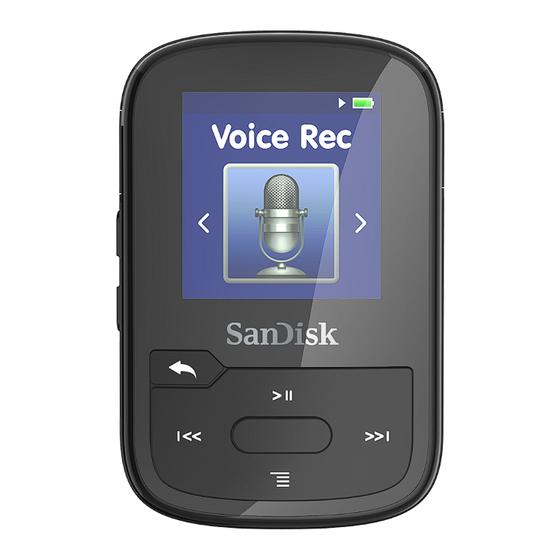
Sport – Functioning time saves logs and displays Books – Browse and listen to audiobooks log details. DRM. Settings – View or customize the SanDisk Voice Record – Record hours of lectures or the player features. longest sermon. Tips & Troubleshooting... -
Page 12: Product Capacities
Battery life for voice recording is 15 hours To use the player for the very first time, you should fully charge the battery. You can charge your SanDisk player through the USB port of your computer, a car adapter (not included), or AC adapter (not included). -
Page 13: Firmware
It is highly recommended to update the firmware after the first battery charge. For the latest firmware information and instructions to update your player, go to http://www.sandisk.com/support/clipvoice. Earbuds The Clip Voice includes earbuds with built-in microphone for voice recording. Tips & Troubleshooting... -
Page 14: Chapter 3
CHAPTER 3 This chapter describes basic user operation instructions for the SanDisk Clip Voice. Basic Operation Power/Select Button The Power button is located in the center of the player. It can be used to turn the player on or off, and also to select player options. -
Page 15: Connecting Player To A Windows Or Mac Computer
2. Connect the smaller end of the USB cable into the player’s dock connector. 3. The display screen will show “Charging” (shown below). 4. The player will appear in My Computer as “Clip Voice.” Disconnecting the Player from a Windows Computer Simply disconnect the USB cable from the player after you have finished charging, transferring, or upgrading firmware. -
Page 16: Chapter 4
This chapter describes how to use your SanDisk Clip Voice for voice recording. Voice Recording The SanDisk Clip Voice is ready to record hours of lectures or the longest sermon. Initiating Voice Recording 1. Use the navigation pad to the Recordings menu 2. -
Page 17: Chapter 5
SanDisk Clip Voice and play music on the device. Music The SanDisk Clip Voice is able to store thousands of songs in various formats and provides multiple listening options that can be customized to suit your individual needs. -
Page 18: Drag And Drop (Mac)
To drag-and-drop music to the player from a Mac computer, follow these steps: Connect the player to your computer using the USB cable. Double-click on the removable disk icon named Clip Voice that appears on your desktop. Double-click on the Music folder. -
Page 19: Options Menu
4. Press the Forward button to skip to the next song or press-and-hold to fast forward. 5. Press the Previous button once to go back to the beginning of the current song or press Previous button twice to go back to the previous song. Press-and-hold the Previous button to rewind. -
Page 20: Repeat
Repeat This option repeats the song. 1. Select Repeat. 2. Press Select to toggle and choose a repeat mode: • Off: No repeat of tracks • Song: Repeat the current track • All: Repeat all selected tracks at the current menu location 3. -
Page 21: Creating Playlists
How do I create a playlist on the Clip Voice player? The Clip Voice player only supports M3U playlists and they must be stored in the same directory as the files in the playlist. The process below gives instructions for creating an M3U playlist using Windows Media Player for the use on the player. - Page 22 Step 2 - Drag the folder into Windows Media Player Music...
- Page 23 Step 3 - Click the drop down menu and select "Save list as" Step 4 - Brows to the same directory where the files you want in the playlist are saved, choose M3U playlist as the file type, name the playlist and click save Music...
- Page 24 You should now see the M3U playlist saved alongside the songs you want in the play list Step 5 - Drag the entire folder containing the songs and the M3U playlist to the Music folder of the Clip Voice The Playlist will now be available under the Playlist option in the Music menu. Music...
- Page 25 Adding album art to a track using Windows Media Player Windows Media Player will typically import any media files left in the documents folder and any continuing sub folders. If the files are not importing or they are stored in a separate location then they must be manually added to the library.
- Page 26 2. Click Library on the top bar (Left Bar for WMP10). 3. Select and right-click the file(s) you wish to update. 4. Select Find Album Info. Quick Tips: The SanDisk Clip Voice album art maximum supported resolution is 480 x 480 with a maximum file size of 450kb Music...
-
Page 27: Chapter 6
SanDisk Clip Voice. Books The SanDisk Clip Voice is able to store multiple audiobooks and podcasts. An audiobook is a recorded book in .mp3 format and a podcast is a recorded broadcast in .mp3 format. Loading Audiobooks and Podcasts You can transfer music from your computer to the player using the drag-and-drop method. -
Page 28: Playing Audiobooks And Podcasts
Playing Audiobooks and Podcasts Audiobooks To play audiobooks, follow these steps: 1. Select Books from the Main Menu. 2. Select Audiobooks, then select Audiobooks. Audiobooks are listed in A-Z order. 3. Select desired audiobook. 4. Select desired Chapters. After Chapter is selected, audiobook will play and audiobook name/chapter will be displayed. -
Page 29: Chapter 7
This chapter describes how to use the SanDisk Clip Voice sport mode. Sport The SanDisk Clip Voice has a built-in timer function that records time in hours, minutes, seconds, and hundredths of a second. The timer function also allows you to record and save Laps. -
Page 30: Recording Laps
Recording Laps To record laps, follow these steps: 1. After starting the timer, press the Select button to record a Lap. Quick Tips: A Lap will save and record time between Laps. Lap 1 will save and record time from the beginning, then Lap 2 will save and record the amount of time that has lapsed between the previous Lap and the current time. -
Page 31: Chapter 8
This chapter describes how to customize the SanDisk Clip Voice settings. Settings The SanDisk Clip Voice has multiple settings that allow you to customize the device to match your own personal listening preferences. System Settings To select system setting options, follow these steps: 1. -
Page 32: Brightness
Brightness This option adjusts the display brightness for better viewing in different lighting environments. 1. Select Brightness. 2. Press the Previous or Forward buttons to set the contrast level (20% to 100%). 3. Press the Select button to confirm choice. Power Saver This option turns the player off automatically when it has been idle for a defined period of time. -
Page 33: Replay Gain
Playback Volume level upward to compensate for the “average” level of your library’s track adjustment. Quick Tips: For more information, please visit: http://kb.sandisk.com/app/answers/detail/a_id/430 Language This option selects different languages for the player’s display screen. -
Page 34: Restore
Restore This option restores the player to the original factory settings it had when the device was first purchased. CAUTION: This option will delete all customized settings from the player. 1. Select Restore. 2. Choose desired option by selecting Yes or No. 3. -
Page 35: Learn More, Service, And Warranty Information
Before you contact Technical Support, we encourage you to read the Tips and Troubleshooting section to see if your question is covered there. If you have questions about the use or features of your SanDisk player as well as other SanDisk products, please visit our Knowledgebase at kb.sandisk.com www.sandisk.com/support... -
Page 36: Manufacturer's Limited Warranty
MPEG Layer-3 audio coding technology licensed from Fraunhofer IIS and Thompson. MANUFACTURER’S LIMITED WARRANTY For Technical Support over the Internet, visit: www.sandisk.com/wug FCC REGULATION FCC Compliance Statement The statements should be displayed in the user manual: changes or modifications not expressly approved by the party responsible for compliance could void the user’s authority to operate the equipment. ... - Page 37 Americas of SanDisk products. SanDisk is a trademark of Western Digital Corporation or its affiliates, registered in the U.S. and other countries. The Bluetooth® word mark and logos are registered trademarks owned by Bluetooth SIG, Inc. and any use of such marks by Western Digital Technologies, Inc. is under license.
Need help?
Do you have a question about the CLIP VOICE and is the answer not in the manual?
Questions and answers