Table of Contents
Advertisement
Advertisement
Table of Contents

Related Manuals for Electrolux EWW1122DW


Summary of Contents for Electrolux EWW1122DW
- Page 1 EWW1122DW WashEr & DrYEr UsEr ManUal...
-
Page 2: Table Of Contents
Contents 1. IMPoRtAnt sAFetY InstRUCtIons 2. PARts AnD FeAtURes 3. InstALLAtIon InstRUCtIons 4. InLet Hose ConneCtIon 5. tHe FUnCtIon oF ContRoL PAneL 6. WAsHInG PRoGRAM 7. WAsHInG PRoCeDURe AnD seLeCtIon 8. GUIDe FoR otHeR UseFUL PRoGRAMs 9. MAIntenAnCe 10. HoW to CLeAn tHe FILteR 11. - Page 3 English tHe FIRst RADICAL teCHnoLoGY AnD AIR BUBBLe WAsHInG sYsteM In tHe WoRLD Economic wash system With artificial intelligence, the washer uses • Your washer is adopted the Radical minimum energy and water by selecting Technology that can sterilize your optimal water level and washing time.
-
Page 4: Important Safety Instructions
1. IMPoRtAnt sAFetY InstRUCtIons WARNING! The instructions shall include the substance of the following warning: The instructions shall include the substance of the following. IMPORTANT • Do not dry unwashed items in the tumble ReAD ALL InstRUCtIons BeFoRe Use dryer. - Page 5 English 1. IMPoRtAnt sAFetY InstRUCtIons (CONT’D) the appliance or attempt any servicing unless specifically recommended in the user maintenance instructions or in published user-repair instructions that you understand and have the skills to carry out. • Do not add gasoline, dry-cleaning solvents, or other flammable or explosive substances to the wash water.
- Page 6 1. IMPoRtAnt sAFetY InstRUCtIons (CONT’D) Save these instructions Operation instructions WARNING! Grounding instructions This appliance must be grounded. In To reduce the risk of fire, electric shock, the event of malfunction or breakdown, or injury to persons, read the IMPORTANT...
-
Page 7: Parts And Features
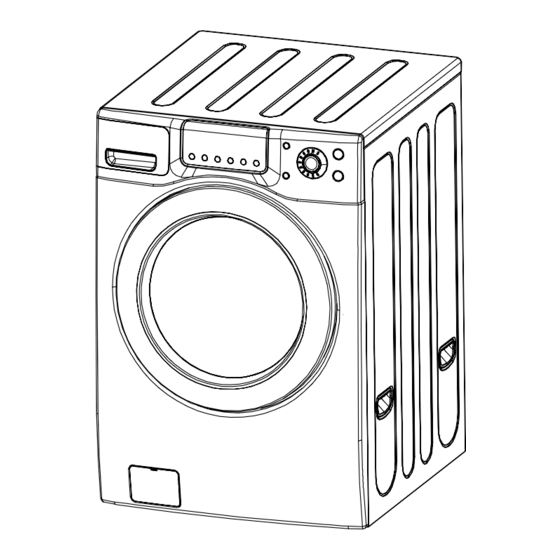
English 2. PARts AnD FeAtURes The parts and features of your washer are illustrated on the page. Get familiar with all parts and features before using your washer. NOTE The drawings in the book may vary from your washer model. They are designed to show the different features of all models coverd by this book, so your model may not include all the features. -
Page 8: Installation Instructions
3. InstALLAtIon InstRUCtIons Removing transit bolts 2. Unscrew the 4 bolts with the spanner supplied. Keep the 4 bolts and spanner 1. Before operating the washer, remove the for future use. (Fig.2) transit bolts (4eA) along with the rubber. -
Page 9: Drain System
English 3. InstALLAtIon InstRUCtIons (CONT’D) Drain system • Never forget to install drain hose before operating your washer. • Open the packing box, and there is a drain hose inside the drum. • Connect the drain hose to the drain ca. -
Page 10: Electrical Connection
10 www.electrolux.com 3. InstALLAtIon InstRUCtIons (CONT’D) Electrical connection Repairs to the washing machine must only be carried out by qualified personnel. • Do not use an extension cord or double Repairs carried out by inexperienced adaper. persons may cause injury or serious •... - Page 11 English 3. InstALLAtIon InstRUCtIons (CONT’D) Minimum installation spacing for Level floor recessed area installation. • Allowable slope under entire washer The following dimensions shown are for the is 1°. minimum spacing allowed. • To minimize noise and vibration, the washer MUST be installed on a solidly Additional spacing should be considered for constructed floor.
-
Page 12: Inlet Hose Connection
12 www.electrolux.com 4. InLet Hose ConneCtIon The washer should be connected to the water mains using new hose sets and old hose sets should not be reused. In using only one water tap or in case of only one water inlet valve, connect the inlet hose to the cold water inlet valve. - Page 13 English 4. InLet Hose ConneCtIon (CONT’D) Loading • Drop items into washer loosely. Items • Mix large and small items in each load. should move easily through wash Load evenly to maintain washer balance. water for best cleaning and wrinkle-free An unbalanced load can make the results.
-
Page 14: The Function Of Control Panel
14 www.electrolux.com 5. tHe FUnCtIon oF ContRoL PAneL Delicates Heavy Duty Clean Me Woollens Cottons Power Regular Favourites Whites Start/ Eco-Whites Wash & Dry Pause Unlock/ Wash Add Clothes Delicates Heavy Duty Clean Me Woollens Power Start/ Cottons Pause Regular 1. - Page 15 English 5. THE FUNCTION OF CONTROL PANEL (CONT’D) Spin Spin Change 8. You can select the 9. You can select the spin speed you want dry condition you desired program and each lamp is want and each lamp turned on when that is turned on when that course is selected.
-
Page 16: Washing Program
16 www.electrolux.com 6. WAsHInG PRoGRAM Proper Maximum Program Fabric type Default setting Temp. Load Wash: main wash Cotton, linen, Rinse: 2 Full laundry Cottons 40°C towels, shirts, sheets Spin: Extra High specified Soil level: Light First check whether Wash: main wash... -
Page 17: Washing Procedure And Selection
English 7. WAsHInG PRoGRAM AnD seLeCtIon 7. 1 Cottons Program Put the laundry into the Drum and put the detergent and softerner into the detergentcase. Then close the Door. • Put the detergent into the main wash room (I I marking) and prewash room(I marking) in the detergent case. - Page 18 18 www.electrolux.com 7. WAsHInG PRoGRAM AnD seLeCtIon (CONT’D) 7.2 Eco-Whites Program Put the laundry into the Drum and put the detergent and softerner into the detergent case. Then close the Door. • Put the detergent into the main wash room (I I marking) and prewash room (I marking) in the detergent case.
- Page 19 English 7. WAsHInG PRoGRAM AnD seLeCtIon (CONT’D) 7.3 Whites Program Put the laundry into the Drum and put the detergent and softerner into the detergent case. Then close the Door. • Put the detergent into the main wash room (I I marking) and prewash room (I marking) in the detergent case.
- Page 20 20 www.electrolux.com 7. WAsHInG PRoGRAM AnD seLeCtIon (CONT’D) 7.4 Favourites Put the laundry into the Drum and put the detergent and softerner into the detergent case. Then close the Door. • Put the detergent into the main wash room (I I marking) and prewash room(I marking) in the detergent case.
- Page 21 English 7. WAsHInG PRoGRAM AnD seLeCtIon (CONT’D) 7.5 Regular Program Put the laundry into the Drum and put the detergent and softerner into the detergent case. Then close the Door. • Put the detergent into the main wash room (I I marking) in the detergent case.
- Page 22 22 www.electrolux.com 7. WAsHInG PRoGRAM AnD seLeCtIon (CONT’D) 7.6 Woollens Program Put the laundry into the Drum and put the detergent and softerner into the detergent case. Then close the Door. • Put the detergent into the main wash room(I I marking) in the detergent case.
- Page 23 English 7. WAsHInG PRoGRAM AnD seLeCtIon (CONT’D) 7.7 Heavy Duty Program Put the laundry into the Drum and put the detergent and softerner into the detergent case. Then close the Door. • Put the detergent into the main wash room (I I marking) and prewash room(I marking) in the detergent case.
- Page 24 24 www.electrolux.com 7. WAsHInG PRoGRAM AnD seLeCtIon (CONT’D) 7.8 Delicates Program Put the laundry into the Drum and put the detergent and softerner into the detergent case. Then close the Door. • Put the detergent into the main wash room (I I marking) in the detergent case.
- Page 25 English 7. WAsHInG PRoGRAM AnD seLeCtIon (CONT’D) 7.9 Wash Program Put the laundry into the Drum and put the detergent and softerner into the detergent case. Then close the Door. • Put the detergent into the main wash room (I I marking) in the detergent case.
- Page 26 26 www.electrolux.com 7. WAsHInG PRoGRAM AnD seLeCtIon (CONT’D) 7.10 Wash & Dry Program Put the laundry into the Drum and put the detergent and softerner into the detergent case. Then close the Door. • Put the detergent into the main wash room (I I marking) in the detergent case.
- Page 27 English 7. WAsHInG PRoGRAM AnD seLeCtIon (CONT’D) 7.11 Clean Me Program Press the Power button. • The LED shows only ‘- --’ signal. select the ‘CLEAN ME’ program using the program selection dial. • If you press ‘Start/Pause’ button aftrer pressing Power button without selecting program, the ‘Cotton’...
-
Page 28: Guide For Other Useful Programs
28 www.electrolux.com 8. GUIDe FoR otHeR UseFUL PRoGRAMs 8.1 Time Delay (Reserved Washing) Put the laundry into the Drum and put the detergent and softerner into the detergent case. Then close the Door. • Put the detergent into the main wash room (I I marking) and prewash room(I marking) in the detergent case. - Page 29 English 8. GUIDe FoR otHeR UseFUL PRoGRAMs (CONT’D) 8.2 Only Wash Put the laundry into the Drum and put the detergent and softerner into the detergent case. Then close the Door. Press the Power button. • The LED shows only ‘- --’ signal. Select the ‘WASH COURSE’...
- Page 30 30 www.electrolux.com 8. GUIDe FoR otHeR UseFUL PRoGRAMs (CONT’D) 8.5 Dry (Dry Only) Put the laundry into the Drum and close the Door Press the Power button. • The LED shows only ‘- --’ signal. Select the “Dry condition” by pressing “DRY” button.
- Page 31 English 8. GUIDe FoR otHeR UseFUL PRoGRAMs (CONT’D) 8.6 Only Wash Put the laundry into the Drum and put softerner into the detergent case. Then close the Door. • Softener should be below ‘MAX’ level. Press the Power button. • The LED shows only ‘- --’...
-
Page 32: Maintenance
32 www.electrolux.com 9. MAIntenAnCe Proper care of your washer can extend its life. This section explains how to care for your washer properly and safely. Cleaning your washer • Exterior Wipe up detergent, bleach, and other spills with a soft, damp cloth or sponge as they occur. - Page 33 English 9. MAIntenAnCe (CONT’D) Winter storage or moving care IInstall and store your washer where it will not freeze. Because some water may stay in the hoses, freezing can damage your washer. If you store or move your washer during freezing weather, winterize it.
-
Page 34: How To Clean The Filter
34 www.electrolux.com 10. HoW to CLeAn tHe FILteR Cleaning your washer 10.1 Clean the filter when water leaks from the water inlet. 1. Pull the power plug out before cleaning it. 2. Turn off the water supply to 3. Pull the inlet filter out. - Page 35 English 10. HoW to CLeAn tHe FILteR (CONT’D) Cleaning the detergent case 10.3 After a while detergent and fabric softeners 2. To facilitate cleaning, the upper part of leave a deposit in the case: the fabric softener compartment can be removed.
-
Page 36: Removing Stains
36 www.electrolux.com 11. ReMoVInG stAIns Stained, heavily-soiled, or greasy items may kind of stain it is, how old the stain is, need to be prewashed or soaked for best what kind of fabric it is, and whether the results. Soaking helps remove protein-type fabric is colorfast. -
Page 37: Stain Removal Guide
English 11. REMOVING STAINS (CONT’D) Stain removal guide 11.2 Program Fabric type Rinse immediately in COLD water. If stain remains, soak in cold water Blood with an enzyme prewash. Use ice in plastic bag to harden the gum. Scrape off what you can and Chewing gum the sponge with white spirits. -
Page 38: Trouble Shooting
38 www.electrolux.com 12. tRoUBLe sHootInG Most problems are easily solved if you understand the cause. Check the following list for problem before calling for service. • If the error mode such as IE, OE, UE were displayed on the control part, in order to solve these problem, first turn off the power of the washing machine and then turn on the power pressing Power button. -
Page 39: Specification
English 13. sPeCIFICAtIon Model EWW1122DW Dimension (mm) 686 x 809 x 1020 (W x D x H) Unit Weight (kg) 97kg(Net) / 101kg(Gross) Maximum Mass 12.0 lbs (7.0 kg) of Dry Cloth Spin Speed (RPM) 1100 rpm max. Operating Water Pressure... -
Page 40: Customer Care
Office Fax: (+84 8) 3910 5470 Email: customer.care@electrolux.com.vn Malaysia Domestic Toll Free : 1300-88-11-22 Electrolux Home Appliances Sdn. Bhd. 7th Floor, Tower 2 , Jaya33, No. 3, Jalan Semangat, Seksyen 13, 46100 Petaling Jaya, Selangor Office Tel: (+60 3) 7843 5999 Office Fax: (+60 3) 7955 5511 Email: Malaysia.customercare@electrolux.com... - Page 41 English note...
- Page 42 42 www.electrolux.com note...
- Page 43 English note...
- Page 44 www.electrolux.com...
Need help?
Do you have a question about the EWW1122DW and is the answer not in the manual?
Questions and answers