
Related Manuals for Alfamacchine munigraf A2M 200

Summary of Contents for Alfamacchine munigraf A2M 200
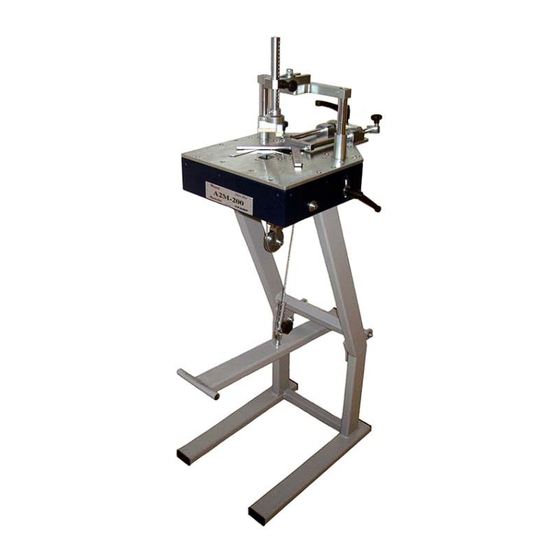
- Page 1 A2M 200 INSTRUCTION HANDBOOK Minigraf ® A2M 200 MADE IN ITALY Alfamacchine Via Selva, 23/25 - 47122 Forlì - Italy Tel. +39-0543-783301 - Fax +39-0543-783302 info@alfamacchine.com - www.alfamacchine.com ENGLISH...
-
Page 2: Table Of Contents
A2M 200 4.8 MACHINE ARRANGEMENT INDEX 4.8.1 V-nails magazine loading 4.8.2 V-nail guide head replacement to change V-nails size 4.9 ADJUSTMENTS 1. GENERAL INFORMATION 4.9.1 V-nails inserting positions adjustment 1.1 PRODUCER 4.9.2 Vertical clamp adjustment 1.2 ASSISTANCE CENTERS 4.9.3 Vertical clamp position adjustment 1.3 CERTIFICATION 1.4 WARRANTY 4.9.4 Vertical clamp height adjustment... -
Page 3: General Information
This handbook is made both for operators and technicians WARRANTY authorized to perform the machine maintenance. Alfamacchine’s products are built to have a long life and are The operators can not execute operations reserved to the tested one by one. -
Page 4: Symbols Utilized
A2M 200 1.6.4 Symbols utilized It indicates a danger with a mortal risk for the operator DANGER P... It indicates a warning or a note about key functions or useful information. Pay the maximum attention to the paragraph WARNING marked with this symbol. A... -
Page 5: Machine Description
A2M 200 2. MACHINE DESCRIPTION SURROUNDING CONDITIONS WORKING PRINCIPLE The machine does not need special surrounding conditions. The Frame Assembling A2M 200 has been realized to It has to be installed inside an industrial building, lit, aired assemble any kind of frame. and with a compact and flat floor. -
Page 6: Technical Data
A2M 200 2 . 9 TECHNICAL DATA We have listed below the Machine’s data and technical characteristics to which you can use for reference for any eventual contact with your distributor for Technical Assistance. TABLE 2. 9 A - Data and Specifications Frames thickness min-max 6-90 mm. -
Page 7: Safety
The utilizer is requested to achieve an and surrounding zones. adequate training to be instructed by Alfamacchine’s technicians. 3 . 5 RESIDUAL RISKS The other risks related with manual working way, are the During the normal working cycle and while maintenance,... -
Page 8: Installation
A2M 200 4. INSTALLATION SHIPPING AND HANDLING The shipment must be performed by a qualified technical staff. The machine has to be shipped in a safe way to avoid any damage to its parts. Overall dimension : (660x440x500)mm (see pic. 4.1B) •... -
Page 9: Multiple Shipping And Handling
Remove the external packing and save it for future use. Check for any casual shipping damage andreport them immediately. Shipping damages or any other defects must be reported to Alfamacchine not later than 3 days from receipt of the machine. -
Page 10: Machine Assembly
A2M 200 4.7 MACHINE ASSEMBLY KIT assembly parts list: 4.7.1 Pic. #1 ( 1 ) Bottom side floor-stand; ( 2 ) n.4 Rubber feet; ( 3 ) Upper side floor-stand; ( 4 ) n. 4 Washers; ( 5 ) n.4 Screws; ( 6 ) Foot-pedal;... -
Page 11: Machine Assembly For Front Use Side
A2M 200 Pic. #4 4.7.2 MACHINE ASSEMBLY FOR FRONT USE SIDE: 6 - Place the machine ( 11 ) onto the legs of the upper side stand ( 3 ) ; 7 - Turn the machine in order to have the lable toward the user side, line up the holes of the machine sides with the stand ones then lock with the screws ( 13 ) and washers ( 12 );... -
Page 12: Machine Assembly For Back Use Side
A2M 200 Pic. #5 4.7.3 MACHINE ASSEMBLY FOR BACK USE SIDE: 6 - Place the machine ( 11 ) onto the legs of the upper side stand ( 3 ) ; 7 - Turn the machine in order to have the positions adjustment group toward the user side, line up the holes of the machine sides with the stand ones then lock with the screws ( 13 ) and washers ( 12 );... -
Page 13: Wings Assembly
A2M 200 Pic. #6 4.7.4 WINGS ASSEMBLY: 12 - Remove the flat point socket set screws (size M8x8) from the holes used for the wings mount of the machine sides; 13 - Line up the left wing ( 24 ) to the holes of the left side of the machine ( 11 ), set the upper face of the wing at the same level of the bench and lock it by the screws ( 27 ) and washers ( 28 );... -
Page 14: Machine Arrangement
A2M 200 4.8.2 V-nail guide head replacement to change V- MACHINE ARRANGEMENT nails size 4.8.1 V-nails magazine loading The V-nail guide head must be changed each time you To load the V-nail magazine proceed as follows: use V-nails of different sizes. ·... -
Page 15: Adjustments
A2M 200 ADJUSTMENTS The machine is completely tested and checked in ALFAMACCHINE’s plants before its shipment, so the operator has only to perform the following adjustments: 4.9.1 V-nails inserting positions adjustment To properly position the mouldings to be assembled, the A2M 200 is equipped with a 90° fence. -
Page 16: Vertical Clamp Adjustment
A2M 200 4.9.2 Vertical clamp adjustment 4.9.4 Vertical clamp height adjustment The vertical clamp can be adjusted in height and · Pull out the plunger pin knob (see pic. #15) and adjust position. the pressure pad height over the frame. We Proceed as follows to adjust them: recommned that you put the bar height between 5mm and 8 mm above the moulding. - Page 17 A2M 200 4.9.6 Foot Pedal high adjustment The foot pedal is connected to the head group mechanism by a wheels and spring system that drive the clamp and hammer movements. Its high level from the ground depends on the tilting position of the working bench (see pic.
-
Page 18: Functions To Be Checked Before Starting Work
A2M 200 4.9.7 Driver Blade heigh adjustment The correct position of the driver blade when it is completely out, is when its upper surface is set at the same level of the nail head. If the driver blade is too heigh it will sign the wood during the nail insertion. -
Page 19: Functioning
A2M 200 5. FUNCTIONING TIPS FOR PERFECT JUNCTIONS OPERATORS The machine has been projected to be used by only one a) V-nail types operator. In order to allow the machine to make excellent quality The staff assigned to operate on the machine, must be in junctions using different materials, it has been necessary possession (or acquire through an adequate training) the to manufacture different V-nails types for different uses. -
Page 20: Maintenance
A2M 200 6. MAINTENANCE 6 . 4 ORDINARY MAINTENANCE 6 . 1 STATE OF MAINTENANCE The following operations must beperformed at the times The maintenance operations must be performed with the indicated below. Not observing the following instructions machine in the conditions described at “state of the machine” exonerate the Producer from any responsibility regarding in the tables 6.6-A and 6.7-A the warranty. -
Page 21: Main Cord Replacing
A2M 200 MAIN CORD REPLACING · Remove the knob from the foot pedal fork in order to release the cable plug (see pic. #25); · Take out the CLIP that hold the cord to the fork of the head group (see pic. #26); ·... -
Page 22: Diagnostics
A2M 200 7 DIAGNOSTICS SAFETY WARNINGS The interventions must be executed by personnel properly trained and they must take all precautions in order to avoid accidental starts. BREAKDOWN SEARCH TABLE 7. 2 - A CAUSE CHECK AND REMEDY TROUBLE V-nails positioned wrong into check that the sharpened side (glue side) Pressing the foot pedal the v-nails the V-nail magazine... -
Page 23: Request Of Assistance
We remind you that only a qualified technician can repair the machine. Thuerefore we suggest the intervention of your local distributor or ALFAMACCHINE’s Center of Technical Assistance, which has the qualified staff, proper equipment and tools, and who uses original spare parts. - Page 29 A2M 200...
Need help?
Do you have a question about the munigraf A2M 200 and is the answer not in the manual?
Questions and answers