
Related Manuals for TOPP K140

Summary of Contents for TOPP K140
- Page 1 INSTRUCTIONS FOR INSTALLATION AND USE AUTOMATION AND ELECTROMECHANICAL DRIVERS K140 FOR LINEAR SLIDING DOORS WITH ONE OR TWO PANELS installer's manual/original instructions COD. 0P5501 VER 0.0 REV 03.16...
-
Page 3: Table Of Contents
5.12- Digital switch ..........................pag. 50 6- APPENDICES 6.1- Maintenance.............................pag. 51 6.2- Spare parts and optional accessories ....................pag. 51 6.3- Demolition ............................pag. 52 6.4- Troubleshooting..........................pag. 52 7- EC DECLARATION OF INCORPORATION OF PARTLY COMPLETED MACHINERY ......pag. 53 K140 INSTRUCTIONS FOR INSTALLATION AND USE... -
Page 4: 1- General Information
& TOPP srl reserves the right to amend or improve the manual and the products described therein at any time without notice. & The data contained in this manual were written and checked with the maximum care; TOPP srl is not liable for possible errors due to omissions or printing errors, or errors in transcription. -
Page 5: User
(example reader bedge) for which automation could not ensure the operating mode set. In case you want to exclude the auto recovery please contact support Topp Srl. K140 INSTRUCTIONS FOR INSTALLATION AND USE... -
Page 6: Technical Data
PACKING Every standard product package (cardboard carton) contains: N.1 K140 automatic door (complete with motor unit and belt transmission preassembled on the crossbar, side caps, casing, door stop limit switch, cable raceway, emergency battery,raceway, rubber cable sleeves); N.1 package of hardware consisting of , 2 self-tapping screws TC d6x70 and 2 nylon anchor bolts 10x60;... -
Page 7: Models
1 LEFT DOOR PANEL VPA = net doorway width VPA* VL = gross opening LT/LC = automation length / LT/LC casing length BP = rail + runner on the floor PC = electric wire raceway K140 INSTRUCTIONS FOR INSTALLATION AND USE... -
Page 8: Sliding Doors With One Panel
In some countries the laws forbid this type of assembly as there is a possible risk of getting the fingers caught. Fig. 5a Fixed door panel Sliding door panel Automation Fig. 5b Fixed door panel Sliding door panel Tubular jamb Automation Fig. Fixed door panel Sliding door panel Wall end Overlap Automation INSTRUCTIONS FOR INSTALLATION AND USE K140... -
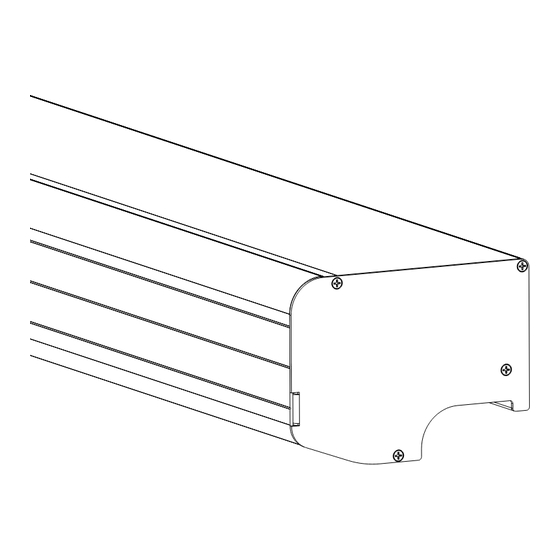
Page 9: Description Of Parts And Dimensions
Plastic runner on floor Toothed transmission belt Wire raceway 17 - Belt transmission with pulley and encoder 18 - Door stop Low voltage transformer 19 - Metal motor module 10 - Electronic control circuit 20 - Logline K140 INSTRUCTIONS FOR INSTALLATION AND USE... - Page 10 Fig. Crossbar supporting bracket Fig. INSTRUCTIONS FOR INSTALLATION AND USE K140...
-
Page 11: General Recommendations
& Before installing the automation, verify that the structure to be automated is stable, sturdy and able to withstand the weight of the automation and, if necessary, take steps to ensure that it is. Topp srl is not liable for failure to comply with the rules of good workmanship in the construction of the door panels to motorize, or for any distortions that may develop with use of the device. -
Page 12: Installing The Adapter And Track
Drill the door panel at the top and fasten the adapter using cylindrical M6 screws or cylindrical self-tapping d5.5 screws depending on the type of material; Drill the door at the bottom and fasten the rail using flared self-tapping cylindrical screws diam. 4.8. Fig. 10 Adapter Door panel Rail INSTRUCTIONS FOR INSTALLATION AND USE K140... -
Page 13: Installing The Carriageson The Door
Fastening nut Standard adapter Fig. 12 Single door panel, opening toward the left Single door panel, opening toward the right Fig. 13 Double door panel, simultaneous opening toward the right and left 15÷70 15÷70 K140 INSTRUCTIONS FOR INSTALLATION AND USE... -
Page 14: Fastening And Adjustment Of The Sliding Panels
Fig. 15 Fig. 14 Load-bearing wheels Anti-derailing wheels Anti-derailing wheels Height adjustment Load-bearing Fastening screw wheels Carriage Carriage fastening screw fastening screw Carrello LEFT RIGHT Adjustment screw Fig. 16 Rear part of door panel INSTRUCTIONS FOR INSTALLATION AND USE K140... - Page 15 Fig. 17 Lower carriage bracket Standard adapter Runner on floor Fig. 18 K140 INSTRUCTIONS FOR INSTALLATION AND USE...
-
Page 16: Installing The Motor Module, Belt Transmission, Belt,Logline
INSTALLING THE MOTOR MODULE, BELT TRANSMISSION, BELT,LOGLINE K140 - model with 2 door Fig. 19 Fig. 20 panels (Fig.19) L Belt L Logline 1000 876 876 2 x 1736 928 928 2 x 1840 1046 1100 1200 980 980 2 x 1944... - Page 17 Tighten screws “B” after checking that the transmission is Pulley aligned with the crossbar. Belt Lower belt bracket Fig. 23a Motor module belt trasmission K140 INSTRUCTIONS FOR INSTALLATION AND USE...
-
Page 18: Fastening The Drive Brackets On The Door Panel
FASTENING DOOR DRIVE BRACKETSE Fig. 24 2 DOORS – simultaneous opening toward the right and left INSTRUCTIONS FOR INSTALLATION AND USE K140... - Page 19 Horizontal adjustment slots Door drive bracket Lower belt bracket Fig. 26 1 LEFT DOOR – opening toward the left M6x8 screws Front door carriage M6x10 screws Horizontal adjustment slots Door drive bracket Upper belt bracket K140 K140 INSTRUCTIONS FOR INSTALLATION AND USE...
-
Page 20: Installing The Door Block
Carriage block fastener To release and open the door, push the manual release lever under the casing forward and, at the same time, pull the door with your hand until it opens. Manual release INSTRUCTIONS FOR INSTALLATION AND USE K140... -
Page 21: Installing The Casing
Fasten the casing to the beam using the two screws type TCEI M5x10. Fig. 32 antivibration felt Rating place and “CE” marking 1 2 m m Ø6.5 M3,5x9,5 screws for fastening casing M5x10 screws for fastening casing K140 INSTRUCTIONS FOR INSTALLATION AND USE... -
Page 22: 4- Electrical Connection
Make sure that all the cables are inside the duct and that they cannot come into contact with moving parts once positioned. During installation, make sure that the conductor cables are secured by an additional attachment near the terminals or electrical connections, i.e. using bands. Make sure that the cables are stripped near the terminals. INSTRUCTIONS FOR INSTALLATION AND USE K140... -
Page 23: Electronic Circuit Board
Emergency battery system input Gearmotor input Door block 1 input don’t touch Door block 2 input (pharmacy) 10. Transformer input 11. Lighted display 12. Encoder cord input 13. DOWN key 14. ENTER key K140 INSTRUCTIONS FOR INSTALLATION AND USE... -
Page 24: Pre-Wired Electrical Connections
LAMP 14. LATERAL SECURITY 32. 24V SAFETY 1 22. EXTERNAL CURTAINS 15. GND RADAR 16. 24V 23. GND 24V* 24. 24V Ÿ Ÿ SIGNAL A Ÿ GND (shield) Ÿ SIGNAL B Ÿ * Unregolated INSTRUCTIONS FOR INSTALLATION AND USE K140... -
Page 25: Electrical Wiring Diagram (Flow Chart)
ELECTRICAL WIRING DIAGRAM (FLOW CHART) Fig. 35 INSTRUCTIONS FOR INSTALLATION AND USE K140 K140... -
Page 26: Connection Of Detection Sensors
NO ATT. white white COM. ATT. grey grey grey grey +24V green/black green/black N.C. SIC white/black white/black COM. SIC yellow yellow NO ATT. COM. ATT. white white grey grey grey grey +24V INSTRUCTIONS FOR INSTALLATION AND USE K140... - Page 27 RX1 - TX1 = First beam RX2 - TX2 = Second beam ACTIVATION yellow yellow N.O. white white grey grey grey grey +24V ACTIVATION yellow yellow N.O. white white grey grey +24V grey grey K140 INSTRUCTIONS FOR INSTALLATION AND USE...
- Page 28 RX2 - TX2 = Second beam yellow yellow N.O. ACT. white white grey grey grey grey +24V green/black green/black N.C. SIC. white/black white/black yellow yellow N.O. ACT. white white grey grey grey grey +24V INSTRUCTIONS FOR INSTALLATION AND USE K140...
- Page 29 N.C. white white white white +24V yellow yellow N.O. ACT. white white grey grey grey grey +24V green/black green/black N.C. SIC. white/black white/black yellow yellow N.O. ACT. white white grey grey grey grey +24V K140 INSTRUCTIONS FOR INSTALLATION AND USE...
- Page 30 Fig. ¬Digital program switch menu: PARAMETERS>OTHER PARAMETERS> SAFETY SENSOR LOGIC: N.C. WITHOUT TEST program parameter 9 with the dot IS2 EXTERNAL ACTIVATION/SAFETY IS2 INTERNAL ACTIVATION/SAFETY SENSOR SENSOR IS5 LATERAL SENSOR N.C. N.C. INSTRUCTIONS FOR INSTALLATION AND USE K140 K140...
- Page 31 RX1 - TX1 = First beam Rx2 - TX2 = Second Beam ACTIVATION yellow yellow N.O. white white grey grey grey grey +24V N.C. ACTIVATION yellow yellow N.O. white white grey grey grey grey +24V K140 INSTRUCTIONS FOR INSTALLATION AND USE...
- Page 32 NO ACT. white white COM. ACT. grey grey grey grey +24V green/black green/black N.C. SIC white/black white/black COM. SIC yellow yellow NO ACT. white white COM. ACT. grey grey grey grey +24V N.C. N.C. INSTRUCTIONS FOR INSTALLATION AND USE K140...
- Page 33 N.C. N.C. N.O. yellow yellow ACT. white white grey grey grey grey +24V green/black green/black N.C. SIC. wite/black wite/black yellow yellow N.O. ATT. white white grey grey grey grey +24V K140 INSTRUCTIONS FOR INSTALLATION AND USE...
- Page 34 RX1 - TX1 = First beam Rx2 - TX2 = Second beam ACTIVATION yellow yellow N.O. N.C. white white grey grey grey grey +24V ACTIVATION N.C. yellow yellow N.O. white white grey grey grey grey +24V INSTRUCTIONS FOR INSTALLATION AND USE K140...
- Page 35 ACTIVATION green green N.O. white white brown brown +24V black black TST- TEST TST+ N.C. rose rose SECURITY blue blue yellow yellow ACTIVATION green green N.O. white white brown brown +24V K140 INSTRUCTIONS FOR INSTALLATION AND USE...
- Page 36 SECURITY blue blue green green ACTIVATION white white N.O. black black +24V brown brown TST- TEST grey grey TST+ N.C. yellow yellow SECURITY blue blue green green ACTIVATION white white N.O. black black +24V INSTRUCTIONS FOR INSTALLATION AND USE K140...
- Page 37 +24V TST- black black TEST TST+ N.C. rose rose SECURITY blue blue yellow yellow ACTIVATION green green N.O. white white brown brown +24V 16 15 13 11 10 IS5 LATERAL S. K140 INSTRUCTIONS FOR INSTALLATION AND USE...
- Page 38 N.O. black black +24V TST- brown brown TEST grey grey TST+ N.C. yellow yellow SECURITY blue blue green green ACTIVATION white white N.O. black black +24V 16 15 13 11 10 IS5 LATERAL S. INSTRUCTIONS FOR INSTALLATION AND USE K140...
- Page 39 ¬ PARAMETERS> OTHER PARAMETERS> SAFETY SENSOR LOGIC: N.C. WITH TEST Or program parameter 9 without the dot ELECTRICAL WIRING DIAGRAM FOR OPTEX USING ACTIVATION/SAFETY SENSOR MONITORED IS5 LATERAL S. 1 IS5 LATERAL S. 2 K140 INSTRUCTIONS FOR INSTALLATION AND USE...
- Page 40 ¬ PARAMETERS> OTHER PARAMETERS> SAFETY SENSOR LOGIC: N.C. WITH TEST Or program parameter 9 without the dot ELECTRICAL WIRING DIAGRAM FOR HOTRON USING ACTIVATION/SAFETY SENSOR MONITORED IS5 LATERAL S. 1 Is5 LATERAL S. 2 INSTRUCTIONS FOR INSTALLATION AND USE K140...
-
Page 41: Program Selection With Ms1 Knob
Cable ‘shielding’ should only be used for cable lengths in excess of 20 meters. For shorter cables cut the wire at the level of the sheath 1 2 3 4 5 DS2 DIGITAL SELECTOR CIRCUIT K140 INSTRUCTIONS FOR INSTALLATION AND USE... -
Page 42: Connection Of Key Device
Digital program switch menu: ¬ PARAMETERS> OTHER PARAMETERS> SAFETY SENSOR LOGIC:N.C. WITH TEST Or program parameter 9 without the dot 11 12 RX1 - TX1 = First Beam INSTRUCTIONS FOR INSTALLATION AND USE K140... -
Page 43: Connetion Of Door Block And Pharmacy Function
Or program parameter 9 with the dot 11 12 RX1 - TX1 = First Beam 4.11 CONNETION OF DOOR BLOCK AND PHARMACY FUNCTION Door block with Door block with manual release manual release incorporated 1 incorporated 2 pharmacy function K140 INSTRUCTIONS FOR INSTALLATION AND USE... -
Page 44: 5- Use And Operation
At this point, the card will wait to be reset (see para. 5.4). Ÿ This procedure will delete all the previous settings, except: Error history; Ÿ Counters; Ÿ Cycles and expiry dates of the maintenance menù. Ÿ INSTRUCTIONS FOR INSTALLATION AND USE K140... -
Page 45: Reset Phase: Learning
MS1, automation will not perform any reset (near) as long as this mode will not be changed or if the request will be 'opening to boost key or emergency opening / fire. Once changed how automation will perform the reset (near) as shown above. K140 INSTRUCTIONS FOR INSTALLATION AND USE... -
Page 46: Programming Parameters
The sequence of characters “Radio” appears; at this point: - If you have the remote control kit Topp TS2 press the smooth side of the first key (function open) until, one letter at a time, the word RADIO flash on the 7-segment display. -
Page 47: List Of Errors And Warning
Lateral sensor 1 malfunction. Lateral sensor 2 malfunction. Antipanic sensor malfunction. Obstacle not removed. Check for obstacles or friction. Motor poles inverted. Reverse the cables. Doors free. Bus voltage low. Bus voltage high. Motor bridge voltage high. K140 INSTRUCTIONS FOR INSTALLATION AND USE... -
Page 48: Self Restore Management Of Errors C-D-E-K-N-P-Q
During the slow opening in the preceding paragraph, the occupation of the side sensors causes a slow reclosing Ÿ During the movement, the contemporary employment of at least one safety sensor side and a sensor safety Ÿ compartment passage controls the stop of the door. K140 INSTRUCTIONS FOR INSTALLATION AND USE... -
Page 49: Self Restore Management Of Errors F-G-H-I-J
If the doors are smashed until the automation mode is closed and subsequently repositioned does not run no movement reset. For proper operation of the automated system with panic mounted photocells TOPP F3. 5.11 SELF RESTORE MANAGEMENT AFTER OPENING FIRE OR AN OPENING OF EMERGENCY The opening of emergency or fire causes the immediate opening of the automation, but in case where the sensors... -
Page 50: Digital Switch
(near). This allows you to decrease the value of the function selected and return to the previous menu This allows you to scroll the menu downward. Hold for 4 sec to enter the menu K140 INSTRUCTIONS FOR INSTALLATION AND USE... -
Page 51: Maintenance
In order for the automation unit to operate correctly, we recommend that the user carries out periodical maintenance on the same. This maintenance activity may be carried out either by TOPP, in accordance with a specific agreement made with the user, or by the installation technician or by other competent and qualified technical personnel in possession of all legal requirements. -
Page 52: Demolition
Check the radar contacts, electromechanical block, switch not open contacts The door does not function and the display of Check the malfunction signal consulting the list of messages and the control circuit shows symbols or letters alarms K140 INSTRUCTIONS FOR INSTALLATION AND USE... -
Page 53: 7- Ec Declaration Of Incorporation Of Partly Completed Machinery
36066 Sandrigo (VI) Italia herewith declares that the person authorised to compile the technical file is Name: Bettiati Roberto - Topp S.r.l. Address: via Galvani,59 36066 Sandrigo (VI) that to the partly completed machinery ELECTROMECHANICAL AUTOMATION FOR LINEAR SLIDING DOORS WITH ONE OR TWO LEAFS Type: K140 Serial number and year of construction: from no.1603TB01112 to no. - Page 54 INSTRUCTIONS FOR INSTALLATION AND USE K140...
- Page 56 TOPP S.r.l. Società a Socio Unico soggetta a direzione e coordinamento di 2 Plus 3 Holding S.p.a. Via Galvani, 59 - 36066 Sandrigo (VI) - Italia Tel. +39 0444 656700 - Fax +39 0444 656701 Info@topp.it - www.topp.it...
Need help?
Do you have a question about the K140 and is the answer not in the manual?
Questions and answers