
Related Manuals for Walker WP11DTB

Summary of Contents for Walker WP11DTB
-
Page 1: Operating Instructions
OPERATING INSTRUCTIONS SAORVIEW Digital Receiver WP11DTB DIGITAL TERRESTRIAL RECEIVER BE WALKER WISE...logon to www.walker.ie... -
Page 2: Table Of Contents
CONTENTS 1. GENERAL PROPERTIES ...................... 2 2. SAFETY PRECAUTIONS ....................... 3 3. PREPARING .......................... 4 3.1. REMOTE CONTROL ......................4 3.2. CONNECTIONS ........................5 3.2.1. CONNECTION TO THE TV ....................5 3.2.2. PUTTING INTO OPERATION ..................6 3.2.3. SOCKETS ........................6 4. -
Page 3: General Properties
1. GENERAL PROPERTIES DVB and VBI Teletext RECEPTION : 200 Channels DVB-T Compliant English, German, French, Spanish, Portuguese, Input frequency range: VHFIII; 174– Italian, Finnish, Swedish, Danish, Norwegian, 230 MHz, 8 MHz bandwith Slovak OSD. UHFIV and UHFV;... -
Page 4: Safety Precautions
• Heating or other thermal radiation under the set 2. SAFETY PRECAUTIONS also may cause malfunction or damage the set. • The hot air, which arises during the operation, Power Source should be ventilated with sufficient air circulation. Please do not put the set into closed areas and do ... -
Page 5: Preparing
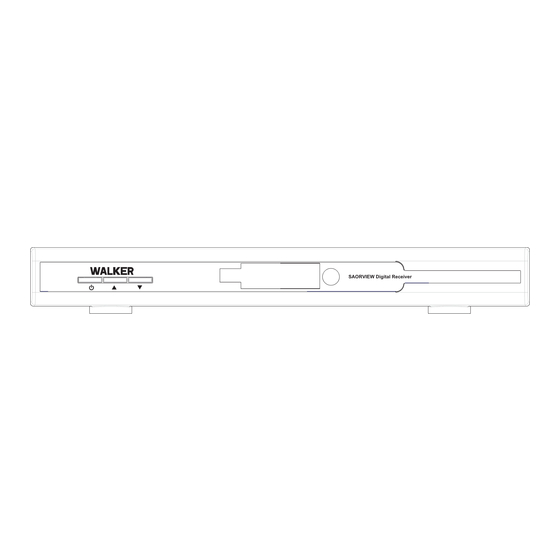
FRONT PANEL SAORVIEW Digital Receiver PROG DISPLAY ON/OFF PROG DOWN NOTE: No display will be shown in standby mode in order to keep the power consumption to a minimum and save energy. REAR PANEL 35027700 HDMI OUT AUDIO L AUDIO R TV OUT ANT. -
Page 6: Connections
3.2. CONNECTIONS 3.2.1. CONNECTION TO THE TV Connect your set-top box with a scart cable using the TV scart connector on the rear panel to your television’s scart connector or use an HDMI cable to connect the HDMI output of your receiver to the HDMI input of your TV (only if your TV has an HDMI input).If you want to get a high quality picture, prefer the HDMI output. -
Page 7: Putting Into Operation
1) Connect one end of Scart cable to TV Scart connector on the STB and the other end of to a Scart connector on your TV 3.2.2. PUTTING INTO OPERATION Be sure that you put through all the cable connections. After plugging in the mains cord of the set-top-box to the mains supply, a red light will be seen on the front panel (Standby mode). -
Page 8: Remote Control Functions
4. REMOTE CONTROL FUNCTIONS 4.1. REMOTE CONTROL LAYOUT LIB. TIMERS GUIDE INFO TEXT BACK PQRS WXYZ MENU FAV. SUBT. WIDE PIP- PIP+ SWAP... - Page 9 BUTTON FUNCTION 1. Standby ON / Standby 2. (optional) Search Forward 3. LIB. Media Browser menu 4. Timers Timer Setup (optional) Record button 6. Info I-Bar 7. Direction buttons / OK Navigation / Entering the channel list 8. Back / Exit Exit 9.
-
Page 10: Menu Interface
MENU INTERFACE FIRST TIME INSTALLATION When the box is opened from stand-by mode and if there is no channel stored in the database, First Time Installation Menu window is displayed on the screen. In the first window, menu language is asked. Then, you are asked to choose the country you are located. -
Page 11: Main Menu
Then “Do you want to start an automatic channel scan?” pop-up menu is displayed. Auto search can be started by selecting the “Yes” button. The box will automatically find the channels and store them for you. MAIN MENU The Main Menu is accessed, pressing the MENU button. The items accessed through the Main Menu are: 1.) Channel List 2.) Programme guide... -
Page 12: Moving Channels
5.2. MOVING CHANNELS Reordering the list can be done by moving the programs one by one to new positions. In order to do that, the "Move" button should be highlighted by pressing the “◄ / ►” keys. Using the “▲ / ▼” keys, select the programme which should be moved and press the OK button. -
Page 13: Programme Guide (7 Days Epg)
6. PROGRAMME GUIDE (7 DAYS EPG) Electronic Program Guide appears on the screen. It is able to get Information of the channel - programs weekly by means of 7- DAY–EPG. All programs of channels are displayed. The current program is highlighted and if you press the info button, there will be a brief information about the programs of the channel, such as: name, short/extended event... -
Page 14: Setup
Channel: “◄ / ►” buttons will navigate the user through the TV or Radio list. Date: By using either “◄ / ►” “0,1,2…,9” buttons start date is entered. Start: By using either “◄ / ►” “0,1,2…,9” buttons start time is entered. End: By using either “◄... -
Page 15: Audio Delay
8.1.2. AUDIO DELAY By pressing buttons on the remote control, you can set to Audio Delay to desired value. You can use “▲ / ▼” this setting when there is a synchronization problem in the received broadcast . Press buttons to change “◄... -
Page 16: Tv Settings
8.1.8. TV SETTINGS 8.1.8.1. TV TYPE Digital terrestrial television channels can broadcast programmes in a widescreen format which must be output differently to normal and widescreen TV sets. This function tells the receiver the screen format of the TV connected so that broadcasts are displayed correctly. Highlight the TV Type line in the Configuration menu and use the “◄... -
Page 17: Set Pin
8.1.9.3. SET PIN Use “/” buttons to go to “Set PIN” option. Press OK to display the “Set PIN” window. Use NUMERIC buttons to enter new pin number you will need to input your new pin a second time for verification purposes. If both pin numbers are four digits long and the same, the pin will be changed. -
Page 18: Installation
Audio: by pressing “/” buttons change the audio language. Subtitle: alter the subtitle language with“/” buttons. The chosen language will be seen in subtitles. Guide: by pressing “/” buttons change the guide language. Current Audio: if audio language is supported change the audio language by pressing “/” buttons ... -
Page 19: Media Browser
9. MEDIA BROWSER You can play the MP3 and JPEG files from a USB / MEMORY CARD device like memory stick, multiple card reader etc. When you connect a USB / MEMORY CARD device, the receiver recognizes it automatically and displays USB Drive 1, USB drive 2 etc. - Page 20 Viewing JPEG Files jump to selected file using the numeric buttons. Jump view the selected picture in full screen. start to slideshow with all pictures in the folder. Play / Slideshow Slideshow Options: Pause the slideshow. Pause (Pause button) ...
-
Page 21: Software Upgrade Through Usb
Divx Options: Play begins with the playback of the file. stops the playback of the file. Stop pauses the playback of the file. Pause Rewind pressing the left arrow button fast rewinds the file (x1, x2, x4, x8 and x16). ... -
Page 22: Messages
11. MESSAGES When the box receives no signal (e.g. the antenna cable is disconnected), “NO SIGNAL” message is seen on the screen. When there is no channel stored in the box, Timer Menu, Channel Table Menus are not accessible. Channel navigation is not allowed. -
Page 23: Channel Navigation
12. CHANNEL NAVIGATION Channel “P+/P-” Buttons: Pressing “P+/P-” buttons will help you to go to the next or the previous channel in the list. Numeric Buttons: Pressing a number button will activate a small digit entry window on the left upper corner of the screen. -
Page 24: Troubleshooting Guide
14. TROUBLESHOOTING GUIDE TROUBLE POSSIBLE REASONS WHAT TO DO Check if the mains cable is plugged The standby led is not lit. Mains cable is not connected. into the power socket. Check the signal cable and scart No picture or sound. No signal or weak signal. -
Page 25: Technical Specifications
15. TECHNICAL SPECIFICATIONS GENERAL Supply Voltage 220 - 240 V AC, 50-60Hz Input Frequency 174MHz - 862 MHz Power consumption 16 W (max) Active antenna output Operating temperature 5ºC to +40ºC Storage temperature -20ºC to +70ºC Humidity 25 to 75 % rel Physical dimensions 295x170x40 mm Weight... - Page 26 TV SCART SOCKET SIGNAL SIGNAL Audio Right Output Audio Right Input Audio Left Output RED Output Fast Blanking Output Audio Left Input BLUE Output Function Switching Output CVBS Output CVBS Input GREEN Output HARDWARE CONFIGURATION Main Processor ST Micro STx7101 Flash Memory 8 Mbyte SDRAM...
- Page 27 Following information is only for EU-member states: The use of the symbol indicates that this product may not be treated as household waste. By ensuring this product is disposed of correctly, you will help prevent potential negative consequences for the environment and human health, which could otherwise be caused by inappropriate waste handling of this product.
Need help?
Do you have a question about the WP11DTB and is the answer not in the manual?
Questions and answers