Table of Contents
Advertisement
Advertisement
Table of Contents

Subscribe to Our Youtube Channel
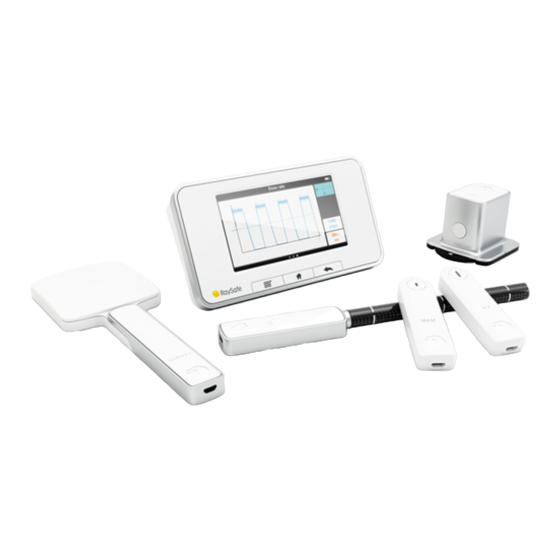
Related Manuals for RaySafe x2


Summary of Contents for RaySafe x2
- Page 1 USER MANUAL RaySafe X2...
- Page 2 Please consult the built-in help in your base unit to ensure that you read a version corresponding to your specific instrument setup. © 2015.06 Unfors RaySafe 5001083-5.1 All rights are reserved. Reproduction or transmission in whole or in part, in any form or by any means,...
-
Page 3: Table Of Contents
RaySafe X2 User Manual CONTENTS Setting: kVp mode Setting: Units GENERAL Setting: Stop delay About the X2 system Setting: Ignore prepulses Navigate the base unit View measurement CT SENSOR Access archived measurements Change parameter view Measure with CT Sensor Analyze waveforms... -
Page 4: About The X2 System
X2 View is a PC software for use with the X2 instruments. In X2 View, you can view measurements and waveforms on a larger display, store measurements, transfer data to Excel or other software and get software updates for the base unit. -
Page 5: Navigate The Base Unit
Back, takes you back to the previous screen On the back side of the base unit are: Reset switch, for forced reboot of the base unit Charger/PC connector, for charging or using with a PC with X2 View mAs connector, for tube current measurements Two sensor connectors Ethernet connector, for future use On/Off switch. -
Page 6: View Measurement
RaySafe X2 User Manual VIEW MEASUREMENT Swipe up or down to scroll between measurements. Tap on a parameter to get larger digits. Swipe right to access the parameter information with measurement specifications. Swipe left to view a waveform, if available for the current parameter. -
Page 7: Access Archived Measurements
Swipe up or down to scroll between measurements. VIA X2 VIEW To access archived measurements via X2 View, connect the base unit to a computer running X2 View and select Import from base unit under the File menu. -
Page 8: Change Parameter View
RaySafe X2 User Manual CHANGE PARAMETER VIEW To change the number of parameters showed on the home screen, press the menu button and select Change view. There are two views to toggle between: All measured parameters, or Four key parameters of your own choice. Press and hold on a box to select which parameter to show. -
Page 9: Analyze Waveforms
RaySafe X2 User Manual ANALYZE WAVEFORMS View a single parameter by tapping on that parameter on the home screen. Swipe left to go to the waveform screen. The dark line represents an average of the measured values. If there are more values than possible to show on the screen, the light blue pixles represent the range of these values. -
Page 10: Connect The Base Unit To A Computer
CONNECT THE BASE UNIT TO A COMPUTER Connect the base unit to a computer running X2 View using a USB cable (recommended length: max 2 m). X2 View can be installed from the X2 View CD, that came with the system. -
Page 11: Connect To Computer Using Bluetooth
X2 View will automatically search for base units. The first time you connect, you will have to select your base unit from the Bluetooth menu in X2 View. The Bluetooth status symbol will turn white when connected. -
Page 12: Upgrade The Base Unit Software
UPGRADE THE BASE UNIT SOFTWARE Connect the base unit to a computer running X2 View and make sure that the computer is connected to internet. If there are any updates available, the X2 Online field will show a notification symbol. Click on that symbol and follow... -
Page 13: Charge The Battery
The battery lasts for about one day of extensive usage, which means that it is recommendable to start your working day with a fully charged unit. The X2 system automatically enters power saving mode when idle for some minutes. If the system does not wake up by radiation or the buttons on the front, press the power button. -
Page 14: Use The Flexi Stand
RaySafe X2 User Manual USE THE FLEXI STAND The flexi stand can be used in many different setups. Below are some examples. - Page 15 RaySafe X2 User Manual...
-
Page 16: Setting: Screen Brightness
RaySafe X2 User Manual SETTING: SCREEN BRIGHTNESS Adjust the screen brightness by sliding the bar. Reduce the brightness to prolong the base unit battery time. -
Page 17: Setting: Speaker Volume
RaySafe X2 User Manual SETTING: SPEAKER VOLUME 0 % turns the speaker off and 100 % is max volume. -
Page 18: Setting: Time And Date
RaySafe X2 User Manual SETTING: TIME AND DATE Set time and date according to your local time. Measurements are automatically stored in the base unit, sorted by time. -
Page 19: Final Disposal Of The System
This product should be disposed of at an appropriate facility to enable recovery and recycling. Unfors RaySafe supports users in: Recovering reusable parts. Recycling of useful materials by competent disposal companies. Safe and effective disposal of product. For advice and information, contact your Unfors RaySafe Service Organization first, or otherwise the manufacturer. -
Page 20: Regulatory Information
RaySafe X2 User Manual REGULATORY INFORMATION N28111 Unfors RaySafe K.K. -
Page 21: Measure With R/F Sensor
RaySafe X2 User Manual MEASURE WITH R/F SENSOR Place the connected sensor centered in the field with the crosshair towards the X-ray source. The angle of the sensor in the horizontal plane has no impact on the measurement result. Expose. - Page 22 RaySafe X2 User Manual TIP! Tap a parameter to get large digits, parameter information, and, if applicable, waveform. Switch between these by swiping sideways. NOTE! The dark line centered in the circle represents the active area of the sensor. The lines on...
- Page 23 RaySafe X2 User Manual R/F SENSOR: MEASUREMENT PARAMETER DEFINITIONS Dose and HVL are calculated from all recorded data. Dose rate is the average dose rate, calculated as dose/time. Time starts the first time the dose rate waveform reaches 50% of peak, and ends the last time it drops below 50%.
-
Page 24: R/F: Sensor Specifications
RaySafe X2 User Manual R/F SENSOR: SPECIFICATIONS Dimensions: 14 × 22 × 79 mm (0.5 × 0.9 × 3.1 in) Weight: 42 g (1.5 oz) Storage temperature: -25 – +70 °C (-13 – +158 °F) Storage humidity: Non-condensing Operating temperature: 15 –... -
Page 25: Setting: Units
RaySafe X2 User Manual SETTING: UNITS Select displayed unit for dose and dose rate. 1 Gy = 114.1 R NOTE! X2 systems approved by PTB do not have the possibility to change dose unit to Röntgen (R). -
Page 26: Setting: Stop Delay
RaySafe X2 User Manual SETTING: STOP DELAY The stop delay setting defines for how long the instrument will wait for more radiation to include in the same measurement. Use a longer stop delay when measuring on a pulsed fluoroscopy system or to get a prepulse recorded into the same measurement as the following ordinary exposure. -
Page 27: Setting: Ignore Prepulses
RaySafe X2 User Manual SETTING: IGNORE PREPULSES Use the ignore prepulses setting to remove one or many unwanted prepulses from the measurement. Ignore prepulses = 0, the whole exposure is captured. Ignore prepulses = 1, the (first) prepulse is excluded from the measurement. -
Page 28: Measure With Mam Sensor
RaySafe X2 User Manual MEASURE WITH MAM SENSOR The MAM sensor is ready to measure dose and HVL for all anode/filter combinations without changing any settings. Place the connected sensor centered in the field, with the crosshair 6 cm (4 cm in the US) from the examination table front edge (A). - Page 29 RaySafe X2 User Manual Read the result. TIP! Tap a parameter to get large digits, parameter information, and, if applicable, waveform. Switch between these by swiping sideways. NOTE! The dark line centered in the circle represents the active area of the sensor. The lines on...
-
Page 30: Mo/Rh Kv With Mam Sensor
RaySafe X2 User Manual MO/RH KV WITH MAM SENSOR Place the sensor centered and 6 cm from the chest wall. Place the 2 mm Al filter on the sensor. Be sure to cover the active sensor area. Recommended generator setting ≥ 100 mAs. -
Page 31: W/Al Scanning With Mam Sensor
RaySafe X2 User Manual W/AL SCANNING WITH MAM SENSOR Mount the X2 MAM sensor in the holder. Place the holder centered on the table, tight to the chest wall. Settings: Philips MicroDose: Stop delay: 2 s. W/Al Philips, if kVp is desired. - Page 32 RaySafe X2 User Manual MAM SENSOR: MEASUREMENT PARAMETER DEFINITIONS Dose and HVL are calculated from all recorded data. Dose rate is the average dose rate, calculated as dose/time. Time starts the first time the dose rate waveform reaches 50% of peak, and ends the last time it drops below 50%.
-
Page 33: Mam: Sensor Specifications
RaySafe X2 User Manual MAM SENSOR: SPECIFICATIONS Dimensions: 14 × 22 × 79 mm (0.5 × 0.9 × 3.1 in) Weight: 42 g (1.5 oz) Storage temperature: -25 – +70 °C (-13 – +158 °F) Storage humidity: Non-condensing Operating temperature: 15 –... -
Page 34: Setting: Kvp Mode
RaySafe X2 User Manual SETTING: KVP MODE The MAM sensor is ready to measure dose and HVL for all beam qualities without any settings. However, to get a kVp reading you have to select a beam quality. If your beam quality is not in the list, you have to change your anode/filter combination to one of the listed. Expose, and you will get a kVp reading which is applicable to all anode/filter combinations for the mammography machine (since the high voltage generator will behave identically regardless of selected anode/filter combination). -
Page 35: Setting: Units
RaySafe X2 User Manual SETTING: UNITS Select displayed unit for dose and dose rate. 1 Gy = 114.1 R NOTE! X2 systems approved by PTB do not have the possibility to change dose unit to Röntgen (R). -
Page 36: Setting: Stop Delay
RaySafe X2 User Manual SETTING: STOP DELAY The stop delay setting defines for how long the instrument will wait for more radiation to include in the same measurement. Use a longer stop delay when measuring on a pulsed fluoroscopy system or to get a prepulse recorded into the same measurement as the following ordinary exposure. -
Page 37: Setting: Ignore Prepulses
RaySafe X2 User Manual SETTING: IGNORE PREPULSES Use the ignore prepulses setting to remove one or many unwanted prepulses from the measurement. Ignore prepulses = 0, the whole exposure is captured. Ignore prepulses = 1, the (first) prepulse is excluded from the measurement. -
Page 38: Measure With Ct Sensor
RaySafe X2 User Manual MEASURE WITH CT SENSOR Push the connected sensor tight into the phantom ..or use the flexi stand for positioning free in air. Expose. - Page 39 RaySafe X2 User Manual Read the result. NOTE! The effective length of the CT sensor is 100 mm, and is marked with center and edge lines on the tube. TIP! Tap a parameter to get large digits, parameter information, and, if applicable, waveform.
-
Page 40: Measure Kvp On Ct
RaySafe X2 User Manual MEASURE KVP ON CT For kVp measurements, use an R/F sensor. Position it flat on the table and expose without rotation, using scout, tomogram or topogram mode. Use no or slowest table movement. - Page 41 RaySafe X2 User Manual CT SENSOR: MEASUREMENT PARAMETER DEFINITIONS Dose is calculated from all recorded data. Dose rate is the average dose rate, calculated as dose/time. For measurements longer than 3 s, intermediate readings are moving averages. Time starts the first time the dose rate waveform reaches 50% of peak, and ends the last time it drops below 50%.
-
Page 42: Ct: Sensor Specifications
RaySafe X2 User Manual CT SENSOR: SPECIFICATIONS Dimensions: 14 × 22 × 219 mm (0.5 × 0.9 × 8.6 in) Diameter: 12.5 mm (0.5 in) Weight: 86 g (3.0 oz) Storage temperature: -25 – +70 °C (-13 – +158 °F) -
Page 43: Setting: Units
RaySafe X2 User Manual SETTING: UNITS Select displayed unit for dose and dose rate. 1 Gy = 114.1 R NOTE! X2 systems approved by PTB do not have the possibility to change dose unit to Röntgen (R). -
Page 44: Setting: Stop Delay
RaySafe X2 User Manual SETTING: STOP DELAY The stop delay setting defines for how long the instrument will wait for more radiation to include in the same measurement. Use a longer stop delay when using a phantom and a slow rotation rate, to prevent that an axial scan will be cut into two measurements. -
Page 45: Measure With Light Sensor
RaySafe X2 User Manual MEASURE WITH LIGHT SENSOR Luminance: Place the connected sensor with the aperture centered on the area you want to measure, and with luminance selected on the sensor wheel. Illuminance: Place the connected sensor with the diffuser in the direction you want to measure, and with... - Page 46 RaySafe X2 User Manual The sensor is constantly measuring. If you want to store a value, press the button once the reading is stable. The measurement will continue below the stored value. TIP! Tap a parameter to get large digits and parameter information. Switch between these by swiping sideways.
- Page 47 RaySafe X2 User Manual LIGHT SENSOR: MEASUREMENT PARAMETER DEFINITIONS Illuminance is the amount of light incident on a surface. Luminance is the amount of light emitted from a surface.
-
Page 48: Light: Sensor Specifications
RaySafe X2 User Manual LIGHT SENSOR: SPECIFICATIONS Dimensions: 48 × 60 × 68 mm (1.9 × 2.4 × 2.7 in) Weight: 136 g (4.8 oz) Storage temperature: -25 – +70 °C (-13 – +158 °F) Storage humidity: Non-condensing Operating temperature: 15 –... -
Page 49: Setting: Units
RaySafe X2 User Manual SETTING: UNITS Select between cd/m² and lux, or fL and fc 1 cd/m² = 0.2919 fL (luminance) 1 lux = 0.09290 fc (illuminance) -
Page 50: Measure With Survey Sensor
RaySafe X2 User Manual MEASURE WITH SURVEY SENSOR Position the sensor with the dark side towards the radiation source. If you measure in manual trig mode, press Start or Stop whenever you want to begin or end measuring. If you measure in auto trig mode, measurement is triggered by radiation. - Page 51 RaySafe X2 User Manual side towards the radiation source. NOTE! Dose rate readings may need some time to return to zero after high radiation levels, due to afterglow in the scintillators. TIP! Tap a parameter to get large digits, parameter information, and, if applicable, waveform.
- Page 52 RaySafe X2 User Manual SURVEY SENSOR: ZERO ADJUST A zero adjustment is needed either when prompted by the instrument or when the dose rate appears too high even if no radiation is present. You can initiate a zero adjustment by pressing the >0< button. You will then get the option to either adjust, or to reset to the factory zero.
- Page 53 RaySafe X2 User Manual SURVEY SENSOR: MEASUREMENT PARAMETER DEFINITIONS DURING MEASUREMENT Time is the total time since start of measurement. Dose is calculated from all recorded data since start of measurement. Dose rate and mean energy are moving averages. FINAL READINGS...
-
Page 54: Survey: Sensor Specifications
RaySafe X2 User Manual SURVEY SENSOR: SPECIFICATIONS Dimensions: 14 × 66 × 192 mm (0.5 × 2.6 × 7.6 in) Weight: 140 g (4.9 oz) Storage temperature: -25 – +70 °C (-13 – +158 °F) Storage humidity: Non-condensing Operating temperature: 15 –... -
Page 55: Setting: Trig Mode
RaySafe X2 User Manual SETTING: TRIG MODE The trig mode setting affects both how a measurement is triggered and which parameters are displayed. AUTO When in auto trig mode, start of measurement is triggered by radiation, with trig level (N80) 20 μSv/h or 10 μGy/h (1.2 mR/h). -
Page 56: Setting: Units
, is measured in Gy or R, where 1 Gy = 114.1 R. Ambient dose equivalent, H (10), is measured in Sv. Typical response: NOTE! X2 systems approved by PTB do not have the possibility to change dose unit to Röntgen (R). -
Page 57: Setting: Stop Delay
RaySafe X2 User Manual SETTING: STOP DELAY The stop delay setting defines for how long the instrument will wait for more radiation to include in the same measurement. Use a longer stop delay when measuring on a pulsed fluoroscopy system or to get a prepulse recorded into the same measurement as the following ordinary exposure. -
Page 58: Measure Mas
RaySafe X2 User Manual MEASURE MAS Switch off the X-ray generator. Remove the jumper. Connect the mAs cable to the base unit and to the generator. - Page 59 Make an exposure and read the result. NOTE! Users of RaySafe X2 mAs must be aware of the potential damage to generators and of electrical human hazards in case of improper connection or damaged equipment. RaySafe X2 mAs is intended for use only by personnel authorized in performing calibration and repair of X-ray equipment.
- Page 60 RaySafe X2 User Manual MAS: MEASUREMENT PARAMETER DEFINITIONS mAs is calculated from all recorded data. mA is calculated as an average of all samples above 50% of peak. Rush currents are automatically removed. Live readings are based on samples since last reading. For long measurements, the final reading is recorded approximately 1–2 s before end trig.
-
Page 61: Setting: Stop Delay
RaySafe X2 User Manual SETTING: STOP DELAY The stop delay setting defines for how long the instrument will wait for more radiation to include in the same measurement. Use a longer stop delay when measuring on a pulsed fluoroscopy system or to get a prepulse recorded into the same measurement as the following ordinary exposure. -
Page 62: Setting: Ignore Prepulses
RaySafe X2 User Manual SETTING: IGNORE PREPULSES Use the ignore prepulses setting to remove one or many unwanted prepulses from the measurement. Ignore prepulses = 0, the whole exposure is captured. Ignore prepulses = 1, the (first) prepulse is excluded from the measurement.
Need help?
Do you have a question about the x2 and is the answer not in the manual?
Questions and answers