
Related Manuals for ultega DRAFTER 550 PRO

Summary of Contents for ultega DRAFTER 550 PRO
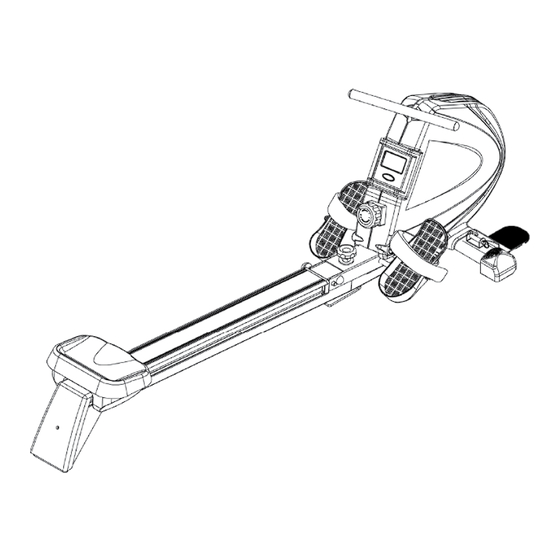
- Page 1 DRAFTER 550 PRO DRAFTER 550 PRO DRAFTER 550 PRO USER MANUAL MANUEL D‘UTILISATION / MANUAL DE USO US331000000015...
- Page 2 Dear customer! The manufacturer is constantly improving all types and models. Please understand that changes to the delivered product in terms of form, features and technology are thus possible at any time. Therefore no claims may be derived from the information, illustrations and descriptions in this manual.
-
Page 3: Table Of Contents
INDEX HARDWARE LIST ASSEMBLY EXPLODED DRAWING ASSEMBLY STEP COMPUTER FUNCTION WARM-UP AND COOL-DOWN... -
Page 4: Hardware List
HARDWARE LIST No.16 No.15 Flat washer (OD20xID8.5x2.0T) No.31 Spring washer (M8) 4pcs 4pcs Nut (M8) 4pcs No.32 No.33 No.34 Pedal separating tube Flat washer (OD22xID13x2.0T) Pedal ixing tube (OD16x1.2Tx156.5) (OD16x1.2Tx75) 2pcs 2pcs 2pcs No.9 No.47 No.46 Flat washer Screw (M10x52) 2pcs (OD20xID10.5x2.0T) 2pcs... -
Page 5: Assembly Exploded Drawing
ASSEMBLY EXPLODED DRAWING... -
Page 6: Assembly Step
ASSEMBLY STEP Attention! Please cut irst the cable tie on the lower left side, before using the device. Make sure that the rope has not been damaged. Step 1 • Attach the Front Stabilizer (50) to the main frame with M10x52 Screw (46) and OD20xID10.5x2.0T... - Page 7 ASSEMBLY STEP Step 3 • Pull the resistance rope (45) go through pulley (inside(3))- Pic1 • Attached Rear Stabilizer (3) to the end of Aluminum Sliding Tube (8) secure by lock with the M8x20 Screw (14) and OD20xID8.5x1.5T Flat Washer (16) • Pull the resistance rope under Aluminum sliding Tube (8), then hook on holder- Pic 4...
- Page 8 ASSEMBLY STEP Schritt 4 • Put the seat (28) on Aluminum Sliding Tube (8), insert the M6x1.0x12 Screw (9) through the end of Aluminum Sliding Tube (8) with Seat Block (10), secure with M6x10 Screw (11). Schritt 5 • Attach the cover (2) to the rear stabilizer (3)
- Page 9 ASSEMBLY STEP Step 7 • Insert the Pedal Fixing Axle (35) through Main Frame (39), secure Pedal Fixing Tube (34) with OD22xID8.5x1.5T Flat Washer (16), M8 Spring Washer (15) and M8 Nut (31) Step 8 • Insert the Pedal Axle (58) through the Main Frame (39), slide Pedal Tube (32), D22xID13x2.0T Flat Washer (33) and Pedal (30 ,57), then lock it up with the...
-
Page 10: Computer Function
COMPUTER FUNCTION FUNCTION COUNT : Accumulates workout counts. T. COUNT : Accumulates total counts for diferent exercise session. TIME : Accumulates workout time. COUNT/MIN : Display round per minute. : Accumulate consumed calories during exercise. SCAN : Automatically scan through COUNT, TIME, TOTAL COUNT, ROUND/MIN, CALORIES, PULSE. -
Page 11: Conditioning Guidelines
CONDITIONING GUIDELINES How you begin your exercise program depends on your physical condition. If you have been inactive for several years, or are severely overweight, you must start slowly and increase your time on the equipment; a few minutes per workout. -
Page 12: Warm-Up And Cool-Down
WARM-UP AND COOL-DOWN WORKOUT GUIDELINES Each workout should include the following three parts: A warm-up, consisting of 5 to 10 minutes of stretching and light exercise. A proper warm-up increases your body temperature, heart rate, and circulation in preparation for exercise. - Page 13 WARM-UP AND COOL-DOWN 3. Calf/Achilles Stretch With one leg in front of the other, reach forward and place your hands against a wall. Keep your back leg straight and your back foot lat on the loor. Bend your front leg, lean forward and move your hips toward the wall.
- Page 14 Cher client ! Le fabricant ne cesse de perfectionner ses produits et ses modèles. C’est pourquoi, nous vous saurions gré de bien vouloir accepter les modiications techniques éventuellement apportées. Les photos, données et autres descriptions indiquées dans le présent mode d’emploi ne sont donc pas contractuelles.
- Page 15 SOMMAIRE LISTE DES PETITES FOURNITURES VUE ÉCLATÉE DU MONTAGE INSTRUCTIONS DE MONTAGE FONCTIONS DE L’ORDINATEUR EXERCICES D’ASSOUPLISSEMENT...
- Page 16 LISTE DES PETITES FOURNITURES No.16 No.15 Rondelle plate No.31 Rondelle élastique M8 ; 4 pièces OD20*ID8.5»2.0T ; 4 pièces Ecrou M8 ; 4 pièces No.32 No.33 No.34 Tube de séparation de la pédale Rondelle plate Tige de ixation de la pédale (OD16*1.2*75) ;...
- Page 17 LISTE DES PETITES FOURNITURES...
- Page 18 ÉTAPES D’ASSEMBLAGE Attention! S‘il vous plaît premièrement veuillez couper l‘attache du câble à gauche sur le côté inférieur, avant d‘utiliser le dispositif. Assurez-vous que la corde n‘a pas été endommagé. Étape 1 • Fixez le pied stabilisateur avant (50) au châssis principal à...
- Page 19 ÉTAPES D’ASSEMBLAGE Étape 3 • Faites passez la courroie (45) sur la poulie (à l’intérieur de (3)). (Illustr. 1) • Placez le pied stabilisateur arrière (3) à l’extrémité de la barre coulissante en aluminium (8) et ixez-le avec une vis M8x20 (14) et une rondelle plate OD20xlD8.5x1.5T (16).
- Page 20 ÉTAPES D’ASSEMBLAGE Étape 4 • Placez le siège (28) sur la barre coulissante en aluminium (8), insérez la vis M6 x 1,0 x 12 (9) dans l’extrémité de la barre coulissante en aluminium (8) avec la cale d’arrêt du siège (10) puis ixez avec une vis M6x10 (11).
- Page 21 ÉTAPES D’ASSEMBLAGE Étape 7 • Faites passer l’axe de ixation des pédales (35) dans le châssis principal, ixez les tiges de ixation des pédales (34) avec une rondelle plate OD22xlD8.5x1.5T (16), une rondelle élastique M8 (15) et un écrou M8 (31).
- Page 22 FONCTIONS DE L’ORDINATEUR FONCTIONS COUNT : Comptabilise les unités d’entraînement efectuées. T. COUNT : Comptabilise le nombre total d’unités d’entraînement efectuées. TIME : Indique la durée de l’entraînement. COMTE / MIN : Rond Aicher par minute. : Comptabilise les calories dépensées pendant l’exercice.
- Page 23 CONSIGNES D’ENTRAÎNEMENT L’entraînement avec le vélo d’appartement Drafter 550 Pro ULTEGA devra se faire en tenant compte de votre condition physique. Si vous n’avez pas pratiqué de sport pendant plusieurs années ou soufrez d’une surcharge pondérale importante, il faudra démarrer l’entraînement à un niveau faible et augmenter progressivement la durée des séances (quelques minutes par unité...
- Page 24 ÉCHAUFFEMENT Demandez à une personne qualiiée de vous initier aux mouvements d’étirement et d’échaufement pour éviter d’emblée les erreurs qui pourraient nuire à votre santé. Chaque unité d’entraînement devrait se dérouler en plusieurs phases : une phase d’échaufement (warm- up) - une phase d’entraînement - une phase de détente (cool-down) permettant d’éviter les blessures et...
- Page 25 ÉCHAUFFEMENT 3. Extension des muscles du mollet et du talon d’Achille Appuyez vos mains contre un mur en plaçant votre pied droit le plus loin possible vers l’arrière sans léchir le genou. Votre jambe gauche est pliée, elle se trouve à peu près au niveau de votre bassin.
- Page 26 ¡Estimado cliente! El fabricante está constantemente mejorando todos los tipos y modelos. Por favor comprenda que por ello son posibles cambios en el producto entregado en cuanto a forma, características y tecnología en todo momento. Por lo tanto no podrán derivarse reclamos de la información, ilustraciones y descripciones contenidas en...
- Page 27 ÍNDICE LISTA DE HARDWARE DIAGRAMA EXPLOSIVO DEL ENSAMBLAJE 5 PASOS DEL ENSAMBLAJE FUNCIONES DE LA COMPUTADORA CALENTAMIENTO Y ENFRIAMIENTO...
-
Page 28: Lista De Hardware
LISTA DEL HARDWARE No.15 No.16 No.31 Arandela de resorte (M8) 4pcs Arandela plana 4pcs Tuerca (M8) 4pcs No.32 No.33 No.34 Pedal separar No.33 tubo 2pcs Arandela plana 2pcs Pedal tubo ijación 2pcs No.9 No.46 No.47 Tornillo (M10x52) 2pcs Arandela plana 2pcs Cabeza plana (M7.8x80) 1pc... -
Page 29: Diagrama Explosivo Del Ensamblaje
DIAGRAMA EXPLOSIVO DEL ENSAMBLAJE... - Page 30 ASSEMBLY STEP Atención: Por favor corte la cinta de plástico luego de haber ensamblado toda la máquina. Paso 1 • Fije el estabilizador frontal (50) al marco principal con el tornillo M10x52 (46) y la arandela plana (47). Paso 2 • Retire el perno (37), el tornillo (36), la arandela plana (33) y la tapa de nylon (54) con la llave (ver ig.
-
Page 31: Pasos Del Ensamblaje
PASOS DE ENSAMBLAJE Paso 3 • Hale la cuerda de resistencia (45) a través de la polea (adentro de (3) Pic. 1 • Fije el estabilizador trasero (3) al extremo del tubo corredizo de aluminio (8) asegurado con el tornillo M8X20 (14) y la arandela plana (16) • Hale la cuerda de resistencia por debajo del tubo corredizo de aluminio (8), luego enganche al... - Page 32 PASOS DE ENSAMBLAJE Paso 4 • Ponga el asiento (28) sobre el tubo corredizo de aluminio (8), inserte el tornillo M6x1.0x12 (9) a través del extremo del tubo corredizo de aluminio (8) con el bloqueo de asiento (10) , asegúrelo con el tornillo M6x10 (11).
- Page 33 PASOS DE ENSAMBLAJE Paso 7 • Inserte el eje ijador del pedal (35) a través del marco principal (39), asegure el tubo ijador del pedal (34) con la arandela plana (16), la arandela de resorte M8 (15) y la tuerca M8 (31).
-
Page 34: Funciones De La Computadora
FUNCIONES DE LA COMPUTADORA FUNCIONES COUNT : Acumula conteo de ejercicios T. COUNT : acumula conteos totales para diferentes sesiones de ejercicio. TIME : Acumula tiempo de ejercicio. COUNT/MIN : muestra rondas por minuto. : Acumula calorías consumidas durante el ejercicio. - Page 35 GUÍA PARA EL ACONDICIONAMIENTO Cómo comenzar su programa de ejercicio depende de su condición física. Si usted ha estado inactivo durante varios años, o lleva un sobrepeso importante, debe empezar lentamente y aumentar su tiempo con el equipo; unos minutos por entrenamiento.
-
Page 36: Calentamiento Y Enfriamiento
CALENTAMIENTO Y ENFRIAMIENTO GUÍA DE ENTRENAMIENTO Cada entrenamiento debe incluir las tres siguientes partes: Un calentamiento, que consta de 5 a 10 minutos de estiramiento y ejercicio ligero. Un calentamiento adecuado aumenta su temperatura corporal, la frecuencia cardiaca y su circulación, preparándole para los ejercicios. - Page 37 CALENTAMIENTO Y ENFRIAMIENTO 3. Estiramiento de Talón de Aquiles/Pantorrillas Con una pierna delante de la otra, reclínese hacia adelante y coloque las manos contra la pared. Mantenga la pierna de atrás estirada y el pie adelante apoyados en el suelo. Doble la pierna delantera, inclínese hacia delante y mueva sus caderas hacia la pared.
- Page 38 Manufacturer & Service Summary USA Inc.372 W. Ontario Street. #304 Chicago, IL 60654 Hotline: 888-278-6970 E-mail: service.us@ultega.net GARANTIE En cas de dommage relevant de la garantie, veuillez contacter tout d‘abord notre assistance en ligne ou nous écrire un e-mail. Fabricant & SAV Summary USA Inc.372 W.
Need help?
Do you have a question about the DRAFTER 550 PRO and is the answer not in the manual?
Questions and answers