Table of Contents
Advertisement
Quick Links
Advertisement
Table of Contents

Related Manuals for sinmag GF-18


Summary of Contents for sinmag GF-18
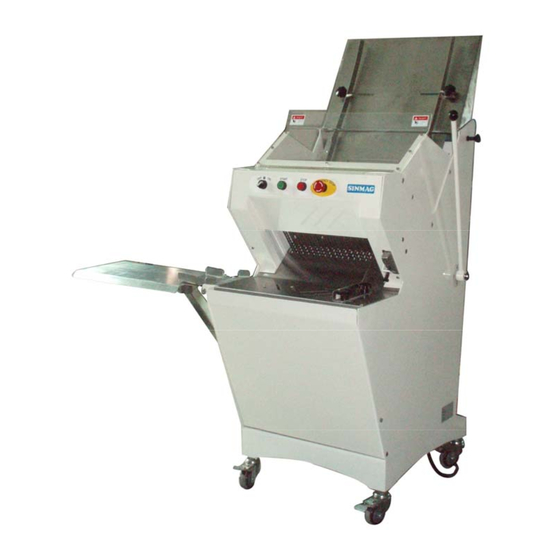
- Page 1 OWNER’S MANUAL GF-18 (Bread Slicer)
-
Page 2: Table Of Contents
CONTENTS Introduction••••••••••••••••••••••••••••••••••••••••••••••••••••••••••••••••••••••••••(2) Installation •••••••••••••••••••••••••••••••••••••••••••••••••••••••••••••••••••••••••••(4) Operation•••••••••••••••••••••••••••••••••••••••••••••••••••••••••••••••••••••••••••••(5) Attention••••••••••••••••••••••••••••••••••••••••••••••••••••••••••••••••••••••••••••••(7) Cleaning & Maintenance••••••••••••••••••••••••••••••••••••••••••••••••••••••••••(8) Trouble Shooting•••••••••••••••••••••••••••••••••••••••••••••••••••••••••••••••••••(9) Parts List••••••••••••••••••••••••••••••••••••••••••••••••••••••••••••••••••••••••••••(10) Wiring Diagram••••••••••••••••••••••••••••••••••••••••••••••••••••••••••••••••••••(14) Machine Warranty•••••••••••••••••••••••••••••••••••••••••••••••••••••••••••••••••(15) -
Page 3: Introduction
All of the information, illustration and specification contained in this manual are based on the latest product information available at the time of printing. SINMAG reserves the right to make changes at any time without notice. If questions arise during the operation or servicing, please contact us before proceeding. - Page 4 INTRODUCTION 8). Strong casters-two locking. Specification...
-
Page 5: Installation
INSTALLATION Installation After uncrating your slicer, inspect the machine for any damage that might have occurred during shipment. Report any damage to us before proceeding to operate or service this machine. Never attempt to operate the machine with damaged parts. Select a location for your slicer with sufficient room for operating, cleaning and servicing, and the floor must be solid and level. -
Page 6: Operation
OPERATION Operation Step 1). At the start of the day, release the EMERGENCY STOP button. 2). Place your bread on the rear table and adjust the loaf guides. 3). Adjust the pressure plate (comb) in relationship with the height of the bread and its regularity. - Page 7 OPERATION 6). Now you are working on the other (rear) blade frame remaining attached on the machine frame. Warning: − Do not unscrew more than 4 blades at the same time to avoid the breaking of the other blades. Place and tight first the 3 new blades leaving a blade space to unscrew and pull out 4 other blades in a more safety way.
-
Page 8: Attention
ATTENTION Attention To ensure that your bread slicer offers you total satisfaction for many years and to benefit from your one-year guarantee, we advice you to take note of the following recommendations. Request the help of you dealer. ENVIRONMENT This machine is designed for professional bakers. It must be used by onlyy one person at a time. -
Page 9: Cleaning & Maintenance
CLEANING AND MAINTENANCE Daily Cleaning − Clean cover and tables with soft brush or damp cloth. − Empty the crumb basket. Warning − Always disconnect the power supply before servicing. − Be extremely careful while cleaning the rear table and around the slicing blades, as contact with blades could cause severe injury. -
Page 10: Trouble Shooting
TROUBLE SHOOTING 1. The machine has stopped completely. − Have you plugged the machine in? − Is there power in the socket? − Is there EMERGENCY STOP button unlocked? − Has the fuse blown? 2. The slices are irregular in thickness. −... -
Page 11: Parts List
PARTS LIST... - Page 12 PARTS LIST...
- Page 13 PARTS LIST Parts Parts Code Parts Name Specification Number GF18001 14GF18-6-2 Restrained Plate GF18-6-2 GF18002 11GF18-6-1 Top Plate SUS430/HL Weld GF18003 15HQL10*32 Plastic Ball M10*32 BLACK GF18004 11GF18-1-3 Protective Plate Weld GF18005 11GF18-4-1 Spanner Weld GF18006 11GF18-5-1 Located Block Weld GF18007 11GF18-6-8 Restrained Plate...
- Page 14 PARTS LIST GF18041 12GF18-7-14 Electric Box Cover SPCC 2T*280*230 GF18042 14GF16-3-1 Connector Nylon 66 GF18043 13GF16-3-007 Small Shaft 21*42 Q235 220V-60HZ-3PH GF18044 16MDLGF16-1 Motor Y80S-4P 3/4H GF18045 14GF16-3-006 Big Belt Wheel HT200 GF18046 15PDLA27 Belt A/13 680 GF18047 14GF16-3-003 Small Belt Wheel HT200 GF18048 14GF18-6-6...
-
Page 15: Wiring Diagram
WIRING DIAGRAM... -
Page 16: Machine Warranty
MACHINE WARRANTY Machine Warranty We promise to offer our clients the best quality of products and service, our guaranty period is one year dated from the delivery date. The following terms are not included: 1. Abnormal operation or adjustment. 2. Sundries or corrosive liquid or wasted oil enter to cylinder make short circuit and burnt out of internal components.
Need help?
Do you have a question about the GF-18 and is the answer not in the manual?
Questions and answers