Advertisement
Quick Links
Download this manual
See also:
Instruction Manual
Service Manual
COPYRIGHT © 1999 ANDERS ENGSTRÖM
555ELDOM.EPS
ANDERS ENGSTRÖM, ILLUSTRATÖR
990215
Östra vägen 46
430 91 HÖNÖ
tel/fax 031- 96 84 64
anders@aeillustr.se
May 1999
Victor Hasselblad AB
Göteborg Sweden
Advertisement

Related Manuals for Hasselblad 555ELD


Summary of Contents for Hasselblad 555ELD
- Page 1 Service Manual COPYRIGHT © 1999 ANDERS ENGSTRÖM 555ELDOM.EPS ANDERS ENGSTRÖM, ILLUSTRATÖR 990215 Östra vägen 46 430 91 HÖNÖ tel/fax 031- 96 84 64 anders@aeillustr.se May 1999 Victor Hasselblad AB Göteborg Sweden...
- Page 2 Contents list Camera body 555ELD General Tools Disassembly Reassembly Adjustment, final assembly and calibration of the flash meter Sub-assembly: Front bayonet plate and auxiliary shutter Exploded view: Shell Exploded view: Motor housing Exploded view: Right hand wall & main components Exploded view: Left hand wall &...
- Page 3 Contents list Camera body 555ELD Exploded view: Motor drive gear box 553ELX/500ELX Exploded view: IR Release unit Revision 0 May 1999...
- Page 4 Release and S-arm redesigned - 553ELX and 500ELX 05/99 Preliminary spare part catalogue - 555ELD 07/99 New Service Manual - 555ELD 09/99 Mounting plate in motor housing modified - 555ELD 14/99 Battery compartment for AA batteries - 500ELX 01/00 New CD-ROM - Version 1.2 09/00 New CD-ROM - Version 1.3...
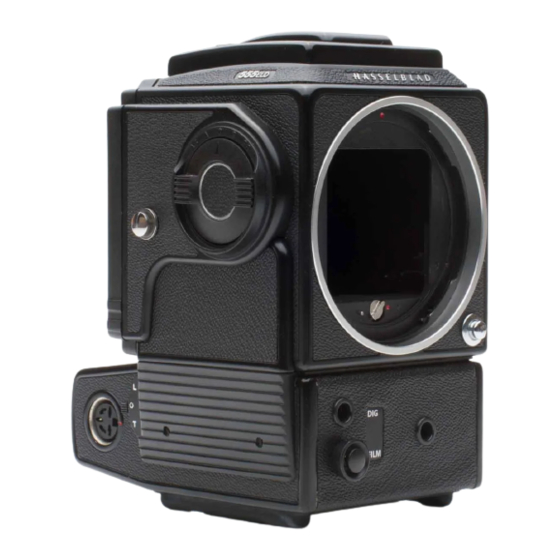
- Page 5 General description Camera body 555ELD Medium format single lens reflex camera with a built-in motor, Camera type: TTL/OTF flash metering and two release systems, one adapted for conventional photography, the other one for digital photography including integrated connections for digital camera backs.
- Page 6 ○ ○ IR Release unit: Unit for infrared remote release of the Hasselblad 555ELD. Attaches to the front release ports of the camera and powered by the camera batteries. Can be set for normal or digital photography. Supplied with the Hasselblad IR Remote control 44113, which in normal conditions provides an operating range of approx.
- Page 7 Tools Camera body 555ELD Tool No. Description Used for V-2211 Pin driver Fitting the locating pin in the front plate and the front gear bracket V-2229 Focal length gauge Adjustment of the focal length, mirror 45ºangle and focusing screen V-2236...
- Page 8 Camera body 555ELD Disassembly Motor Housing Remove the lens, film magazine, viewfinder and focusing screen. 30737, (30742) Unlock the battery cover, operate the release button and disconnect the battery cover at the exact moment when the auxiliary shutter is closed and mirror is in the upper position.
- Page 9 Camera body 555ELD Disassembly Remove the tripod foot (30763) by removing the six screws (829790) and the rubber support (30778) held by double-sided tape. When the tripod foot and the rubber support have been removed, four holes are exposed allowing access to the four screws (823745)
- Page 10 Camera body 555ELD Disassembly To remove the parts from the outer and inner 13605 30435 22351 mounting plates proceed as follows (see the exploded views 13 and 14): Remove the small nut (828001), eccentric (22352) 814601 and bearing pin (14100). Remove the screw (821033)
- Page 11 Camera body 555ELD Disassembly Remove the two long screws (823781) located towards the front of the camera shell. Remove the 823335 two short screws (823755) located towards the rear of the camera shell. Remove the cap (22470) from the chassis connector and peel back the leather (22455) covering the two screws (823335).
- Page 12 Camera body 555ELD Disassembly Rear plate 815511 105412 821017 820013 Remove the screw (821033) from the centre of the large gear (13557) and lift the gear clear. With the gear removed an additional screw is exposed which must also be removed (820025). Remove the screws...
- Page 13 Camera body 555ELD Disassembly Mirror Disconnect the mirror hinge (30754) from the two pins "A" and release the pin "B" on the mirror frame, from the mirror lever (22460). The complete mirror (30716) can now be separated from the remainder of the assembly.
- Page 14 Camera body 555ELD Disassembly Right and left hand wall 22513 Remove (or cut) the foam plastic pad (22513) to get access to the screws (820014). remove the right hand wall. Fig. 15. 820014 Mechanism plate To dismantle the right and left hand wall proceed...
- Page 15 (820011) and cable holder (12453). 13525 DIS19.EPS 990316 Remove the two clips "D" (817115), then remove the S-wire (21223) and the A-wire (21224). Fig. 17 Fig. 17. The dismantling procedure for the Hasselblad 555ELD is now completed. Revision 0 May 1999...
- Page 16 Camera body 555ELD Reassembly Lubricate the camera as detailed in the appropriate lubrication chart. Use the lubricants listed below: = Isoflex Topas L32 = Mollykote - X = Isoflex PDP-48 = Gleitmo 805-K = Loctite, e.g. Loctite 243 = Safety lacquer...
- Page 17 Camera body 555ELD Reassembly Outer wall right Lubricate according to Fig. 20. Fit the washer (810703) followed by the B-arm (21221), then fit the washer (810702) followed by the S-arm (22923). Fit the washer (810702) followed by the locking arm (21219) and the two washers (810702/705) and secure them into place with the clip (817123).
- Page 18 Camera body 555ELD Reassembly Release catch/arm adjustment Check and if necessary bend the release catch (13570) 22922 at the arrow so that it is engaged by approximately 1mm. Fig. 22. 13570 Fig. 22 REA02.EPS 990316 Refit the gearwheel (13557) temporarily. Rotate the...
- Page 19 Camera body 555ELD Reassembly Left hand wall Check the tension of the spring (816864). This should be between 40 and 60 grams. Adjust by bending the spring (816864) as indicated in Fig. 25. REA05.EPS 816864 990505 Fig. 25 Fit the left and right hand walls together and secure with the screws (820014).
- Page 20 Camera body 555ELD Reassembly Front bayonet plate "A" Before fitting the bayonet plate (30706-1) make sure the camera is released. This is done by turning gear (22476). Note that the pin "A" should be visible from 22476 "B" the outside.
- Page 21 Camera body 555ELD Reassembly The key position of the front gear is checked with the Position for screw driver camera cocked. This is carried out as follows: 21219 "D" Fit the blade of a screwdriver in the slot on the front gear wheel (30413).
- Page 22 Camera body 555ELD Reassembly Mirror 30754 Lubricate according to Fig. 31. Make sure the camera is released. Locate the mirror (30716) into position. Connect the mirror hinge (30754) to the two pins "A". "B" Relocate the pin "B" on the mirror frame to the mirror lever (22460).
- Page 23 Camera body 555ELD Reassembly Seal between the rear plate and the left side wall using black silicone or similar as shown in Fig. 34 to ensure a tight light seal. Seal here REA09.EPS 990316 Fig. 34 Preliminary adjustment of the focal length 71.40 ±...
- Page 24 Camera body 555ELD Reassembly Place the ruler with indicator clock onto the gauge and move the indicator around the periphery on the front plate and check that the length is within the tolerance. If the camera body is too short, on the left-hand side, then the front must be moved forward on this side.
- Page 25 4:10 Camera body 555ELD Reassembly Dog (13525), gear (13567) and gear "E" (13556) "D" Cock the camera as follows: 21219 Fit the blade of a screwdriver in the curved slot on the front gear (30413). Turn the gear in a clockwise direction until the check "C"...
- Page 26 4:11 Camera body 555ELD Reassembly When the gear (13556) is turned in a clockwise direction the dog (13525) should release the setting hook from the check "G". Fig. 39. 1 - 2mm "D" Adjustment: Disengagement should occur when the check "D" has passed the locking arm (21219) and moved a further 1 - 2 mm.
- Page 27 4:12 Camera body 555ELD Reassembly Control and Adjustment of Auxiliary Shutter Operate the release catch so that the camera auxiliary shutter opens. Check that the auxiliary shutter blinds do not influence on the light path. Fig. 41. REA12.EPS Fig. 41...
- Page 28 4:13 Camera body 555ELD Reassembly Circuit board and contact flex 820015 CAUTION! When handling the circuit board a grounded bench mat and a wrist strap must be used to prevent ESD damage. Fit the circuit board in position. It is fixed to the...
- Page 29 4:14 Camera body 555ELD Reassembly Camera shell Secure all screws (except those which are secured with loctite) with safety lacquer. Lubricate with Isoflex Topas L32 onto the pin for the teflon button (103773) and put that one in position before inserting the camera body into the camera shell.
- Page 30 4:15 Camera body 555ELD Reassembly Motor Housing Insert a screwdriver through access holes at the bottom of the housing and secure it to the main camera body with four screws (823745). Fit the rubber support (30778) Fit the tripod foot (30763) and secure it with the six screws (829790).
- Page 31 4:16 Camera body 555ELD Reassembly Lubricate according to Fig. 50. When the wiring has been correctly connected, re- assemble the outer mounting plate by using the following sequence: Secure the stop arm (13571), by refitting the bearing pin (14100), the eccentric (22352), the small nut (828001) and secure by the clip (817112).
- Page 32 4:17 Camera body 555ELD Reassembly Adjusting the Function of the Micro-Switch The micro-switch (13605) is set so that the current is 14099 13563 interrupted when the clutch arm (14099) is 1mm from the top of one of the teeth on clutch gear (13563).
- Page 33 Camera body 555ELD Adjustment Checking and Adjusting the Camera Functions Operate the camera. If there is no exposure operation, one reason for this can be that the release lever (30793) is not releasing the cocked action between the release arm (22922) and the release catch (13570).
- Page 34 Camera body 555ELD Adjustment Check that the flat side of gear (13558) is parallel with the rear section. Adjustment: The source of current must be removed before adjustment is carried out. If the position of gear (13558) is faulty in relation to rear section, this can be adjusted by modifying engagement with gear (13557).
- Page 35 Camera body 555ELD Adjustment RS - Repeated pre-release The same function occurs as in the S position except that the selector knob (30429) remains in the set position and the camera returns automatically to the S position after exposure until the selector knob is returned manually to the 0 position.
- Page 36 Camera body 555ELD Adjustment Check that the magnet arm (13561) has free movement between the shanks of spring (816826) during exposure. Adjustment: Bend the front shank of spring (816826) forwards. Check the spring (816826) blocks the magnet arm (13561) when the T-arm (21283) is in the L position.
- Page 37 Camera body 555ELD Adjustment Checking the databus connections Check the integral control connector to ensure automatic and direct communication between camera body and digital back. Proceed using the following sequence: "A" Short-circuit the two pins "B" and "C". The camera "B"...
- Page 38 Camera body 555ELD Adjustment Check the mirror 45 angle using the sighting tube which fits in the holder on the gauge. Tighten the locking screw. Shine a light source towards the oval cut-out in the upper part of the tube so that the white ring of the ocular is illuminated.
- Page 39 Control/calibration should be carried out each time the camera has been in for repair. The tolerance for the flash meter is ±0.3 EV at all settings. If the Hasselblad Service System 970600 is used, follow the step by step instruction in the STS user manual.
- Page 40 Camera body 555ELD Adjustment Calibration On pressing the MEASURE button one of the three LED´s will light. The variable resistor in the camera (access behind the leather beside the ISO dial) should be turned so that the green LED lights when the MEASURE button is pressed again.
- Page 41 Camera body 555ELD Front bayonet plate Front plate reassembly Fit the four bayonet tongues (103439) and secure with eight screws (820425). Behind the front plate glue the two foam plastic strips (13212) and (22899) as well as the reflection protector (22527) into place.
- Page 42 Camera body 555ELD Front bayonet plate The hole for the locating pin (812202) is bored with 1.15 mm drill. Use tool V-2211 for driving in the pin. Drive the pin in until the face of the tool touches the front bayonet plate.
- Page 43 Camera body 555ELD Auxiliary shutter Exchanging the auxiliary shutter 825661 840514 Note! For convenience use the aux. shutter jig V-5423 when removing/mounting the pins (811108). Remove the pin (811108), spring retainer, spring 810505 (816807) and the upper actuating arm (13580).
- Page 44 Camera body 555ELD COPYRIGHT © 1998 ANDERS ENGSTRÖM 55507.EPS ANDERS ENGSTRÖM, ILLUSTRATÖR 981217 Östra vägen 46 430 91 HÖNÖ tel/fax 031- 96 84 64 anders@aeillustr.se Revision 0 May 1999...
- Page 45 Camera body 555ELD Description Spare Remark Part No. 22 894 Name plate 40 364 Shell, complete (chrome) Part No. 40 365 (black) 12 978 Plate 815 604 Spring 809 120 Steel ball 22 514 Reflection protector 13 315 Foam plastic pad...
- Page 46 COPYRIGHT © 1998 ANDERS ENGSTRÖM 55508.EPS Camera body 555ELD ANDERS ENGSTRÖM, ILLUSTRATÖR 981217 Östra vägen 46 430 91 HÖNÖ tel/fax 031- 96 84 64 anders@aeillustr.se Revision 0 May 1999...
- Page 47 Camera body 555ELD Description Spare Remark Part No. 30 737 Battery cover, compl. (chrome) Part No. 30 742 (black) 812 505 810 864 Washer 13 550 Spacer 21 317 Leather 30 739 Rubber cap 21 304 Turn button 30 745...
- Page 48 Camera body 555ELD 55509.EPS COPYRIGHT © 1998 ANDERS ENGSTRÖM 981217 ANDERS ENGSTRÖM, ILLUSTRATÖR Östra vägen 46 430 91 HÖNÖ tel/fax 031- 96 84 64 anders@aeillustr.se Revision 0 May 1999...
- Page 49 Camera body 555ELD Description Spare Remark Part No. 821 033 Screw 13 557 Gear 13 570 Release catch 816 608 Spring 22 922 Release arm 817 123 Clip 810 702 Washer Alternatively 810 703/705 13 559 Selector 821 012 Screw...
- Page 50 Camera body 555ELD Description Spare Remark Part No. 810 705 Washer (0,20 mm) Alternatively 810 702/703 (0,05/0,10 mm) 21 219 Locking arm (normal) Alternatively 21 219-1 (long) 21 219-3 (short) 810 702 Washer 810 703 Washer 22 896 40 423...
- Page 51 COPYRIGHT © 1999 ANDERS ENGSTRÖM Camera body 555ELD ANDERS ENGSTRÖM, ILLUSTRATÖR 55510.EPS Östra vägen 46 430 91 HÖNÖ 990112 tel/fax 031- 96 84 64 anders@aeillustr.se = Soldering should be accomplished in less then 5 seconds. Keep the soldering tip temperature less than 320ºC (608ºF).
- Page 52 Camera body 555ELD Description Spare Remark Part No. 22 678 Foam 820 014 Screw 817 115 Clip 22 707 Inner wall, left 816 864 Spring 22 879 Double-sided tape 820 015 Screw 22 882 PC-board (incl. tape) 12 453 Cable holder...
- Page 53 Camera body 555ELD 55511.EPS COPYRIGHT © 1999 ANDERS ENGSTRÖM 990115 ANDERS ENGSTRÖM, ILLUSTRATÖR Östra vägen 46 430 91 HÖNÖ tel/fax 031- 96 84 64 anders@aeillustr.se Revision 0 May 1999...
- Page 54 Camera body 555ELD Description Spare Remark Part No. 816 807 Spring 840 514 40 422 Rear plate Please state serial No. 22 423 Magazine hook 823 640 Screw 825 661 Screw 810 505 Washer 816 806 Spring 13 547 Spacer...
- Page 55 Camera body 555ELD COPYRIGHT © 1999 ANDERS ENGSTRÖM 55512.EPS 990119 ANDERS ENGSTRÖM, ILLUSTRATÖR Östra vägen 46 430 91 HÖNÖ tel/fax 031- 96 84 64 anders@aeillustr.se Revision 1 January 2001...
- Page 56 Camera body 555ELD Description Spare Remark Part No. 22 706 Reflection protector 22 513 Foam plastic pad 823 028 Screw 22 917 Cover Incl. tape 22 916 820 013 Screw 820 015 Screw 22 916 Tape 823 015 Screw 823 655...
- Page 57 Camera body 555ELD COPYRIGHT ' 2001 ANDERS ENGSTR M 55513.EPS ANDERS ENGSTR M, ILLUSTRAT R 010102 stra v gen 46 430 91 H N tel/fax 031- 96 84 64 anders.968464@telia.com ELCIRC01.EPS COPYRIGHT ' 2001 ANDERS ENGSTR M 010103 ANDERS ENGSTR M, ILLUSTRAT R...
- Page 58 Camera body 555ELD Description Spare Remark Part No. 22 823 Foam pad 853 587 Capacitor 853 042 Ferrite 853 549 Capacitor 22 827 Motor 22 825 Spacer 824 703 Screw 828 001 13 538 Insulating bushing 820 020 Screw 22 913 PC board, complete Incl.
- Page 59 Camera body 555ELD COPYRIGHT © 1998 ANDERS ENGSTRÖM 55514.EPS ANDERS ENGSTRÖM, ILLUSTRATÖR 981210 Östra vägen 46 430 91 HÖNÖ tel/fax 031- 96 84 64 anders@aeillustr.se May 1999 Revision 0...
- Page 60 Camera body 555ELD Description Spare Remark Part No. 12 942 Foam plastic strip 22 904 Contact spring 21 309 Battery holder 22 978 Mounting plate, inner 13 607 Rubber tube 13 565 Gear 814 601 Spring 22 351 Link 817 112...
- Page 61 Camera body 553 ELX/500ELX COPYRIGHT © 1998 ANDERS ENGSTRÖM 55315.EPS ANDERS ENGSTRÖM, ILLUSTRATÖR 981217 Östra vägen 46 430 91 HÖNÖ tel/fax 031- 96 84 64 anders@aeillustr.se Revision 0 May 1999...
- Page 62 Camera body 553 ELX/500ELX Description Spare Remark Part No. 22 610 Name plate 40 364 Shell 553ELX, complete Chrome, (Note! P/N 40331 not incl.) 40 365 Shell 553ELX, complete Black, (Note! P/N 40331 not incl.) 40 335 Shell 500ELX, complete Chrome 40 334 Shell 500ELX, complete...
- Page 63 Camera body 553 ELX/500ELX Description Spare Remark Part No. 820 014 Screw 810 613 Washer 810 607 Washer 13 541 Washer 816 906 Spring Revision 1 February 2000...
- Page 64 COPYRIGHT © 1998 ANDERS ENGSTRÖM 55317.EPS Camera body 553ELX ANDERS ENGSTRÖM, ILLUSTRATÖR 981217 Östra vägen 46 430 91 HÖNÖ tel/fax 031- 96 84 64 anders@aeillustr.se Revision 0 May 1999...
- Page 65 Camera body 553ELX Description Spare Remark Part No. 30 737 Battery cover, compl. (chrome) Part No.30 742 (black) 812 505 810 864 Washer 13 550 Spacer 21 317 Leather 30 739 Rubber cap 21 304 Turn button 30 745 Contact spring 41 001 Insert, right 22 682...
- Page 66 Camera body 500ELX COPYRIGHT © 1998 ANDERS ENGSTRÖM 50018.EPS ANDERS ENGSTRÖM, ILLUSTRATÖR 990201 Östra vägen 46 430 91 HÖNÖ tel/fax 031- 96 84 64 anders@aeillustr.se Revision 0 May 1999...
- Page 67 Camera body 500ELX Description Spare Remark Part No. 22 118 Battery cover, compl. (black) Chrome, no longer available 812 505 13 550 Spacer 810 864 washer 21 320 Plate 21 318 Contact spring 21 319 Plate 833 103 Rivet 21 301 Catch 21 304 Turn button...
- Page 68 55319.EPS COPYRIGHT © 1998 ANDERS ENGSTRÖM 981217 ANDERS ENGSTRÖM, ILLUSTRATÖR Camera body 553ELX/500ELX Östra vägen 46 430 91 HÖNÖ tel/fax 031- 96 84 64 anders@aeillustr.se Revision 0 May 1999...
- Page 69 Camera body 553ELX/500ELX Description Spare Remark Part No. 821 033 Screw 13 557 Gear 13 570 Release catch 816 608 Spring 22 922 Release arm 817 123 Clip 810 702 Washer 13 599 Selector 821 012 Screw 815 604 Spring 809 020 Steel ball 13 558...
- Page 70 Camera body 553ELX/500ELX Description Spare Remark Part No. 21 219 Locking arm (normal) Alternatively 21 219-1 (long) 21 219-3 (short) 810 702 Washer 810 703 Washer 820 345 Screw 22 519 Stop 820 320 Screw 810 609 Washer 22 496 Cog sector 816 760 Torsion spring...
- Page 71 Camera body 553ELX/500ELX COPYRIGHT © 1998 ANDERS ENGSTRÖM ANDERS ENGSTRÖM, ILLUSTRATÖR 55320.EPS Östra vägen 46 430 91 HÖNÖ 981207 tel/fax 031- 96 84 64 anders@aeillustr.se Revision 0 May 1999...
- Page 72 Camera body 553ELX/500ELX Description Spare Remark Part No. 820 014 Screw 817 115 Clip 22 477 Inner wall, left 22 678 Foam 816 864 Spring 22 746 Insulating plate 820 015 Screw 22 494 PC-board 22 453 Attachment 820 011 Screw 22 470 Socket cap...
- Page 73 Camera body 553ELX/500ELX 55321.EPS COPYRIGHT © 1999 ANDERS ENGSTRÖM 990115 ANDERS ENGSTRÖM, ILLUSTRATÖR Östra vägen 46 430 91 HÖNÖ tel/fax 031- 96 84 64 anders@aeillustr.se Revision 1 January 2001...
- Page 74 Camera body 553ELX/500ELX Description Spare Remark Part No. 816 807 Spring 840 514 40 367 Rear plate Please state serial No. 22 423 Magazine hook 823 640 Screw 825 661 Screw 810 505 Washer 816 806 Spring 13 547 Spacer 820 025 Screw 13 551...
- Page 75 COPYRIGHT © 1999 ANDERS ENGSTRÖM 55312.EPS 990119 ANDERS ENGSTRÖM, ILLUSTRATÖR Östra vägen 46 430 91 HÖNÖ tel/fax 031- 96 84 64 anders@aeillustr.se Camera body 553ELX/500ELX Revision 1 January 2001...
- Page 76 Camera body 553ELX/500ELX Description Spare Remark Part No. 22 513 Foam plastic pad 823 028 Screw 820 015 Screw 820 013 Screw 823 015 Screw 823 655 Screw 22 902 Reflection protector 820 031 Screw 22 928 Cover Incl. reflection protector 22 902 821 033 Screw 13 566...
- Page 77 Camera body 553ELX COPYRIGHT © 1998 ANDERS ENGSTRÖM 55322.EPS ANDERS ENGSTRÖM, ILLUSTRATÖR 990126 Östra vägen 46 430 91 HÖNÖ tel/fax 031- 96 84 64 anders@aeillustr.se Revision 0 May 1999...
- Page 78 Camera body 553ELX Description Spare Remark Part No. 22 823 Foam pad 22 827 Motor 22 825 Spacer 824 703 Screw 828 001 13 538 Insulating bushing 820 020 Screw 13 572 Connecting terminal Complete 821 033 Screw 853 535 Diode 13 534 Plate spring...
- Page 79 Camera body 500ELX COPYRIGHT © 1998 ANDERS ENGSTRÖM 50023.EPS ANDERS ENGSTRÖM, ILLUSTRATÖR 990126 Östra vägen 46 430 91 HÖNÖ tel/fax 031- 96 84 64 anders@aeillustr.se Revision 0 May 1999...
- Page 80 Camera body 500ELX Description Spare Remark Part No. 22 823 Foam pad 22 827 Motor 22 825 Spacer 824 703 Screw 828 001 13 538 Insulating bushing 820 020 Screw 13 572 Connecting terminal Complete 821 033 Screw 853 535 Diode 13 534 Plate spring...
- Page 81 Camera body 553ELX/500ELX COPYRIGHT © 1998 ANDERS ENGSTRÖM 55324.EPS ANDERS ENGSTRÖM, ILLUSTRATÖR 981217 Östra vägen 46 430 91 HÖNÖ tel/fax 031- 96 84 64 anders@aeillustr.se May 1999 Revision 0...
- Page 82 Camera body 553ELX/500ELX Description Spare Remark Part No. 12 942 Foam plastic strip 22 646 Contact spring 21 309 Battery holder 22 645 Mounting plate, inner 13 607 Rubber tube 13 565 Gear 814 601 Spring 22 351 Link 817 112 Clip 13 571 Stop arm...
- Page 83 COPYRIGHT © 1999 ANDERS ENGSTRÖM IR_001.EPS IR Release unit ANDERS ENGSTRÖM, ILLUSTRATÖR 990510 Östra vägen 46 430 91 HÖNÖ tel/fax 031- 96 84 64 anders@aeillustr.se Revision 0 May 1999...
- Page 84 IR Release unit Description Spare Remark Part No. 40 421 Cover 826 025 Screw 50 207 Cover 22 909 Contact assembly 22 908 PC-board 439 403 Dust guard 439 401 Button cover 50 206 Housing 22 905 Sign Revision 0 May 1999...
Need help?
Do you have a question about the 555ELD and is the answer not in the manual?
Questions and answers